
If you're using Elementor Cloud for a while now, you might have seen a login page that looks "simple". While it's true we like simplicity, we rather like to have an original and unique item. When it comes to the login page which works like the entry of a home, it should be different from other houses' entry doors.
In this tutorial, we'll show you how to customize the login page of an Elementor Cloud website. But first, let's see whether you really need this.
Why Creating A Custom Login Page?
Why indeed! Well, as I've mentioned above, we all want to have something unique that stands out. Let's imagine you create an eCommerce website that is quite successful with membership. Will you be okay with having a login page that looks like other Elementor Cloud login pages? Absolutely no.
One of the pros of having a customized homepage is to strengthen your brand in your customers' minds, which is obviously a good point. Let's now jump on the way you can use to customize your login page.
Create Amazing Websites
With the best free page builder Elementor
Start NowLoginPress
LoginPress is a free WordPress plugin that allows you to customize your WordPress login page and no only. Thanks to this module, you'll be able to change your background, and your login form and add other authentication mechanisms (pro). For example, you can allow your user to use Google, Twitter, Linkedin, etc to log in.
This plugin is free on the WordPress repository, but also has a premium version that includes several features and is available for $49 per year.
Key Features
- Custom Login Backgrounds
- Custom Logo
- Social Login
- Add Login Page Footer
- Beautiful Buttons
- Diverse Login Forms Styles
- Not authorized Page
- Custom Welcome Messages
Changing Elementor Cloud Login Page Background
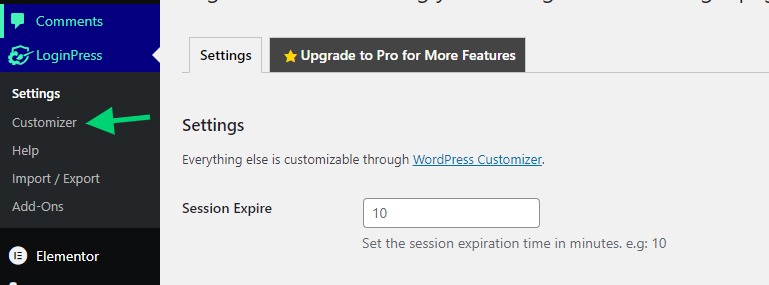
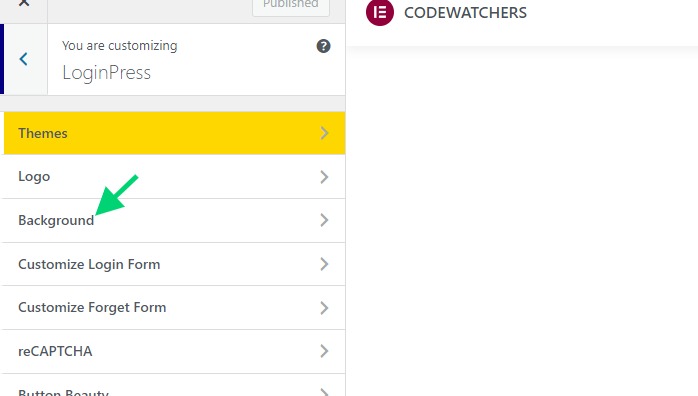
We'll get started by changing the Elementor Cloud page which is mostly white. Once you've downloaded the plugin (even the free version), you'll see a menu named "LoginPress". From there, we'll click on "Customizer".
This will open a customizer that looks similar to the theme customizer. From there you'll click on "Background".
By default, the plugins come with a predefined background you can use. But you can also upload your own background if you want.
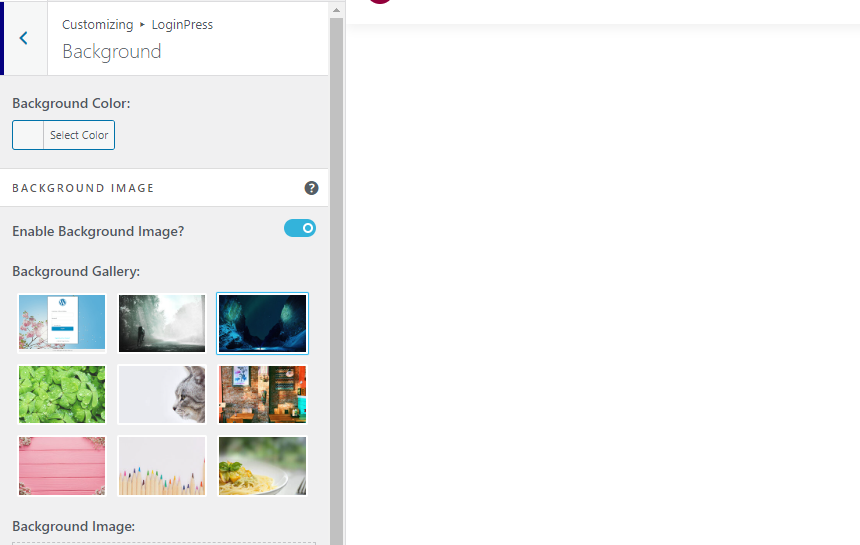
Once you're done, save your changes.
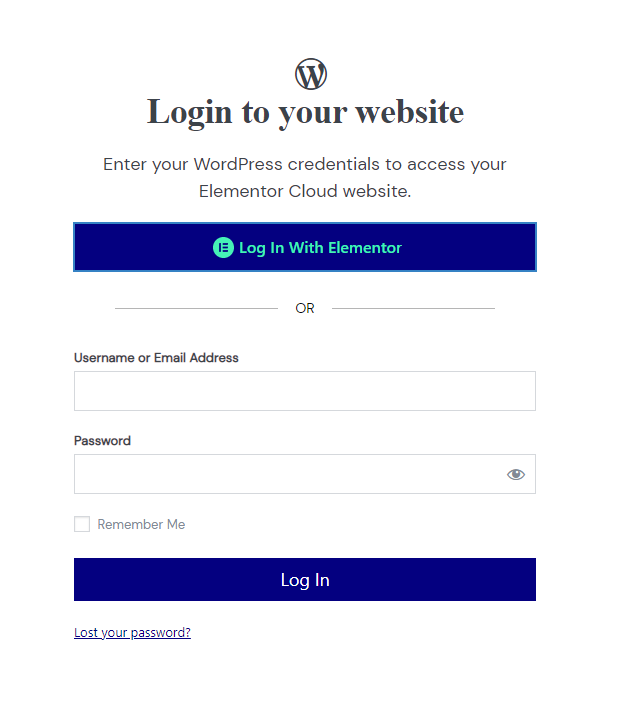
How To Hide Elementor Login Button
The login button allows anyone having an Elementor account to log in (while they need to be granted to access the website). You might find this option not necessary especially if you want your customer to always log in with the account you created for them.
Here we'll use the CSS option to hide the section that shows the login button of Elementor.

You'll need to past the following code into the CSS textarea:
.lwe-button-container {
display: none !important;
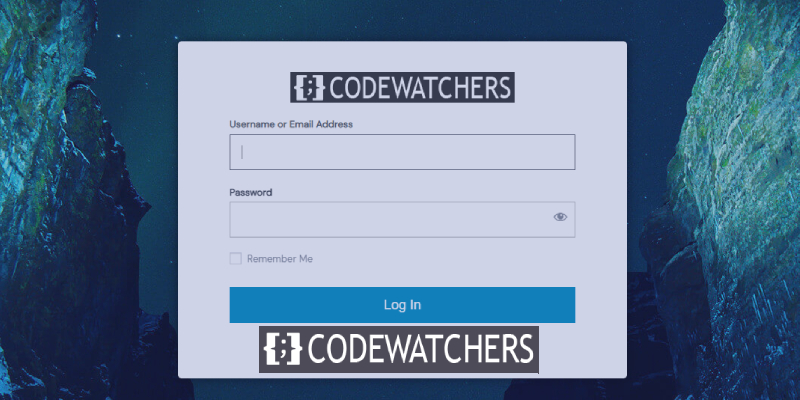
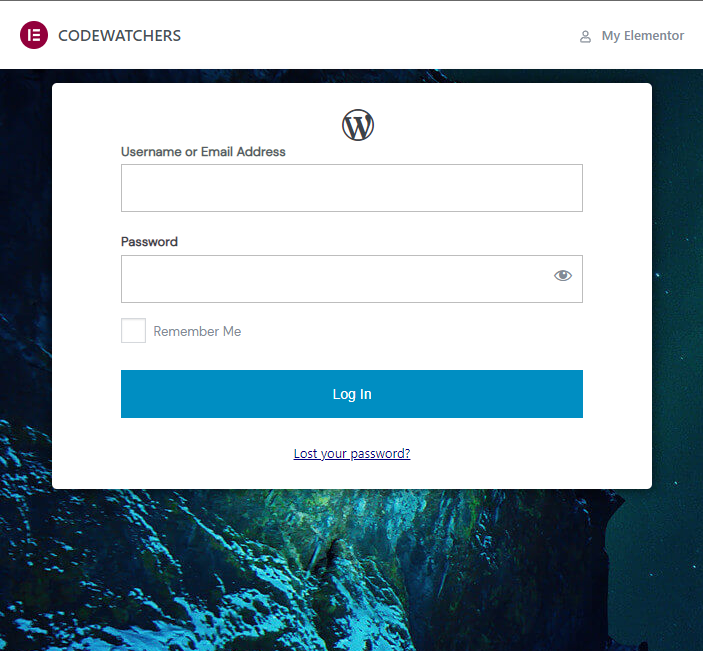
}From this moment you should have a login page that looks like what follows.
How To Hide The Elementor Admin Bar
Above the login page, you can see an admin bar that shows links to Elementor and Elementor brand along with your website name. If you would like to hide this, in the same CSS section you can add the following CSS snippet:
.e-admin-bar {
    display:none!important;
}
Doing this will set the form close to the top which is not really beautiful. What we want next is to center the form so that either on mobile or desktop it looks more attractive.
For that, we'll need to paste the following code on the CSS section as well.
body.login {
    display: flex !important;
    align-items: center !important;
    justify-content: center !important;
}
How To Add A Custom Logo
Unfortunately for us, the logo options don't work on the Elementor Cloud login page. The reason for this is that it's not created by WordPress but by Elementor instead. So the plugin doesn't effectively update that logo.
To change the logo, we'll first need to hide the WordPress icon and inject our logo. The following code will hide the default WordPress icon.
#wp-logo i.dashicons {
display:none !important;
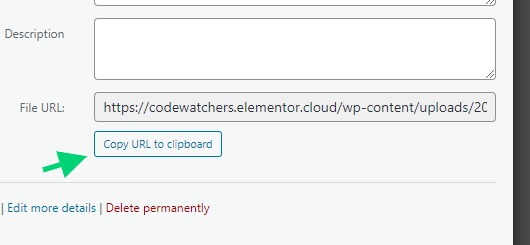
}Now using JavaScript, we'll inject our logo. The first thing to do here is to upload your logo on the media and to copy the URL to your logo.
Now in the same section, there is a CSS, we'll inject the following JavaScript code.
// we'll create the image
let image = document.createElement( 'img' );
image.src = 'https://codewatchers.elementor.cloud/wp-content/uploads/2022/07/site-logo-1.png';
// we'll give some style but this is optional
image.style.cssText="background:#333;margin: 15px 0;";
// we'll add the image to the logo section
document.querySelector( '#wp-logo' ).appendChild( image );
// we'll disable the default logo height
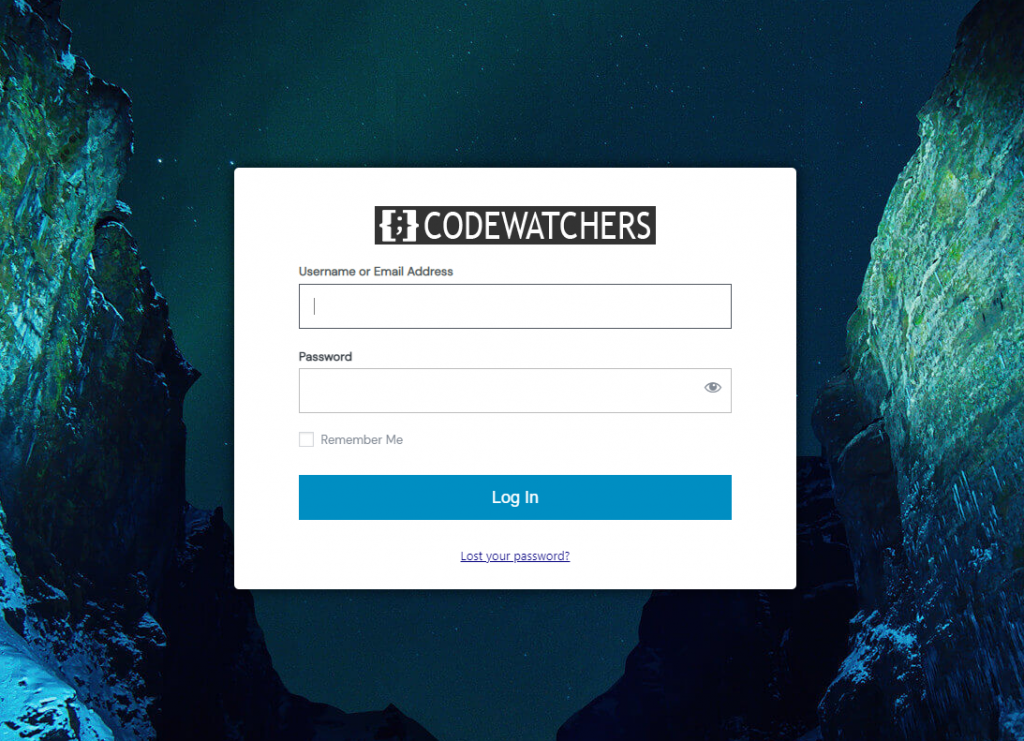
document.querySelector( '#wp-logo' ).style.cssText="height:auto";By the end, you'll have a login page that looks like this:
Troubleshooting
Editing the background might not work. You'll need to edit the background using a CSS code. First, as previously, you'll need to upload the background you want to use and add it to the CSS snippet:
body.login {
    background-image: url(https://codewatchers.elementor.cloud/wp-content/plugins/loginpress/img/gallery/img-3.jpg) !important;
    position: relative;
}
Make sure to replace the text "ttps://codewatchers.elementor..../gallery/img-3.jpg" with your actual background and save your settings.
We hope by the end of this tutorial you'll be able to customize your Elementor Cloud login page.


