
Security and speed are two very important things to work on for your website. But another way to make a good impression on your visitors is to improve your header, which is one of the first things they see when they land on your site. You should know how to make your own WordPress custom header if you want your website to stand out. There are many WordPress tutorials out there, but not many of them are just about editing this important part. You can reach this goal in a number of ways, which is a good thing.
In this post, we'll talk about what a WordPress header is, where to find it, and how to make a custom WordPress header with and without a plugin. We'll end by talking about the best ways to do things.
What is Header In A WordPress Website?
The header is one of the most important parts of a WordPress site. It has a navigation menu, a logo, and other important things like social media icons, call-to-action buttons, and even information about the business. Since the WordPress header is the first thing people see when they visit your site, it's important to make a good first impression. It should have all of the pages, contact information, branding elements, and other important information that a visitor needs to see.
You no longer have to use the WordPress customizer, which is good news. With the development of full site editing, you can now design and implement the header or any other part of your site however you want.
Create Amazing Websites
With the best free page builder Elementor
Start NowWhere Is the Header in WordPress?
The header is at the top of your site, while the WordPress footer is at the bottom. But if you don't know much about WordPress, it might be hard to find the header file on the back end.
It also depends on what your theme is. For example, you can usually find the file that contains your WordPress header by going to Appearance > Theme Editor:
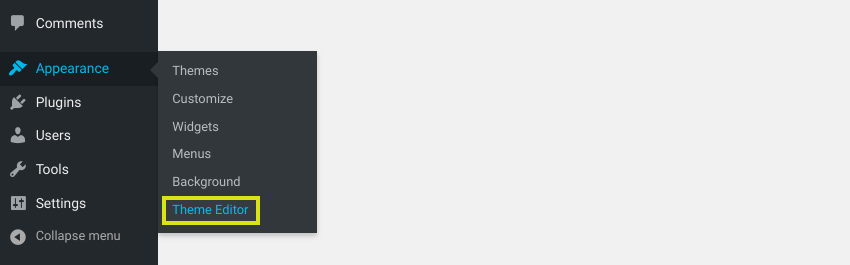
Here, you can see all the files that make up your theme. The header functions are in the header.php file, and the code for how the header looks and how it is styled is in the style file. file.css:
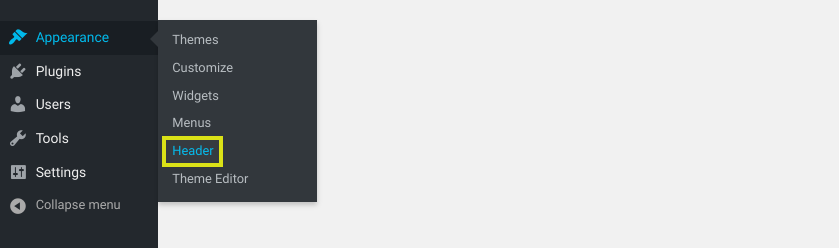
But with some other themes, like Twenty Seventeen, you can find your header by going to Appearance > Header from your WordPress dashboard:
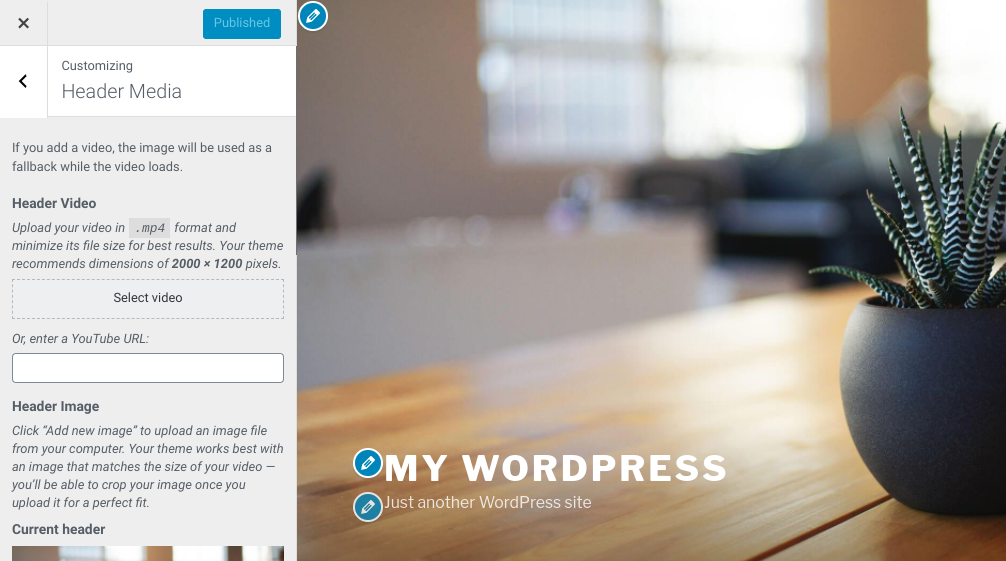
This will take you to the WordPress Customizer, where you can change your WordPress header media in specific places:
The best way to get to your WordPress header or change it depends on a few things. It will depend on your level of experience, the changes you want to make, and the theme you are using.
How to Customize Your Header in WordPress
Now that you know more about WordPress headers, it's time to look into the different ways you can change yours. Let's look at three different ways to do this:
- Use the Default Customizer
- Change the code of your theme
- Install a Header Plugin for WordPress.
Use the Default Customizer
We just talked about how the WordPress Customizer is one of the ways you can change your WordPress header. You might be able to do this by going to Appearance > Header, depending on your theme.
Most themes, though, let you get to it by going to Appearance > Customize. In the Customizer, you can change your header image and change your site's title and tagline. (Note: Some themes put these parts in the Site Identity tab.)
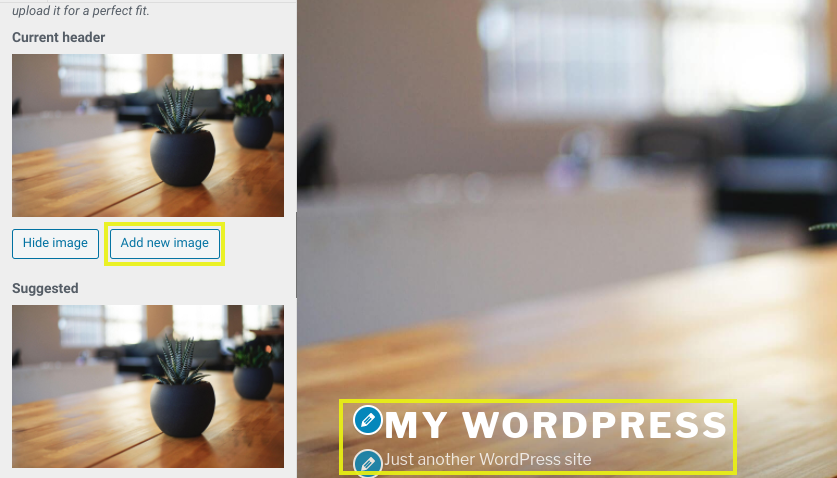
When you use the Customizer, you don't have to mess with the code if you don't want to. You'll also be able to see how your changes look in the panel on the right called "Live Preview."
Change the code of your theme
You can also change the look of your WordPress header by changing the code in your theme's files. This gives you more control over the customizations, but you will need to know how to code. Before you start, it's a good idea to make a child theme.
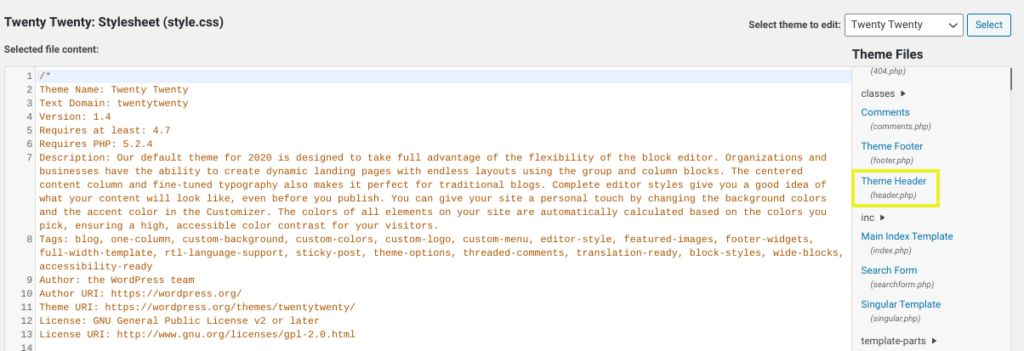
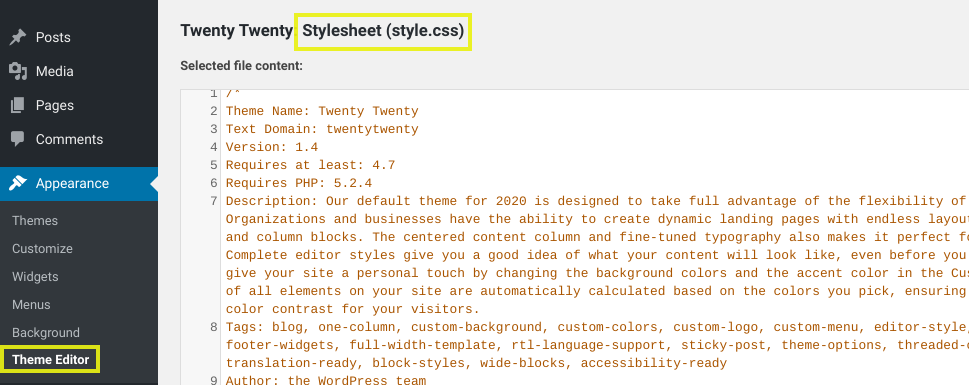
Go to Appearance > Theme Editor and then open the style.css file to change the code for your header:
In the Site Header part of this file, you can add or remove code:
Among the commands, you can use, but not the only ones, are:
- font: italic; This code changes the style of the font to be italic.
- background-opacity:.5; This makes the background less transparent (0 is completely transparent and 1 is not transparent at all).
- font-size: 20px; Use this to change the size of the text in the header (change the px to whatever you like).
- padding: 20px; This lets you change the space around the header (change 20 to whatever you like).
- border: 20px; This gives the header a border.
- border-color: white; This sets the color of the border to white (you can also use a hex color).
- line-height: 20px; Use this to set the spacing to match the size of your font, which can be helpful if you are using a larger font and it is overlapping on line breaks.
If your new code doesn't work, try adding it! important to the end of the command, like padding-left: 0! important;. If this doesn't work, your header's name might not be "header." Some WordPress themes don't use "header," but instead use "masthead," "inline-header," or other labels.
If you think it's necessary, you can also change your header.php file. But this code has nothing to do with how something looks. Since most people who want to change their headers care more about how their sites look than how they work, you'll probably pay most of your attention to its CSS.
Install a Header Plugin for WordPress.
A plugin makes it easier to change the look of your WordPress header. If you're not sure how to edit your site's files directly, this is the best way to do it.
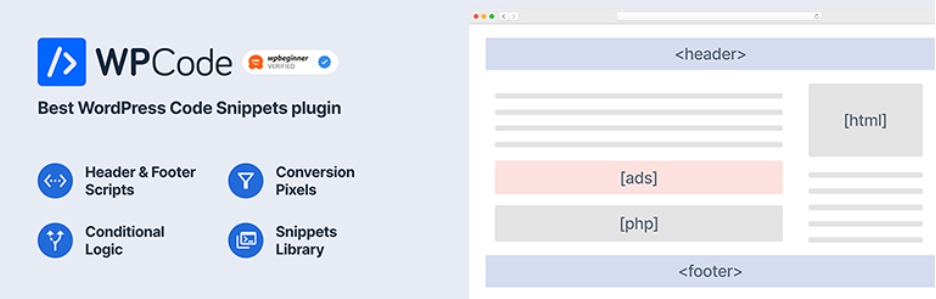
There are a few tools you can use, depending on how much you know and what changes you want to make. WPCode – Insert Headers and Footers is a free plugin that many people use.
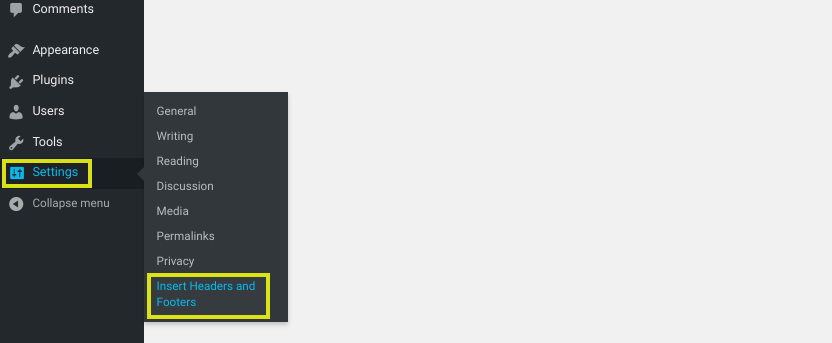
Once it's turned on for your site, you can find it under Settings > Insert Headers and Footers:
Next, you can add code for anything you want to add or take away from your header in the Header section:
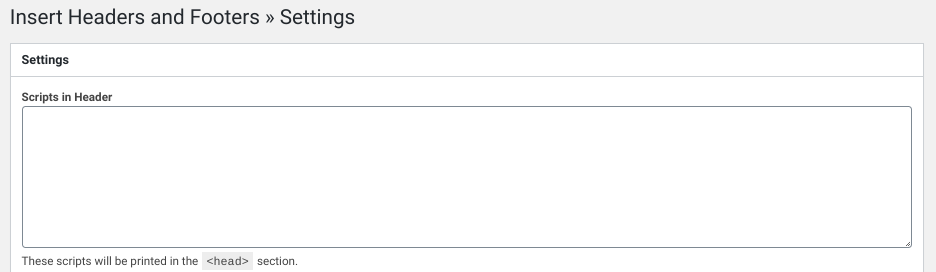
If you put scripts here, they will be added to the 'head' tag of your WordPress site automatically. When you're done, click the button that says "Save changes."
You could also use a premium custom header plugin for WordPress, like Popping Sidebars & Widgets.

This plugin lets you add widgets to your header, such as text, forms, social media icons, etc. If you want to avoid code altogether, this may be the best way to do it. It also lets you change the look of your sidebars and footers.
You can look at a demo of the Popping Sidebars & Widgets plugin on the OTWthemes website to learn how to use it. You can also sign up for a free trial if you want to try it out before you buy the paid plugin.
Change WordPress Headers by Using Divi
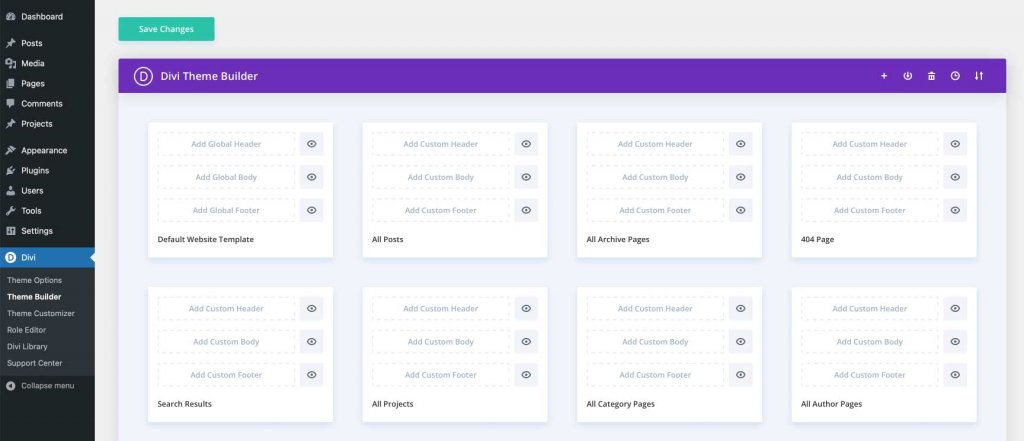
Divi lets you add custom headers to your WordPress site in a similar way, but it takes things a step further. Divi is the most advanced theme for editing an entire website in the WordPress world. It is the best way to design a website because it has more than 200 design elements, a fully responsive framework, and the ability to change every part of your site without writing a single line of code.
Divi's Theme Builder lets you make your own headers, which you can then use on different templates on your website. Headers can be made and used on your pages, posts, archive pages, 404 pages, search results pages, projects, category pages, author pages, and a lot more.
Wrapping Up
You now know how to change the header of your WordPress site. With this, you can get the attention of website visitors right away. Check out more content about header customization including both Elementor and Divi. Hope this tutorial will help you to gather further excellence in your WordPress development venture.


