
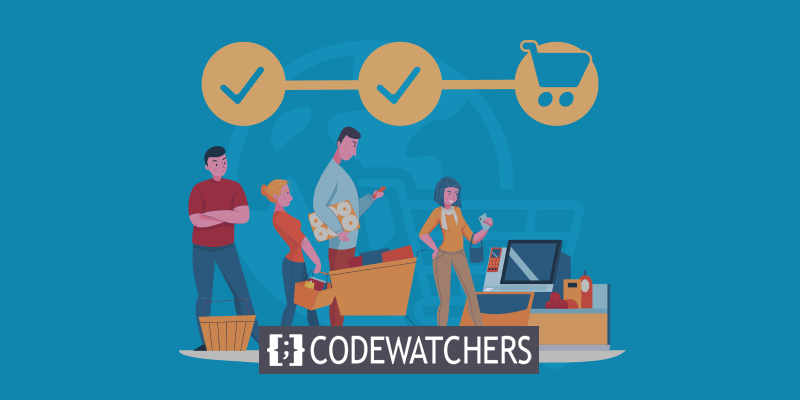
WooCommerce is one of the most popular eCommerce plugins for WordPress. To help with this, Divi released a number of new Woo-centric modules that give you more freedom when creating your standard WooCommerce pages. We'll work through creating a WooCommerce cart timeline for Divi in today's post. We will design a visual depiction of the user journey for this period. The user's journey from the store to the checkout should be visibly displayed.
Design Preview
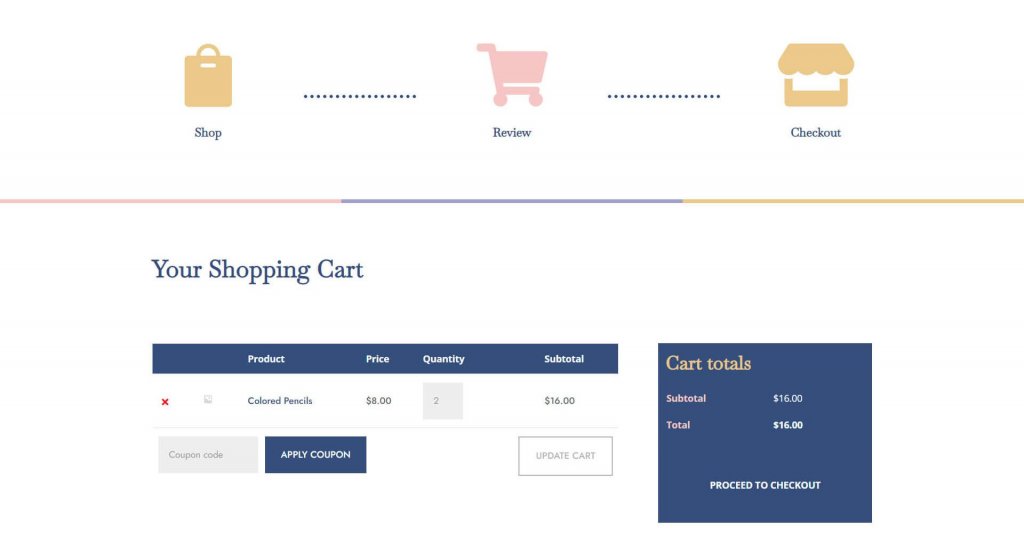
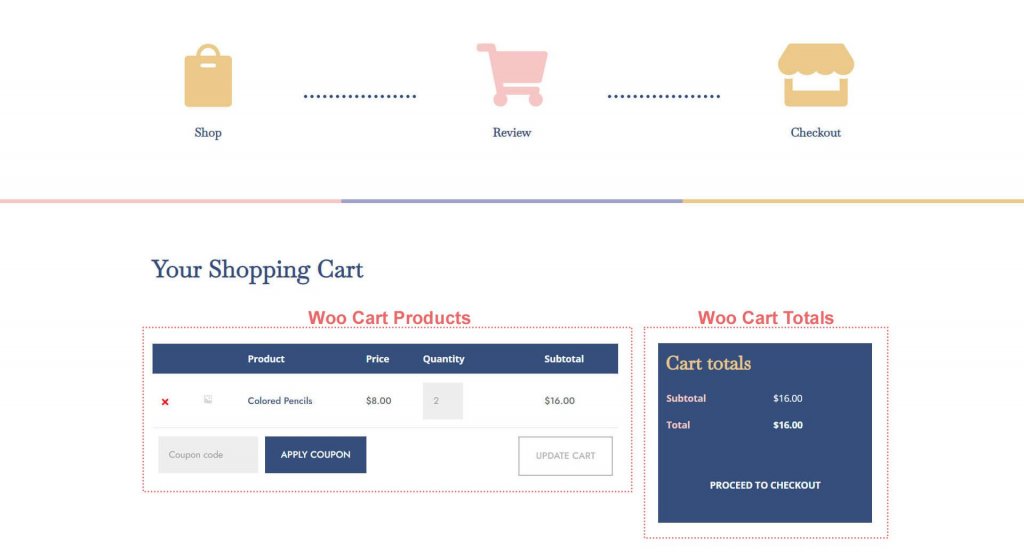
Before we jump right into designing, let's check out what our design will look like once we are finished. Here is the cart page preview.
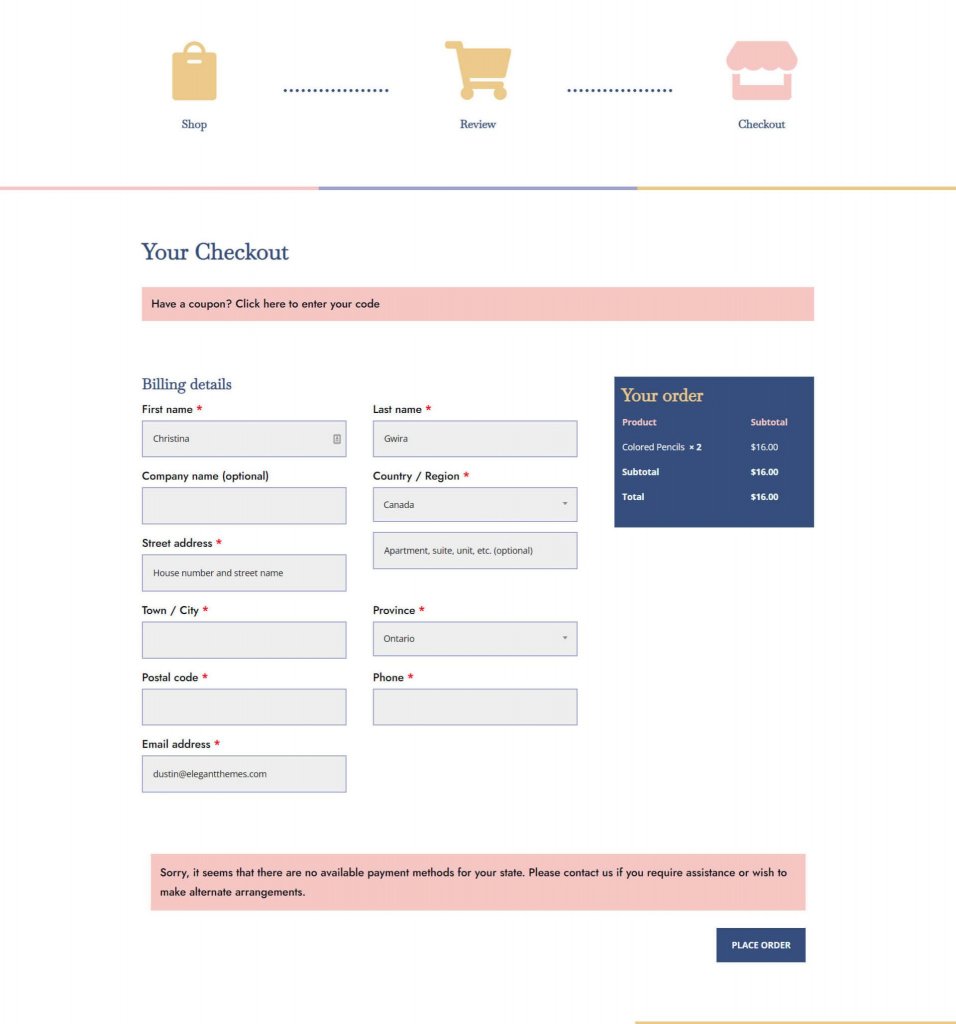
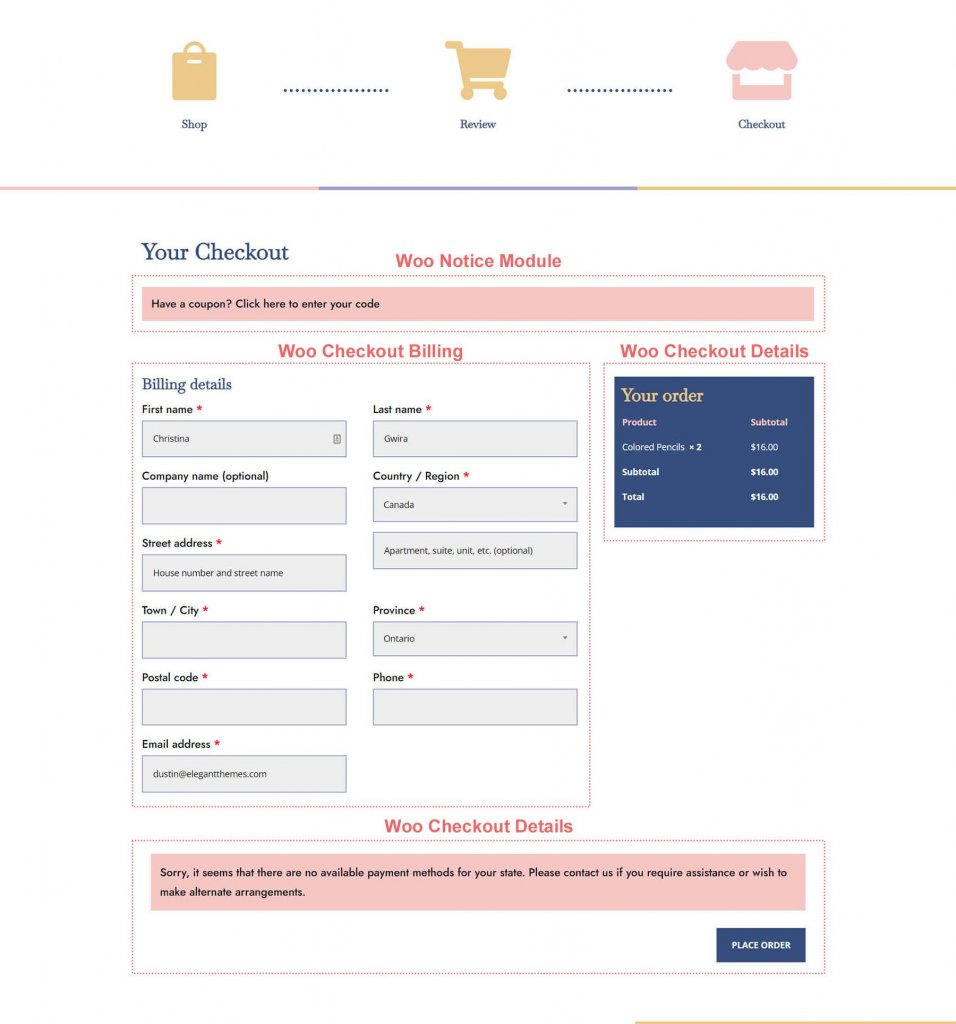
Also, this is how our checkout page will look like.
To download the template, Click here and get the file. Then unzip it.
Create Amazing Websites
With the best free page builder Elementor
Start NowInstall The Template
Go to the Divi Theme Builder in the WordPress website's backend to upload the template.

Then, a two-arrow icon will appear in the top right corner. Toggle the icon.
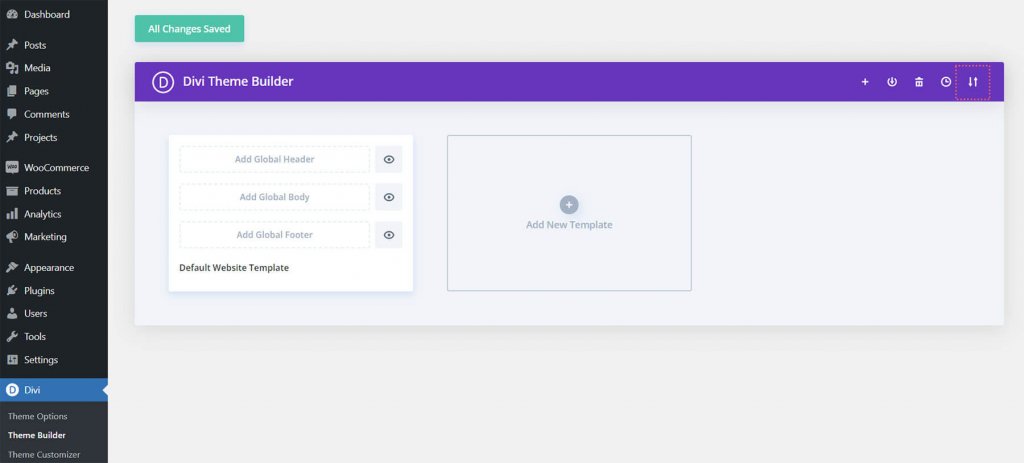
Click "Import Divi Theme Builder Templates" after uploading the JSON file you downloaded from this post to the import tab.
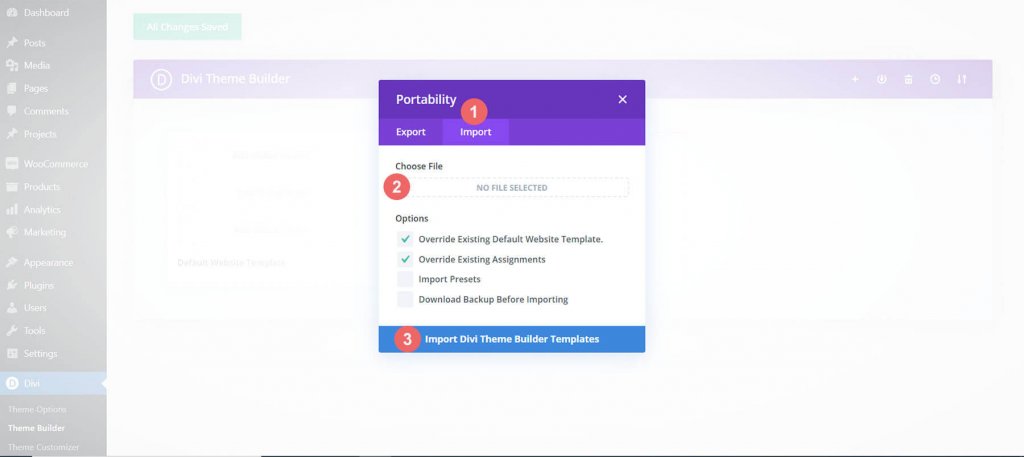
You'll notice a new cart, checkout, and shop template when you've uploaded the file. As soon as you wish the templates to be activated, save your modifications in the Divi Theme Builder.
Create the WooCommerce Cart Timeline
The next section of our blog post will demonstrate how to re-create the WooCommerce cart timeline for Divi if you're looking for a little more of a challenge. The procedures in this guide can be used to create a cart timeline that is unique to you. Make use of it as motivation for your subsequent WooCommerce and Divi endeavors! This is how the WooCommerce cart timeline we'll be building will look:

Let's get started now that we have a visual representation of what we'll be creating!
Divi Theme Builder Setup
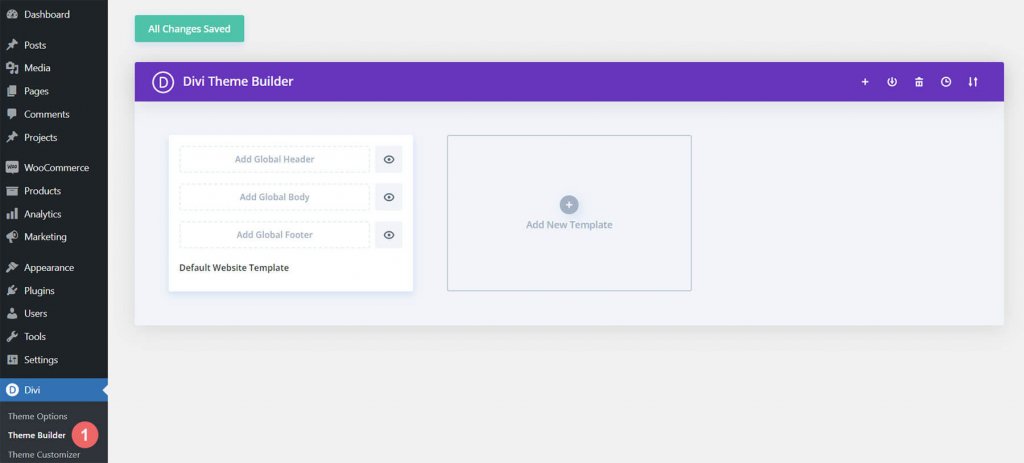
These templates that we'll be developing will have an impact on WooCommerce's checkout and cart pages. Thus, we start working on our project in the Divi Theme Builder.
Within the Add New Template card, click the plus sign.
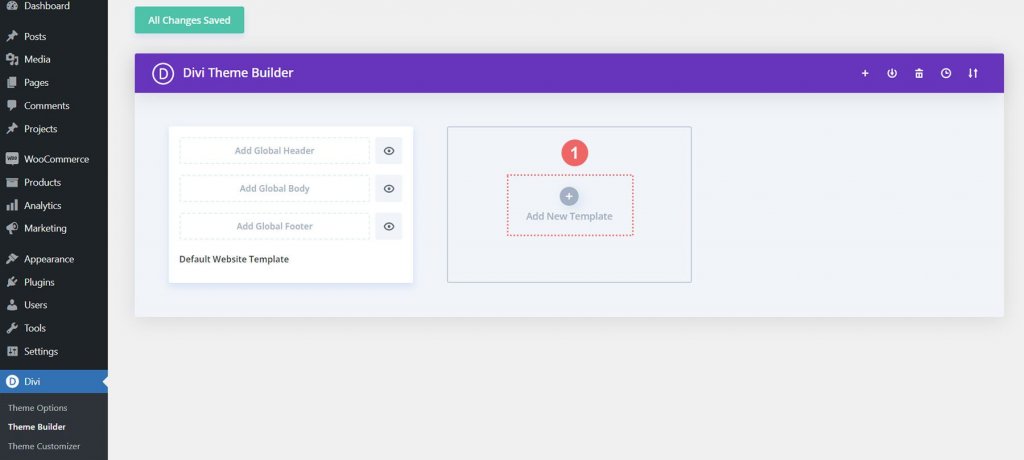
Choose to Create New Template next.
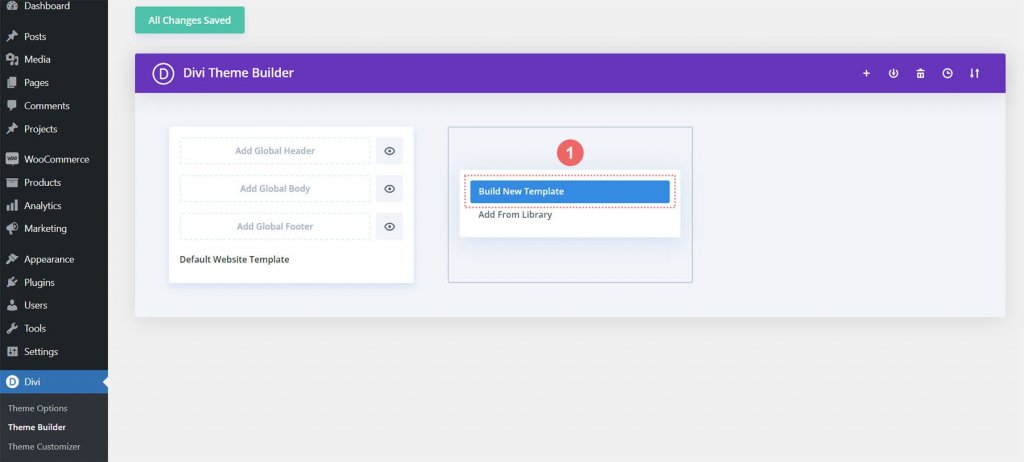
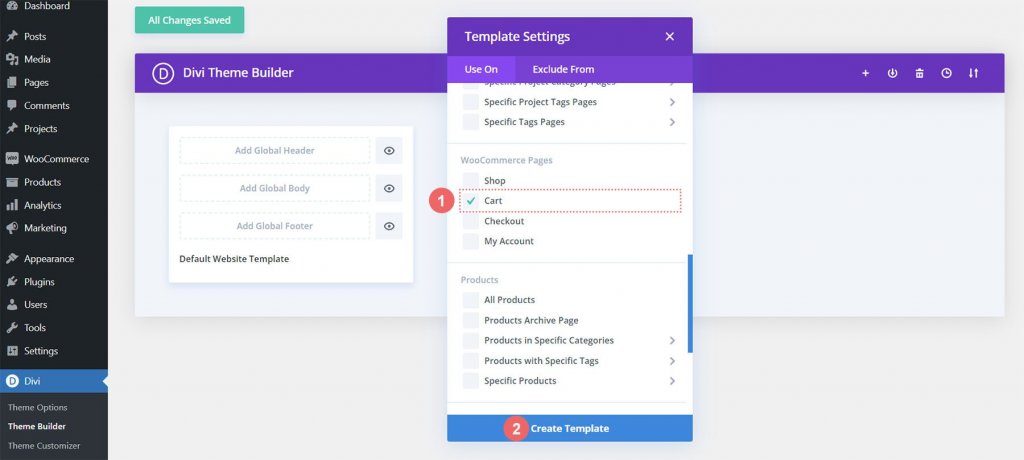
After that, a modal box listing all the different assignments you can attach to the new template you're building will be displayed to you. In this instance, we'll be making a template for the WooCommerce store's cart page. So, navigate to the WooCommerce heading in the modal box and click Cart. After choosing, select Create Template. By doing this, we are tagging the cart page with the newly constructed template.
To develop the checkout template, we will follow a similar procedure. Within the Add New Template card, click the plus sign.

Choose to Create New Template once again.

We must scroll down the modal window and choose Checkout from the WooCommerce heading in order to access the checkout page. After choosing, select Create Template.
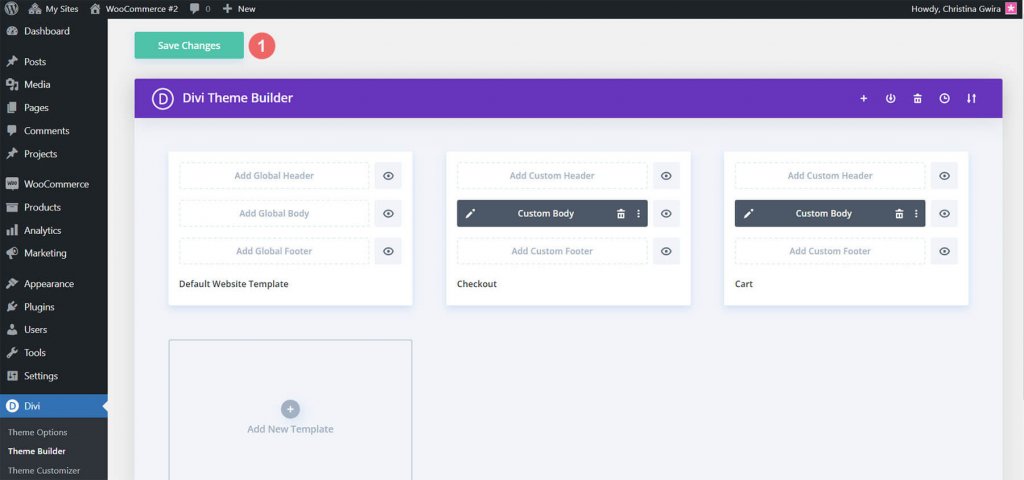
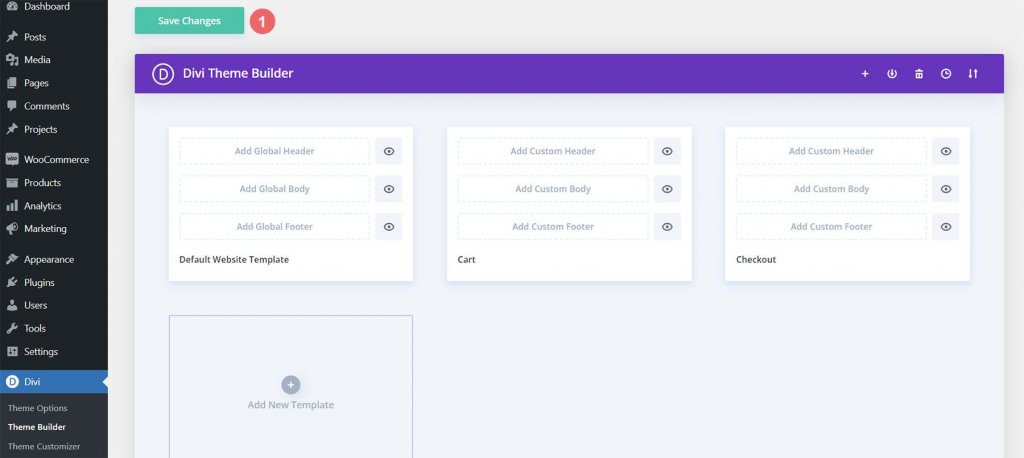
We may now save our cart and checkout templates after creating them. At the top of the Divi Theme Builder, select the green Save Changes button.
Building the WooCommerce Cart Flow
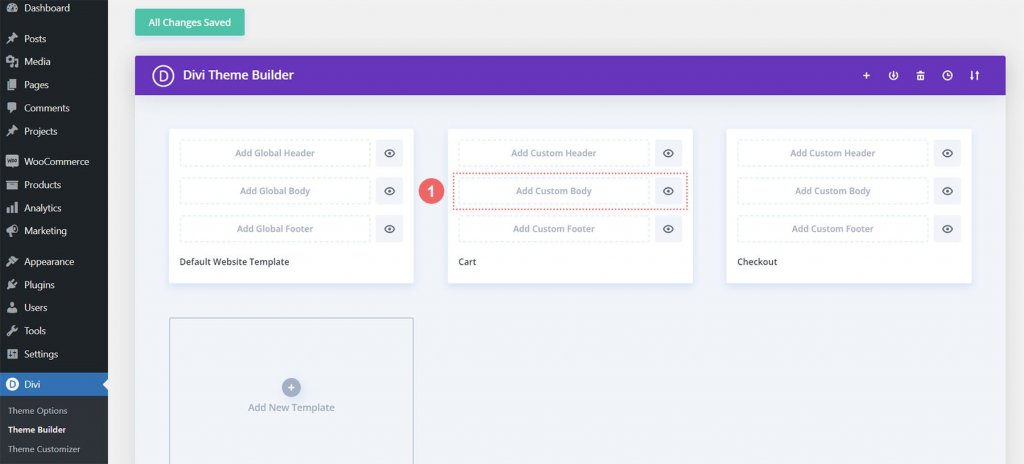
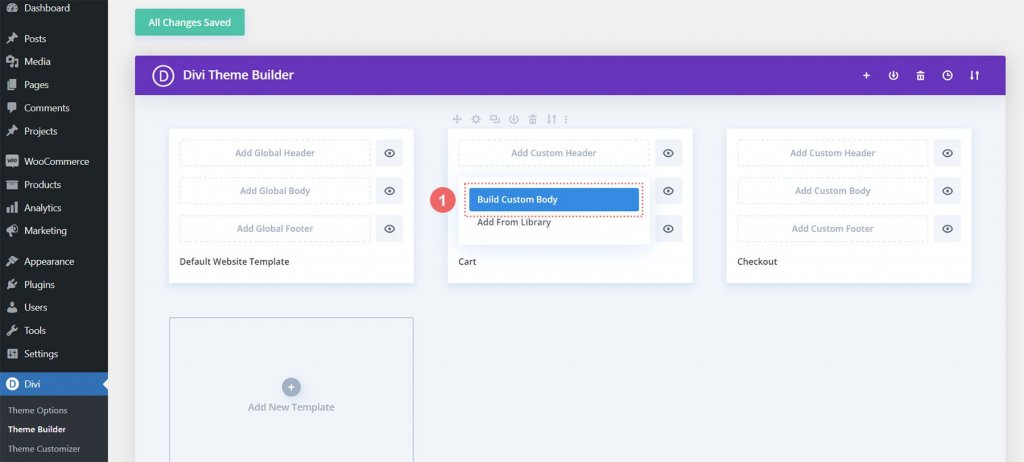
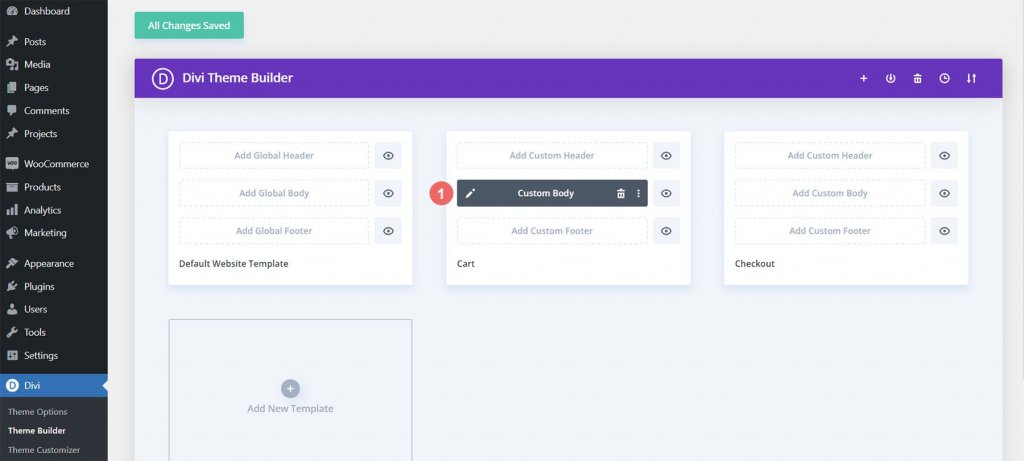
The fun starts now! We're going to start drafting the schedule for the cart page's cart flow. To achieve this, we open the Cart template we just made and select the Add Custom Body button.
We're going to select the Create Custom Body button that appears in the modal box, just as we did when we created these templates and their assignments.
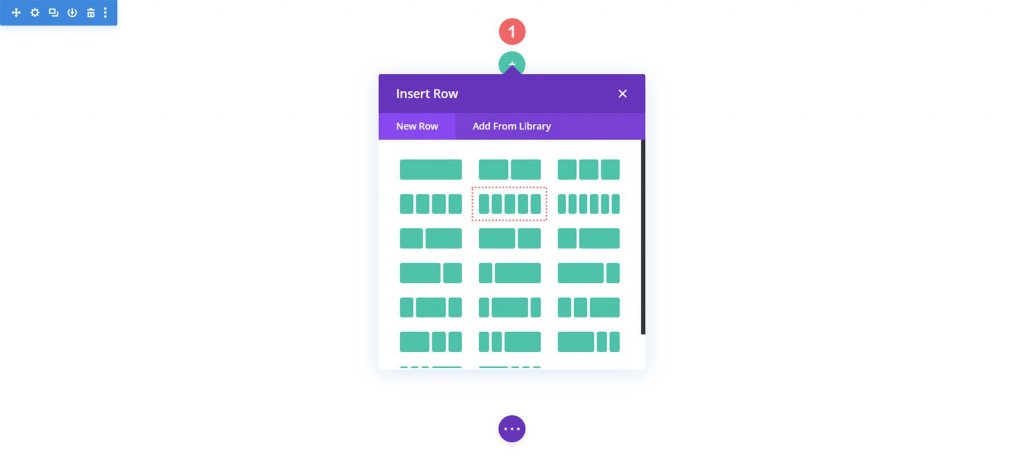
New Section and Row
We will create a new row now that we are in the Divi Builder. There will be five columns in this row.
To columns 1, 3, and 5 of your new row, add three Blurb Modules.
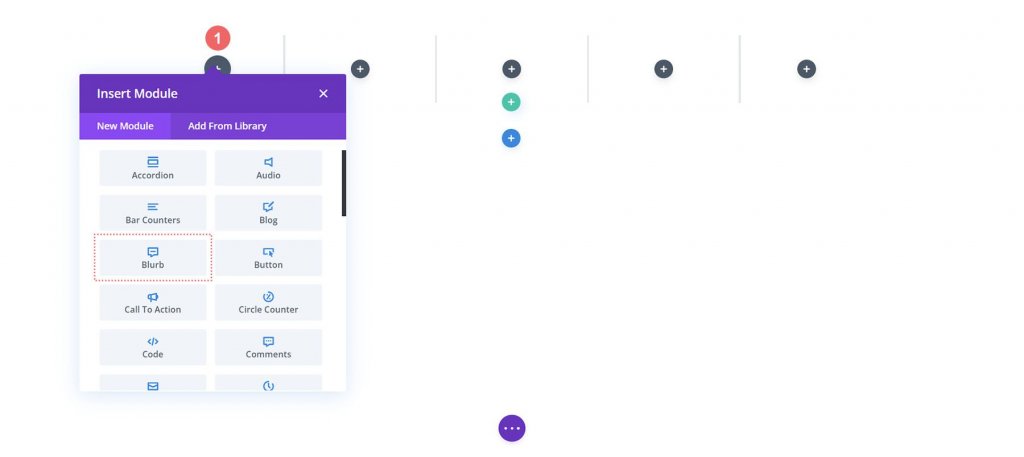
Follow the blurb module settings:
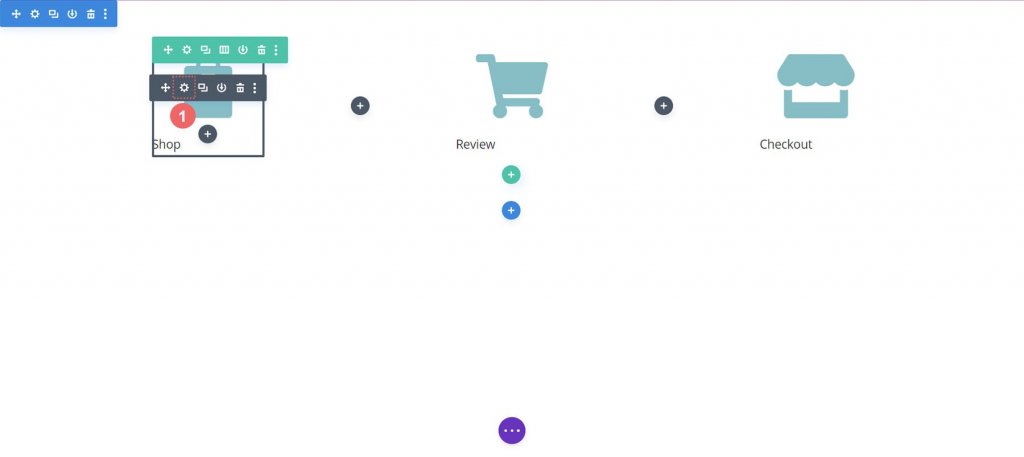
First Blurb (Column 1)
- Title: Shop
- Body: Leave empty
- Use Icon: Yes
- Icon: See screenshot below
- Module Link URL: /shop (Or your custom link to your shop page)
Second Blurb (Column 3)
- Title: Review
- Body: Leave empty
- Use Icon: Yes
- Icon: See screenshot below
- Module Link URL: /cart (Or your custom link to your cart page)
Third Blurb (Column 5)
- Title: Checkout
- Body: Leave empty
- Use Icon: Yes
- Icon: See screenshot below
- Module Link URL: /checkout (Or your custom link to your checkout page)
At this point, our WooCommerce timeline will appear as follows:

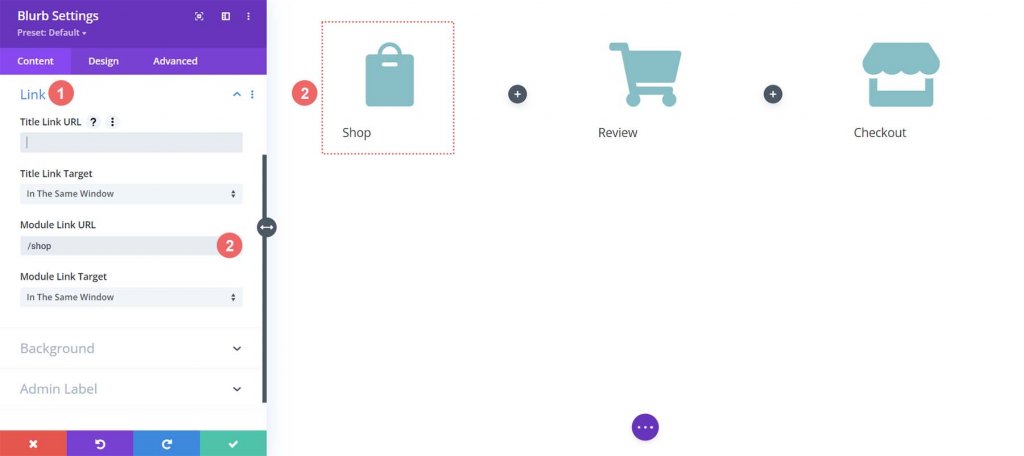
No matter which pages customers land on, we require simple access to our Blurb Modules as we create templates for the cart and checkout page. The ability of the end user—your customer—to seamlessly move between the various checkout stages is a key component of the WooCommerce timeline. We will first enter the module settings of the first blurb, shop, to add the link to the site's default shop, cart, and checkout pages.
No matter which pages customers land on, we require simple access to our Blurb Modules as we create templates for the cart and checkout page. The ability of the end user—your customer—to seamlessly move between the various checkout stages is a key component of the WooCommerce timeline. We will first enter the module settings of the first blurb, shop, to add the link to the site's default shop, cart, and checkout pages.

Each Blurb Module will receive links to the normal WooCommerce pages. Make the necessary adjustments to any custom links you may have established for these pages on your WooCommerce installation. We start with the Shop Blurb Module first. We type /shop into the Module Link URL box. This is WooCommerce's shop page's standard URL. Remember to replace this URL with your personalized URL if you updated it.
To save your changes, click the green checkmark button. On to the Review Blurb Module we go next. The link to the cart page is provided by this module. Once more, the Link tab is selected, and the Module Link URL /cart is added to the Module URL.

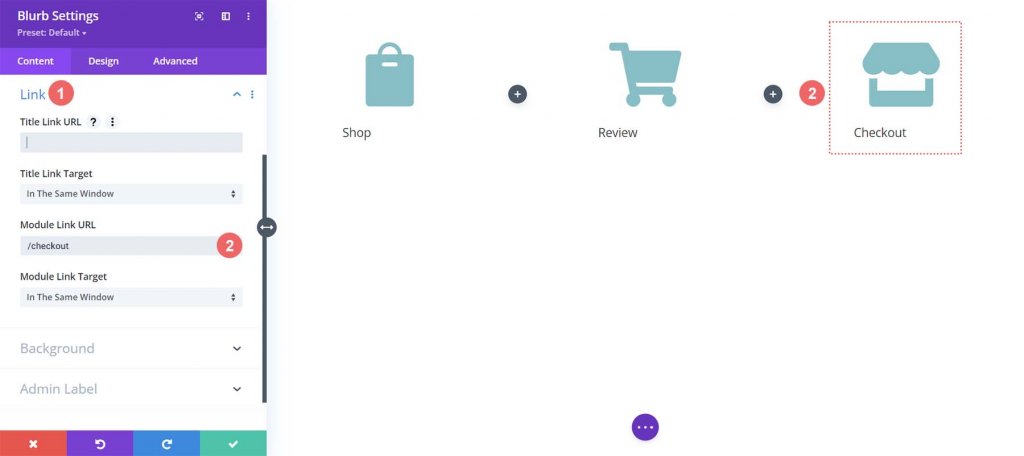
We will link to the standard WooCommerce checkout page link, which is /checkout, for the last Blurb Module, the Checkout Blurb Module.
Style Blurb Modules
The styling of our newly added Blurb Modules will then start. On the modules, we'll apply hover styles. This improves the WooCommerce cart timeline's user experience (UX). We desire a different color for the Blurb Module that represents the page we are now on. Also, we want the icon to change color and grow as we hover over it.
Blurb Module Styling
- Icon Color: #eac989
- Hover Icon Color: #9fa2ce
- Text Alignment: Center

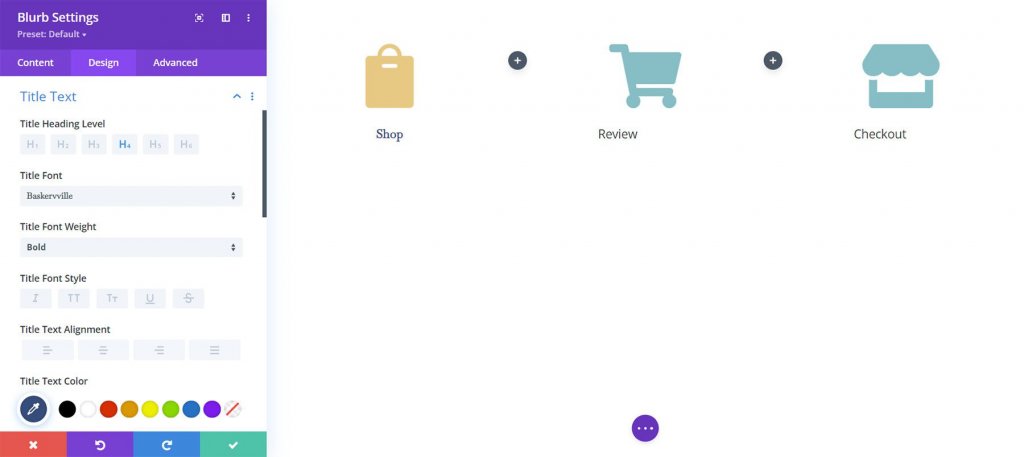
Title Text:
- Title Heading Text: H4
- Title Font: Baskerville
- Title Font Weight: Bold
- Title Text Color: #354e7c
Transform:
- Transform Scale (Desktop): 100%
- Transform Scale (Hover): 115%
We'll apply the design parameters to the other Blurb Modules in our row after we've finished configuring them for the first Blurb Module.
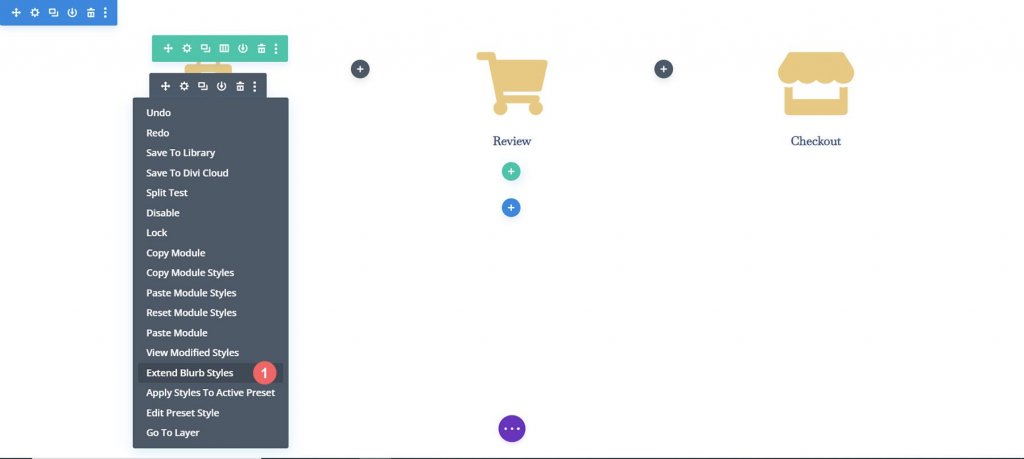
Just The Modules in our section are the objects we want to extend our styles to. This is significant to remember, especially if you're working on a page with existing content.
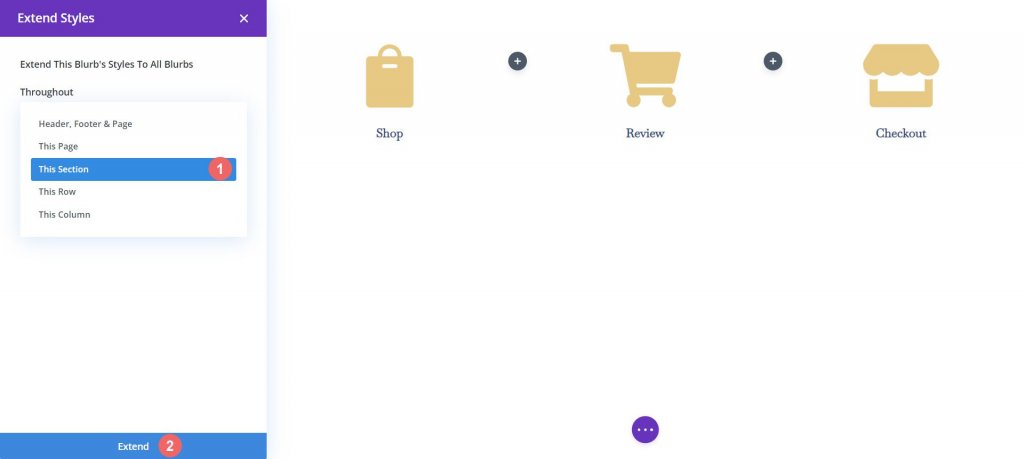
Styling the Cart Blurb Module
We're going to give the stage that our user is now on a separate icon color to indicate the various checkout process stages. For instance, we'll alter the color of the Blurb Module referencing the cart stage of the process if they are on the cart page.
Cart Page Blurb Module:
- Icon Color (Desktop): #f6c6c5
- Icon Color (Hover): #9fa2ce
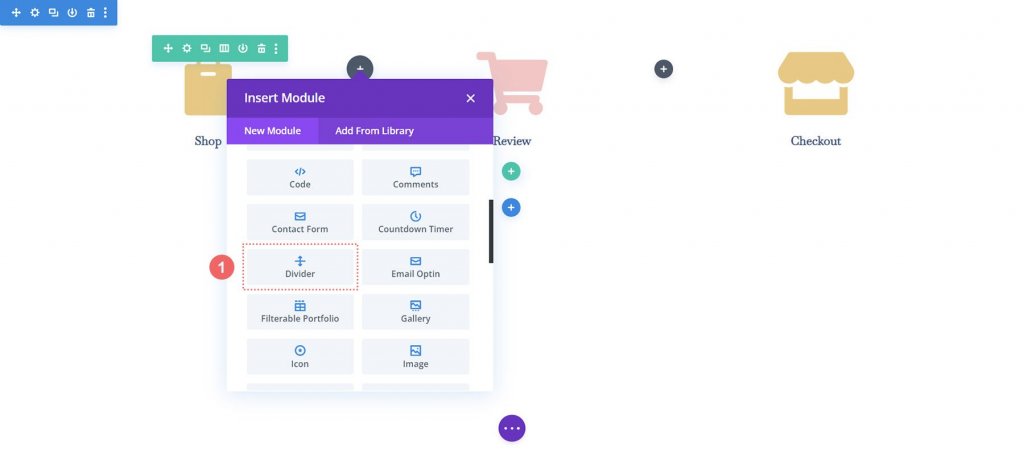
Add Timeline Dividers
We will start by adding and customizing our Divider Modules after we have constructed and styled our Blurb Module. The second and fourth columns of our row include the Divider Module.
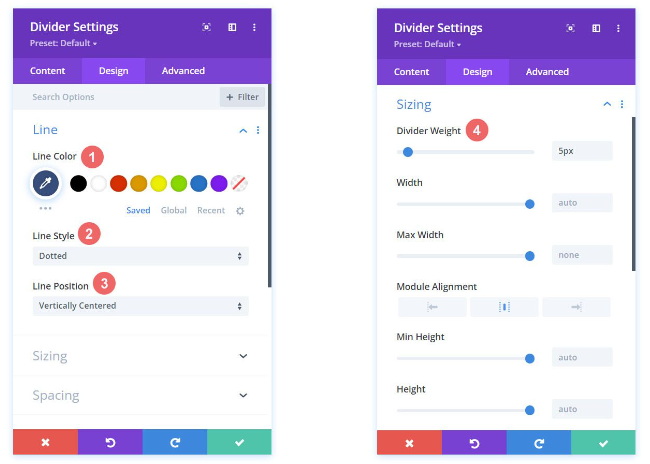
Style Timeline Dividers
Next, we will customize Divider Modules. Make the following changes in Divider settings.
Visibility:
- Show Divider: Yes
Line:
- Line Color: #354e7c
- Line Style: Dotted
- Line Position: Vertically Centered
Sizing
- Divider Weight: 5px
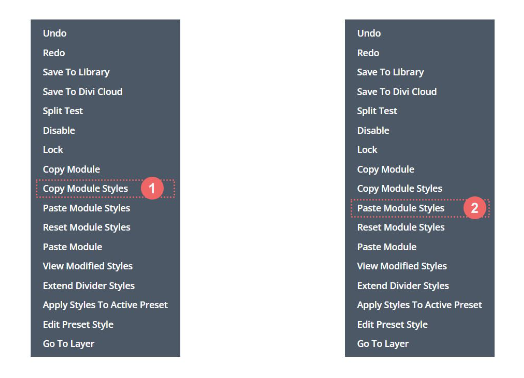
Let's copy and paste the styles from this Divider Module to the other module in our row using a really clever Divi feature. Then, we'll right-click on the Divider Module that has been finished. Then, we will select Copy Module Settings. Then, we right-click the Divider Module, which is unstyled at the moment. The last step is to click Paste Module Settings. Saving time is earning time!
Custom CSS
Our WooCommerce cart timeline currently looks like this:

We're going to add some CSS to our row to make sure that our Divider Modules are properly aligned and to make our timeline module mobile-responsive.
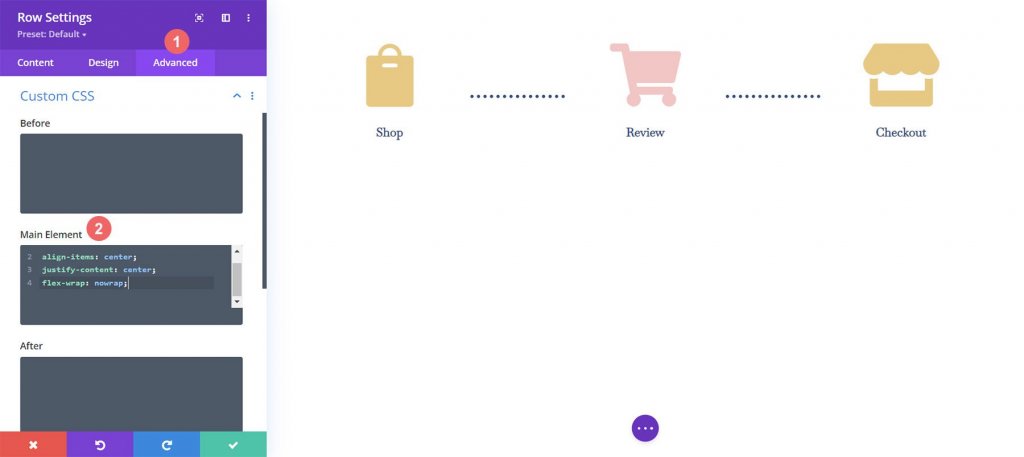
We must first input the Row Options for our WooCommerce Cart Timeline before we can add our Custom CSS. We then choose the Advanced Tab. Last but not least, we'll include the following CSS in the Main Element:
display:flex;
align-items: center;
justify-content: center;
flex-wrap: nowrap;
Now click the green checkmark to save the settings.
Setting Up the Checkout Page
In our cart page, we've laid the groundwork for our WooCommerce cart flow timeline. But, we must update our checkout page template with our completed work to finish our timetable. To simplify our procedure for the checkout page, we'll use the Right-Click Menu, which was one of Divi's original features. Let's get going!
Copy Cart Flow Timeline from Cart Page
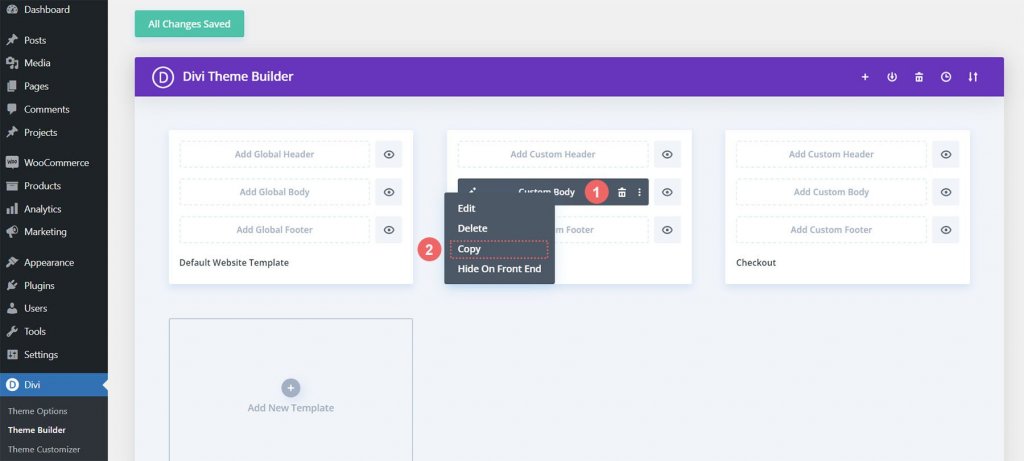
We'll return to the shopping cart page. We won't be using the Divi Builder for the body, though.
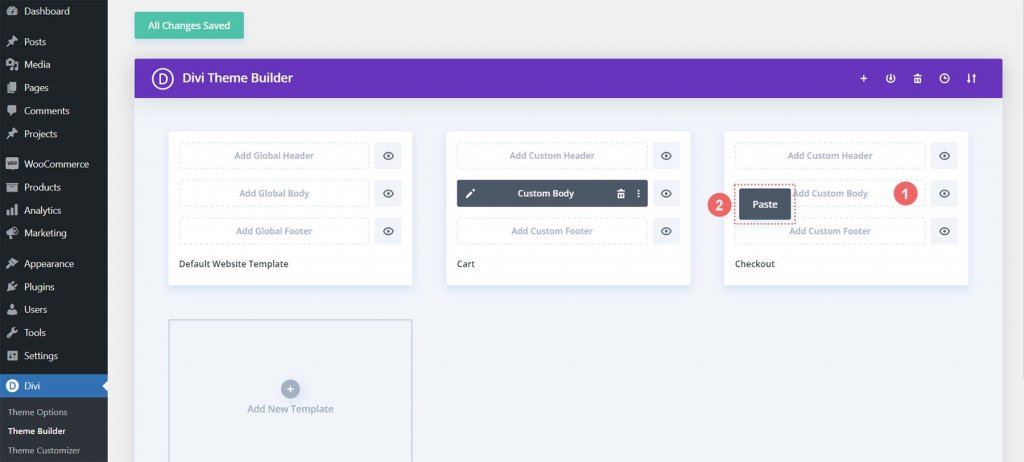
Right-click the cart template's Custom Body. After that, select Copy from the right-click menu.
We will now paste the work we completed within the cart template into the checkout template after we have duplicated it. In the checkout page template, we right-click the Add Custom Body button to accomplish this. When you've finished, the Paste option will appear in the menu. To copy the Custom Body from the checkout page template to the cart page template, click Paste.
You can now see that the checkout page template and the cart template both have a custom body. This will enable us to speed up the site design procedure. Thank you, Divi. We'll click the green Save Changes button at the builder's top to save our modifications to the checkout template.
Update Checkout Page
After cutting some time from the design process, let's make the last adjustments to the checkout page to make sure it integrates seamlessly with the rest of our project. To edit the Custom Body of the checkout page template, first, click the pencil icon.
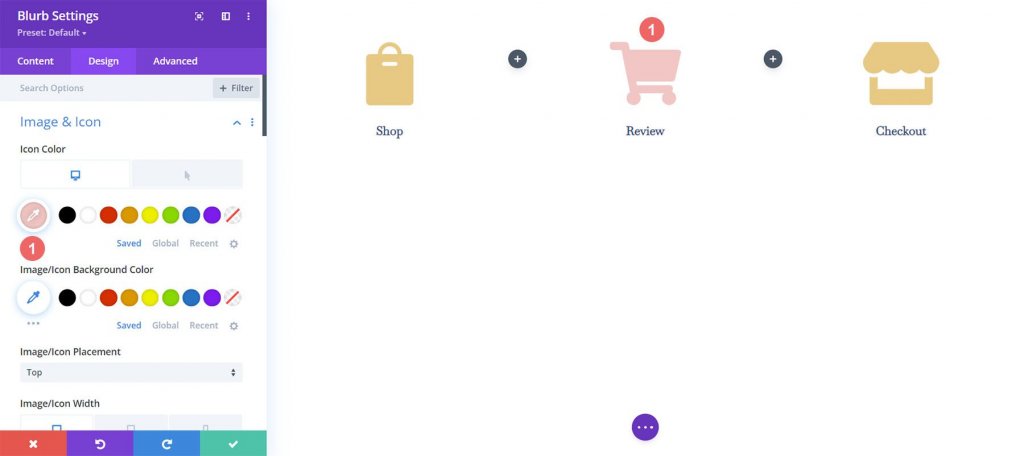
Style Checkout Icon
Start styling our checkout icon now. The Module Settings of the checkout button will be opened when you click the gear symbol.
Go to the Module Settings module's Design tab. The title "Image & Icon" should be clicked. The color of the icon will be changed. Hence, select the eyedropper icon and enter the hexadecimal value #f6c6c5. As a result, the icon will take on the current page's color, which is pink.
Update Cart Icon
It will be necessary to go back and change the cart icon's icon color. We're going to return to the module settings to accomplish this. Then we select the cart symbol's gear icon.
We will once more navigate to the Module Settings' Design tab. After that, select the eyedropper tool from the Picture & Icon section. Then enter #eac989 in hexadecimal format.
Once you have left the Divi Builder, don't forget to save your settings and all of your laborious work.
Marge All Together
While the cart timeline is the main focus of this tutorial, the template also requires the use of additional WooCommerce modules. These additional WooCommerce modules must be added to each template page for your store to be complete.
Cart Page Template
- Woo Cart Products: This will display the WooCommerce cart
- Woo Cart Totals: Showcase the subtotal, taxes, and more with this module
Checkout Page Template
- Woo Notice Module: We use this module to show any errors, information, or notices that relate to checking out
- Woo Checkout Billing: This module will color the billing details of your customers
- Woo Checkout Details: Unlike the cart totals, this module will show the actual product names, quantity, and more
- Woo Checkout Billing: To show available payment methods, we have this module added to the checkout page
Wrapping Up
A cart timeline gives customers a visual depiction of their journey through your site. You have the ability to tweak and add a new component to your WooCommerce store using Divi. You can apply what you've learned here to your own client and personal websites thanks to Divi's tools. If you use this tutorial outside of the classroom, please let me know!


