
Since Elementor 2.5, we're able to create animation on Elementor. If you've ever wanted to know how to create animation on Elementor, you're at the right spot.

That update of Elementor has added 4 different motion effects that you can use on your blog. We'll have an overview of these animations. Let's get started.
How To Animate Images on Elementor
With Elementor it's now possible to add animation on :
- Rotate
- Horizontal Scroll
- Vertical Scroll
- Scale
Let's explore concretely what happens when you perform one of these events.
Create Amazing Websites
With the best free page builder Elementor
Start NowHow To Create A Rotating Animation Of Images On Elementor
So if you want to create a rotating animation for your images, you need to head to the Advanced Tab, open the Motion Effects section, and turn on Scrolling Effects. Then, you need to click on the Rotate option and choose in which direction the image should rotate.
If you want to create a smooth animation, we'll define the Slider Speed to 1. It's not necessary to change the viewport here.,
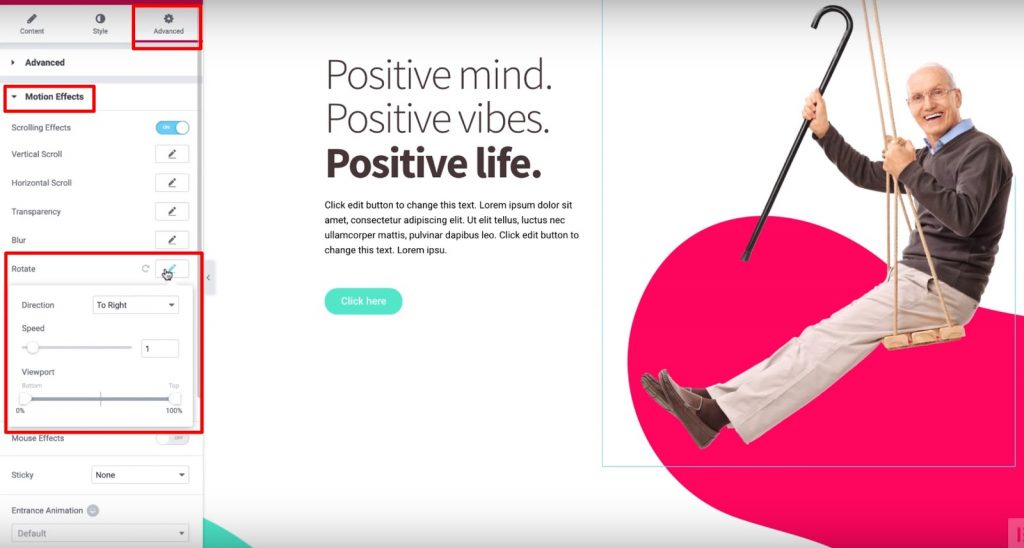
Finally, we can set the Y Anchor Point to Top to make the images turn from that point.
How To Create Slide Animation On Scroll On Elementor
In order to create a slide animation, we need to turn on "Scrolling Effects" as we did in the previous section. Now we'll turn on "Horizontal Scroll", and defined the following configuration :
- Sliding Direction
- Set the Speed to 10
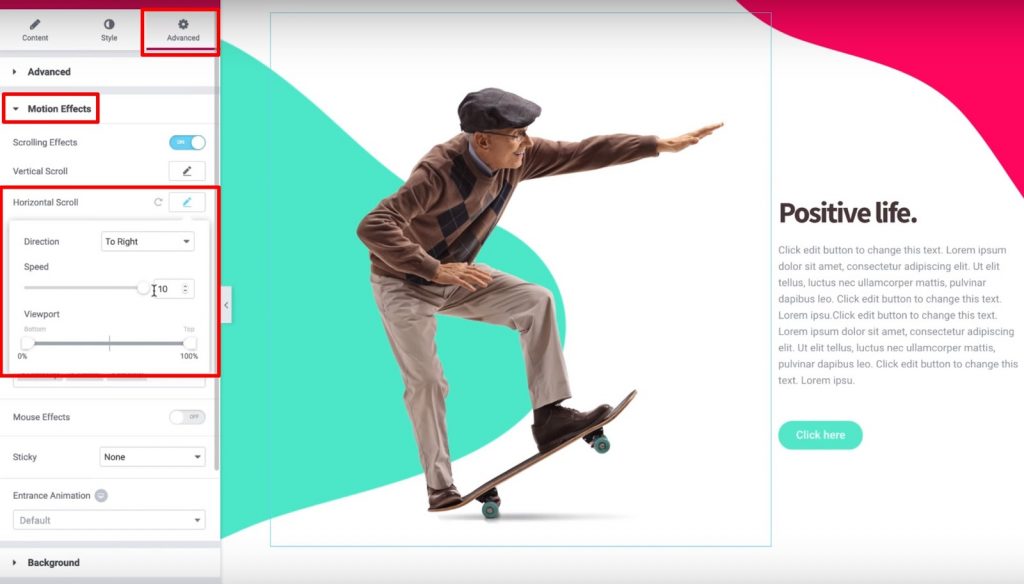
Here is a demo of how the sliding can look like on scrolling.
How To Create Vertical Scroll Animation On Elementor
Same as in the previous sections, we need to turn on the Scrolling Effects. The difference now is that we'll turn on Vertical Scroll and define some configurations :
- Define the speed to 4
- Set the direction to "Down"
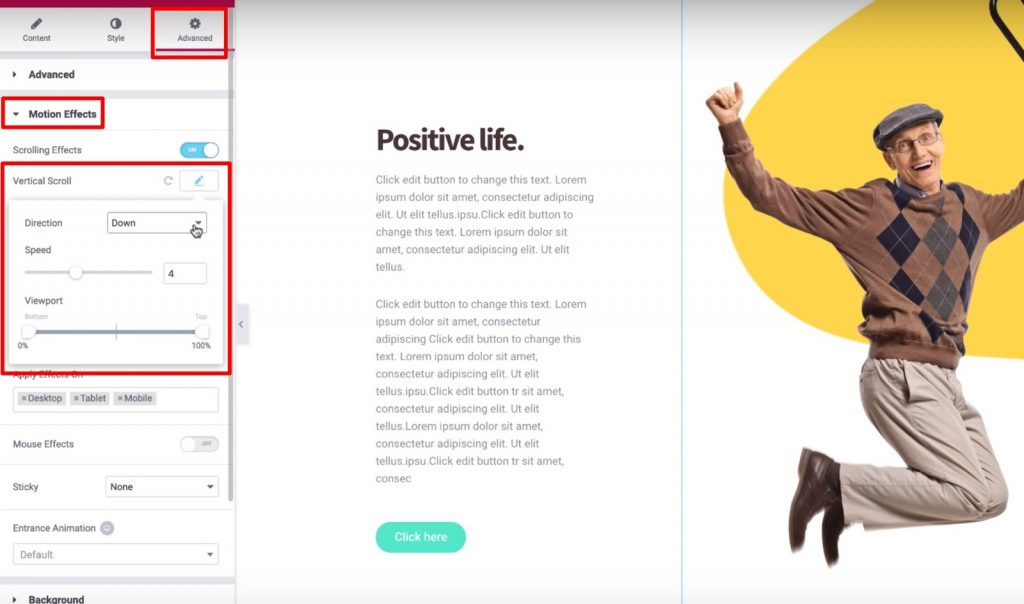
And that’s it! You can leave the other settings as the defaults.
How To Create A Zoom Animation On Elementor
With this animation, we'll have the feeling the image is moving towards us. That can be very useful to attract the attention of a specific element of your website.
So, let's turn on Scrolling Effects. Then, enable Vertical Scroll and:
- Set the direction to Down
- Set the Viewport between 0% and 40%
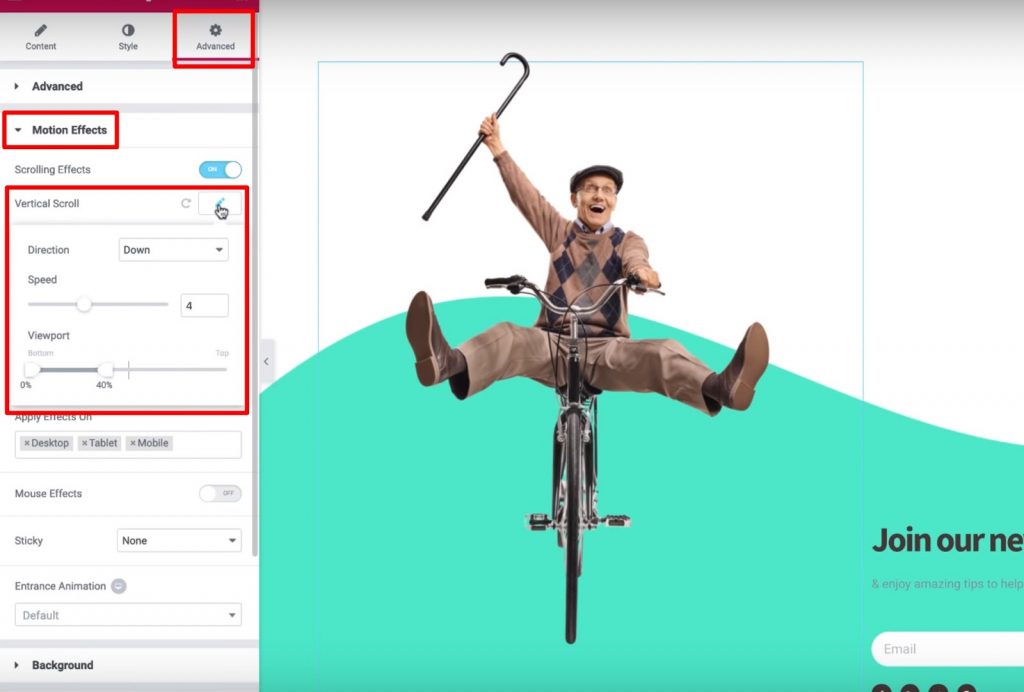
Then, click the Scale option and set the Speed equal to 6. Also, use the Viewport setting to make the bottom 20% and the top 80%.
That's pretty much what you need to know regarding scrolling animation on Elementor.
How To Control Transparency On Scroll On Elementor
Here, you'll learn how to use the Viewport settings to create cool motion effects as visitors navigate your site. We'll apply motion effects to backgrounds and sections, as well as widgets, which provide enough flexibility regarding the effects that we want to create. In few words, here is what you'll need to perform :
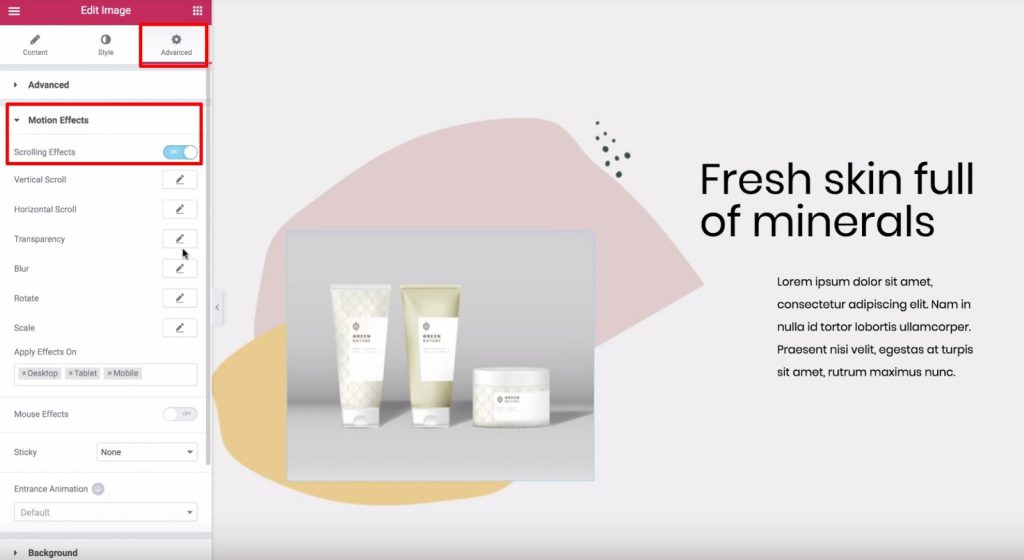
- Select an image
- Open the Advanced tab
- Find the Motion Effects section
- Turn on Scrolling Effects
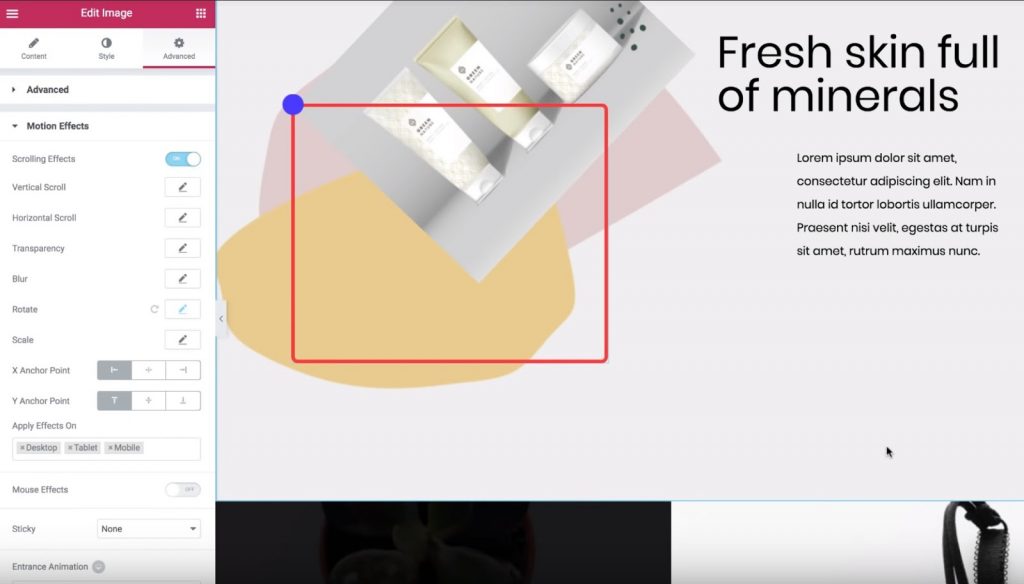
Now, we'll enable the Horizontal Scroll to make sure the image move from left to right as users scroll down the page. We can also adjust the Speed setting to create a smooth or fast animation :
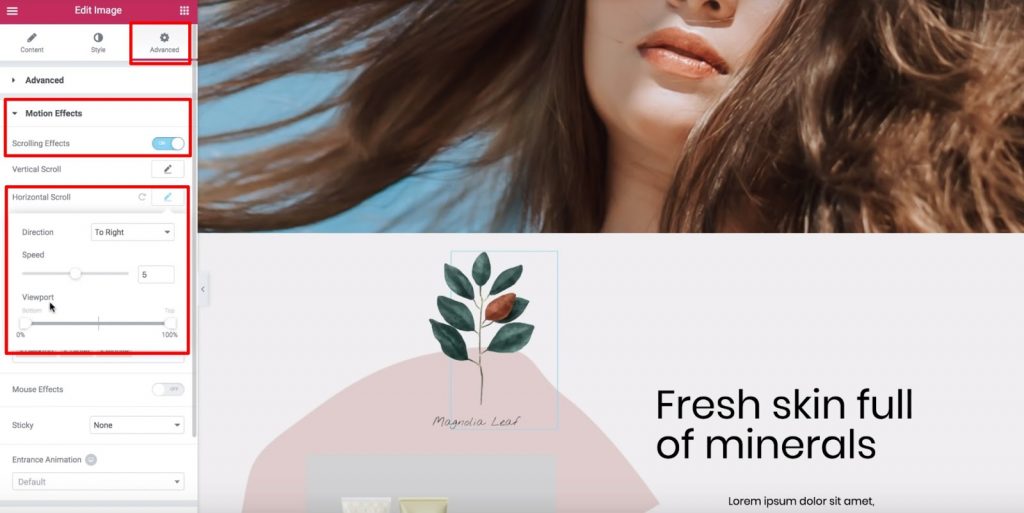
Now, let's get into the ViewPort option and see what changes we can apply to it.
First, it’s important to define what is a ViewPort : a visitor’s viewport is the visible size of a user’s device screen.
The Viewport options let us choose when to begin and stop your chosen scrolling effect based on a visitor’s viewport. For example, if we set the bottom of the viewport to 0% and the top to 100%, the image will start moving as soon as it becomes visible at the bottom of a visitor’s viewport. So, the image will reach its “original” position when it’s in the middle of the visitor’s Viewport (or, 50%), and it will keep moving until it reaches the top (100%).
Concretely here is what happen during a scrolling animation of an image :
- The image will start to the left of the original position when it first appears in a visitor’s viewport (visitor’s viewport at 0%)
- It will reach its original position at the middle of a visitor’s viewport (visitor’s viewport at 50%)
- It will continue sliding to the right of its original position as the visitor keeps scrolling (until it reaches 100%)
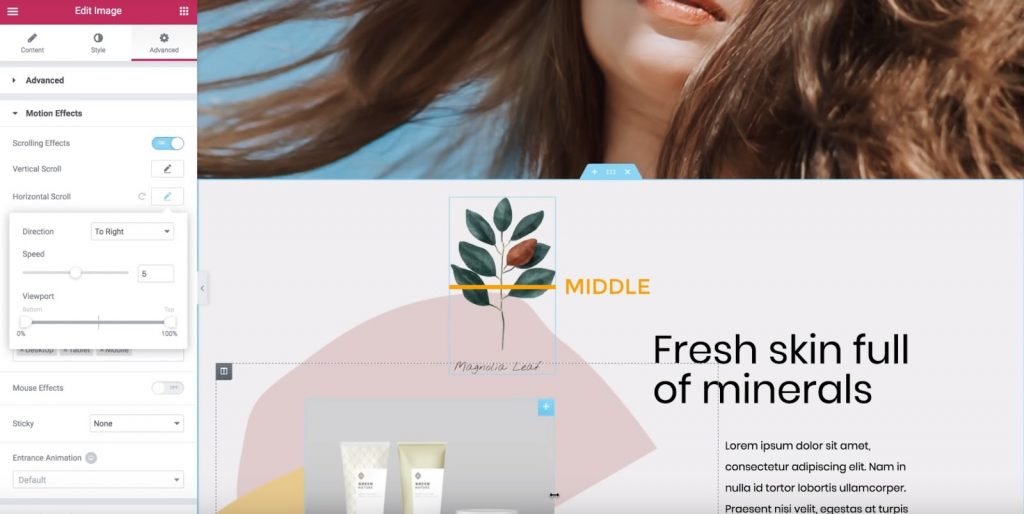
So this means that if we set the Bottom of the Viewport to 50% and the Top to 100%:
- The image will start at its original position.
- Once the image is in the middle of the visitor’s viewport (50%), it will start moving to the right until the image reaches the top of a visitor’s viewport (100%).
How To Create A Transparency Effect Animation On Elementor
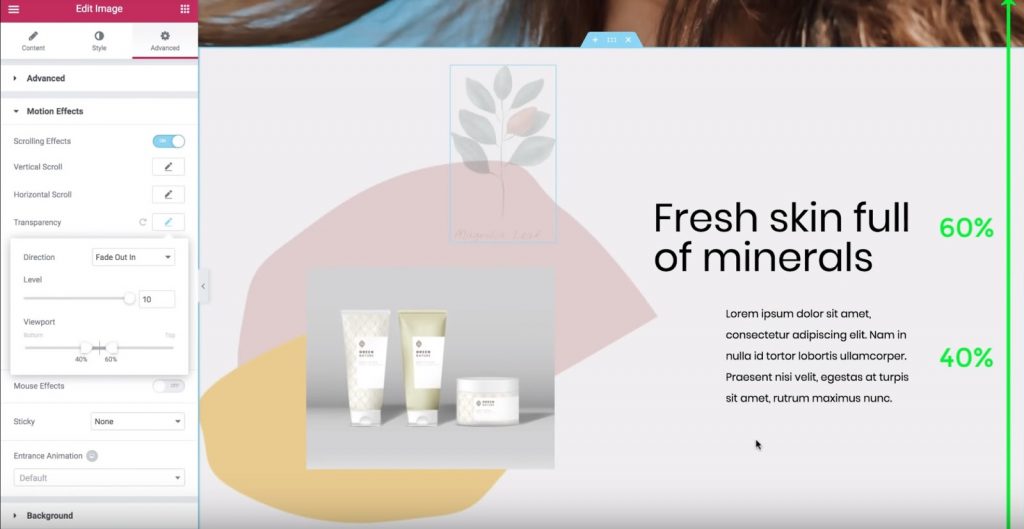
For this example, we'll turn on the Transparency option and:
- Set the direction to Fade In
- Set the Level to 10 (this makes the image very transparent to start)
If we set the Bottom viewport to 0% and the Top to 100%, the image will be transparent when it first appears at the bottom of a visitor’s viewport (0%). As the image moves up, it will become more visible, eventually reaching its original appearance when it reaches the top of a visitor’s viewport (100%). If we want to reverse that, we can define Fade Out. Then, the image will appear normal at first and decrease its transparency as a visitor scrolls down. Another option is Fade Out In. With this one, the image will start with a fade-out state and then back in again as the visitor keeps scrolling. If we set the Bottom viewport to 40% and the Top to 60% with Fade Out In, then:
- The image will fade out from 0% to 40%
- It will stay faded out between 40% to 60%
- Once it reaches 60%, it will start to fade in again between 60% and 100%
Now let's play around with different settings to find the effect that you like.
How To Use X and Y Anchor Points For the Rotating & Scaling Animation Effects
Let's now learn more about the X and Y anchor points for the Rotate and Scale effects in Elementor’s Motion Effects.
By the end of this, you’ll know how to apply these settings to create some cool motion effects at your site.
In short, here are the step we'll go through :
- Go to the Advanced tab
- Find the Motion Effects settings
- Turn on Scrolling Effects
How Anchor Points Works In the Rotate Animation
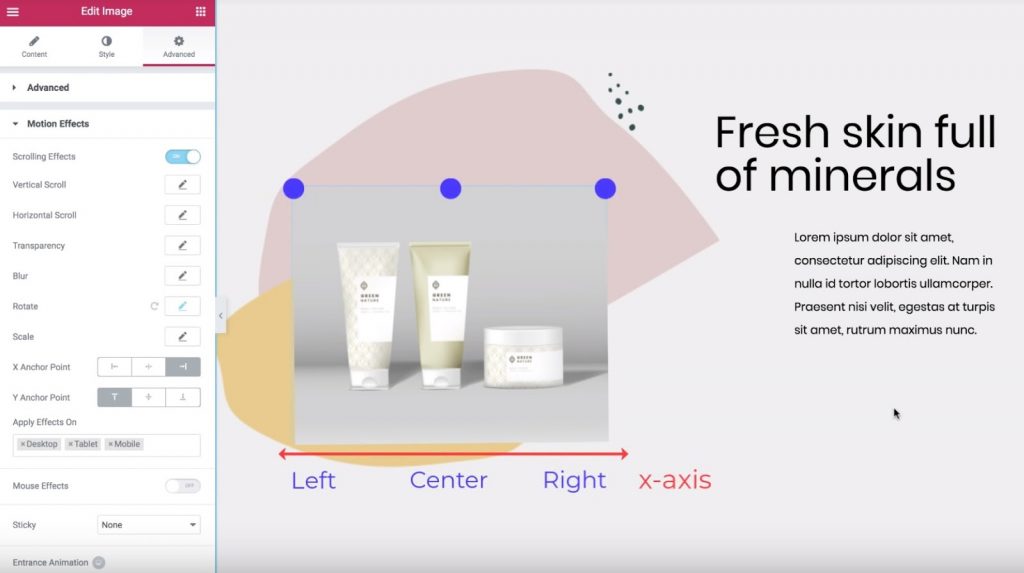
Let's consider the Rotation Effect. Click on the pencil icon by the Rotate effect to turn it on. You can leave the settings as the defaults. Then, look for the X Anchor Point and Y Anchor Point settings that appear below. The X and Y anchor points determine the axis around which an image rotates. By default, both are set to Center, which means that the image will rotate as if there is a “pin” in the center of the image. However, changing the X and/or Y anchor point will cause different rotation effects. For example, if you set the X Anchor Point to the left and the Y Anchor Point to the top, the image will rotate around the top-left corner :
Or, if you set the X Anchor Point to the center, and the Y Anchor point to the top, the image will rotate as if it were a painting that you hung at the top. Do you get it so far ? Let’s look at one more. If you move the X Anchor Point to the right, now the image will start spinning as if it were pinned in the top-right corner. Let’s sum this up. The X Anchor Point determines the position on the x-axis around which the image rotates:
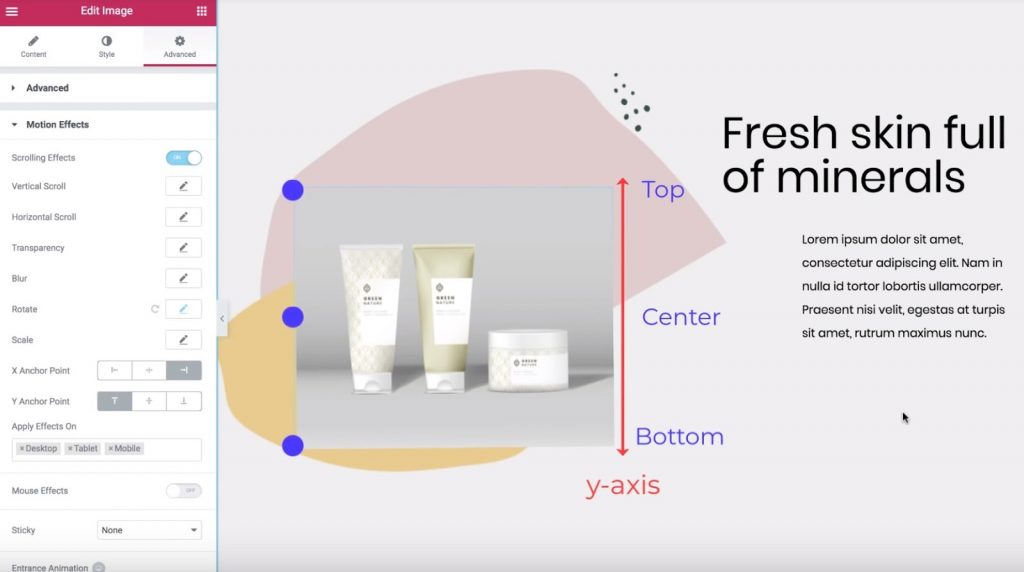
And the Y Anchor Point does the same thing for the vertical orientation:
How To Use Anchor Points In the Scale Animation Effect
Assuming you understand the basics of animation with Elementor, let’s look at how this same idea works with the Scale effect.
To get started, disable the Rotate effect, turn on the Scale effect, and:
- Set the Direction to Scale Up
- Set the Speed to -5
By default, the X Anchor Point and Y Anchor Point are always set to the center, which means that the image scales down toward the center of the image widget.
On the other hand, if you set the anchor points to Top and Left, the image would scale down toward the top-left corner.
It’s the exact same idea as the rotate effect.
Now that you know how X and Y anchor points work, you can go ahead and practice to master well these animations.
How To Animate Text With Overlap Effect On Elementor
Here, you'll learn how to use the Horizontal Scroll feature in Elementor’s Motion Effects to create a neat animated text effect on your site. You’ll be able to have text move across the page as visitors scroll. And with some tweaks, you can even make the text change color as it moves. For this example, we'll go over these steps :
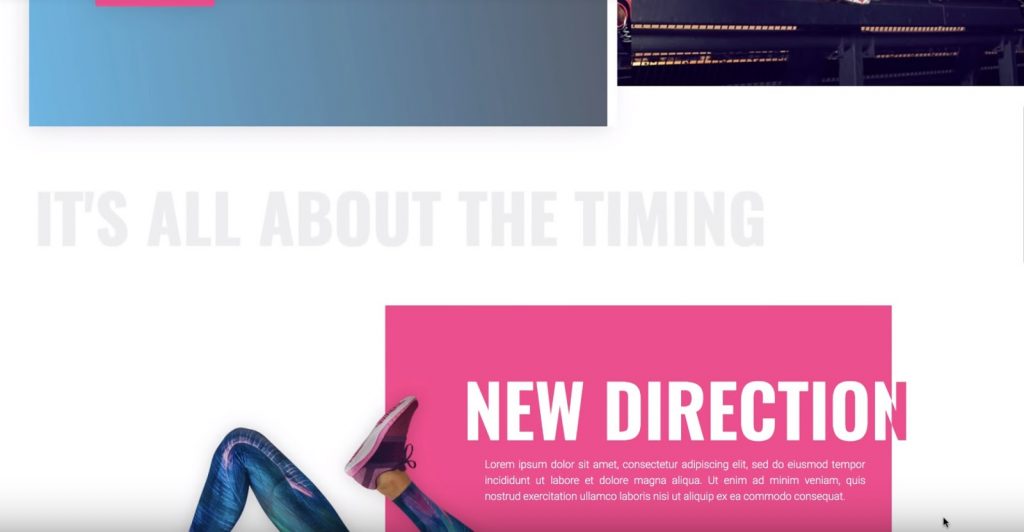
- A simple grey heading that moves to the right and stays the same color
- A white and pink heading that moves to the left and changes from white to pink once it crosses the pink background
Creating The First Header
Let’s start with the solid grey heading. We'll select the heading, then:
- Go to the Advanced tab
- Find the Motion Effects section
- Turn on Scrolling Effects
Then, let's click the pencil next to the Horizontal Scroll effect to enter its settings:
- Change the Direction to the direction you want your text to scroll (“To Right” for our example)
- Leave the Speed and Viewport settings as the defaults
Now the heading will slide to the right as a visitor scrolls down the page.
Creating the Second Header
Now, let’s get a little bit more advanced and have the heading change color as it moves. This process involves:
- Creating duplicate inner sections
- Using the Overflow: Hidden option to hide the heading from one of the sections once it passes outside the inner section
To get started, add a new Inner Section widget to the section where you want to place your header and then delete the left column. Then, set the Min Height equal to 450 px:

Now let's go to the Style tab and set the background color to pink. Finally, let's go to the Advanced tab and set the left padding to 33%. Now, add the Heading widget and give it styling. You should have the heading inside the inner section like this:
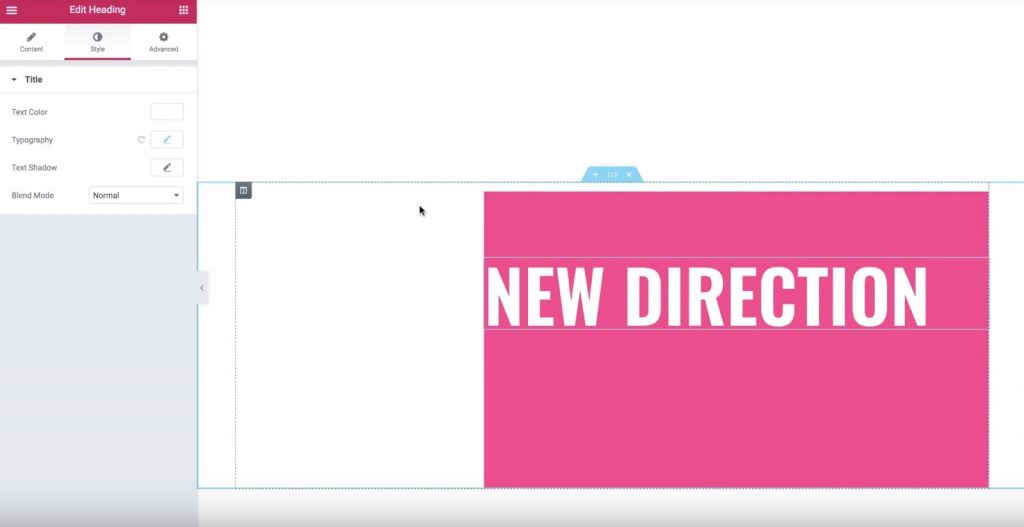
Now, let's edit the Heading widget and turn on Scrolling Effects in the Advanced tab. Then, let's enable the Horizontal Scroll setting and leave the options as the defaults.
Now, your header will move to the left, but it won’t change colors yet. You can see that it’s still white even on the white background.
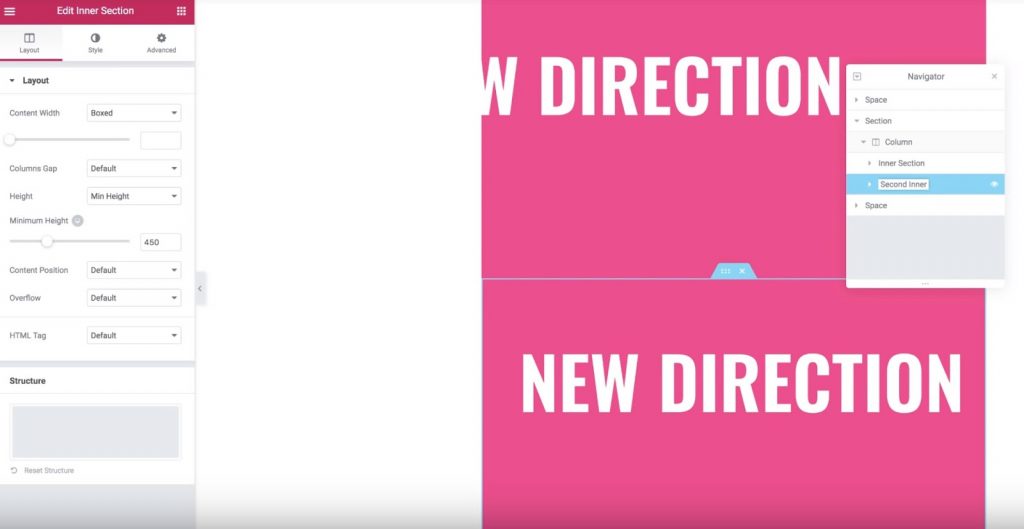
To fix that, we'll duplicate the inner section. Now, we'll have two identical inner sections and headings. You can use the Navigator to rename the sections to help you remember which is which:
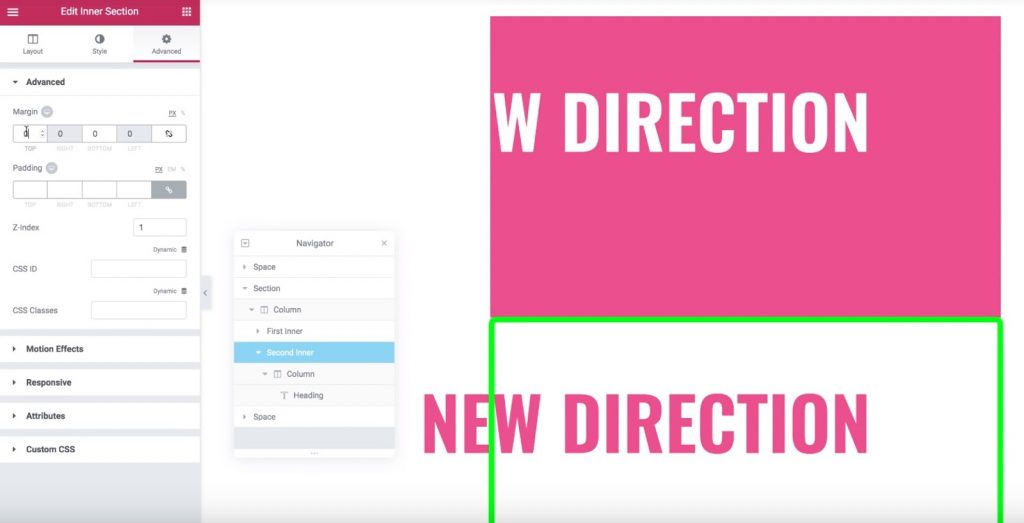
Now, let's move to the bottom inner section (the duplicate one) and change its background color to white. You’ll also want to change the heading color to the same color as the background in your original inner section. Then, add a negative top margin of -450 px to the bottom inner section. Now, the bottom (duplicate) inner section should appear “on top” of the original inner section. To fix this, we need to set the Z-Index for the duplicate section to 1 and set the Z-Index for the original section to 2. We should also make sure that only the pink header shows when it moves outside the inner section’s width. Here is how it should look like :
To achieve this effect, go to the settings for the original inner section. In the Layout tab, find the Overflow option and set it to Hidden.
That's all! Now, only the heading from the duplicate section will appear once it scrolls past the inner section, which creates the neat color-changing text effect. Pretty impressive right?
Summarizing
We hope this tutorial will give your a serious hint on how to create animation with Elementor. Remember that you should practice a lot to master these animations. Don't hesitate to share this guide with your friend.


