
Using Elementor, you can create a drop shadow effect on different areas of your website. A better-looking website has always more chances of retaining its users.

A box-shadow effect will make your website look much more creative and elevate the overall presence of your content. In this tutorial, we will see how to create a drop shadow effect on your website using Elementor.
How To Create Drop Shadow Effect With Elementor
To begin, you have to start editing with Elementor by pressing the Edit with Elementor button at the top.

Here you can choose where you want to place your drop shadow effect. You need to move your cursor to that widget, column or page and click on the Section button that appears above.
Create Amazing Websites
With the best free page builder Elementor
Start Now
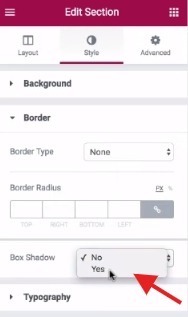
Next, go to the Styles tab and press Border from the menu on the left.

There, you will see the box-shadow option where you can enable it by selecting Yes and it will display all of the further customizations you can do.
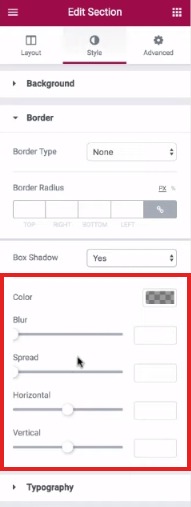
You can have full control over how your drop shadow looks. Using the given options i.e. Colour, Blur, Spread, Horizontal and Vertical you can make sure your drop shadow looks exactly how you want it to be.
Once you are satisfied with the effect you have created, you can go ahead and publish it. Make sure to check it out afterwards on your website to see how it looks.
Elementor is limitless when it comes to customization. It allows you complete freedom to play around with your creativity and help you make your website stand out from the bulk. This is how you can create a drop shadow effect on WordPress with Elementor.
That's all from us for this tutorial. Make sure to join us on our Facebook and Twitter to never miss out on our posts.


