
The WordPress block editor sometimes referred to as Gutenberg, has a function called Reusable Block that is quite helpful but rarely utilized. Reusable blocks serve the same purpose as global modules if you're familiar with Elementor, Divi, or other page builders.

These are blocks, or groups of blocks, that you can reuse after setting them up just once. You don't have to change them again after inserting them on several pages and posts. Additionally, you can make site-wide adjustments if you decide to alter them again, which will save you hours throughout a website. Now let's explore every method for managing your WordPress reusable blocks.
Create a Block in WordPress
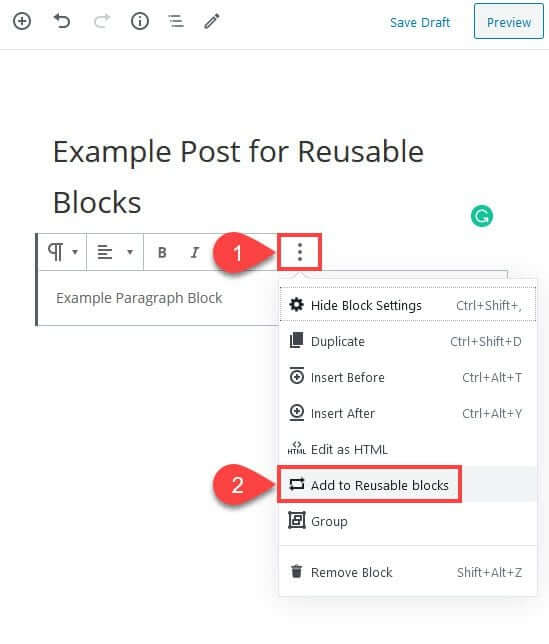
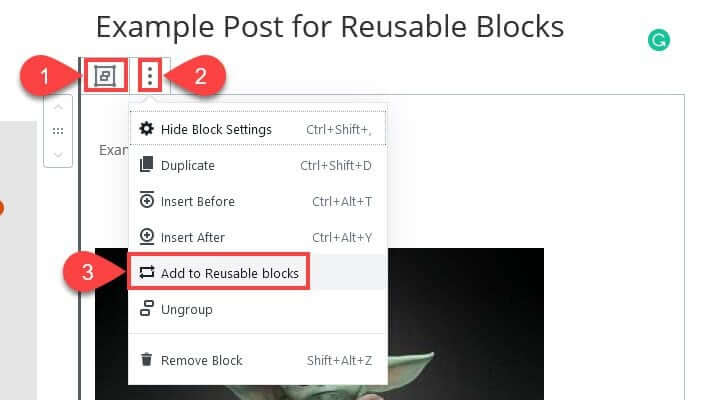
In WordPress, creating a block is not too difficult. You can make any block reusable inside any post that you are updating with the Block Editor (the default editor in WordPress 5.x, unless you are using the Classic Editor plugin). In the hover settings of the block, click the three-dot drop-down menu and choose Add to Reusable Blocks.
When you rename the new block in the editor, it will be easier to retrieve later. For the purpose, it will serve on your website, make sure the name you choose is memorable. Like "Related Posts," "Blog Post Cover Image," or something similarly illustrative.
Create Amazing Websites
With the best free page builder Elementor
Start Now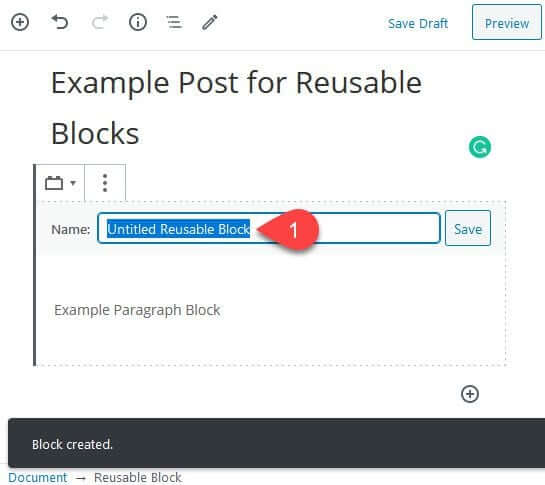
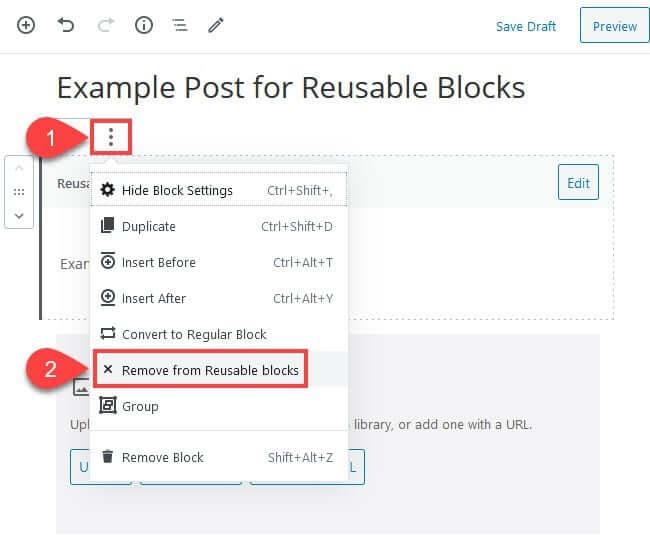
You can click on the dropdown settings again and select Remove from Reusable Blocks if you made a mistake when generating the reusable block, or just made a mistake in general. Using this option removes the block in its entirety from the database. If you'd like, you can then add it back to the collection by following the previous steps.
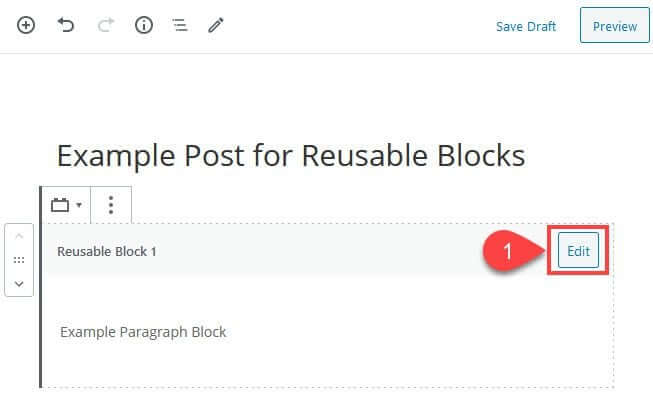
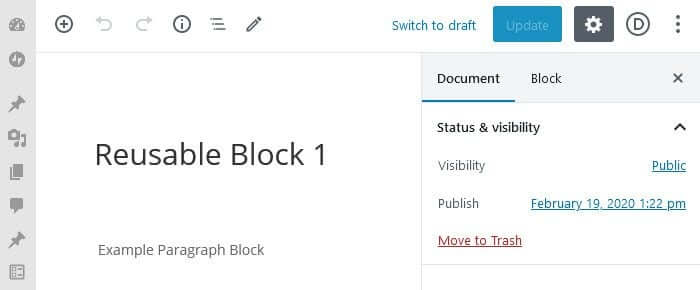
In addition, the Edit option can be used by merely clicking the block itself once saved.
You have the choice to rename the paragraph block in this example. However the changes for each block will be unique. You have extra options for a picture block, like alignment and the ability to upload or insert a different file from your media library.
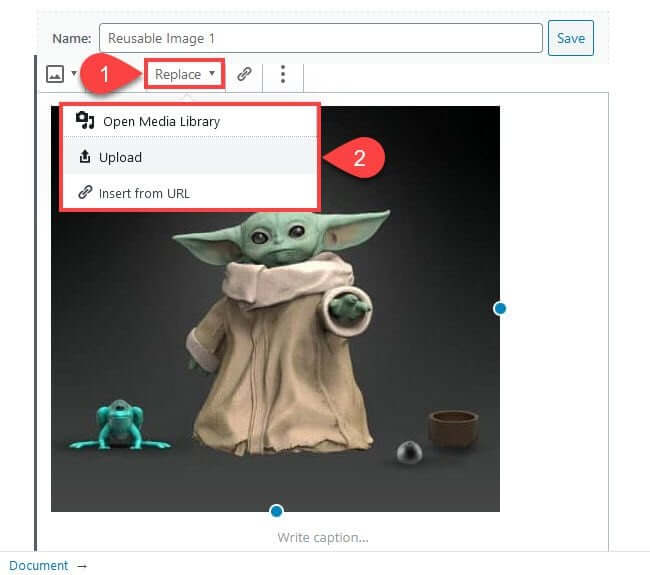
You can use this procedure with any reusable block you make. But remember that any changes you make in this way to a reusable block also affect all other instances of that block on your website. As a result, if you alter a picture in a single block, it will update everywhere.
Inserting A Reusable Block
It's very straightforward to use WordPress' Reusable Blocks feature. To access the Reusable tab in the block editor, click on any instance of the + inside a circle. The plus button can be found in the upper-left corner of the screen, beneath any block, and to the right of any block.
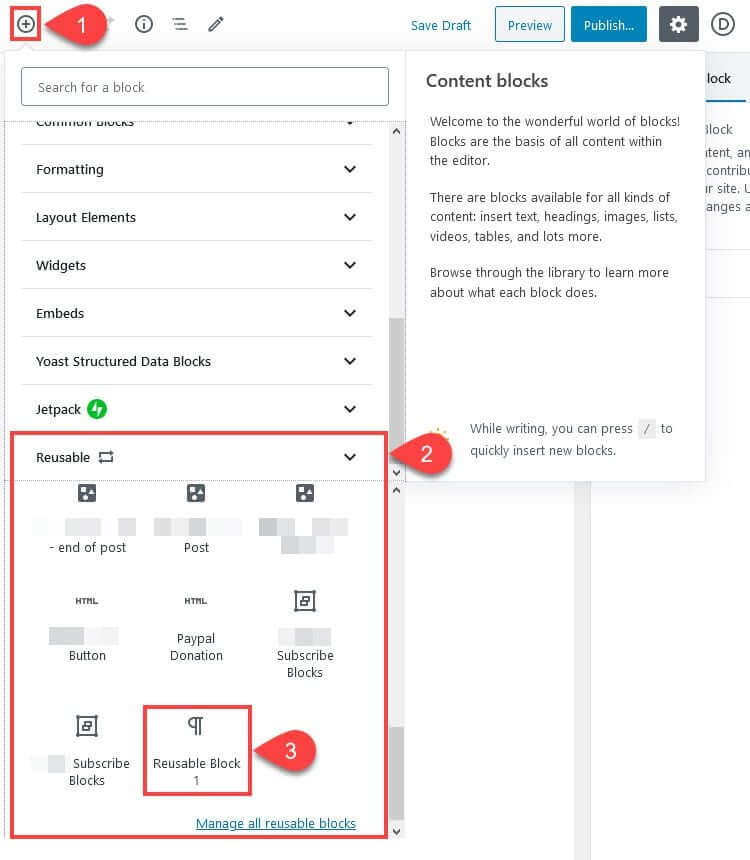
The Most Used tab, which shows at the top of the list each time the Plus button is selected, may also contain the reusable blocks you build when you insert them into other Posts and Pages.
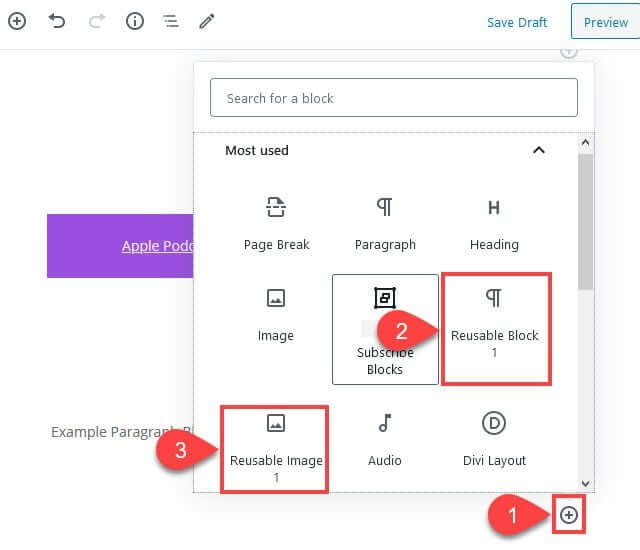
These may vary depending on the blocks you use, however, if you use, for example, the same Reusable Block as the footer for every blog post, they will show up here very frequently.
Managing All Blocks in WordPress
There is a Manage All Reusable Blocks link at the bottom of the Reusable tab. You will be taken to a website that looks familiar after clicking this link, where a list of all the reusable blocks you have generated is displayed. The list will resemble the Posts and Pages list that comes with WordPress by default pretty much exactly.
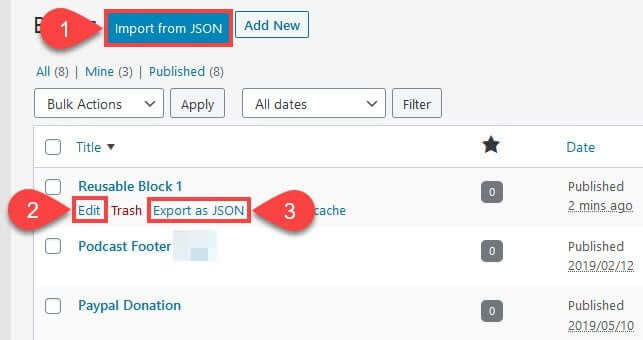
Looking through the list, you notice a few crucial choices. Edit, Export as JSON, and Import from JSON.
When altering a block, use Edit precisely as you would above. The block appears in its post-like editor where you can alter it and just it, rather than inside a specific post. Once more, any modifications made to this block will affect every instance across the whole site.
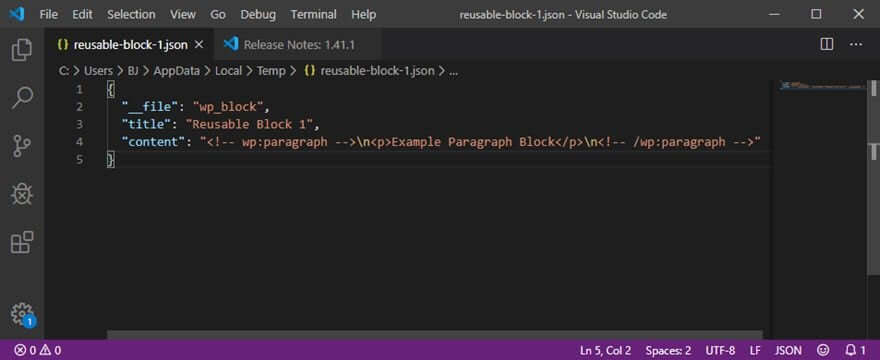
Depending on your browser settings, selecting the Export as JSON button (3) will open a dialogue box where you can select where to save the created JSON file. The file is a simple JSON document. The file type (a block), the title you gave it when editing or creating it, and the actual HTML that WordPress will inject to render the block and its contents on the front end of the website are displayed.
The process of importing from JSON is quite simple: locate the JSON file on your computer, then upload it just like any other file or attachment.
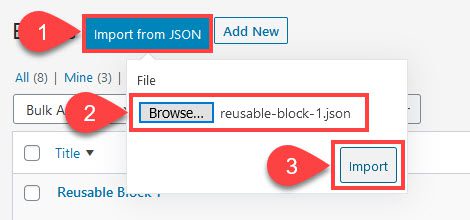
It will show up in your list of reusable blocks once you click Import. But take note that the newly imported block won't have its name changed if you already have one with the same name (Reusable Block 1, in this case). It is a manual process to distinguish between them.

Creating Groups of Blocks in WordPress
The full potential of reusable blocks is enhanced by organizing them into groups. You can also join Gutenberg blocks together and store them as a single Reusable Block, which is an alternative to having a single picture, paragraph, or heading that you can place globally. To create a global email opt-in form for all of your Block Editor posts, you could, for example, group a heading block, a paragraph block, an image block, and a Custom HTML block together.
All you have to do is shift-click any block to add it to a collection of reusable WordPress blocks. Blocks that are selected will have a blue border around them.
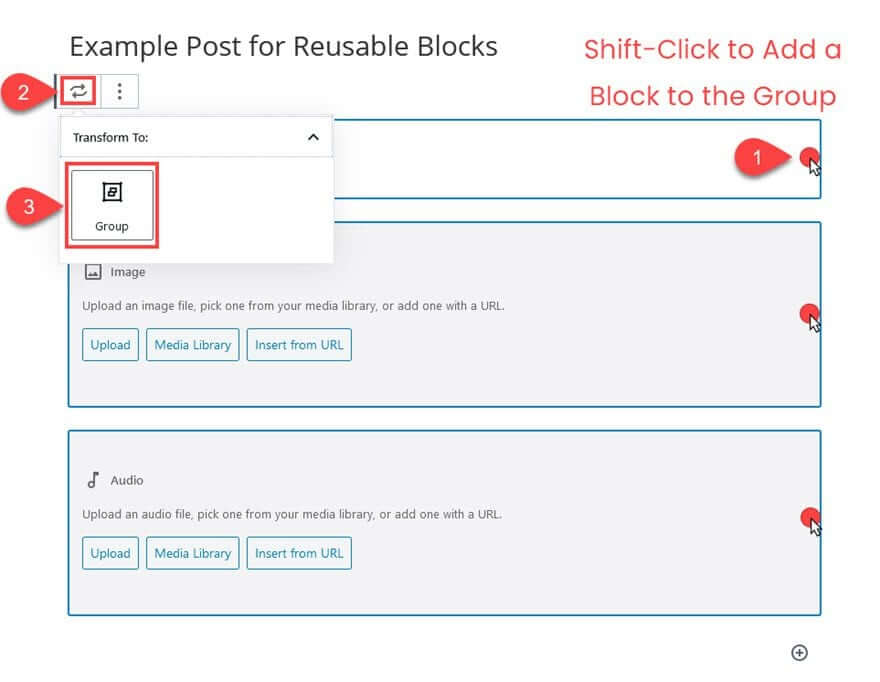
Next, you'll click the Transform button (2) and choose Group from the menu (3). You will now notice that the blocks have combined into one. The group block is then converted to a reusable block using the same procedure as with any other single block.
When you add a new block to a post or page, this new group will then show up in the list of all reusable blocks and under the Reusable tab.
Conclusion
One of the best and most useful aspects of the Gutenberg Block Editor is reusable blocks. Using the reusable blocks function can elevate the design and development of your Posts and Pages to new heights of utility, creativity, and user experience. You can share blocks and content with friends and create templates for common aspects of your site.


