
Image hotspots are a visually appealing approach to presenting your consumers with interactive material. Use Elementor to learn about image hotspots and how to put them into practice. Add a layer of fun to your website to pique the curiosity of visitors and inspire them to remain around long enough to learn more. However, it can be difficult to maintain the same level of involvement across desktop, mobile, and tablet devices.
To your good fortune, you can pique the interest of your visitors by including responsive image hotspots on your website. It is possible to give a five-star, engaging experience on all platforms since hotspots are mobile-responsive.
The advantages of exploiting picture hotspots will be discussed in this article. In the next section, we'll teach you how to create photos with hotspots and make sure they display correctly on desktops and mobile devices. What are we waiting for?
Create Responsive Image Hotspots With Elementor
If you're looking for a creative method to get your visitors to pay attention to and interact with your material, consider including responsive hotspots in your photographs. In light of this, let's have a look at how easy it is to construct them with Elementor.
Create Amazing Websites
With the best free page builder Elementor
Start NowElementor Widgets
Flip Box widget will be used to build our responsive hotspot. This box flips when you hover over it, as the name implies. Elementor Picture widget can be used to insert a hotspot image into a document.
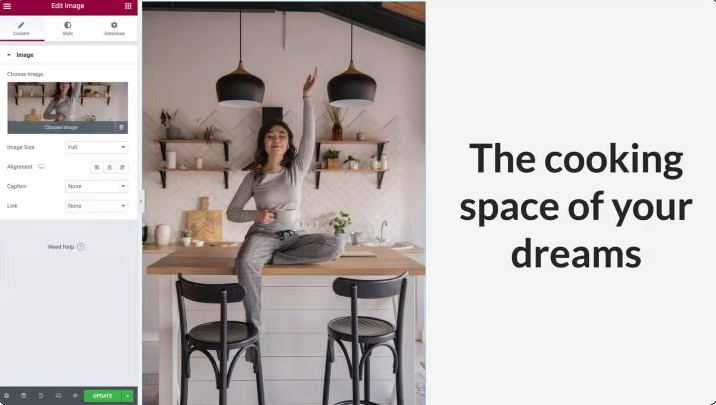
Use a portrait-oriented image if you want this effect to appear on mobile devices; otherwise, a landscape-oriented image may be too small for mobile viewing.
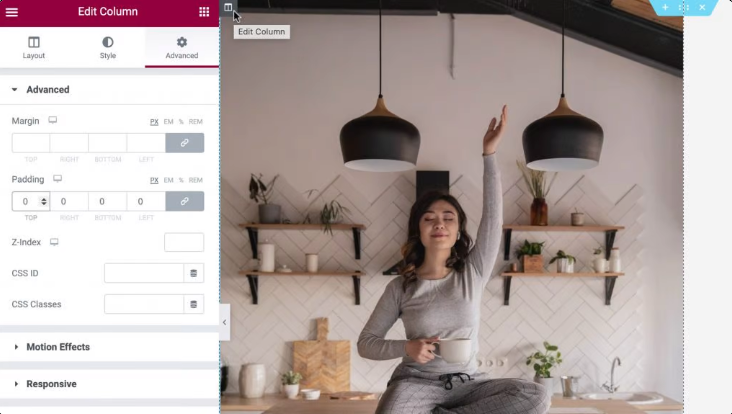
The next step is to ensure that the column is fully occupied by your image's width and height. Entering the column's options will allow you to remove the default padding. Click the gray icon in the upper left corner of the column when your cursor is over it. Set the padding to 0 in the advanced tab.
The Flip Box widget can then be dragged into the same column as your Image widget for further customization. Two sides can be shown on the Flip Box widget. This is the default view, so the green side is upfront. Except for an indicator that we'll transmit as an interactive hotspot, this side will be completely transparent.
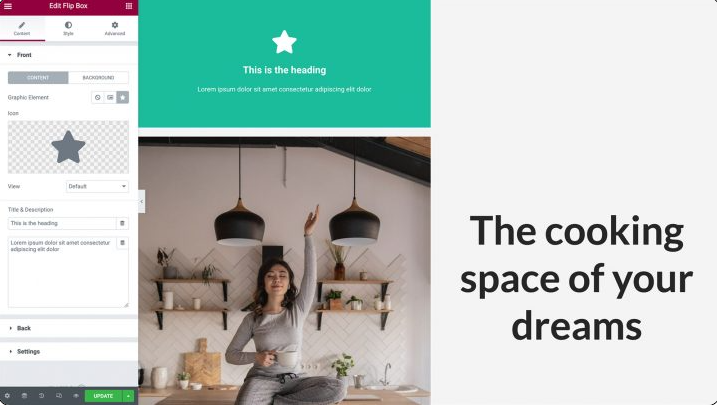
It will turn purple when you hover over it. On this side, we'll create the content for our hotspot:
Adding a button, heading, and description to the hotspot side is an option. As a result, it's an excellent tool for tagging your photographs with attention-grabbing CTAs (CTA).
Add Content To Your Flip Box Widget
Our Flip Box widget will now feature an icon. As a pin, the icon will alert site users to the fact that there is additional information to be found.
You can begin by selecting your Flip Box widget by clicking on it. The Elementor Panel's Icon option can be found by clicking on it. The icon you want to use for your hotspot is then available for selection.
In the Flip Box widget's default side, all other content must be removed first before we can use it. Elementor Panel: Delete everything from the Title and Description fields if you like.
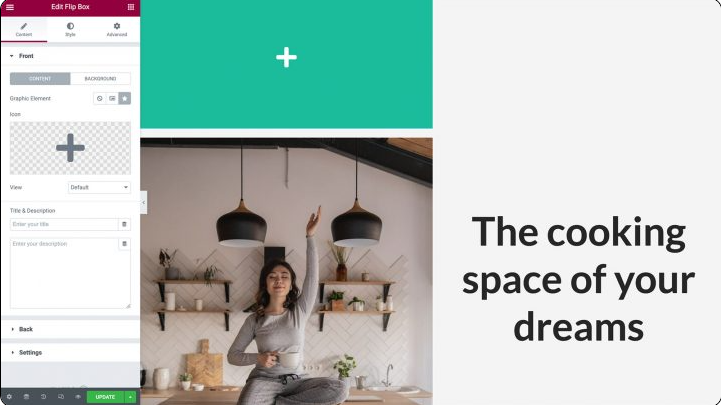
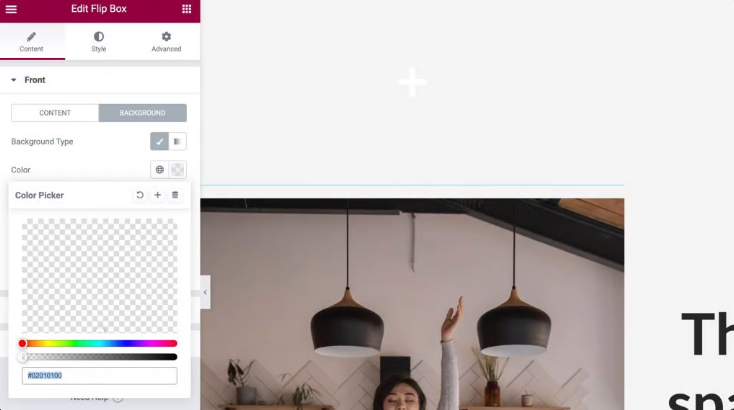
When you are done, you should see nothing except an icon on the front of Flip Box. Finally, pick Backdrop to remove the widget's background. Selecting Color will bring up a color picker. To make your widget entirely transparent, move the transparency slider all the way to the left.
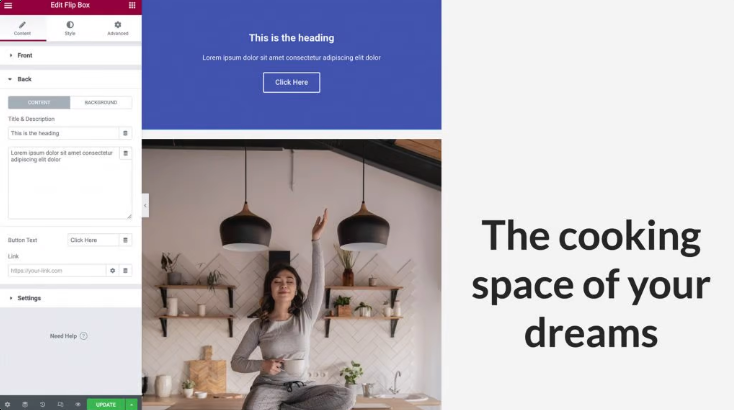
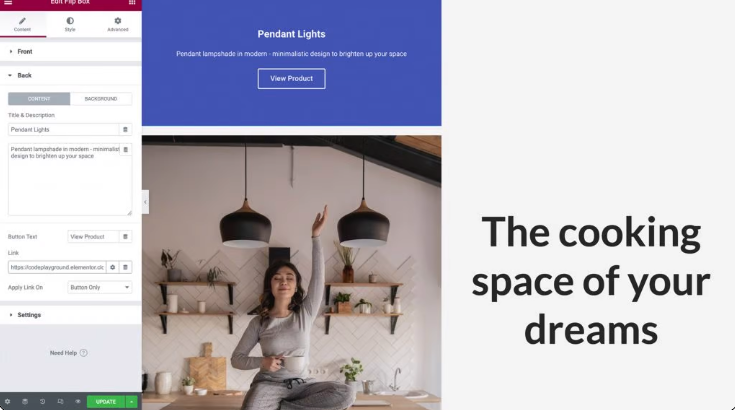
Next, we'll add the material that will display anytime a visitor interacts with your hotspot. This content will display whenever someone interacts with your hotspot. To add your title and description, expand the Back tab and click the following:
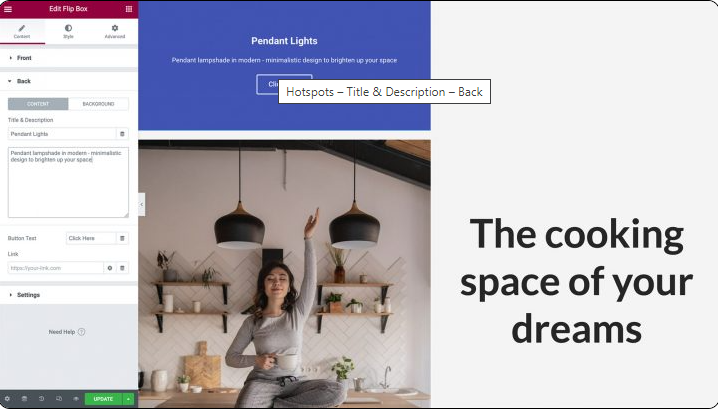
The Flip Box widget has a button included in its design by default. You can get rid of this button by deleting the text that it contains. You also have the option of generating a CTA by personalizing the label of the placeholder button and including your own URL in the mix. You also have the option of choosing whether this link will be applied directly to the button, or whether it will be applied to the entire side of the flip-box:
Next, you will be given the option to select a backdrop color for the popup that your hotspot creates. Choose Background > Background: Classic from the drop-down menu in the Elementor Panel. Simply clicking on Color will bring up the picker, where you can then make your choice. Alternately, you have the choice to make use of an image or a gradient color; but, for the sake of this demonstration, we will go with a white background:
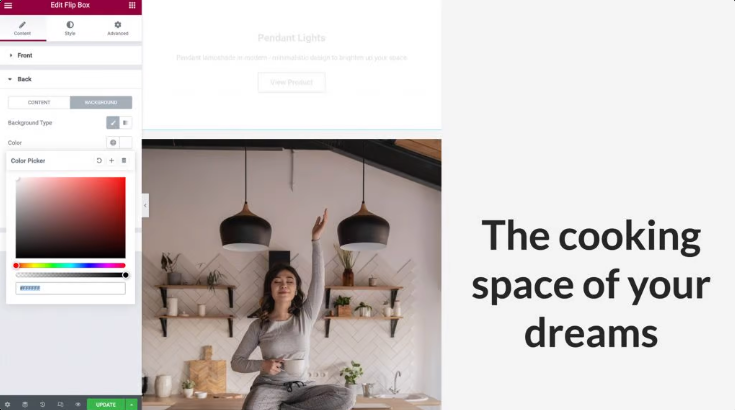
After you have selected your background, you may find it necessary to alter the color of the text. It is now time to move on to the following stage.
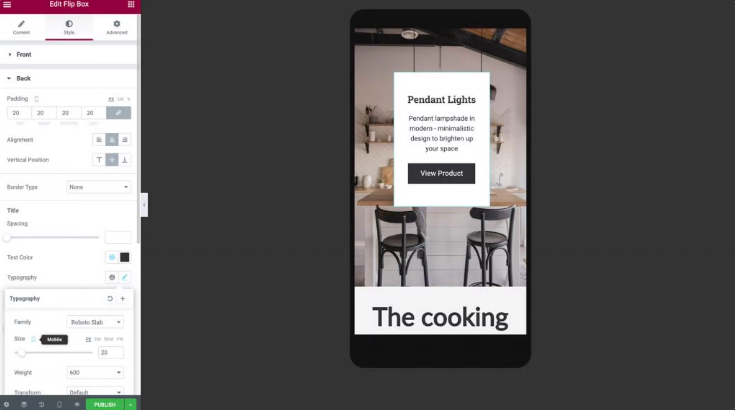
Styling Flip Box
The moment has come to style our Flip-Box widget now that we have completed loading it up with material. Proceed to the tab labeled Style. In this section, you will find a number of options that you may use to customize your icon to meet the requirements of your design.
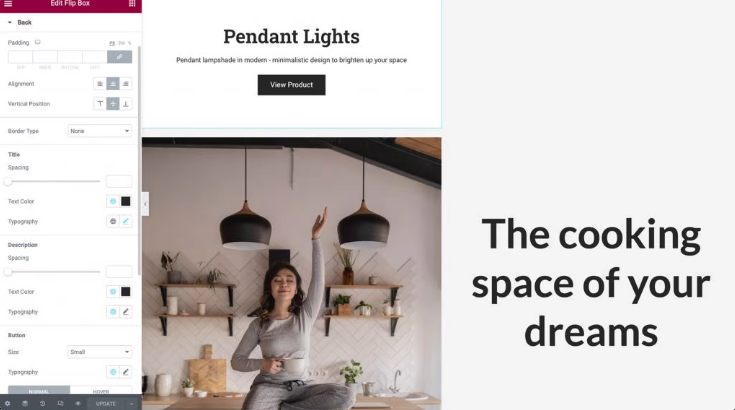
It is essential to have knowledge of the fact that aligning an icon to the top left corner makes it the simplest to place it and ensures that it will remain responsive on all devices. Make sure that the Alignment is set to Left, and then make sure that the Vertical Position is set to Top. In addition to this, we will get rid of any excess padding by setting it to zero:

After you have experimented with the other options to modify the color of your icon, its size, and its rotation, you can expand it by clicking on the Back tab once you have finished.
In the same way that we were able to adjust the Alignment and Vertical Position on the Front side of the Flip-box, here we are also able to make adjustments to the Padding. In this particular illustration, we will not change the settings from their default state.
The next step is to alter your button, as well as the font style, size, and color so that it is legible and understandable to site visitors.
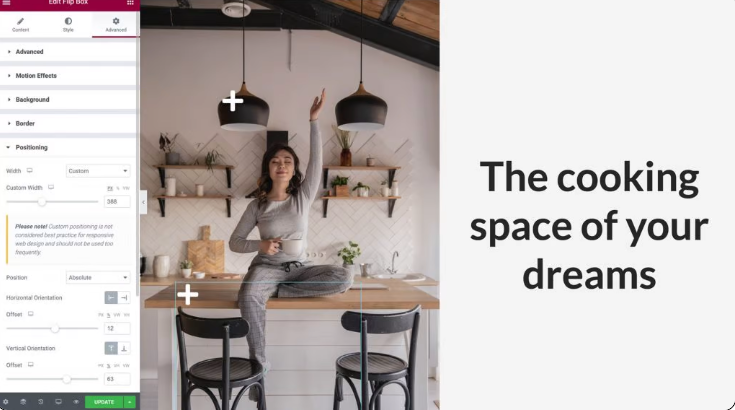
Hotspot Position and Size
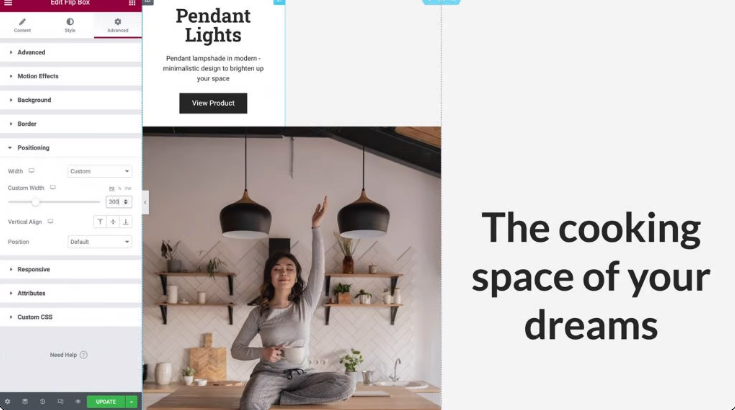
When it comes to image hotspots, position and size are the most important factors to consider. Simply selecting the Advanced option will allow you to fine-tune where on the page your hotspot is shown. After that, you can click to make the Positioning section more visible:
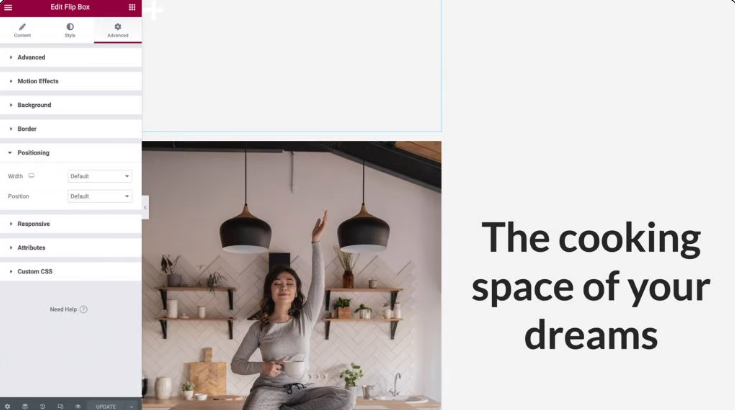
Next, locate the drop-down choice labeled Width and select Custom from it. You have the option of using responsive units such as percentages and viewport width, or you can define the exact size that your hotspot should be. You can even choose to leave it set to its default value so that it occupies the entire horizontal space in accordance with your design. Passing your cursor over the Flip-box widget will allow you to check the appearance of the material on the opposite side of the box.
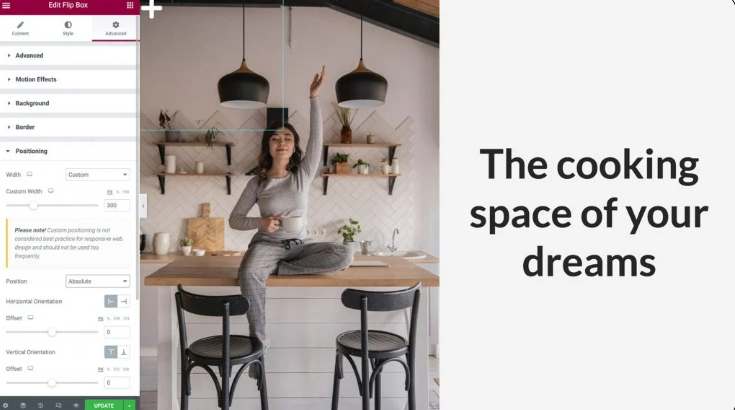
The next step is to select Absolute placement from the Position drop-down option. This will remove your Flip-box widget from the flow of widgets that appear on your website, reducing its physical height within the column, and making it simpler to position it above your image:
In order to give your image hotspot a responsive appearance, you will need to make certain that the Column, the Image, and the Flip Box widgets all scale together while preserving the same aspect ratio.
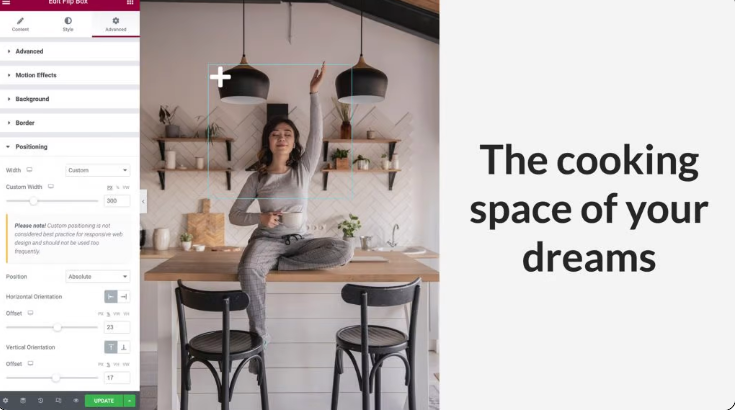
The first thing you need to do is change your offsets from using pixels to using percentages. This will ensure that your Flip Box widget is positioned appropriately in relation to the changing width and height of the column across a variety of screen sizes.
You have the option of selecting the % option within the Elementor Panel for both the Horizontal Orientation as well as Vertical Orientation. After that, you can adjust the position of your hotspot by using the two sliders or just by dragging it around with your cursor:
Finally, return to the Content tab and expand the Settings section by clicking on the Expand button. You have the ability to set the height of the widget here, as well as select an animation for the Flip Effect that will play whenever someone interacts with your hotspot.
For the purpose of this illustration, we are going to keep the height at its current setting and then open the drop-down option for the Flip Effect. You may get a preview of the animation by hovering over your Flip Box widget and selecting the animation from the menu:
You may build stunning animations that will keep your visitors interested in your website by experimenting with a variety of Flip Effects and combining them with the position of your content, which we reviewed in Step 3.
Make The Hotspot Mobile-Responsive
More than three billion people throughout the world use a smartphone. In order to reach as many people as possible, it's critical that your entire website is mobile-friendly.
Test your hotspot's UX on a variety of devices once you're satisfied with how it looks and works in Elementor's default Desktop view. Using Elementor's Responsive Mode, you can see how your design will look on a variety of devices other than a desktop computer. Select the Responsive Mode icon at the bottom of the Elementor Panel and choose Tablet:
Smaller screens should automatically resize the image, column, and hotspot. Our Flip-Box is exactly aligned in this viewport because we utilized responsive units to position it.
Repeat the preceding steps if you need to make adjustments to the content or positioning of your Flip-Box. Viewport icons must be placed next to the options you update in order to prevent your changes from being reflected in all the viewports:
Selecting Responsive Mode > Mobile in your picture hotspot's settings will allow you to see how it renders on a smartphone or tablet.
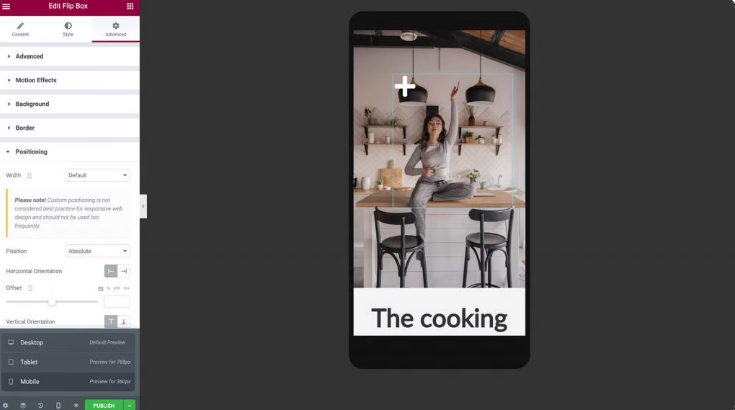
The Column, Image, and Hotspot should instantly shrink to fit the smaller screen when you go to mobile mode.
The flip-box widget should be checked on both sides to ensure that the text is shown accurately. If your design calls for it, you may want to adjust the padding, width, height, and font size on the back of your hotspot.
After making these adjustments, your hotspot is operational! You can rest assured that your responsive image hotspot will look and work properly on any device, be it a smartphone, tablet, or desktop computer.
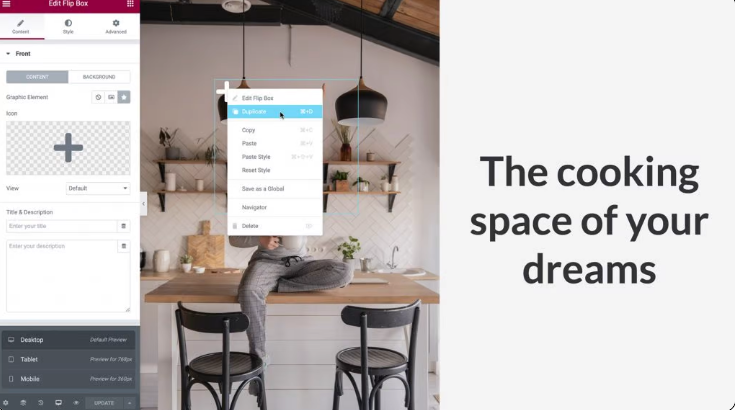
Now that you've learned how to build more hotspots, you can go ahead and copy your widget. Take the Flip-box widget back to the Desktop View, then press the right-click button on it to copy it.
As we did in Step 5, go to Advanced > Positioning and set the Offset of Horizontal Orientation and Vertical Orientation according to your preference. In order to prevent them from overlapping, be sure to provide enough space between them.
Go back to the Contents tab and click Back to expand it, exactly as you did in Step 2 to make changes to your new Hotspot's information. The responsive parameters we previously made to the widget will be immediately replicated, but double-check that everything works correctly on Tablet and Mobile Viewports as well as on the larger screen.
Doing so will allow you to use picture hotspots on your website to attract visitors.
Finishing Words
It's a good idea to seek ways to engage and please your website's users while creating your design. As a web developer, you should consider using image hotspots. For those who need information quickly, these interactive features are a great option.
Create a hotspot with Elementor's Image and Flip Box widgets, as detailed in this article. Our Responsive Mode lets you fine-tune how the hotspot appears and performs on desktop, smartphone, and tablet devices.
If you like the post, then share it with your friends and check out other elementor tutorials from codewatchers.


