
For your main domain, have you ever created any subdomains? Let's examine every aspect of this article. As you may already be aware, a subdomain extends the primary domain, and the search engine views it as a brand-new website. The Subdomain creation process is simple. You must, however, go through some technical procedures. I've seen a lot of bloggers and website owners build Subdomains for specific events so that people may access that section without having to read any unnecessary stuff. The same is true for testing plugin and theme functionalities, and we also experiment with Google ranking for our niche content.
Therefore, it would be wiser to create subdomains if you have a complex website because they are thought of as separate sites but linked to one another under the main site. Subdomains provide a lot of benefits! Let's take a closer look at them before moving on to the steps for configuring the subdomain in Cloudways hosting.
Subdomains' Advantages
Subdomains are easy to make and don't cost anything extra. Through topical authority, it speeds up the rate at which the site is crawled and helps the site move up in the search engine rankings. With subdomains, a website can be well-organized, and yes, the content that is well-organized would bring in more visitors. With the domain extension, it's easy to give your business a brand identity. To get your business known all over the world, you are more likely to try to reach people in different parts of the world. With a subdomain, you can start an online store or a mobile site. The subdomain will help you if you want to look at the features and test how well the plugins and themes work.
When Google penalizes one of your subdomains, it doesn't hurt the other subdomains or your main site. You can use this part of the website to learn and try things out to better understand how search engines work. Subdomains are a good way to work as a group. You don't have to give out the login information for the main site. Instead, you can give people access to the sub-sites they need to edit or write content, test the third-party tools that have been installed, etc.
Procedures For Creating A Subdomain In Cloudways Hosting
In order to optimize their web assets for the newest technological trends and to pass fundamental web vitals examinations, committed enterprises and professional bloggers should choose the lightning-fast managed hosting service provided by Cloudways. I'll explain how to make a subdomain in Cloudways. Simply follow the detailed instructions to do the technical work quickly.
Create Amazing Websites
With the best free page builder Elementor
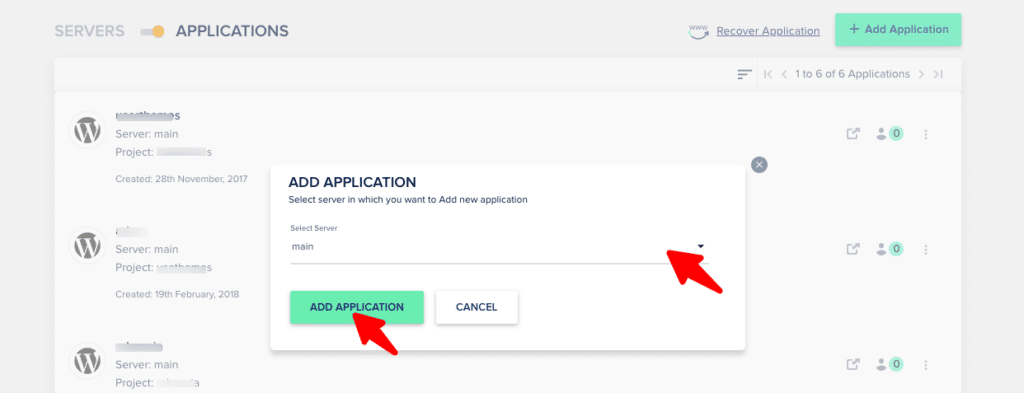
Start NowGo to the Admin Panel portion of your Cloudways account after logging in. Then click Applications > Add Applications > Select Main Server > Add Application from the top menu.
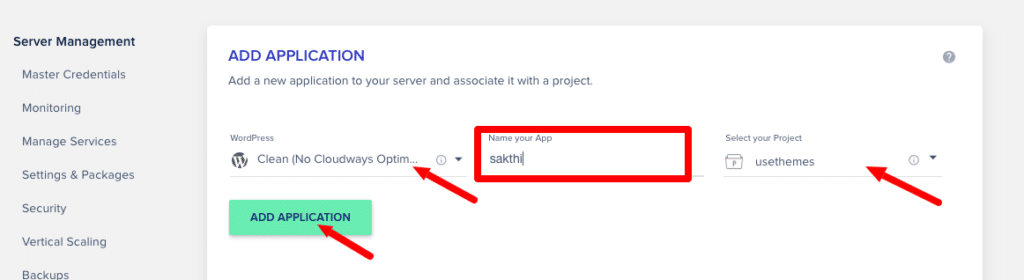
Give your Subdomain a name, select your main domain under "Select your Project," and then select the WordPress version in the select Application setting. Then click Add Application.
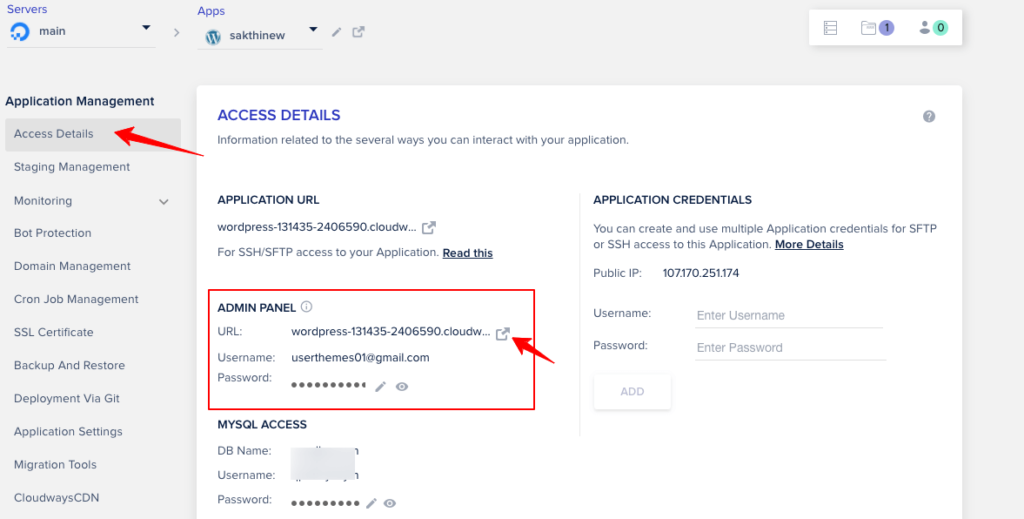
You will now receive a notification indicating that your Subdomain has been installed. Open the Newly Created Sub Domain menu under Applications. The "WordPress Admin Panel URL" provided by the Cloudways hosting is visible.
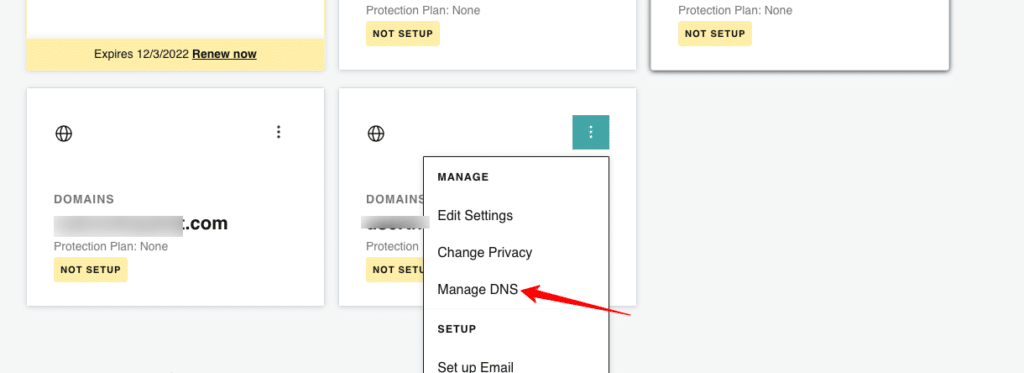
Your Subdomain will open in a new tab when you click that URL. The Subdomain must be pointed at the domain's registered website. Copy your Cloudways Public IP and go to the domain name registration website, such as GoDaddy or Namecheap, to point to the Subdomain. Click "My Products" after signing into your account at GoDaddy. To add the records, click "Manage DNS" under "Domains."
Select "Add" from the menu. You must now input four values: Type, Name, Value, and TTL, which are represented by the letters A, @, public IP (which we copied into the Cloudways admin panel), and Custom (600 seconds), respectively. Press "Add Record." Then We will include the "CName" record using the same process after adding the "A" record. Click "Add" and type CName, Sub Domain Name, default WordPress admin panel URL (which we have seen in Cloudways dashboard), and Custom (600 seconds) for Type, Name, Value, and TTL, respectively. Press "Add Record."
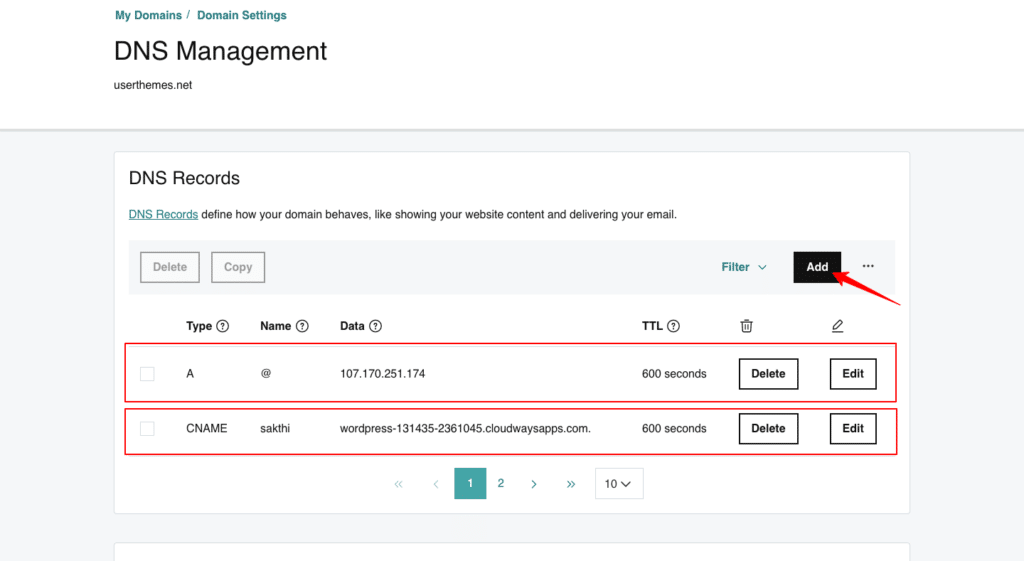
Make sure to omit "https://" from the Admin panel URL when entering it. We have successfully added the records needed to point the Subdomain on the domain registration portal.
Click on Domain Management under Cloudways Admin settings. Give "SUBDOMAIN NAME.MAINDOMAIN.COM" as the name of the primary domain. To make changes to your Subdomain, click "Save Changes."
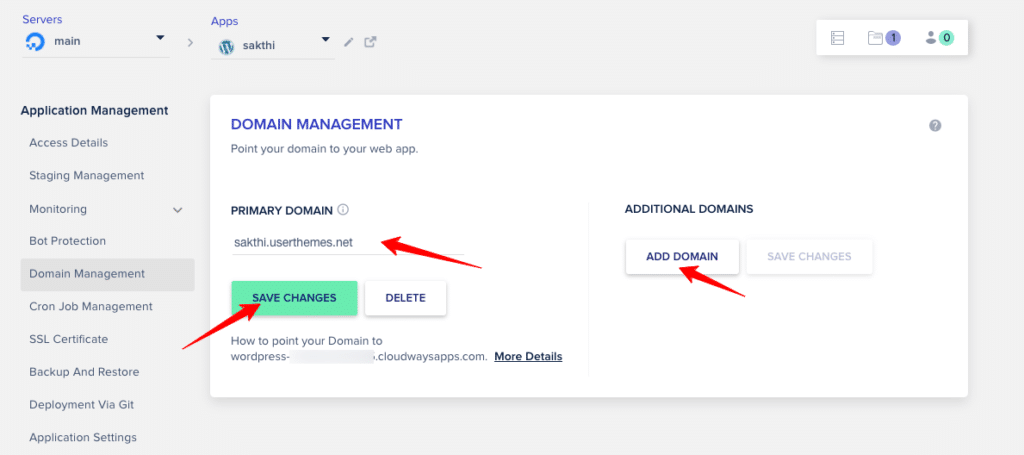
Cars.userthemes.com is a good example. (Subdomain + Main domain)
We shouldn't forget to install the SSL certificate for the newly created Subdomain. Go to "SSL Certificate" and enter your Email Address and the name of your subdomain. Click "Install Certificate."

The SSL installation will take a few seconds, after which you will get a message saying that the SSL has been installed. Click "Save Changes" now.
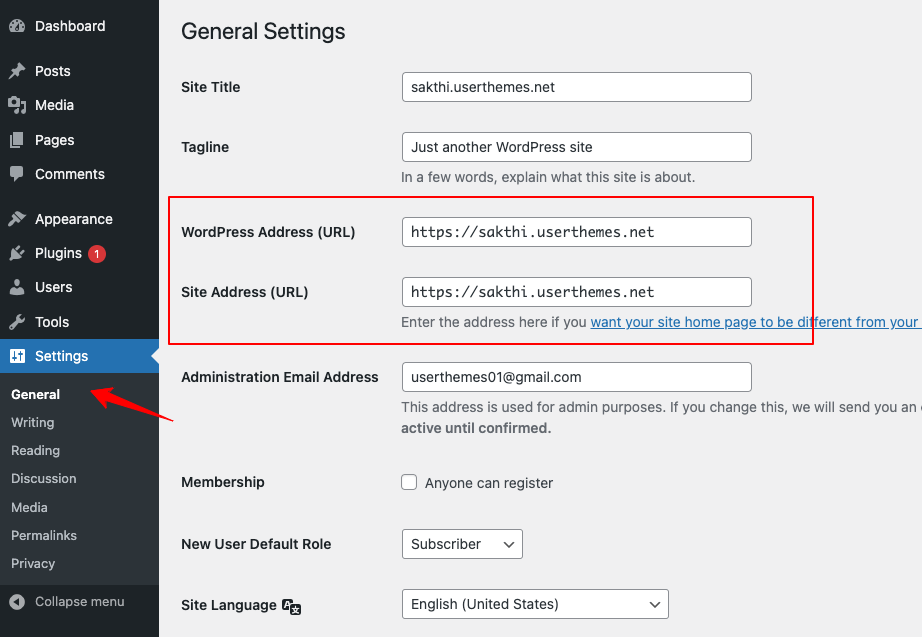
Go to "Access Details" to see the URL for the Admin panel. It will be changed to include the new Subdomain's URL. Just click on it to make sure the URL of your Subdomain is correct. You can see that the URL has changed. You can check this by going to Dashboard > Settings > General in WordPress. Check the "WordPress Address" and "Site Address." They'll both be the same.
Wrapping Up
The Cloudways subdomains will help you organize the hierarchy of your website, which means you can give your visitors the best experience possible. It also helps your SEO by putting keywords in the URL and making content indexing go faster.


