
A blog post's comments section allows readers to interact with one another. It also allows users to start conversations with those who are reading their comments. For those special posts that cause a lot of chaos, the comment section can become quite chaotic! You might want to think about how to make a lengthy comment section easier to navigate. Consider using Divi to create scrollable comments!
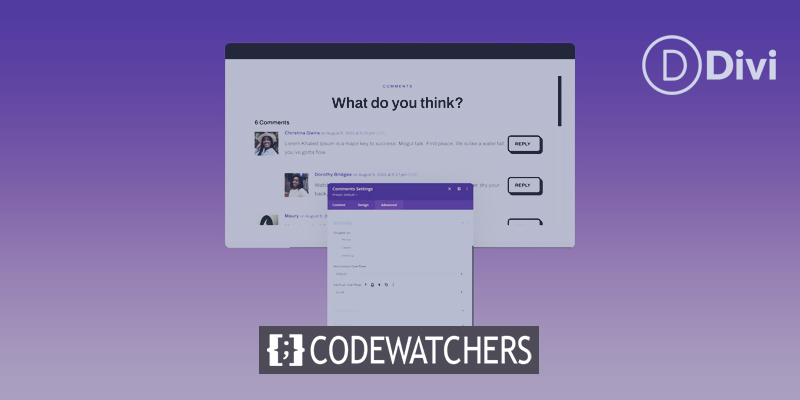
By adding a scroll container to your Divi Comments Module, you may reduce the amount of scrolling your blog's readers must do. As a result, they enjoy a better experience with your website. It's critical to consider user experience considerations while constructing your site, and by including a scrollable comment in Divi, you're making it easier for your readers to appreciate your site, which is always a good thing.
Why Comments Are a Good Thing
Before we begin the course, let's take a moment to discuss comments in general. Divi comes with a Comments module. This module allows visitors to your website to leave a comment on a specific page or topic. The plugin also lets people see the comments that other readers of your site have made on a post. When a post is interesting, readers may want to share their thoughts, ideas, and questions with the author, which is you. This is an example from the Elegant Themes blog of what that looks like:
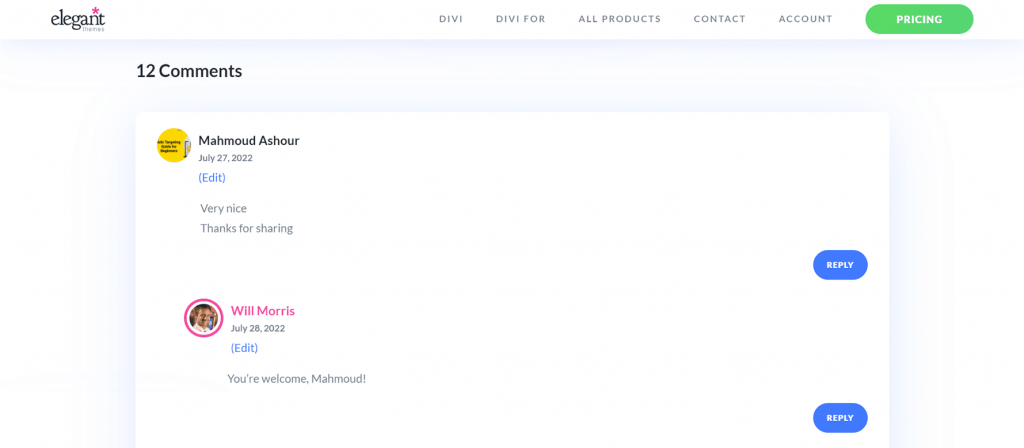
This is the comments section for our blog post, "3 Best Voice Search Plugins for WordPress." Several readers have left feedback, gratitude, and other comments on it. The author of the post has also responded to readers. This kind of participation is good for your blog and website because it shows that you are giving your readers something of value. It also helps you get closer to the people who use and visit your website. Now that we've seen comments in action, let's look at how we can use Divi's Comments Module to handle the comment section in our own blog posts.
Create Amazing Websites
With the best free page builder Elementor
Start NowScrollable Comments in Divi
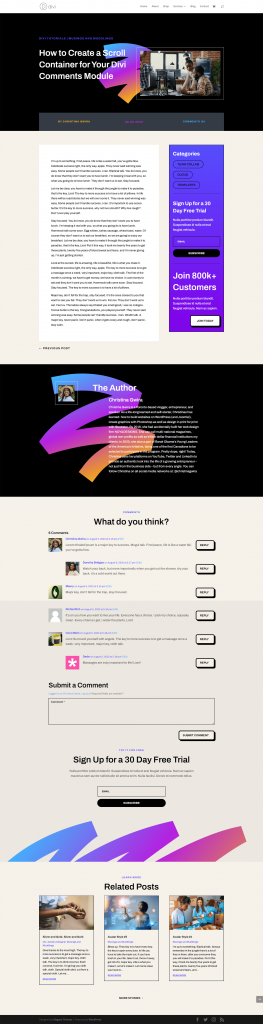
We'll be using the Blog Post Template from Divi's Software Layout Pack for this tutorial. Here's a high-level overview of the template:
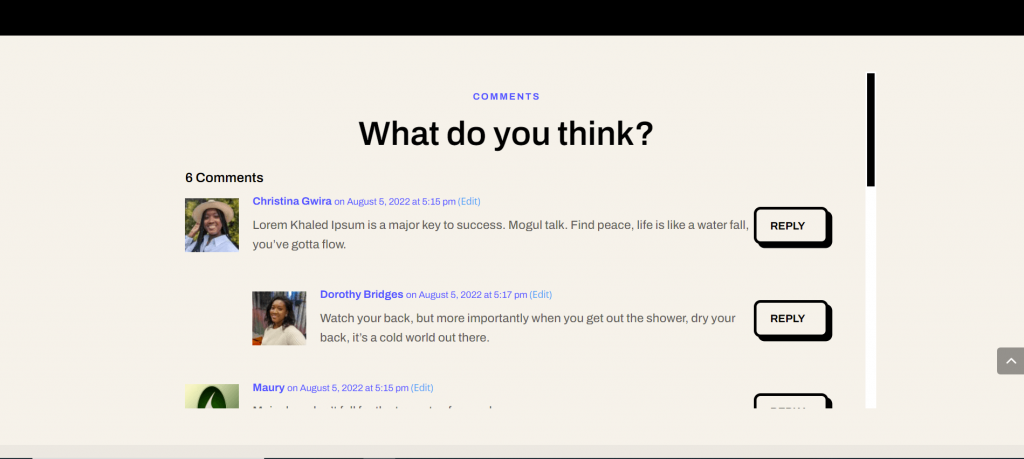
Have you seen how few comments there are on this post? By including a vertical scrollbar, we can make this section of our blog page easier to navigate. In this tutorial, we'll add a vertical scrollbar to the row that has the Comment Module. Then, we'll utilize CSS to style that scrollbar so that it looks different from the page's main scrollbar. Ready? Let's get started!
The Tutorial of Scrollable Comments in Divi
Before we can start making comments that scroll in Divi using the Comments Module, you need to install the Software Blog Post Template. Install your blog post template by following the directions in that blog post.
Enter the Comments Row Settings
After you've installed and changed your template to your liking, we'll move on to the row where the Comments Module is. Scroll to the section containing the Comments Module. Hover your mouse over the row (green outline) and select the gear icon. This will open the row's settings module.
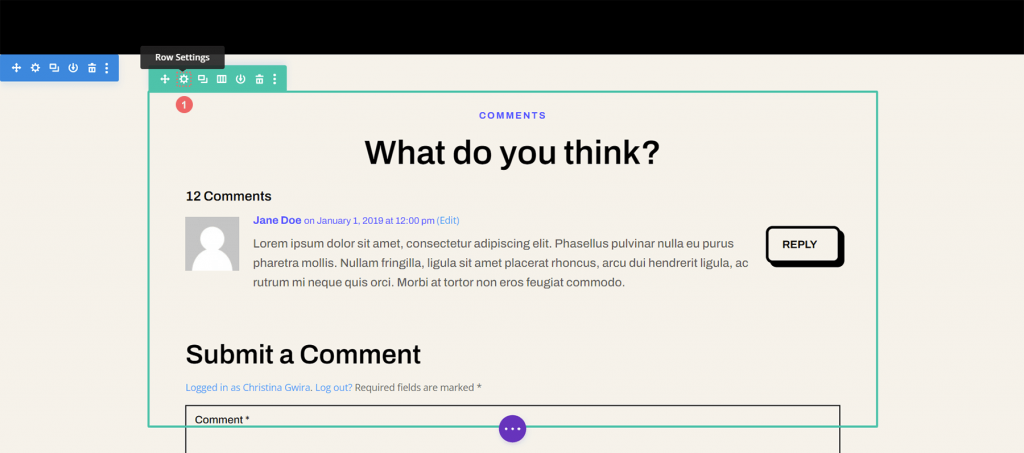
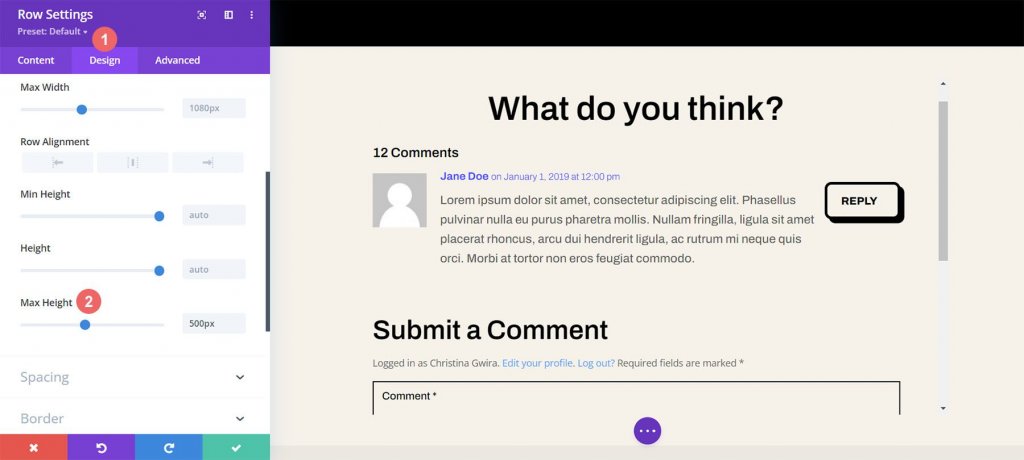
Set Row Max Height
Before we begin styling or triggering the scrolling, we must first modify the row's maximum height. To do so, select the Design tab. Then we select the Sizing tab. We then give the Max Height option a value of 550 pixels.
Enter Row Advanced Settings
After figuring out how high a row can go, we'll go to the Advanced tab in the modal box. The scrolling magic takes place here! Keep an eye out for the Vertical Overflow option, which is located farther down the Advanced tab. We'll go back to that soon.
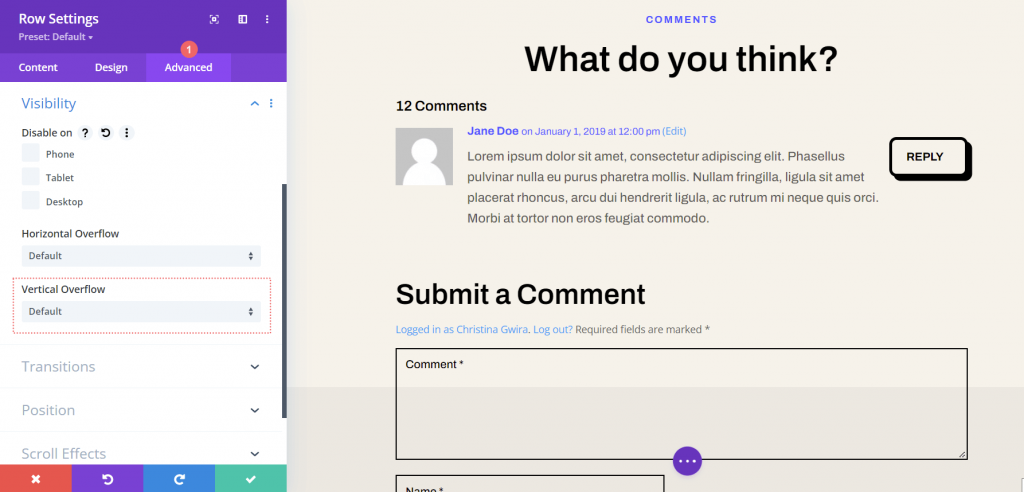
Activate the Vertical Scrollbar with Vertical Overflow
Continue scrolling down until you reach vertical overflow. From the drop-down menu, choose Scroll.

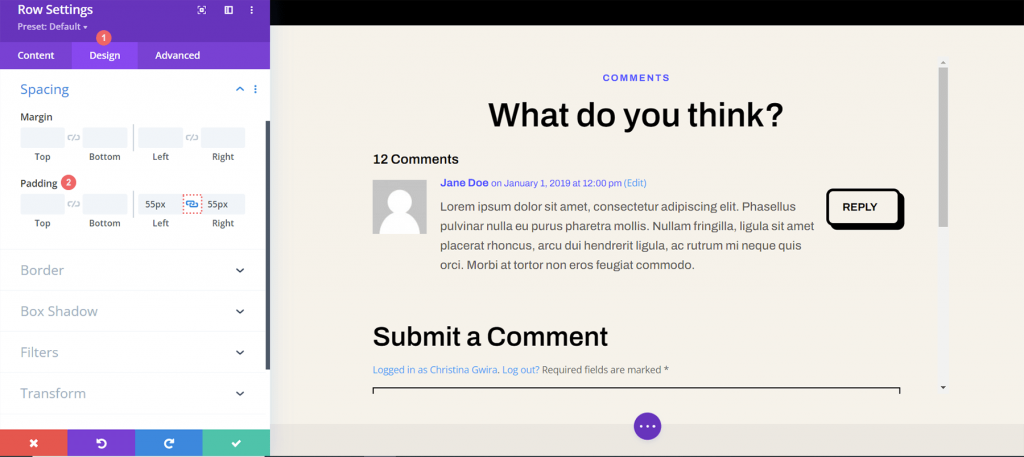
Adding Padding to Prevent Overlap
We'll add some space to the right and left sides of our row so that our new scrollbar doesn't cover up our comment section buttons. To do so, navigate to the Design tab of the Row Settings dialog. Scroll all the way to the bottom to Spacing. Between the Left and Right Padding text fields, click the link icon. We'll add 55 pixels of padding on each side of the row.
Now that we've given our scrollbar some breathing room, let's dress it up with some custom CSS.
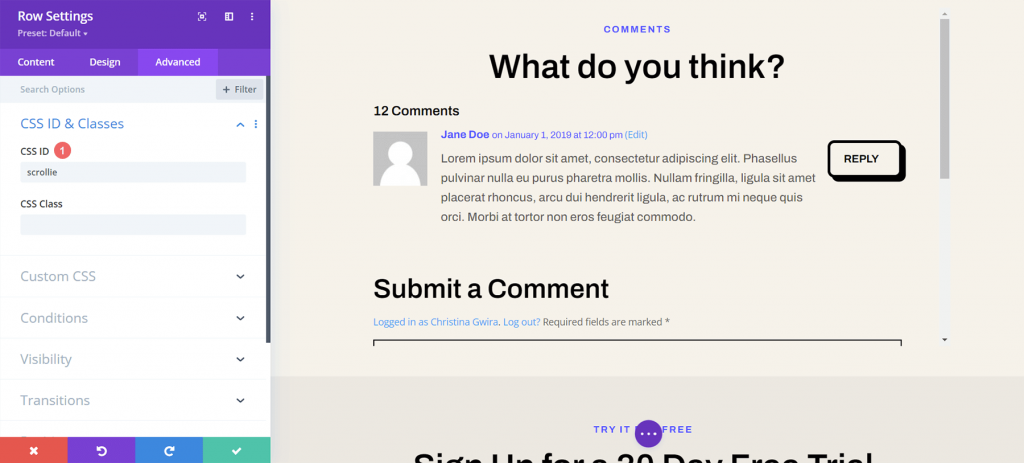
Add a CSS ID to the Row
Return to the row's Advanced tab and scroll to the top. Add your CSS ID—for this example, scroller—that you'll be calling in the Body Template Settings' Custom CSS area.
Add Custom CSS to Style Scrollbars
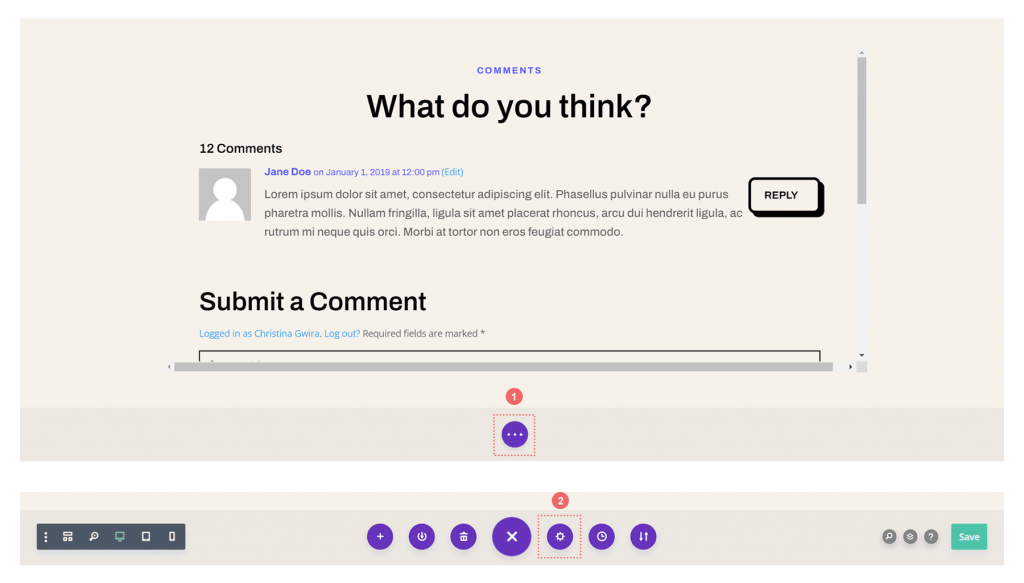
We'll now enter the custom CSS for our blog post template. Because this template is applied to all blog posts within the Divi Theme Builder, our CSS will be active on each blog post on our website. Click on the three dots within the purple button in the bottom center of the builder to enter the custom CSS setting for our body template. Then, click the gear icon.
Add Custom CSS to Style Scrollable Comments in Divi
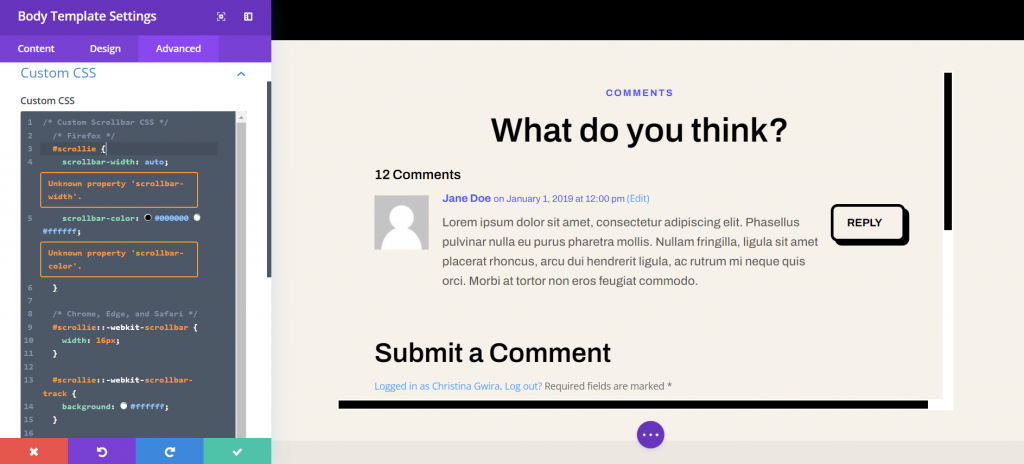
We want to customize the scrollbar for our scroll container so that it stands out from the other scrollbars in our browser's window. We'll use CSS to accomplish this. Select the Advanced Tab once you're in the Body Template Settings. Scroll all the way down to the Custom CSS tab.

Once we're in the Body Page Template's Custom CSS area, copy and paste the following CSS code:
/* Custom Scrollbar CSS */
/* Firefox */
#scrollie {
scrollbar-width: auto;
scrollbar-color: #000000 #ffffff;
}

/* Chrome, Edge, and Safari */
#scrollie::-webkit-scrollbar {
width: 16px;
}

#scrollie::-webkit-scrollbar-track {
background: #ffffff;
}

#scrollie::-webkit-scrollbar-thumb {
background-color: #000000;
border-radius: 0px;
border: 3px solid #ffffff;
}
If you used a different CSS ID, be sure to update the code snippet on your website to reflect this change. You can modify or add to the CSS to style your borders to match your brand and website. In our case, we went with a flat design to go with the look of the Divi Software Layout Pack.
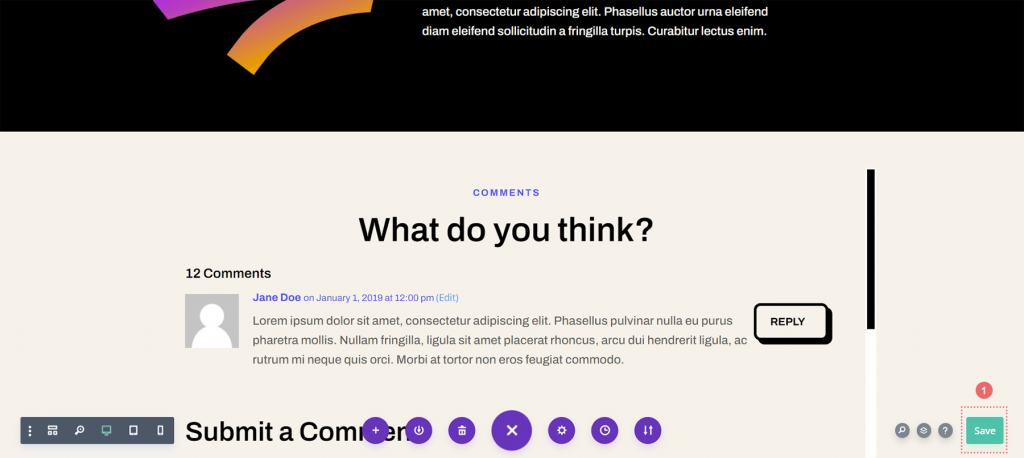
Save Your Blog Post Template
When you're finished with your CSS changes, remember to save your blog page template. Within the Divi Theme Builder, click the green Save button on the bottom right-hand side of the bottom menu.
Once your preferences have been saved, go to your blog's newly improved comments area!
Wrapping Up
Adding a scroll container to your Divi Comments Module improves the user experience with your comment area. User interaction is critical to the success of your blog. You make it easier for your viewers to enjoy your various blog contents by making your Comments Module scrollable.


