
Sharing your menu on your website will allow persuading more customers to visit your business. People are more inclined to order or come if they can quickly check out the cuisine, drinks, and costs.

Besides, when a user lands at a restaurant website their first instinct is to find what is there to be offered. This is why in this tutorial, we will understand how to create a restaurant menu with SeedProd.
Why Should You Create An Online Menu
Adding an online menu page to your WordPress site allows you to provide a more personalized experience for your visitors and potential clients.
When a guest arrives at your restaurant's website, the first thing they glance at is the menu. If you simply provide a PDF menu to guests, they will be unable to view the meal options you provide.
Create Amazing Websites
With the best free page builder Elementor
Start NowThere is no need for your users to download your menu if you create an online menu on your website. Depending on your clients' data plans and internet connection, downloading PDFs might be challenging.
That being said, lets move ahead and proceed to the creation of menu on your restaurant WordPress website using SeedProd.
How To Create A Restaurant Menu With SeedProd
To develop an online restaurant menu in WordPress, we recommend using SeedProd. It's one of the greatest drag-and-drop WordPress page builders, with over 1 million websites using it.
It has a drag-and-drop builder that allows you to design a beautiful restaurant menu. Furthermore, you can quickly update your menu as it evolves and new menu options become available.
To begin, you need to setup your SeedProd account and install and activate the plugin on your WordPress.
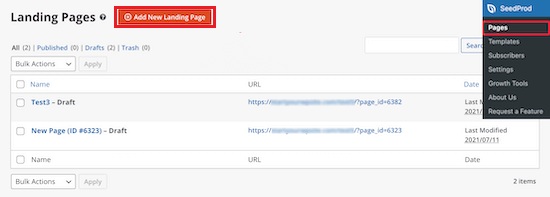
Once the plugin is activated, head over to the SeedProd then pages and press Add New Landing Page
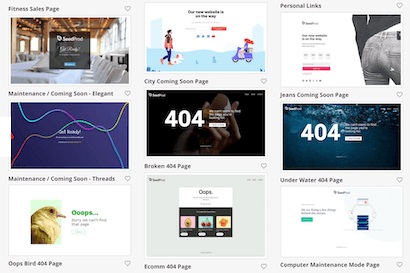
This takes you to the template screen, from which you may choose a page template. There are dozens of templates available for various themes and purposes.
Hover over a template and click the 'Checkmark' button to choose it. You may use whatever template you like for this lesson, however we'll be choosing the 'Dinner Sales Page' template.
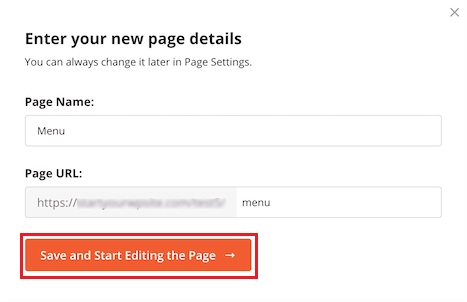
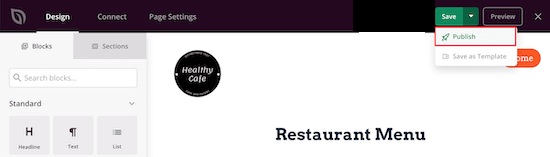
Now, a popup will ask you to enter details for your page and allows you to customize the URL of your page. Once you are done, press Save and Start Editing the Page.
The preview is on the right side of the page and can be freely modified. The left side of the page has several blocks and sections that you can add to the website.

To begin, click on the page's logo and this will open a menu on the left from which you can submit your restaurant's logo. To add a new logo, use the same steps as you would to add an image to WordPress.
Then, toggle the navigation menu button to return to your homepage. As a result, when your visitors have finished perusing the menu, they will be able to return to your website. Moreover, Simply click the navigation menu button to edit the text and link in the left-hand menu.
Then, just hover your cursor over the page's headline and hit the 'Delete Block' icon and follow the similar steps for the image, text, and button elements.
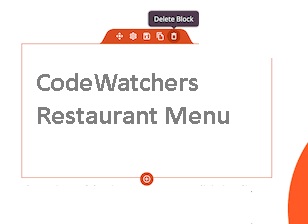
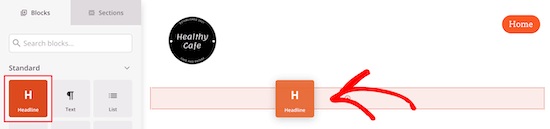
Then, drag the 'Headline' block over to your page to add a headline for the title of your menu.
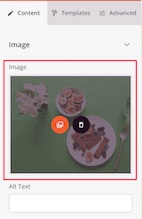
Following that, you may modify the current food items by replacing them with your own text and graphics by clicking on the picture and then using the option on the left to add your own image.
Then, click on the existing headline to input your own content, and you may edit the wording by clicking on it and adding a description.
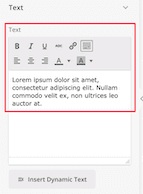
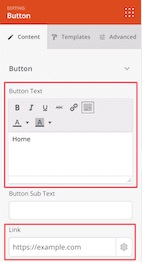
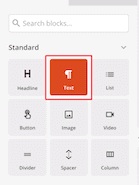
After you've altered the headline and text, you can add a price to the item by dragging the 'Text' element to your page and customizing the text with the left hand option.
Use the similar steps as mentioned above to customize all the elemets according to your choice. Using the Duplicate Row button you can add another menu section of the same style.

You can also go without adding a photo to every item by using the list block to add items. Once you are done with all the changes and settings, make sure to Publish your menu.
This is how you can create a menu for your restaurant website on WordPress. SeedProd allows brings a lot of creative and innovative options for customization while this was just a highlight, there are a huge number of possibilities.
That's all from us for this tutorial. Make sure to join us on Facebook and Twitter to stay updated about our content.


