
Recognizing the physical and psychological state of your patients is crucial for achieving lasting results. However, the conventional method of manually gathering their information can be quite cumbersome. Consequently, modern hospitals are opting for online medical intake forms to streamline the process, save valuable time, and minimize the risk of inaccuracies.

Now, let's delve into the process of creating a patient intake form. What considerations should be kept in mind before crafting a medical intake form? In this article, we will address all pertinent queries on this topic, so please continue reading!
Things to Consider Before Creating a Patient Data Collection Form
When developing a Patient Data Collection Form, healthcare providers and hospitals gather essential personal information. This includes name, date of birth, medical history, and more. However, it's vital to consider the following factors for an effective form:
- Branding: Customize the form to reflect your website's branding.
- Homepage Placement: Ensure easy access to the form on the homepage, especially for emergencies.
- E-Signatures: Include a feature for electronic signatures.
- Patient-Specific Layout: Arrange questions based on patient types.
- Conditional Logic: Use logic to adapt questions based on previous responses.
- Disclaimers: Add disclaimers to clarify data usage.
- Open-Ended Questions: Include space for additional comments.
- User-Friendly Design: Make the form user-friendly and intuitive.
With these considerations, you can create an efficient Patient Data Collection Form on WordPress.
Create Amazing Websites
With the best free page builder Elementor
Start NowCreating a Patient Data Collection Form in WordPress
Choose a form builder plugin
WordPress offers a plethora of form-building tools to streamline the process. In particular, we've chosen Fluent Forms, a highly acclaimed WordPress form builder plugin with a devoted user base of over 200,000 enthusiasts. Furthermore, we've delved into its details in the latter portion of the article. Thus, please continue reading as we transition to the next stage.
Create a form
Proceed to your WordPress dashboard. If you haven't already installed Fluent Forms, locate it in the plugins section and initiate the download. You have the option to acquire both the free and pro versions of the plugin from this section, but for our specific purpose, we recommend opting for the pro version.

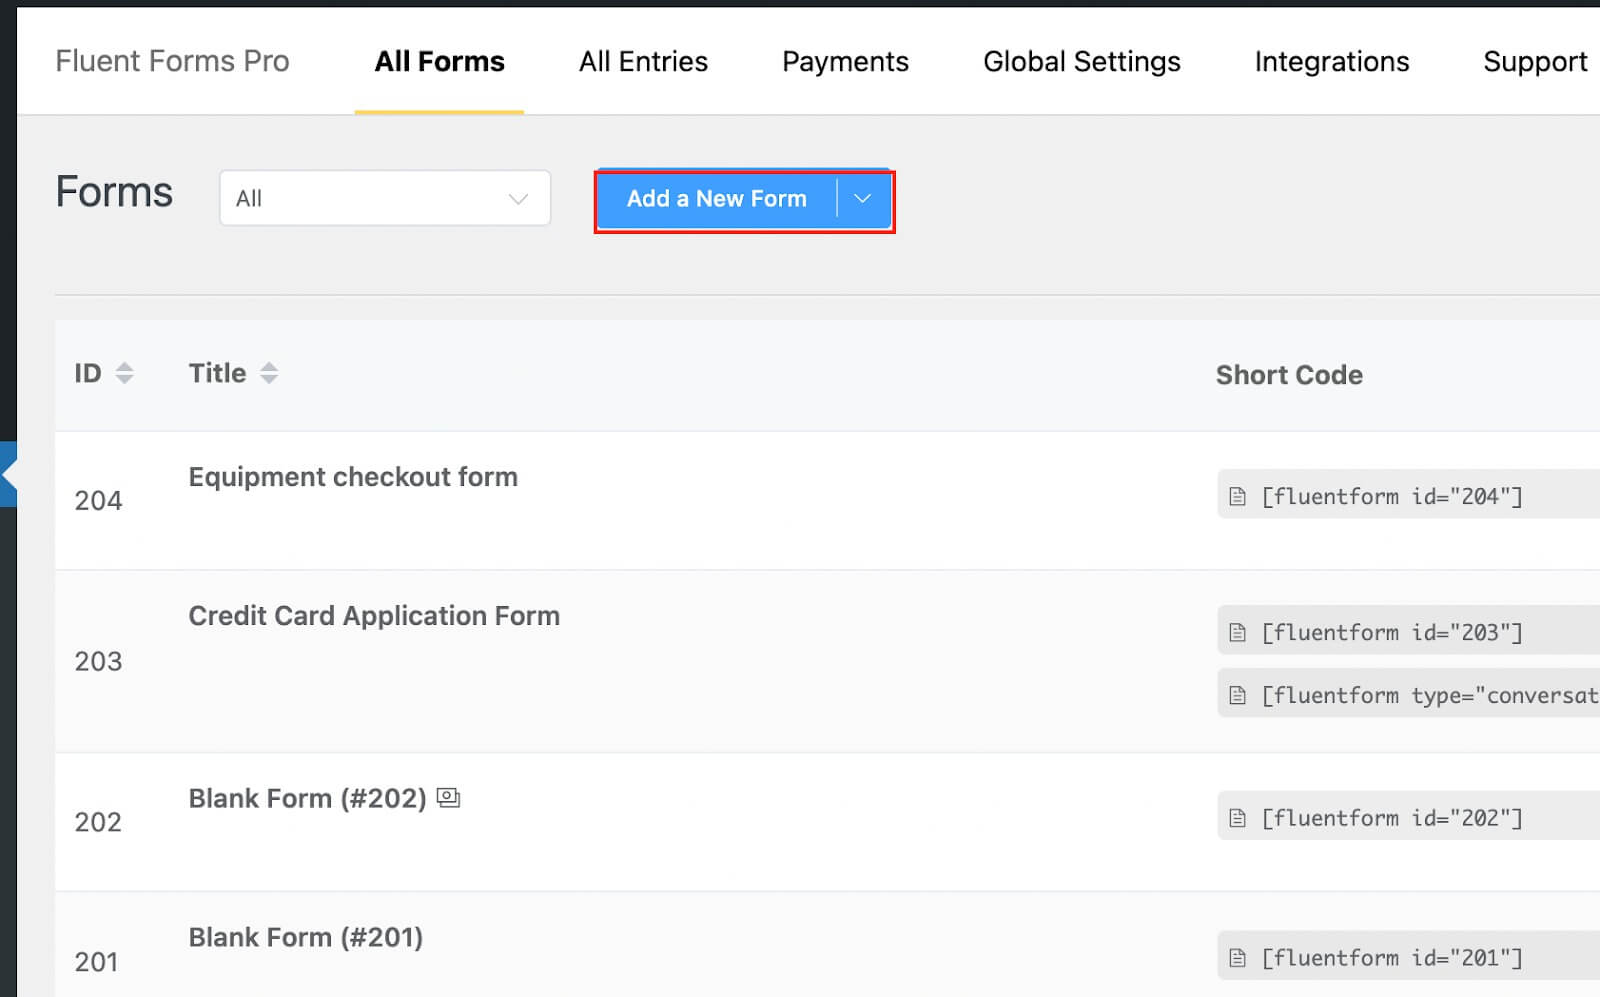
Next, navigate to the Fluent Forms pro dashboard and select the "Add a New Form" button.
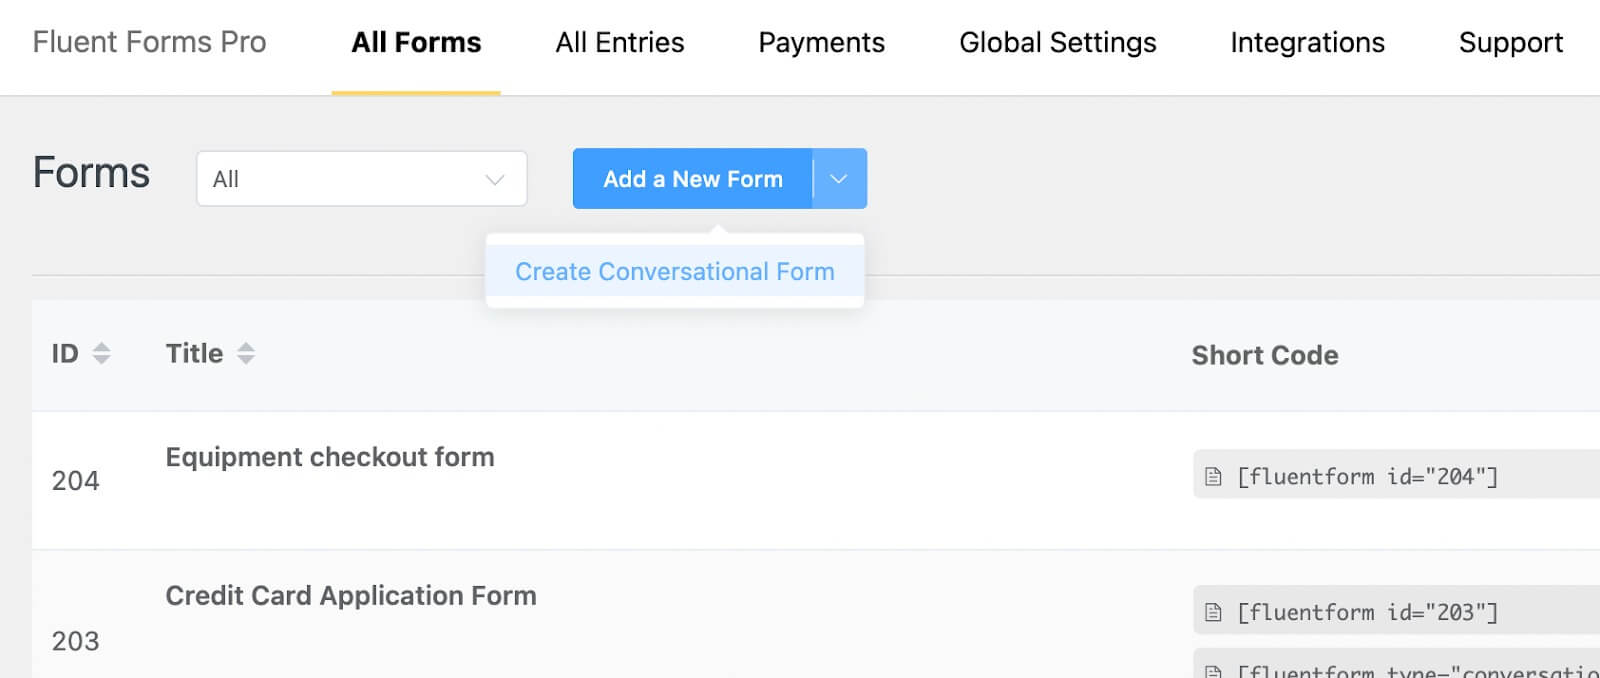
To create conversational forms from scratch, access the dropdown menu situated beside the main button.
For now, we'll choose the general form type. Upon clicking the "Add a New Form" button, you will be prompted to select from the available templates. Opt for the "Blank Form" option.
Now, provide a name for your form by clicking on the top left corner.
We will name our form "New Patient Enrollment Form." Following that, proceed to drag and drop the necessary fields from the Input Fields section or simply click the plus (+) icon within the form editor to add fields.
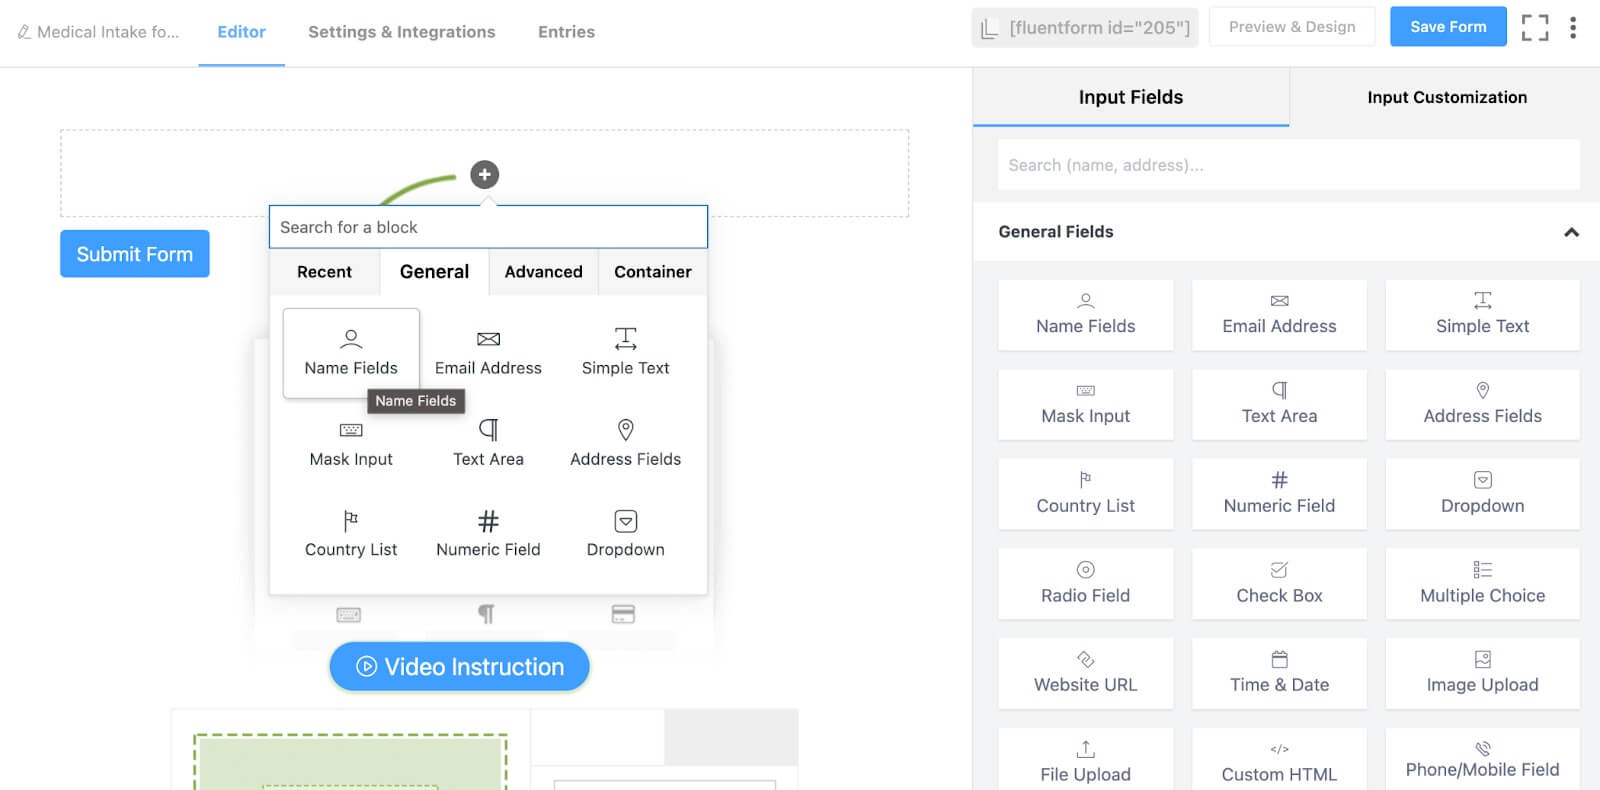
For example, we will include fields for name, email, phone number, address, and more.
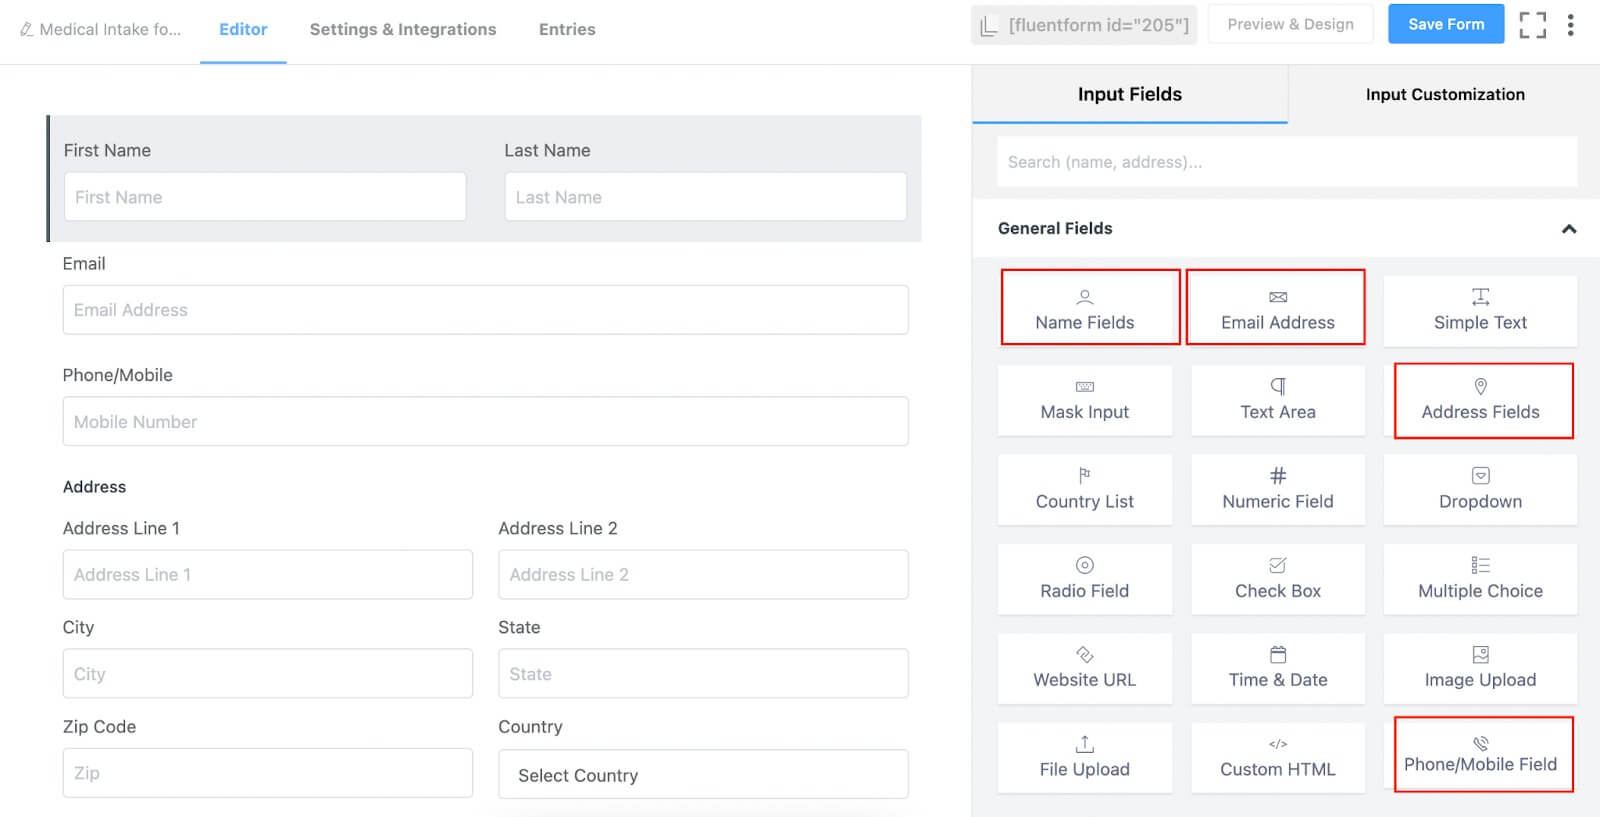
Subsequently, customize these fields in the input customization section of the form editor, or click on the pencil icon to access and edit the settings.
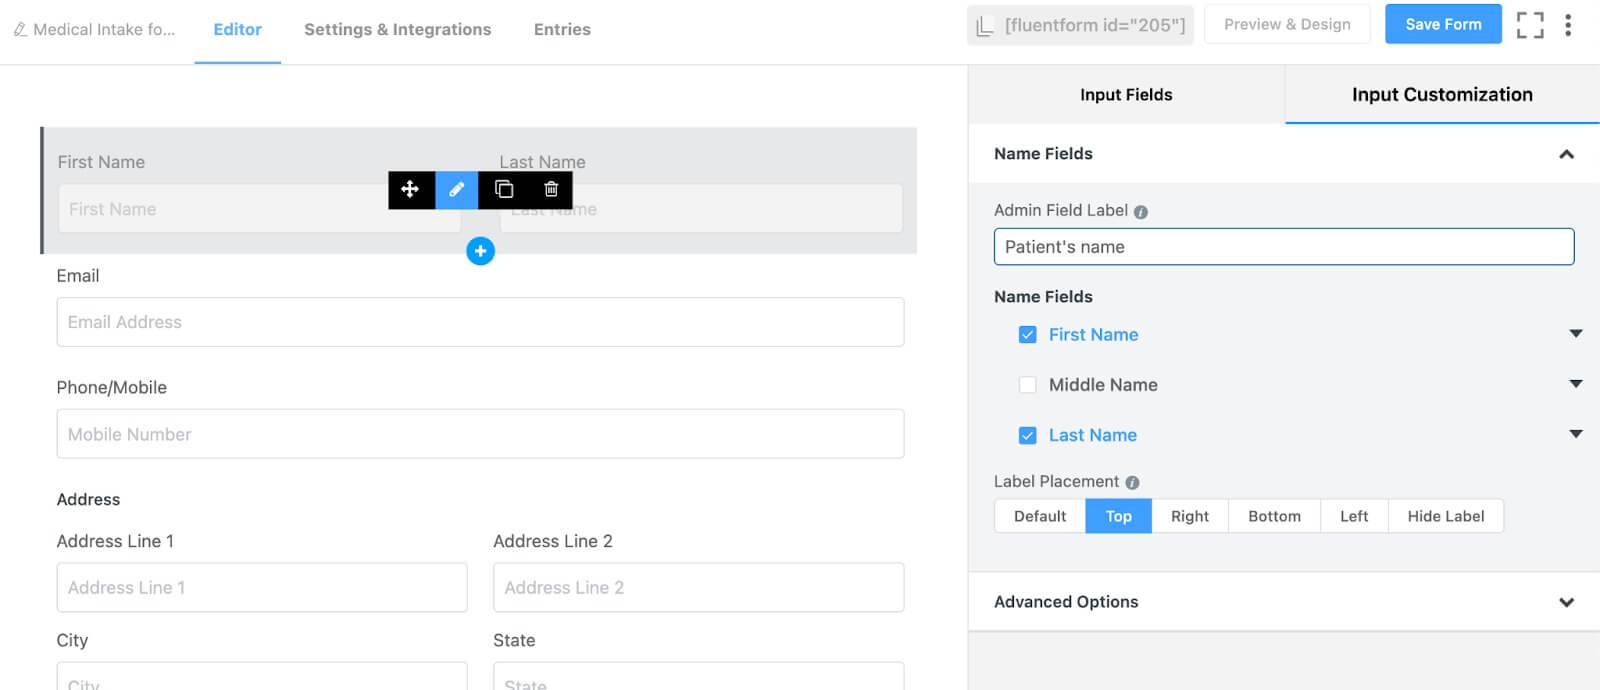
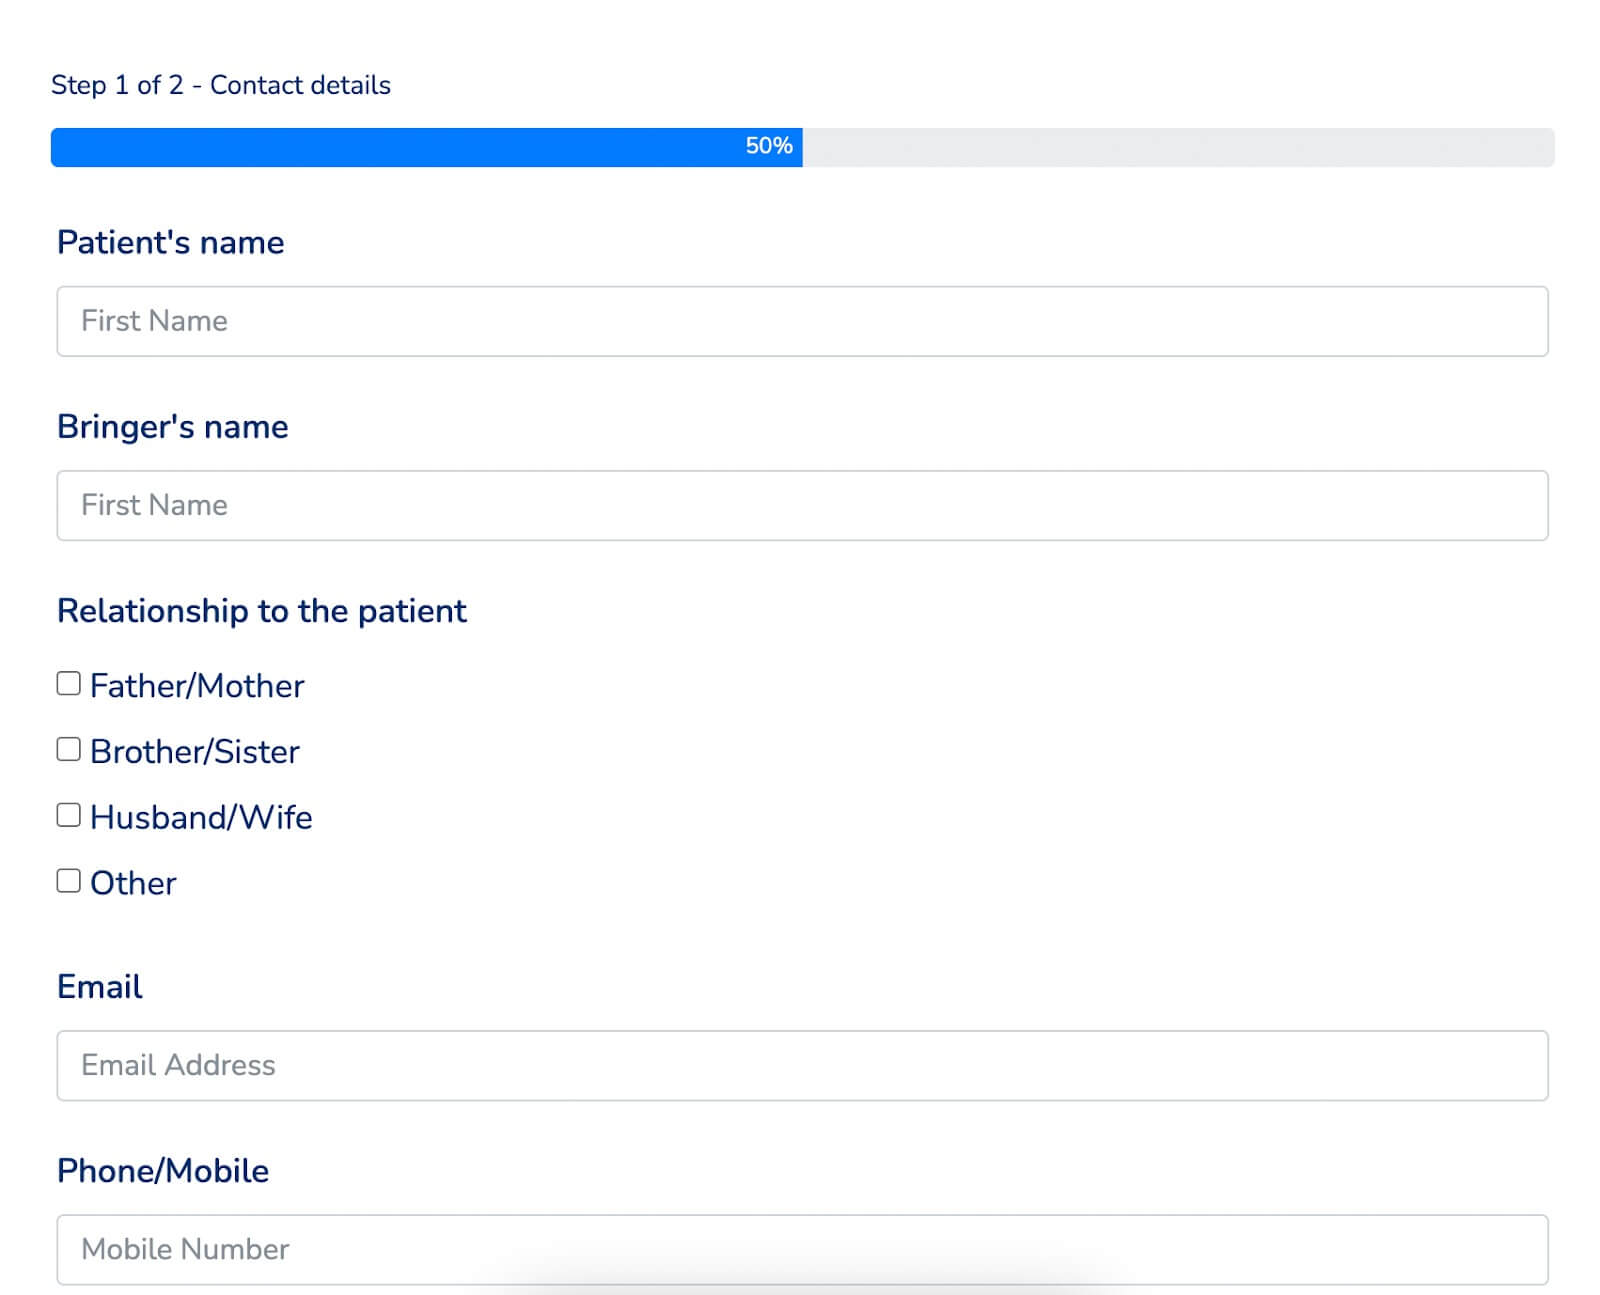
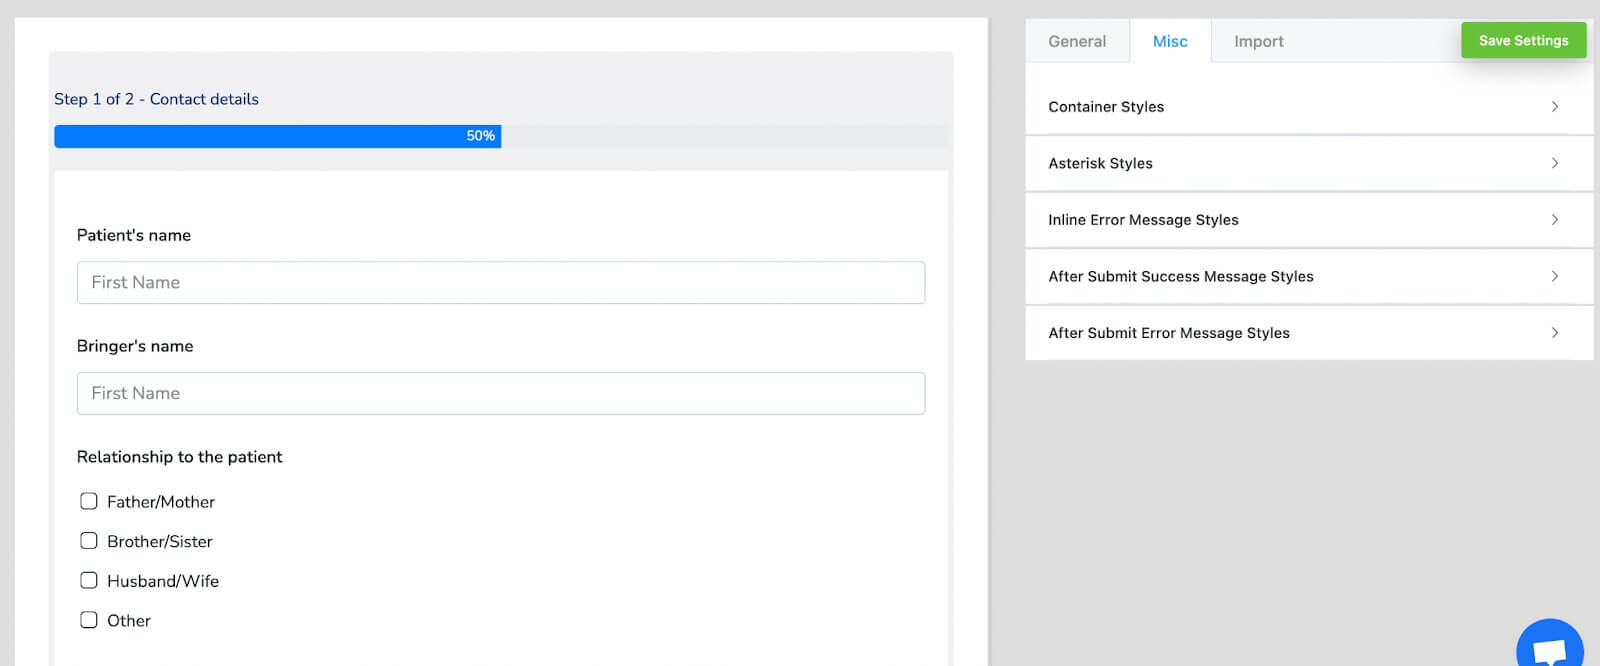
In our case, we are gathering the patient's name, the name of the person accompanying the patient to the hospital, a checkbox field to determine the relationship between the companion and the patient, as well as their email, phone number, and address.
Implement a conditional logic for the "relationship" field's other option.

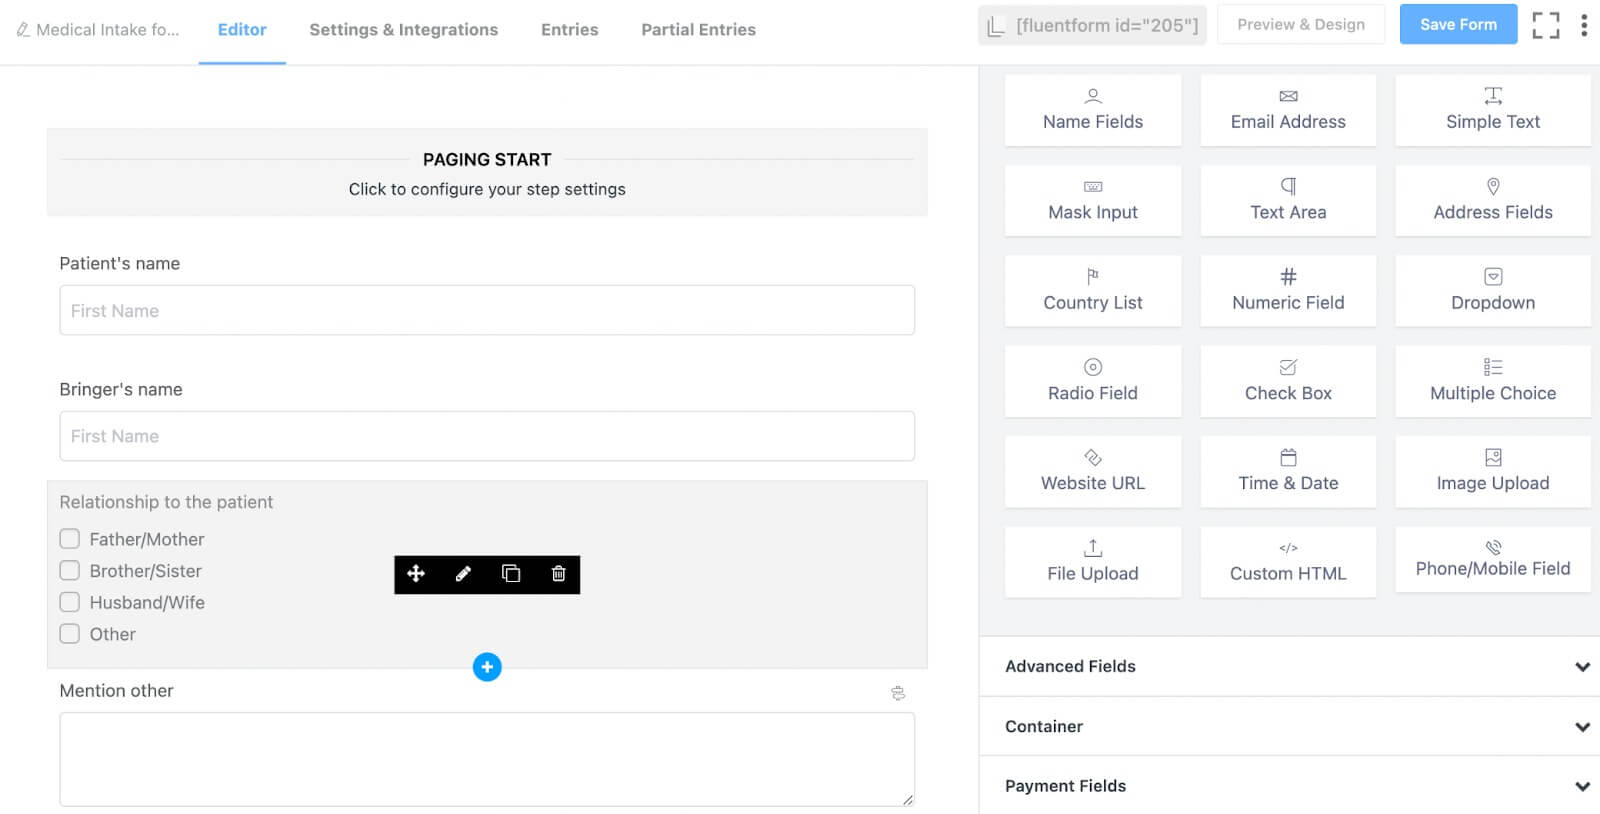
Now that we have gathered the patient's contact details, let's inquire about the patient's physical condition. To achieve this, we'll add a Form Step field. This step is necessary to segment our form into distinct sections, ensuring that our clients do not become disinterested while completing the form.
Proceed to the Advanced Fields option and incorporate the Form Step field from there.

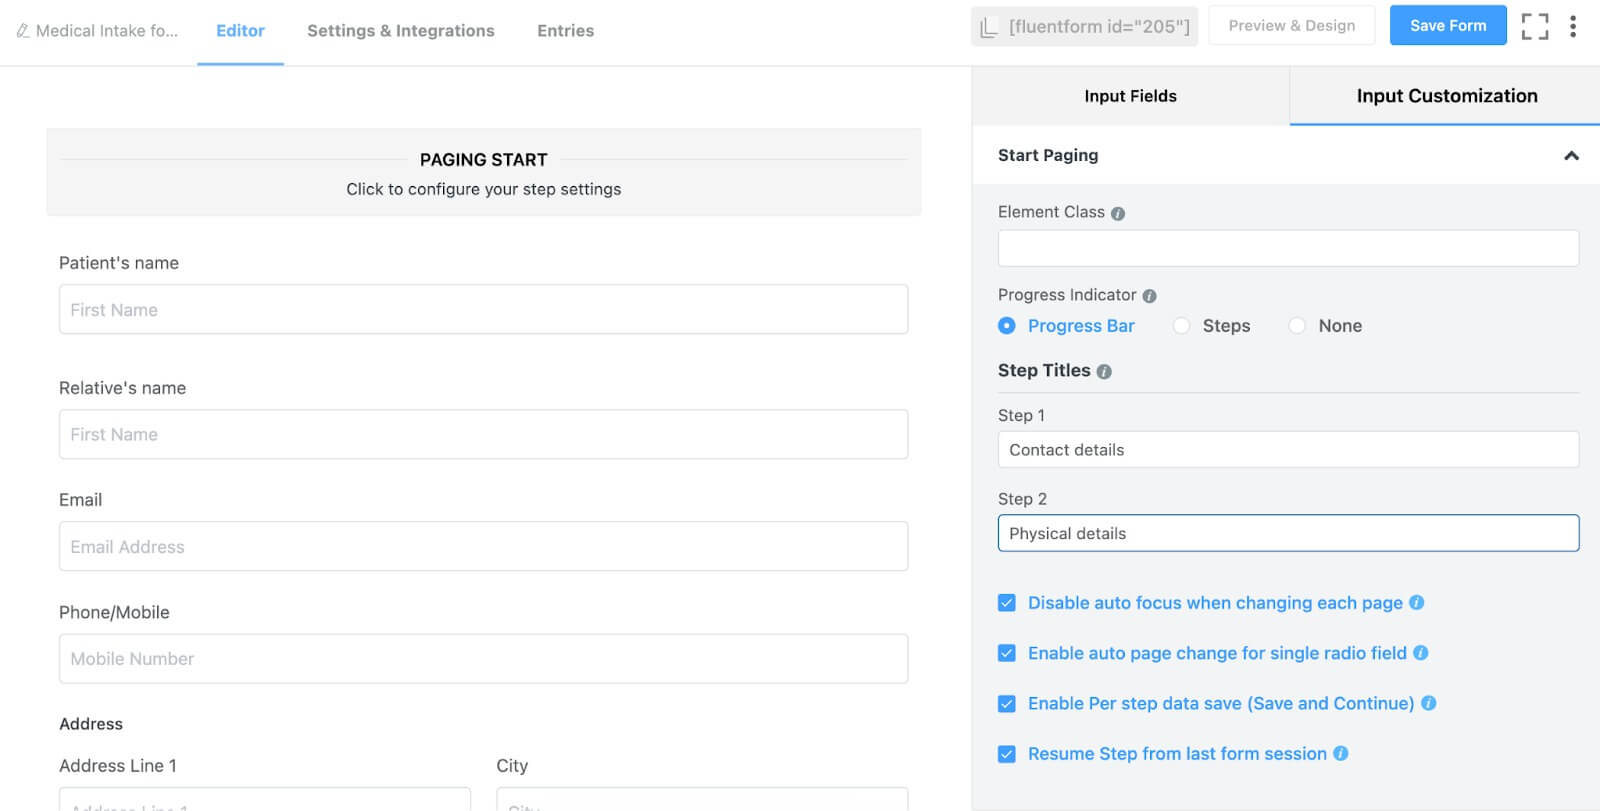
Navigate to the Paging Start option within the Form Step field, then click on the input customization button. Here, assign names to your steps. Typically, you'll find two default steps within one form step field. In our case, we're naming the first step "contact details" and the second step "physical information."
Additionally, activate the autofocus button, auto page change option, per-step data save button, and the option to resume from the last session if desired. We've chosen to enable all of these options.
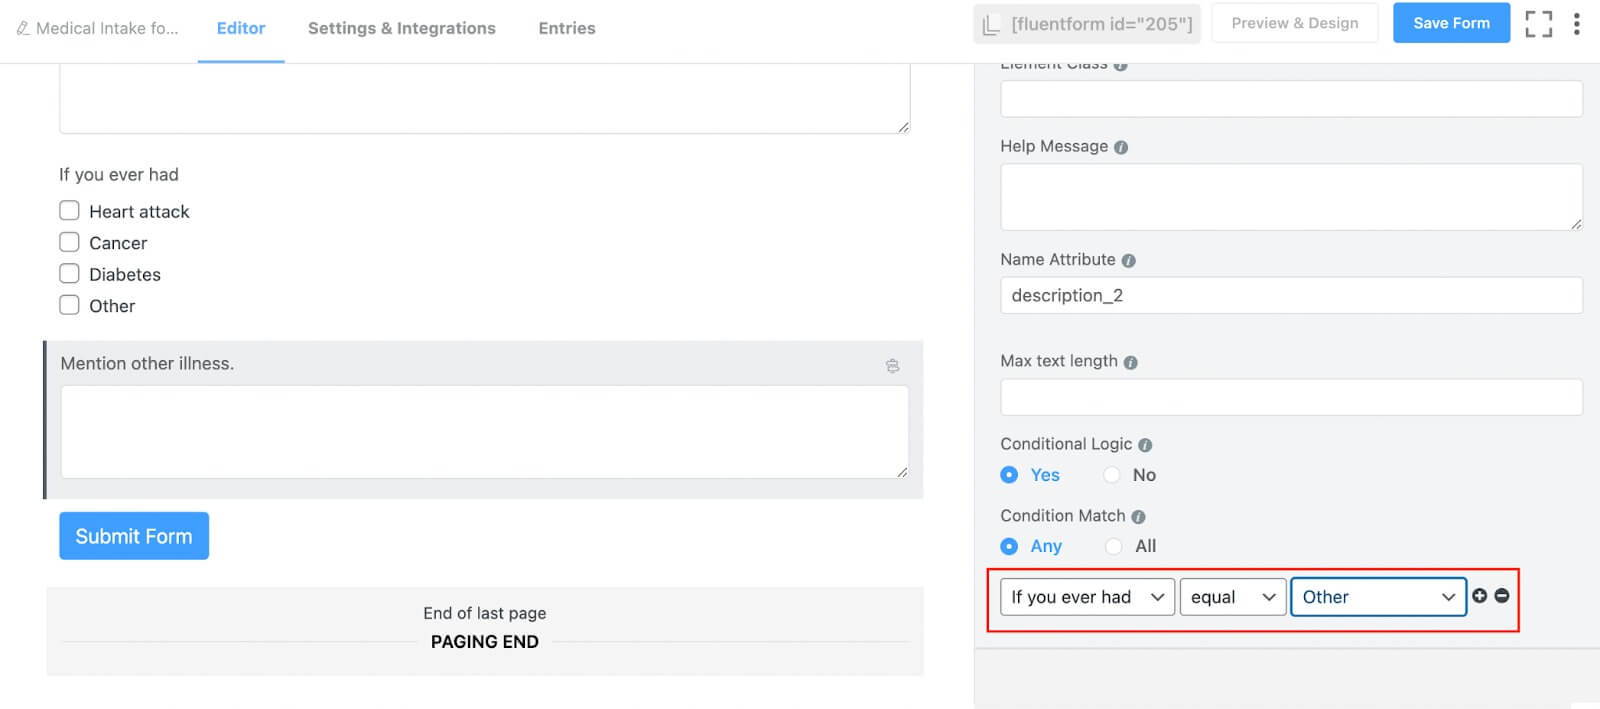
Now, proceed to add the fields for physical information below the Form Step's Page Break option. This involves including a radio field to inquire about the patient's gender, three mask input fields for the patient's birth date, height, and weight, two text input fields—one for the reason for seeing the doctor and another for the patient's medical history—and a checkbox field to determine if the patient has any other illnesses.
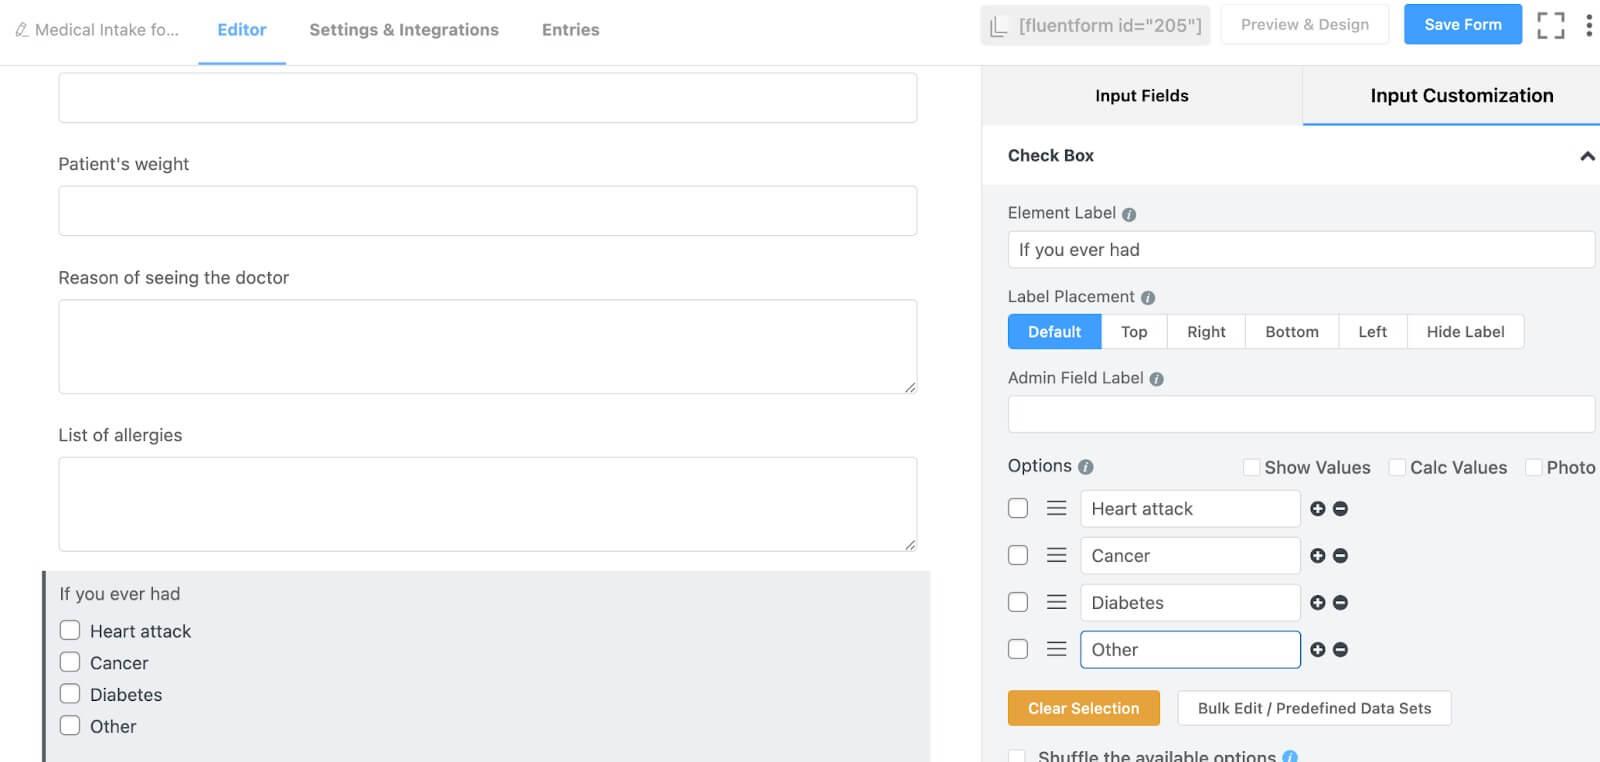
In the section related to the patient's illnesses, we've introduced three distinct choices and included an option to specify other illnesses. To gather information about other illnesses, add a text input field just below the checkbox field and activate conditional logic for that field. This means the text input field will appear only when someone selects the "other" option from the checkbox field.
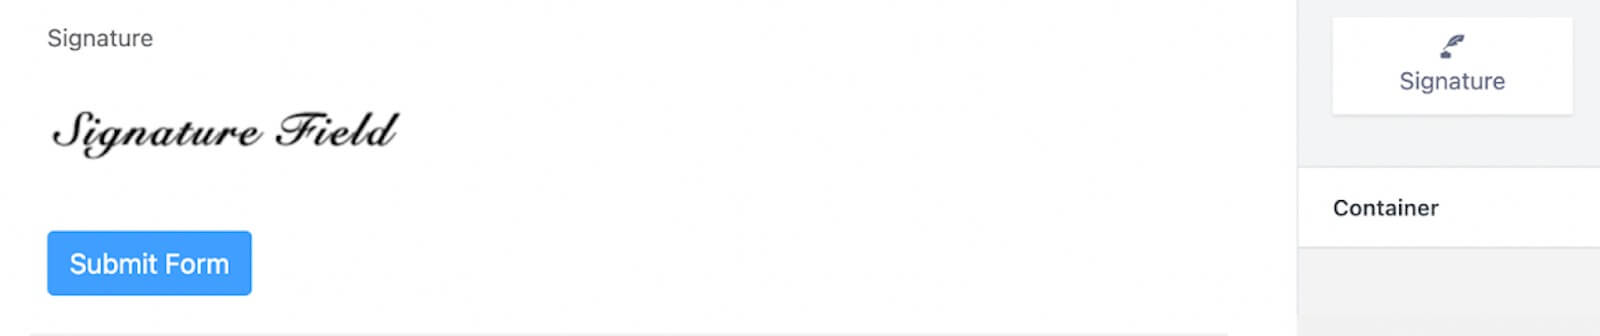
Finally, include a signature field to collect the bringer's consent.
Optionally, you can customize the submit button at this point, though we're skipping this step for now. Below is a preview of the form.
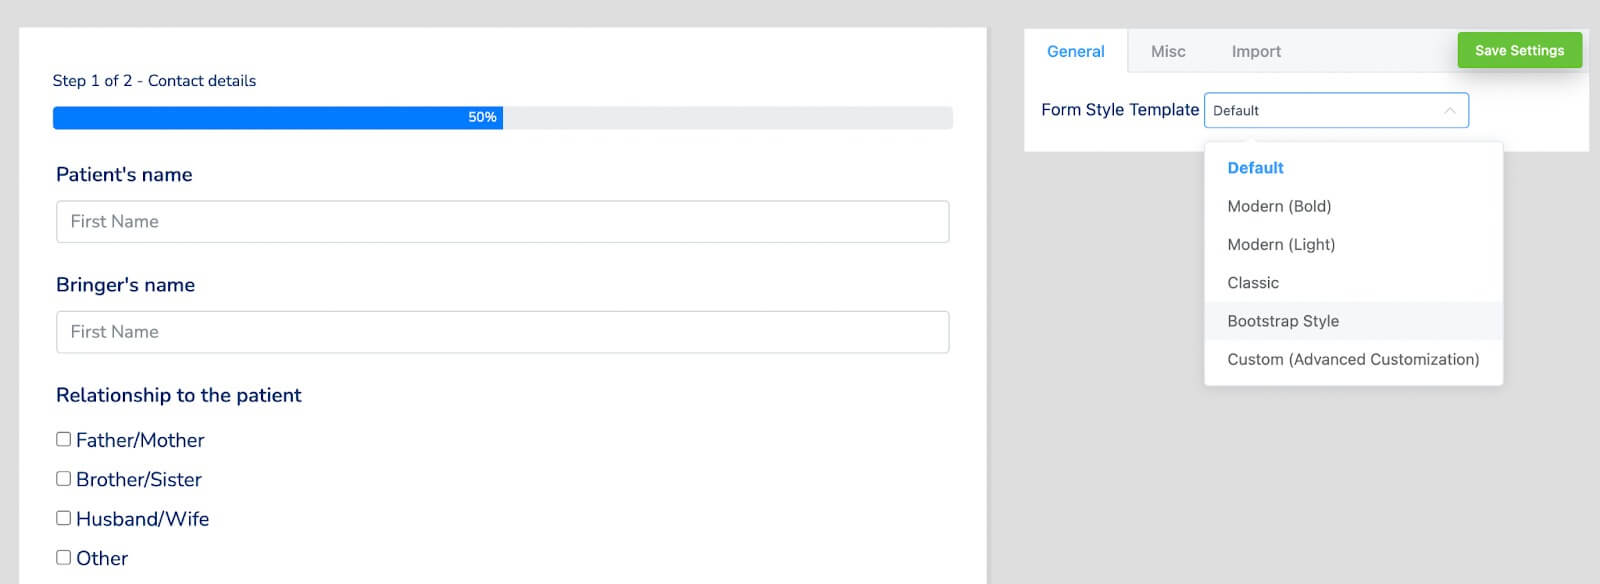
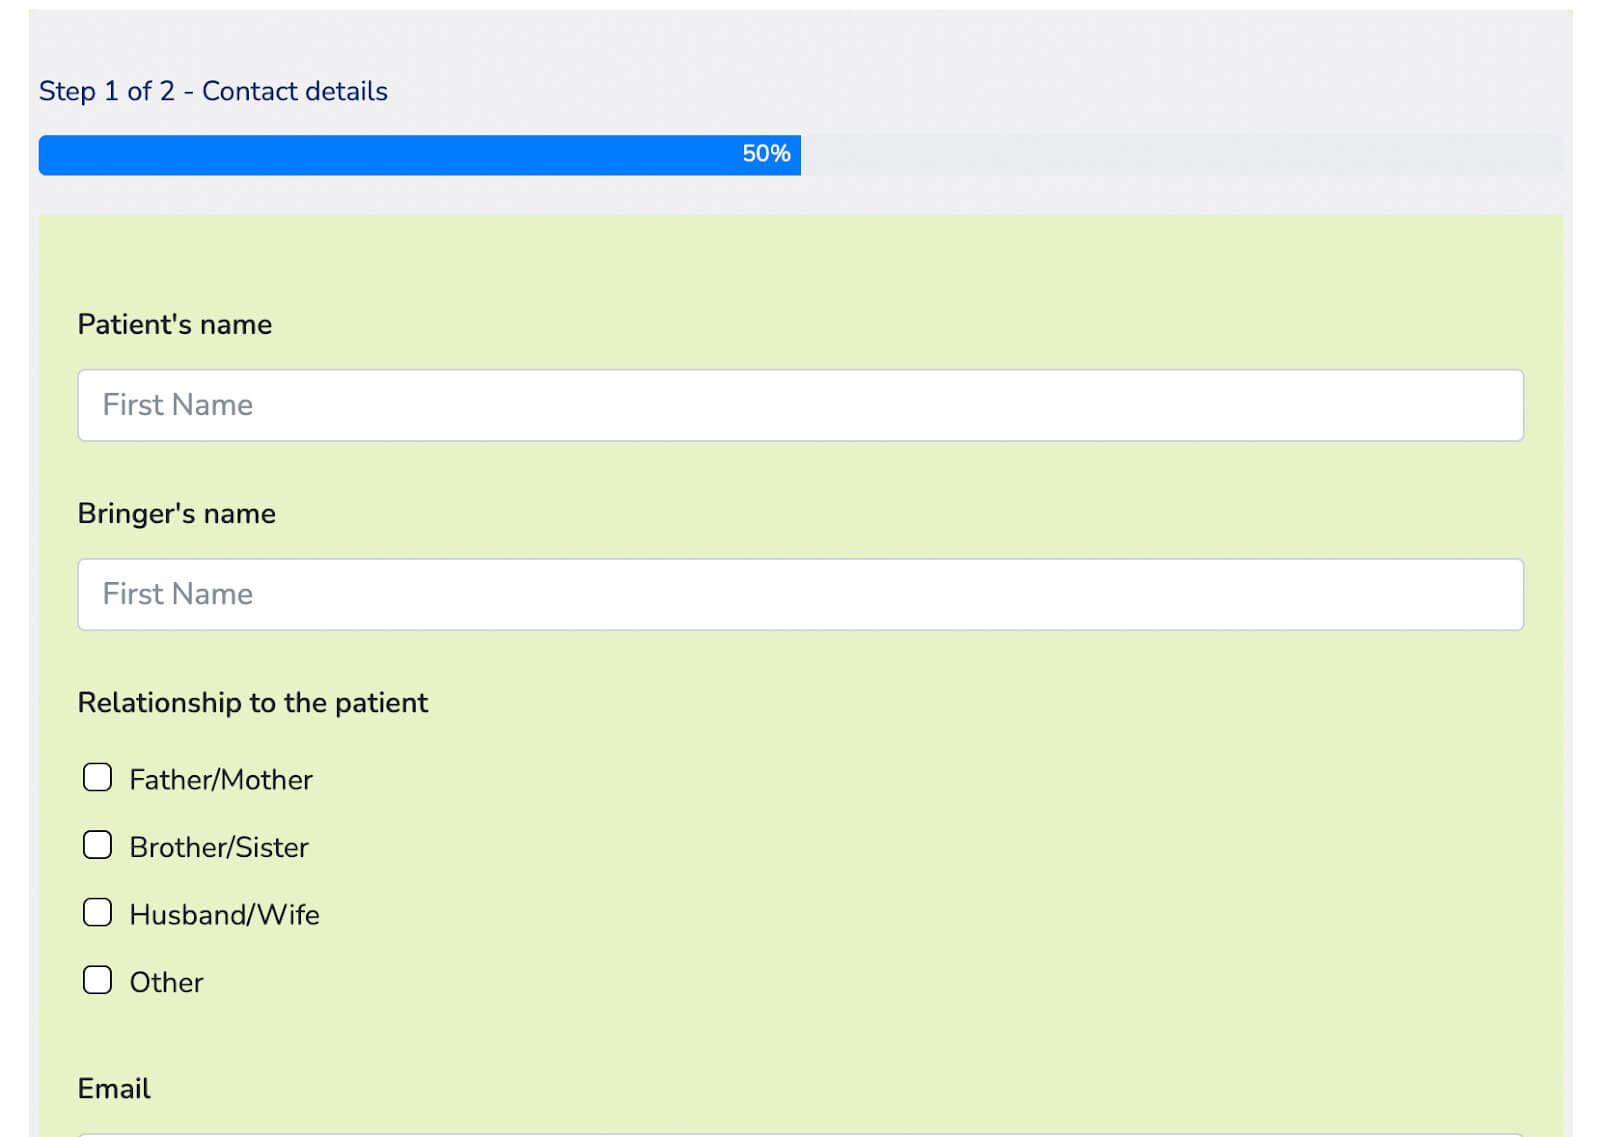
If you wish to add some color to your form, utilize the global styler for the form. From the Preview & Design section, select a Form Style Template. In our case, we're opting for the Bootstrap Style. Alternatively, you can fully customize the form by selecting the Custom (Advanced Customization) template.
Next, access the Misc section to configure container styles, asterisk styles, inline error message styles, after-submit success message styles, after-submit error message styles, and more. We are making a change by adjusting the container color for this particular form.
Here's the final appearance of the form with the updated container color.
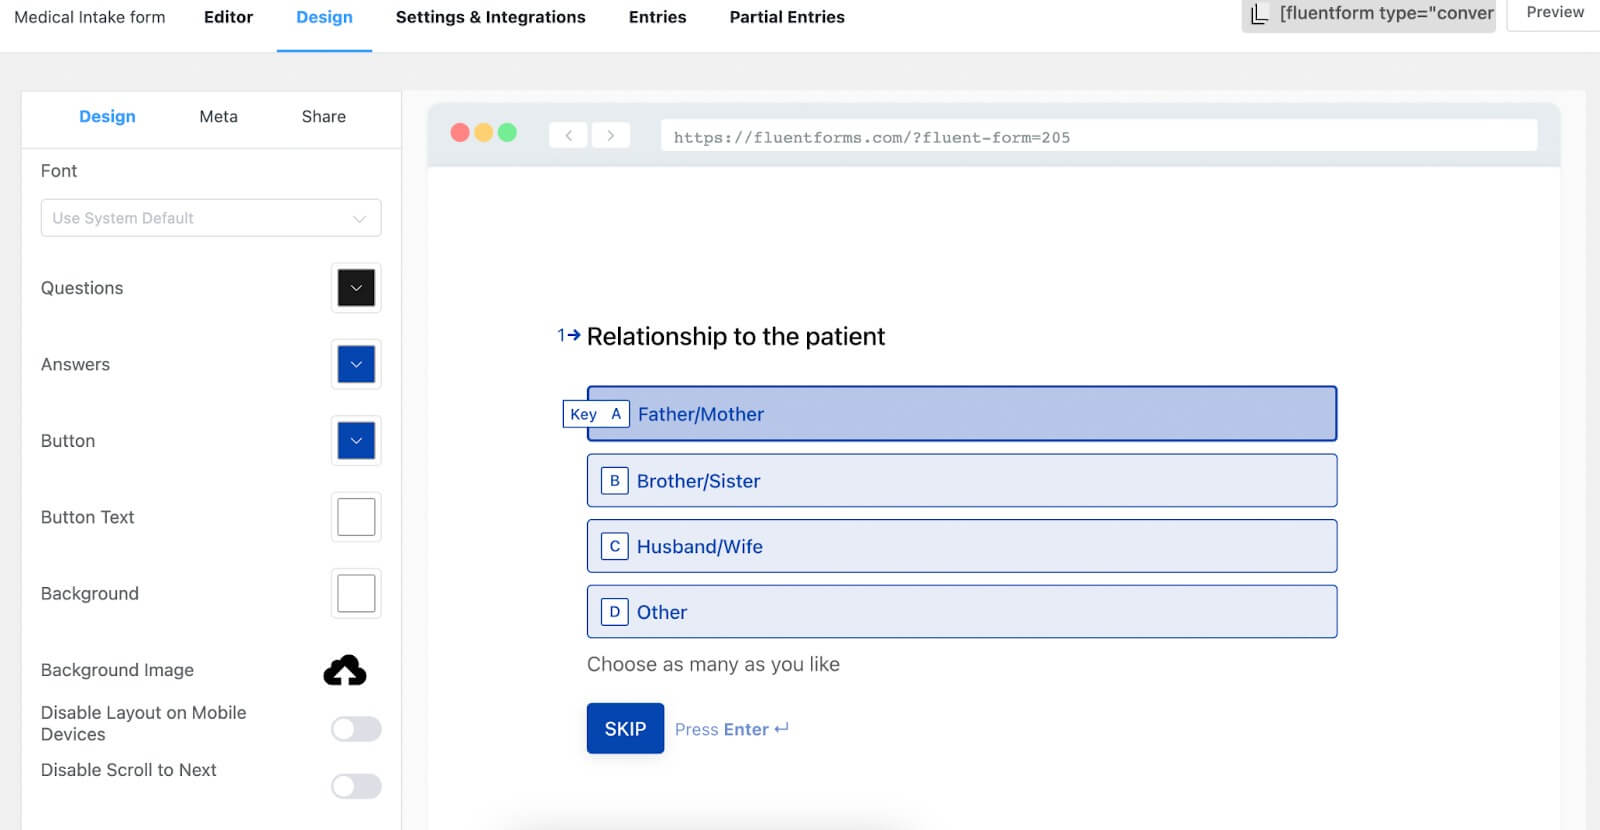
If you want to transform this form into a conversational form, return to the form editor and hover over the three-dot button in the top right corner. You'll find the option to "Convert to Conversational Forms." Click on it and confirm the conversion.
Skip the form editor since you've already added fields and proceed to the form's design section. Here, you can customize your form as desired, such as changing the colors of questions and answers, adjusting the background color, modifying button text color, adding images, enabling or disabling mobile layout, disabling branding, or setting key hints, among other options.
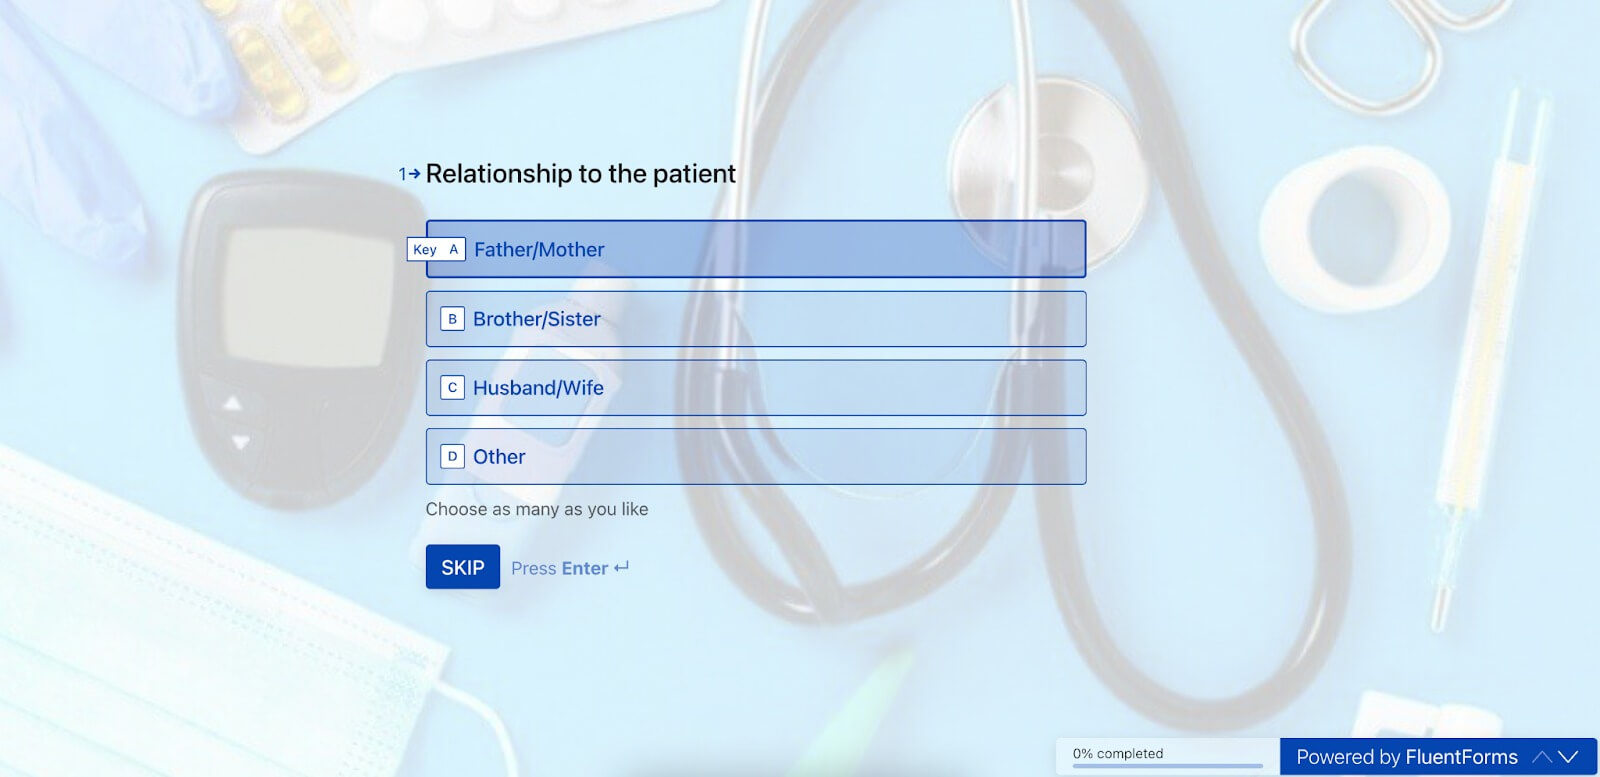
For this form, we're solely adding a background image, resulting in the following preview of the form.
That's it! Your form is now ready for use.
Configuring the Form’s Settings
Proceed to the Settings & Integrations tab within the form editor. Within this section, you will find the Form Settings at the top of the settings list. Initially, you will encounter the Confirmation Settings for the form that triggers after the submission. In this section, you have the ability to configure the confirmation type, the message displayed post-submission, define actions for when submissions are made, and more.
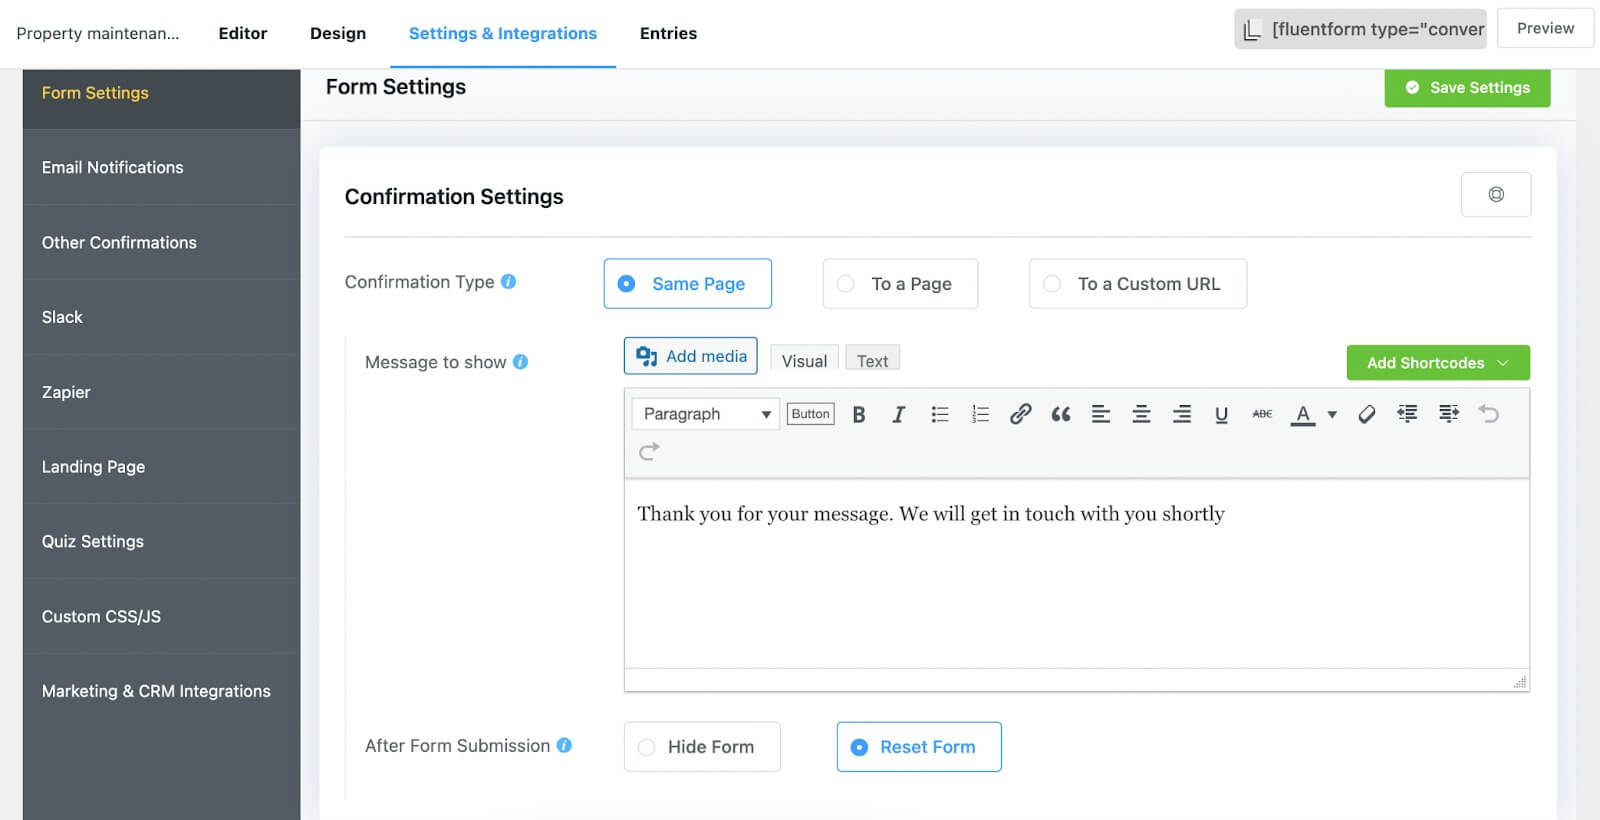
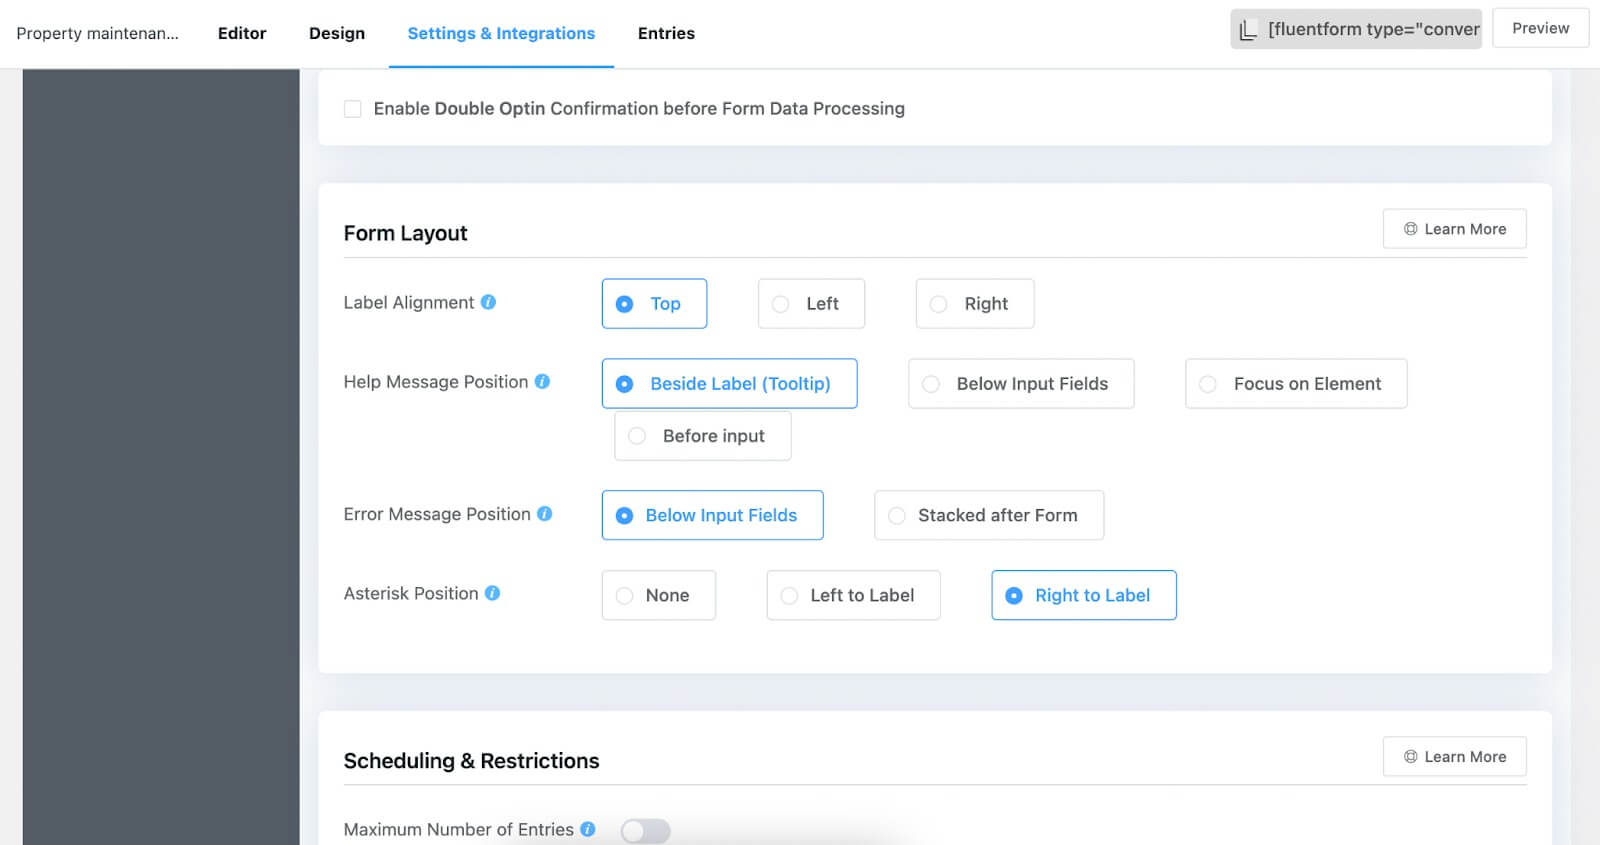
Should you wish to utilize the double opt-in feature, you can enable it here. Additionally, you can configure the Form Layout, form Scheduling & Restrictions, and explore various other customization options.
Don't forget to click on the "Save Settings" button to preserve your choices.
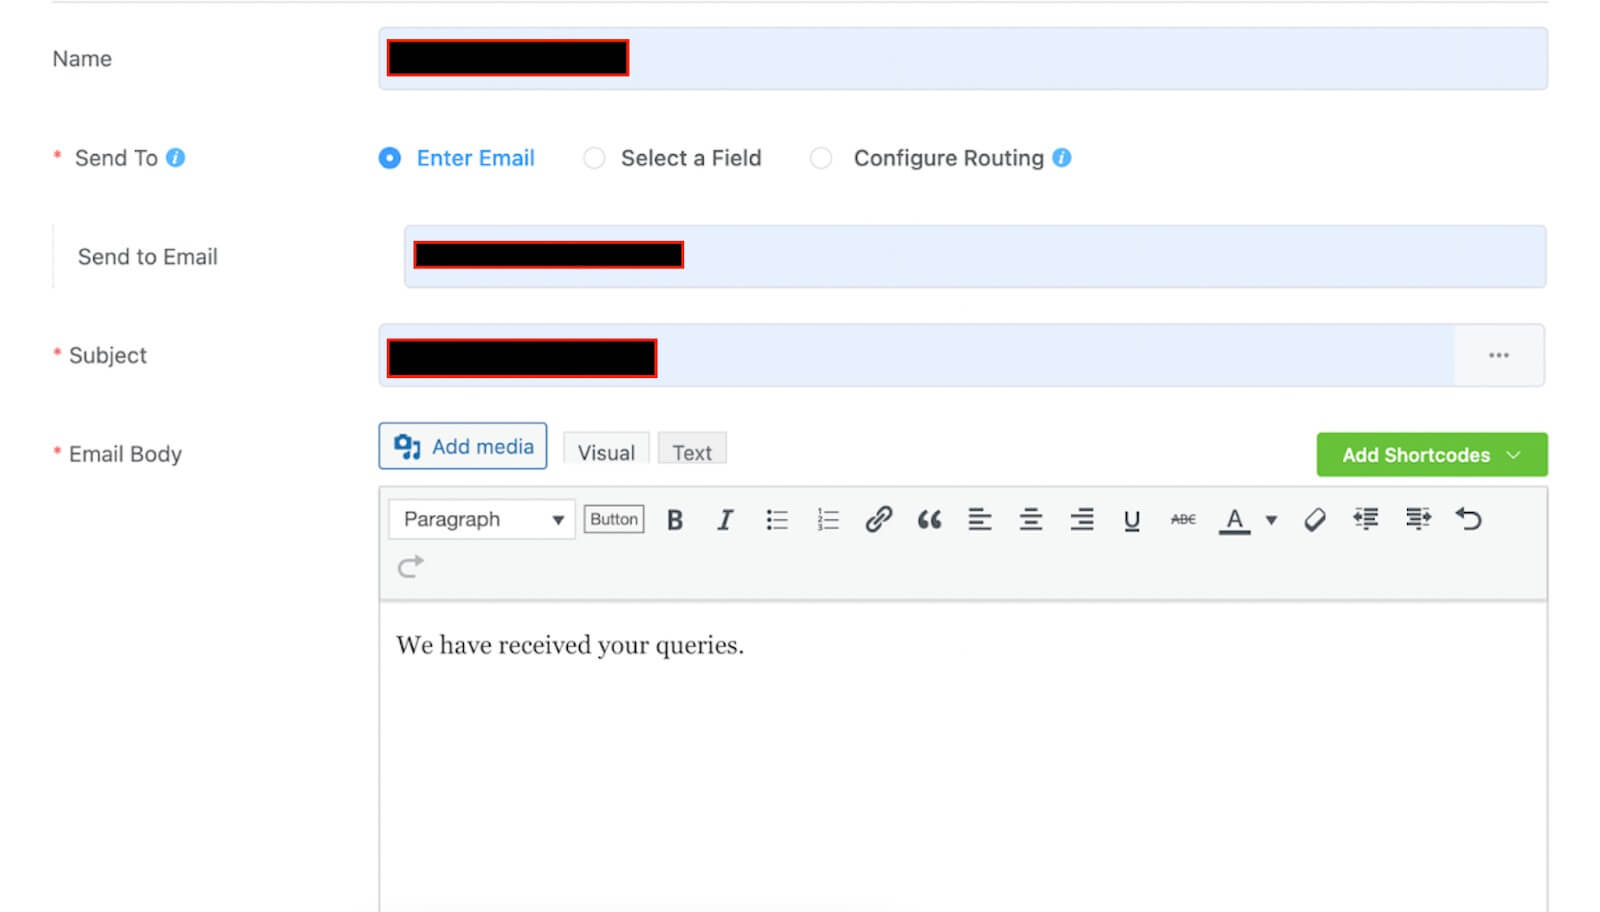
Transitioning to the subsequent section on the list, you can tailor the emails to be dispatched to users after they submit the form. In this part, you can specify the email's name, sender, subject, email body, incorporate conditional logic, attach files, and more. Keep in mind that you'll need the FluentSMTP plugin to send email confirmations.
If you explore the "Other Confirmation" option, you can create supplementary confirmations for your clients.
Finally, the "Marketing & CRM Integrations" option empowers you to establish connections between your form and various third-party tools that are compatible with Fluent Forms. To activate them, navigate to the Integrations section, acquire the API key or secret key from your respective accounts with these tools, and paste them into the Fluent Forms dashboard. We've included an example demonstrating how to integrate Fluent Forms with ActiveCampaign.

Publish The Form
Publishing forms with Fluent Forms couldn't be simpler. For instance, if you'd like to display your form on a webpage, head over to the "Pages" section in your WordPress dashboard, and simply click on the "Add New" button.

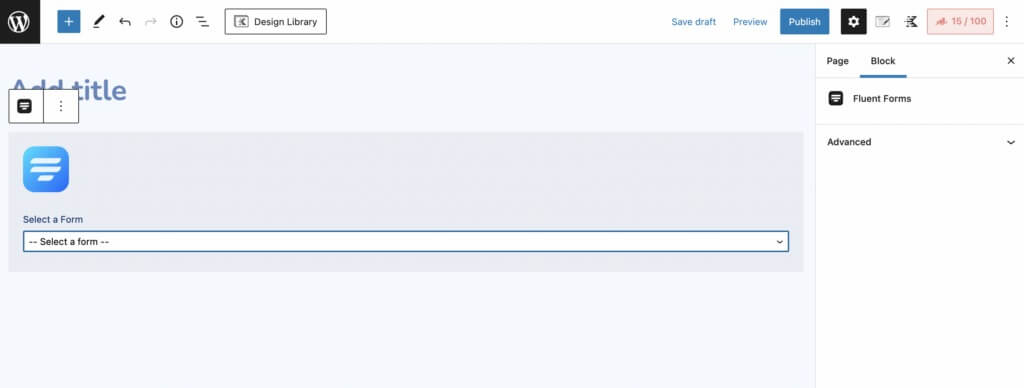
Next, incorporate Fluent Forms' Gutenberg block by clicking on the plus (+) icon.
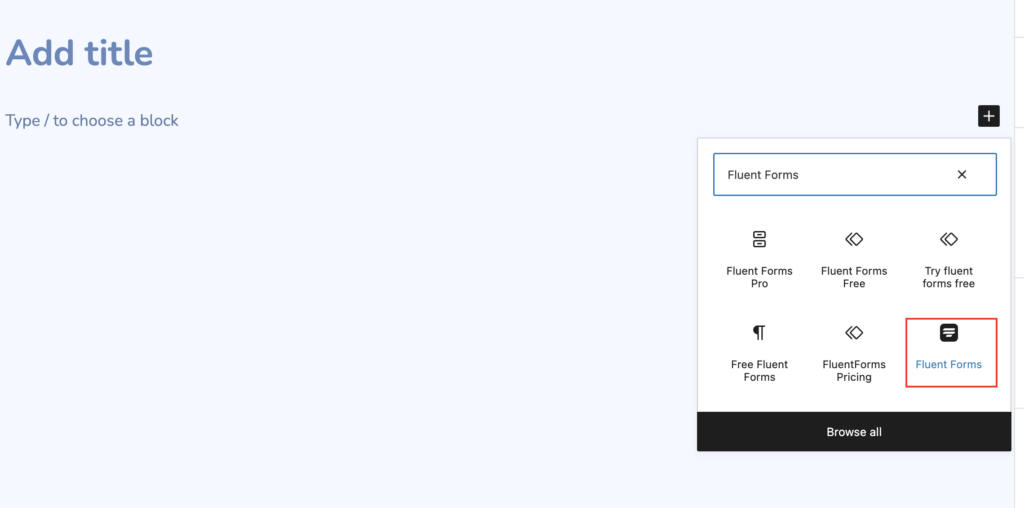
Then, choose your desired form and proceed to publish it on your website.
For the same seamless process of form publication in blog posts, follow the exact same steps.
Alternatively, there's another method to publish your form. Just copy the shortcode associated with your form and paste it anywhere on your website, whether it's within a blog post or on a page. It's worth noting that you'll receive both shortcodes, one for conversational forms and another for regular forms. You have the flexibility to copy and paste either one according to your preference.

It really is that straightforward!
Wrapping Up
In conclusion, Fluent Forms offers a straightforward and efficient solution for creating forms tailored specifically for patient data collection on your WordPress website. Whether you need to gather medical history, appointment details, or other crucial information, Fluent Forms streamlines the process. With its user-friendly interface and shortcode options, you can seamlessly integrate these forms into your site, ensuring a smooth and secure patient data collection experience.


