
One critical error that the majority of small businesses make is using signup forms that are quite common and identical to all other signup forms on the internet.

Whenever we have an opportunity to review our customers' forms while responding to their inquiries, we consistently notice this tendency.
To assist our readers in creating eye-catching signup forms that will grow your newsletter list, we decided to quickly put together this article.
This tutorial will show you how to use Elementor, the most well-liked page builder for WordPress, to construct your unique signup form.
Create Amazing Websites
With the best free page builder Elementor
Start NowCustom Signup Form in Elementor
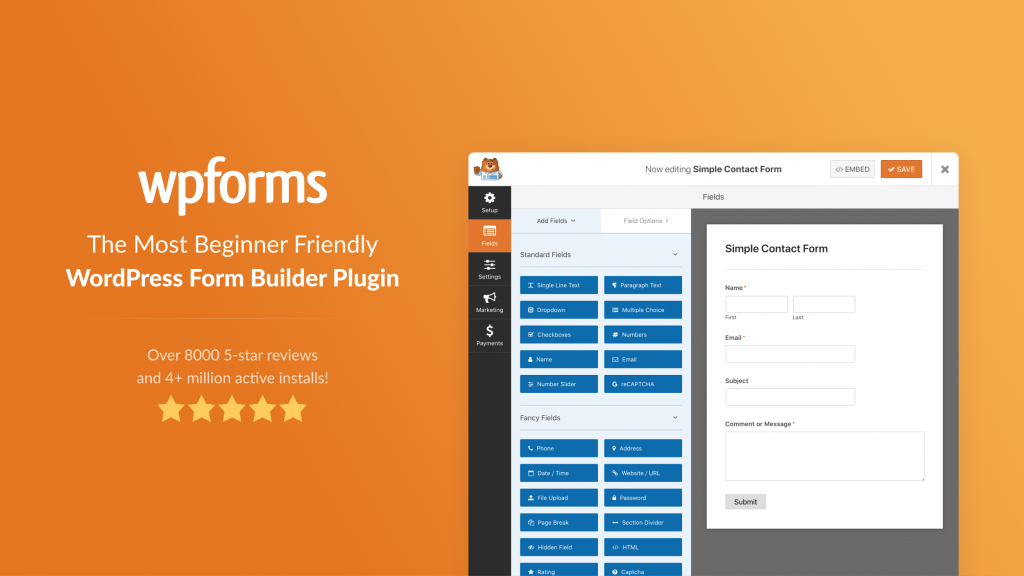
Install Elementor and WPForms
We'll teach you how to utilize Elementor to develop custom signup forms because most users use it to publish their pages.
Install Elementor if it's not already installed on your website.
For this course, a premium Elementor license is not required. Alternatively, you can create signup forms for free by combining Elementor with WPForms!
While you can use a mix of Elementor and WPForms to create stunning custom signup forms entirely for free, we suggest using the WPForms Pro license to gain access to some more sophisticated features for better outcomes.
It's now possible to start constructing your fully personalized signup form after installing both plugins!
Create or Edit a Page with Elementor
A signup form can be added to a newly created page or one that already exists. A newsletter form is typically integrated as one of the many parts of a bigger landing page. However, for the sake of simplicity, we'll be making a new page with just a signup form on it.
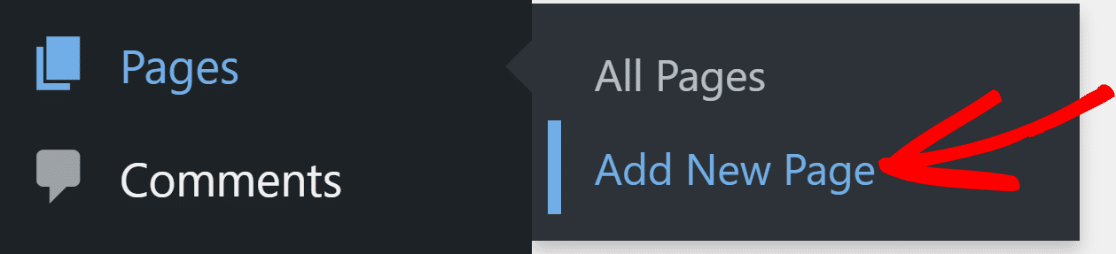
Click Pages > Add New Page in the WordPress dashboard to get started.
Click the Edit with Elementor button located at the top of the WordPress block editor once you're inside.

The Elementor editor will load shortly after you press the button. You can use the drag-and-drop editor to create a fully functional landing page.
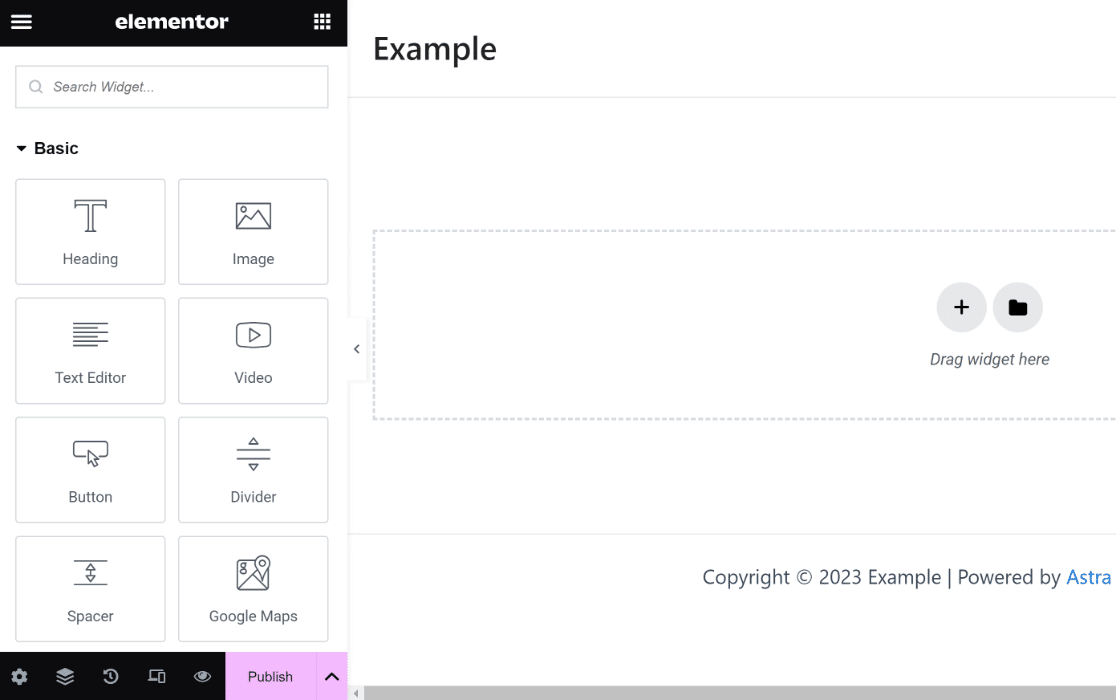
The WPForms widget will be used in the following step to construct a personalized signup form.
Create a New Signup Form
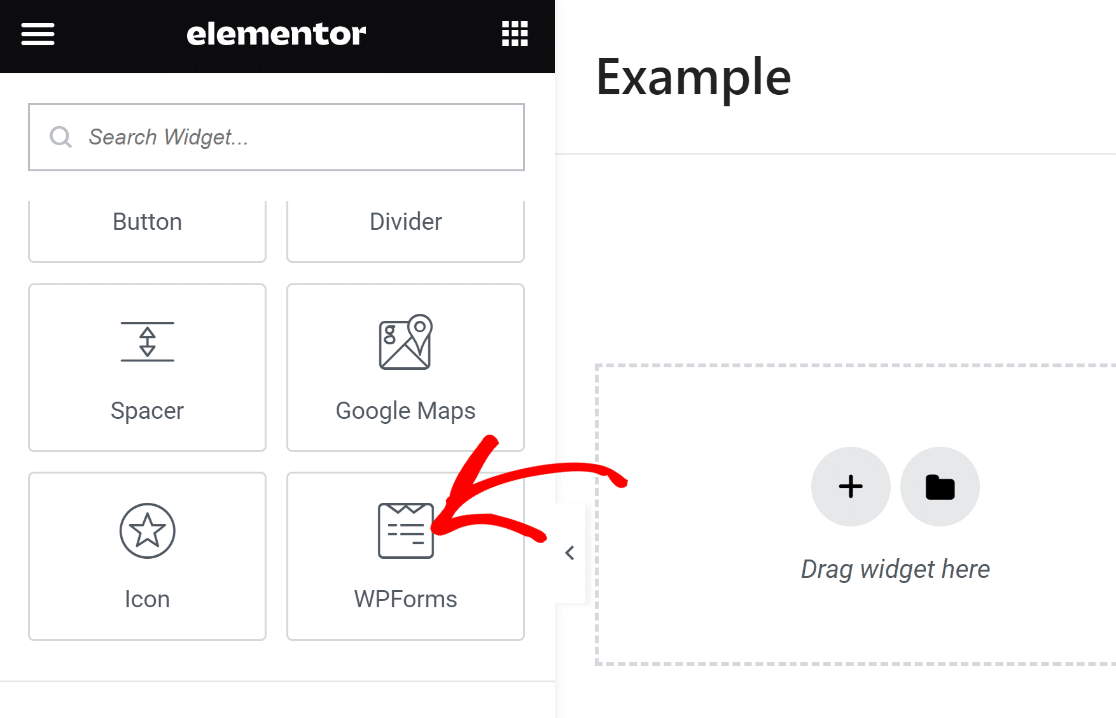
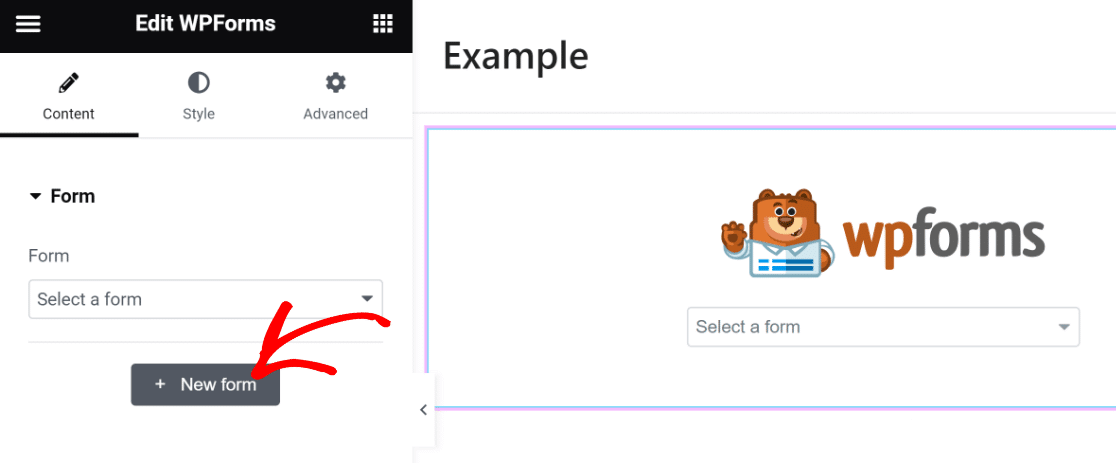
Now, all we need to do is add a custom signup form, so let's locate and drag the WPForms widget to the section on the right.
You can choose from any stored forms you created with WPForms or build a new one after inserting the WPForms widget into your page.
By selecting the + New Form button located in the left-hand window, we will generate a fresh signup form.
The WPForms form builder will now begin to load as an overlay. The sign-up form that you must integrate on your page can be created here.
Start by naming your form. This is useful so that you can locate it in your WordPress dashboard and refer to it later.

Next, locate an appropriate template by using the search bar located beneath the template selection pane and swiping down. For this lesson, we'll be using the Newsletter Signup Form template.
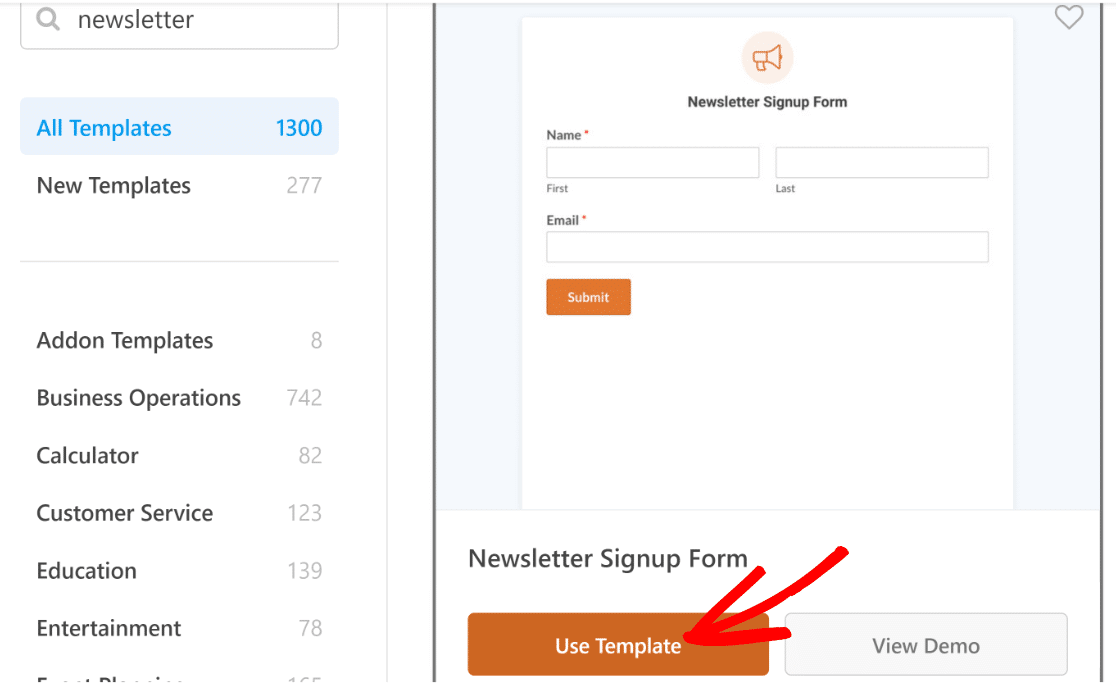
Once you've chosen a template, your screen will load the form builder. The Name and Email fields are already included in this template, which is all you need to sign up for a newsletter.
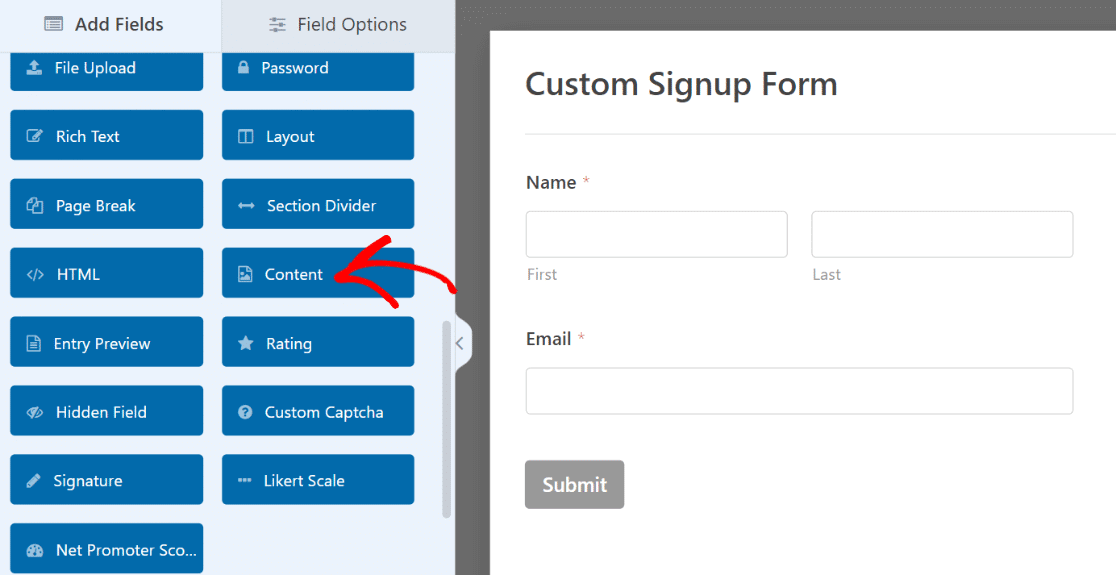
But the good times don't end there! We can elevate this form to a whole new level.
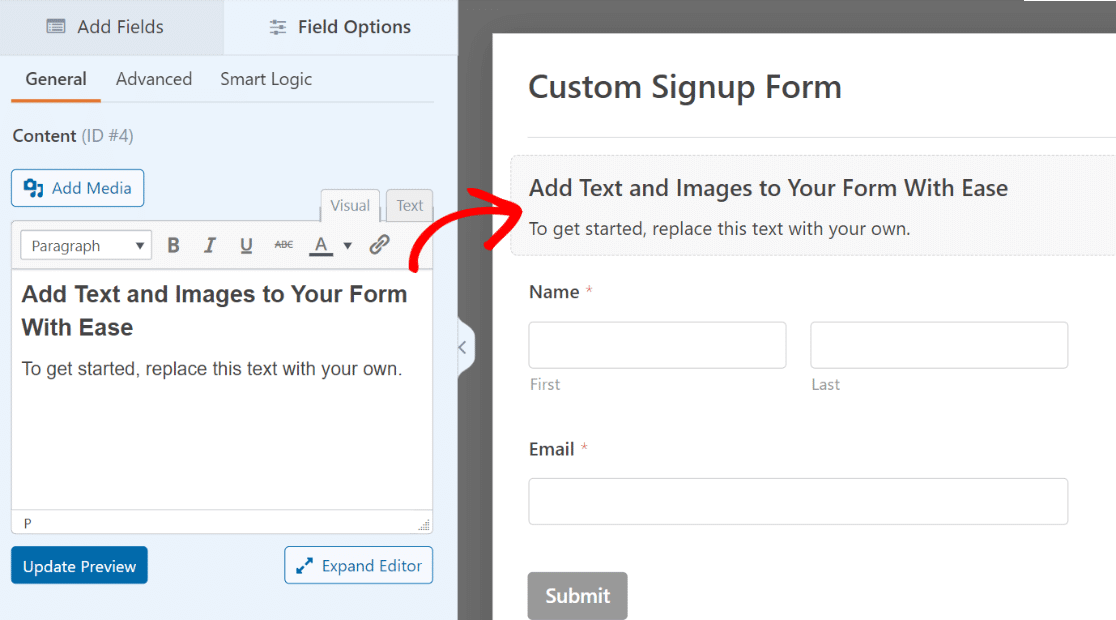
We can accomplish that, for example, by including an engaging headline that encourages more individuals to register.
The Content field in WPForms Pro can be used for this. The Content area will be added to the form's top.
Once the field has been added, click on it to bring up the related Field Options in the left-hand pane.
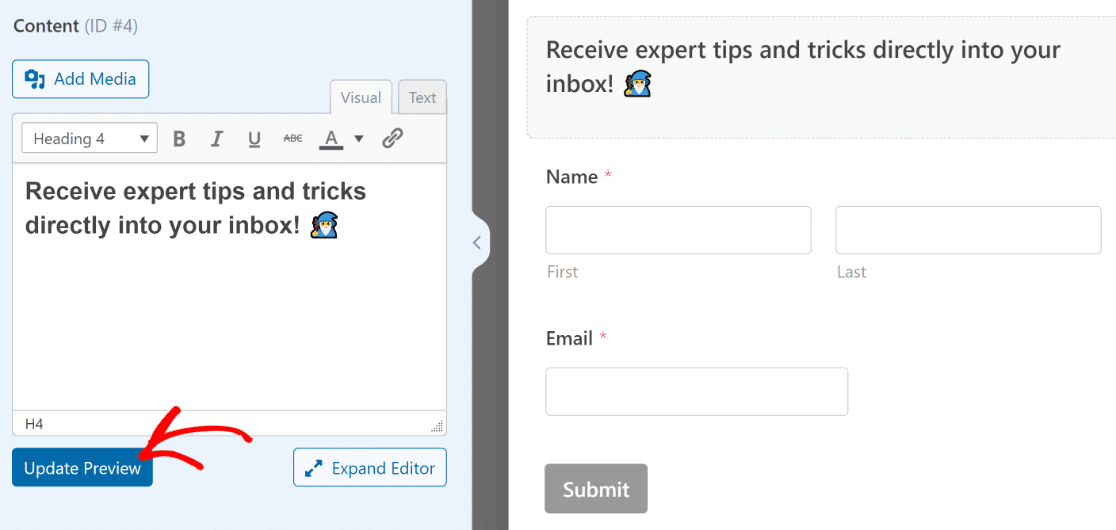
You do not need to know any code to add any text to the text editor on the left-hand window. We will format it as Heading 4 and add some text to it. To further distinguish the words, let's add an emoji!
Make sure to press the Update Preview button under the editor to see the changes take place on your form on the right.
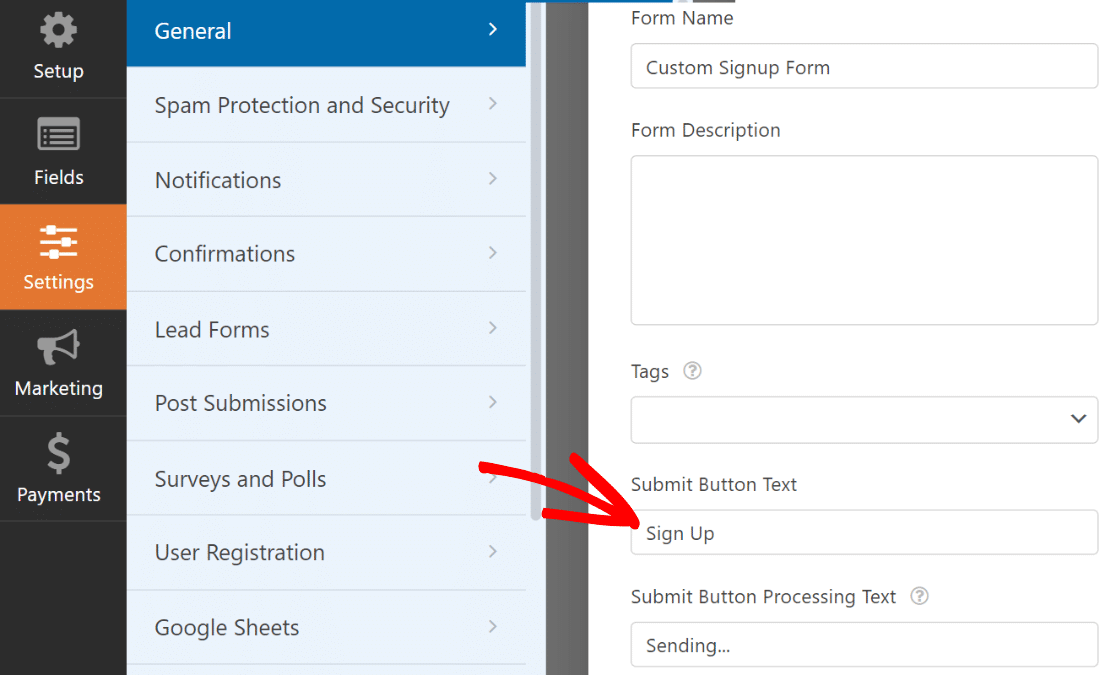
Let's also update the submit button text to better reflect the purpose of the form while we're at it.
Click Settings » General from the form builder's sidebar. Once you reach the Submit Button Text field, scroll down. You only need to type in here to change the default text.
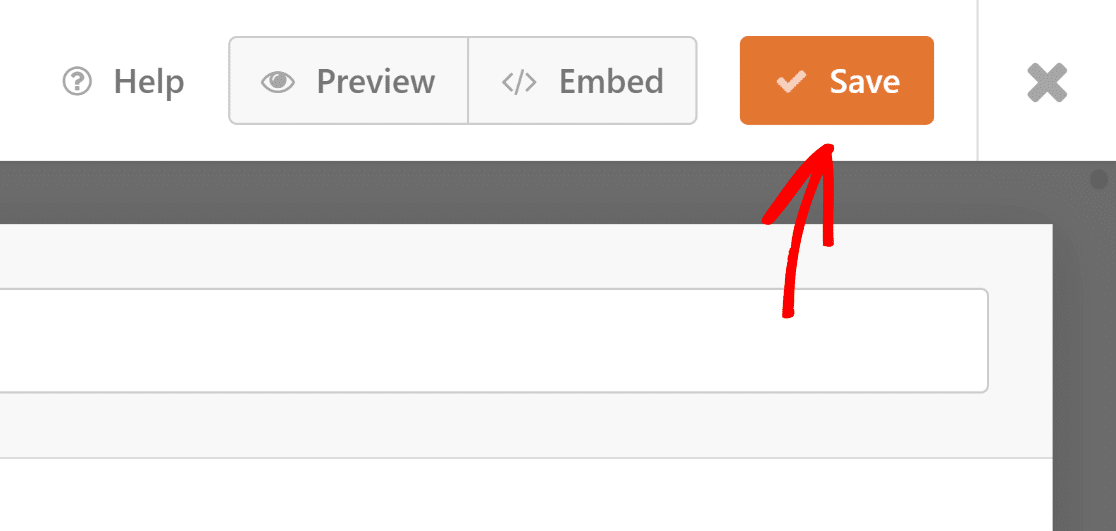
Fantastic! The form is starting to take shape nicely. Now is a good moment to click Save at the top of the form to save it.
However, if a newsletter signup form isn't connected with your email marketing platform, it's useless.
We'll walk you through integrating your form with your marketing software in the following step so that newly signed-up users are automatically added to your subscriber list.
Connect Signup Form with a Marketing Platform
Various marketing connectors are supported by WPForms beginning with the Plus and above subscriptions. If you’re using WPForms Lite, you can still utilize the Constant Contact integration for free.
We'll rapidly walk you through the process of integrating your signup form with Brevo in this example.
Just on the sidebar's Marketing tab.
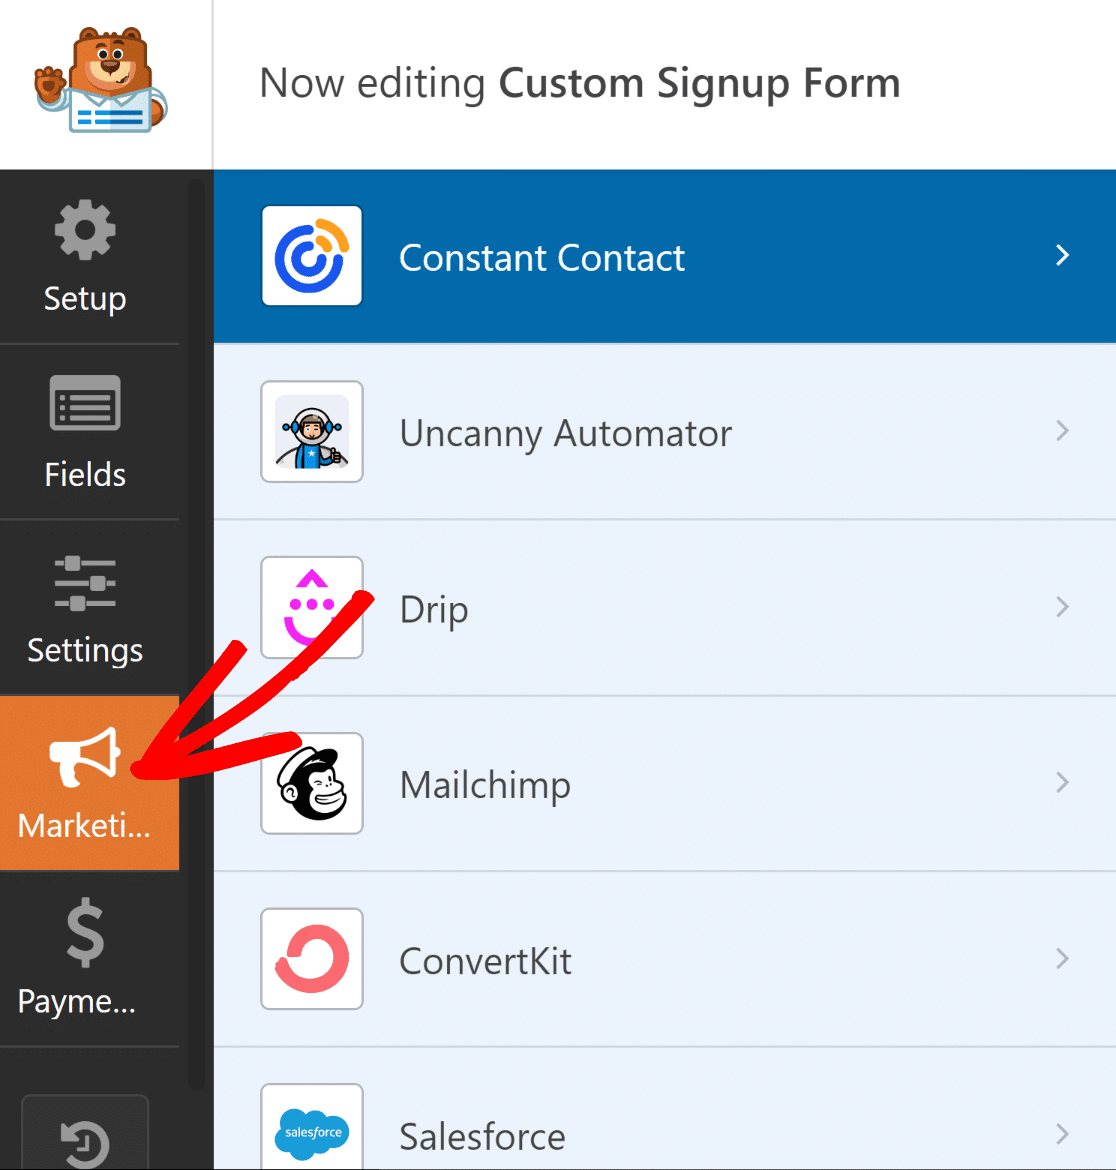
Next, decide which service your form should be connected to. Installing the necessary addon is a prerequisite for all supported marketing integrations, except for Constant Contact.
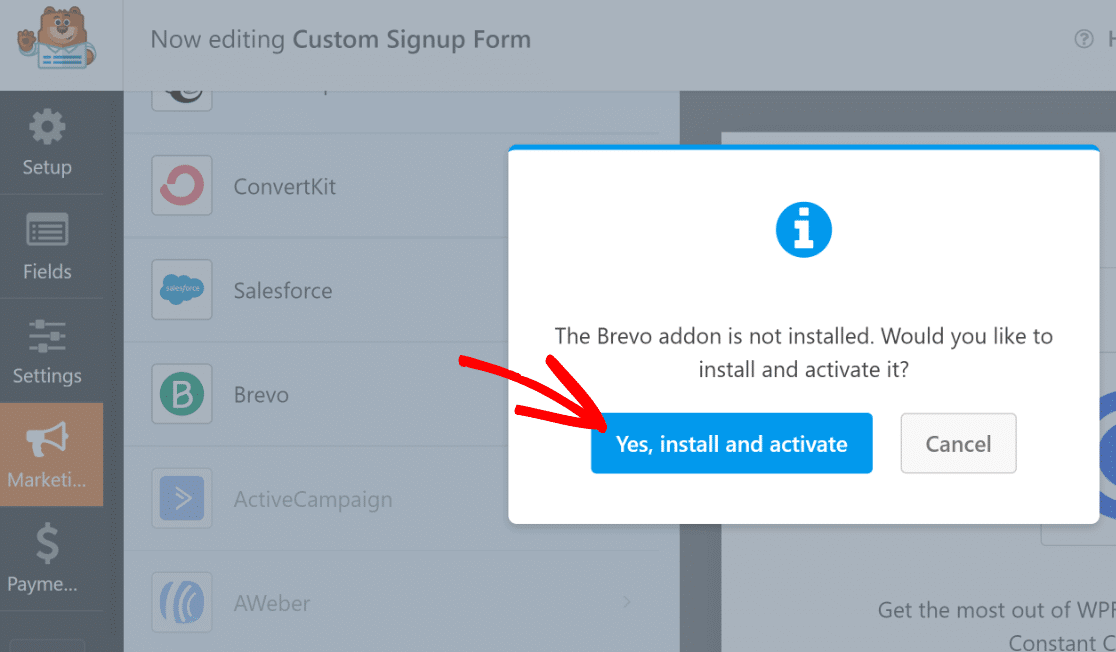
When you click the addon, WPForms will install it if it isn't already installed.
Here, Brevo is being used. When we clicked on Brevo in the Marketing page, an installation prompt appeared. It took about 5 seconds for the Brevo addon to install and be ready once we clicked Yes, install, and activate.
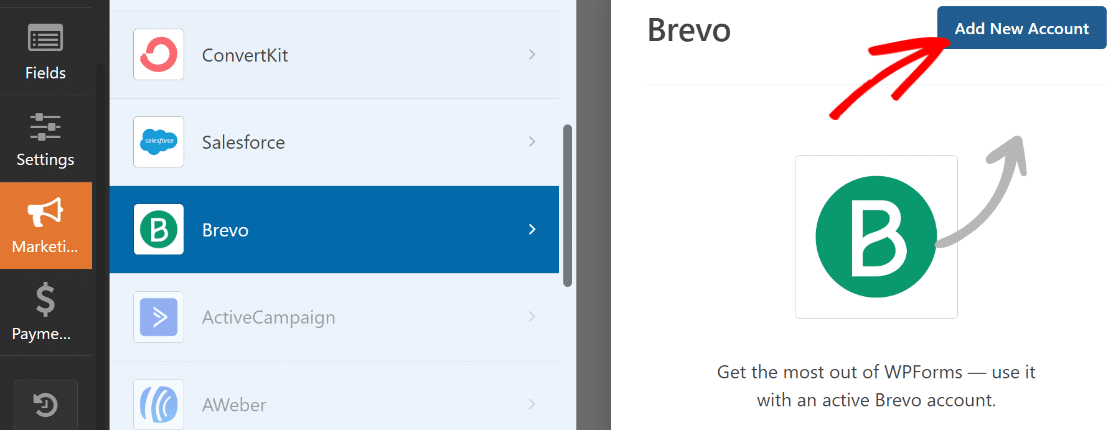
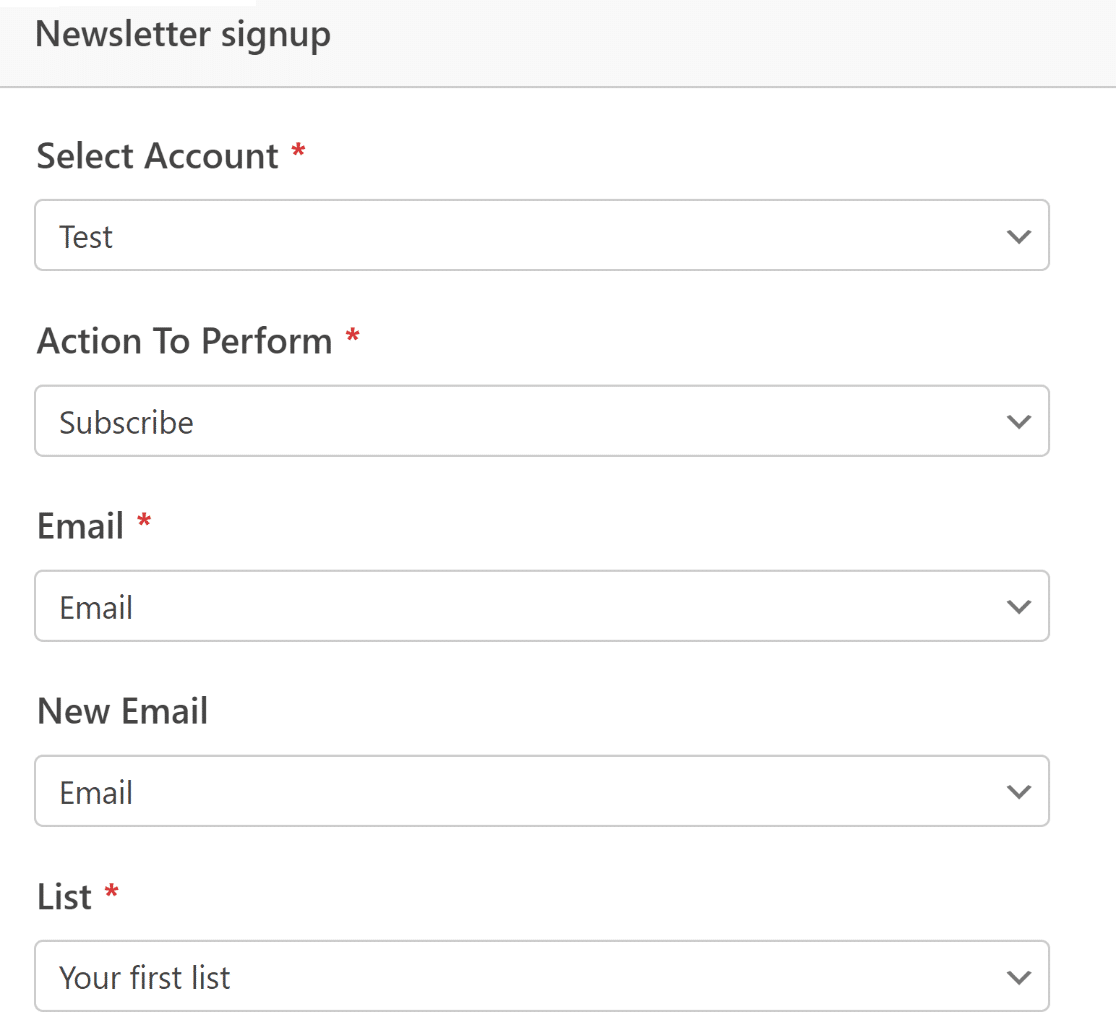
Next, click the Add New Account button in the upper-right corner of the window on the left after selecting Brevo.
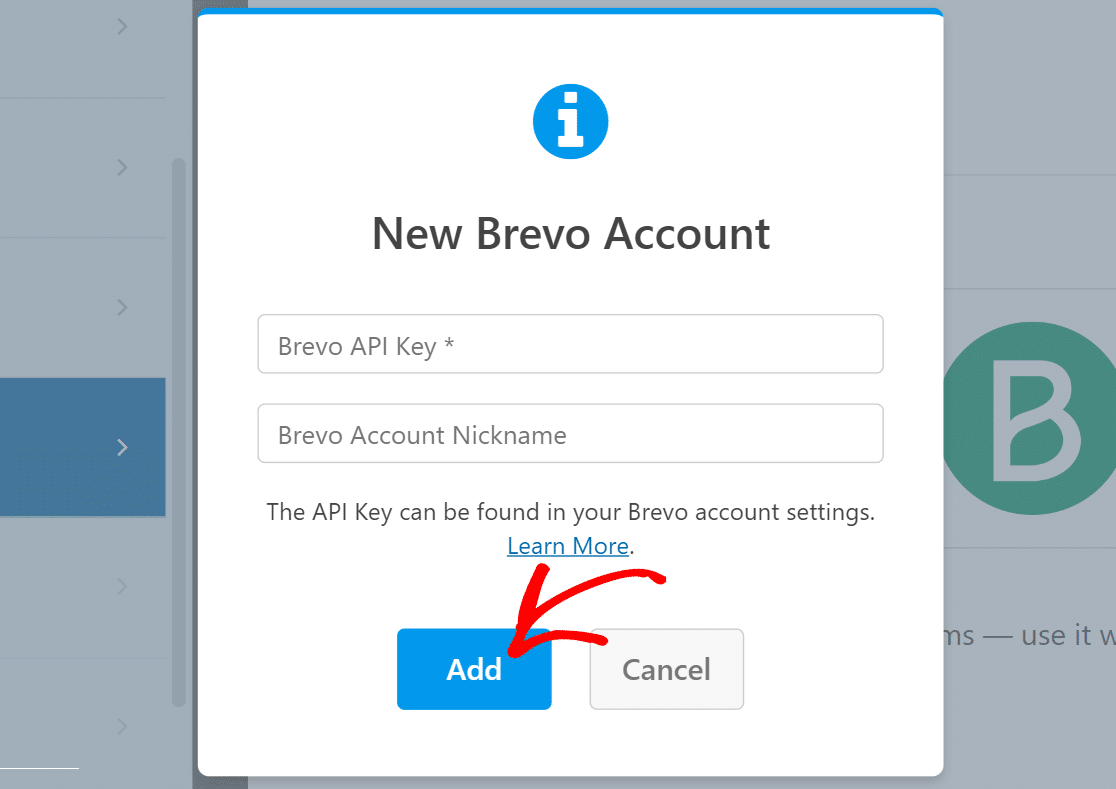
Enter your account nickname and Brevo API Key now. Once the necessary data has been entered, click Add.
The right-hand pane will update with a new list of settings as soon as you're linked to your Brevo account.
Feel free to utilize the dropdown boxes to customize the way your form interacts with your Brevo account. You can configure several aspects such as what happens in Brevo when the form is submitted, which subscribers should be added or removed, how the email fields are mapped, and more.
Make sure to select Save at the top when you're finished.
The integration of marketing has been finished. It was quite simple, wasn't it?
Style Your Signup Form and Publish
We have now completed putting up the necessary features for the registration form. However, as we stressed at the beginning of this article, an impactful form must also be visually striking in addition to being practical.
Even though we've already added some text and emoticons to our form using the Content field, we can do even more with the combined power of WPForms and Elementor.
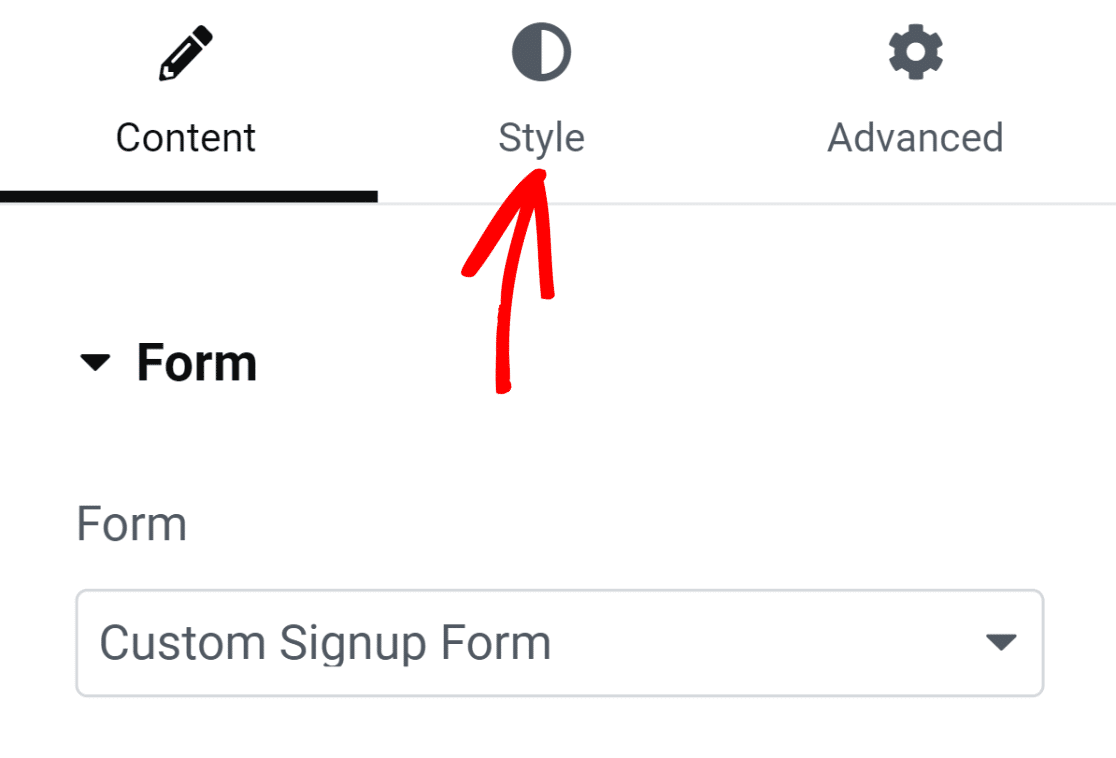
You can easily depart WPForms by clicking the cross button once your form is ready. As of right now, your freshly constructed form should be inserted as a widget in the Elementor editor.
After clicking on the form, choose the Styles tab from the panel on the left.
This page has options for modifying the styling of various form elements. For instance, you don't need to know any code to change the appearance of your buttons, labels, and fields.
The field borders in our form are by default rectangular with straight corners. However, all it takes to achieve rounder field borders is to raise the border-radius setting under Field Styles.
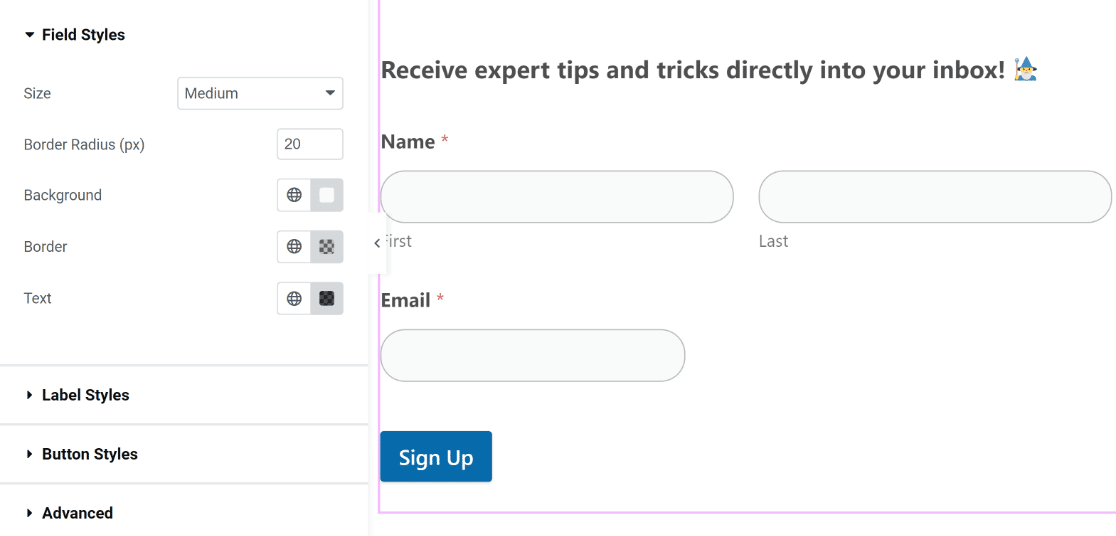
Likewise, you only need to click to alter the color of your buttons, labels, and fields. We’ll utilize the default colors because they complement our theme perfectly and nicely. However, feel free to play around with alternative color schemes for your form.
In Elementor, you can also modify your form container styles. Click the Advanced tab to accomplish that.
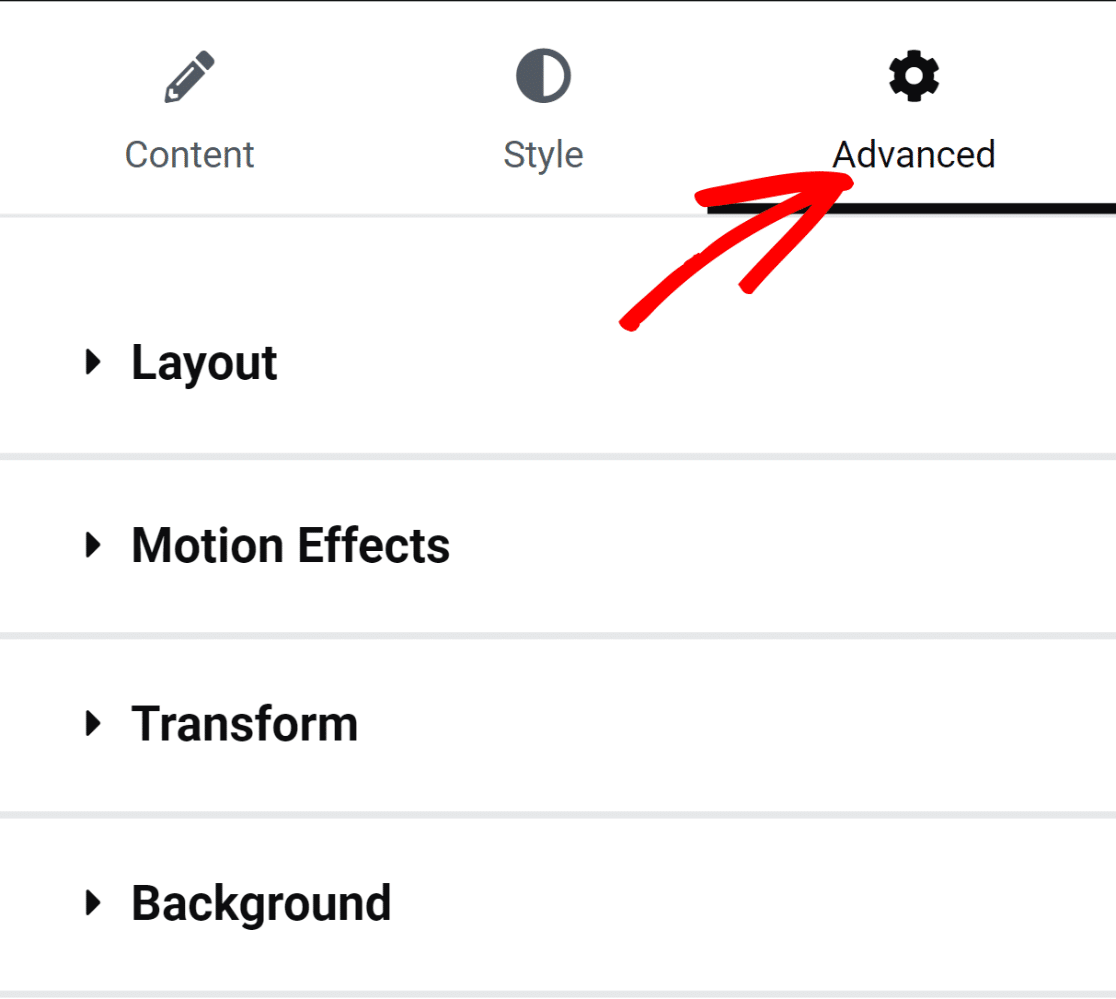
This section has a plethora of interesting settings, such as backdrop customizations, animation effects, and layout adjustments.
To make the form container look more vibrant, let's add a backdrop color. To add more settings to the menu, choose the Background option.
By selecting the color selection icon located on the right, we will apply a solid color.
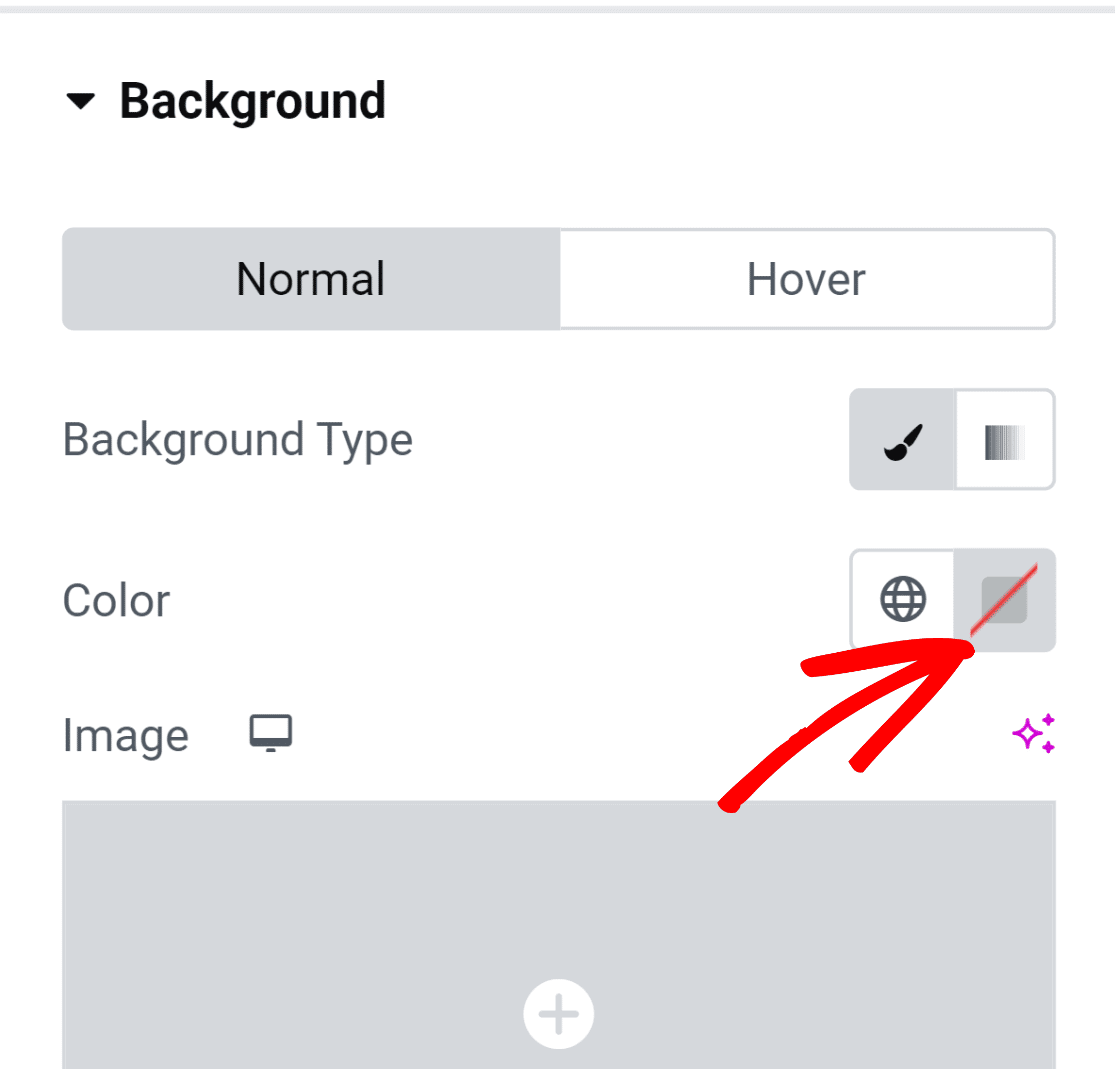
The color picker tool enables you simply select any color with a click.
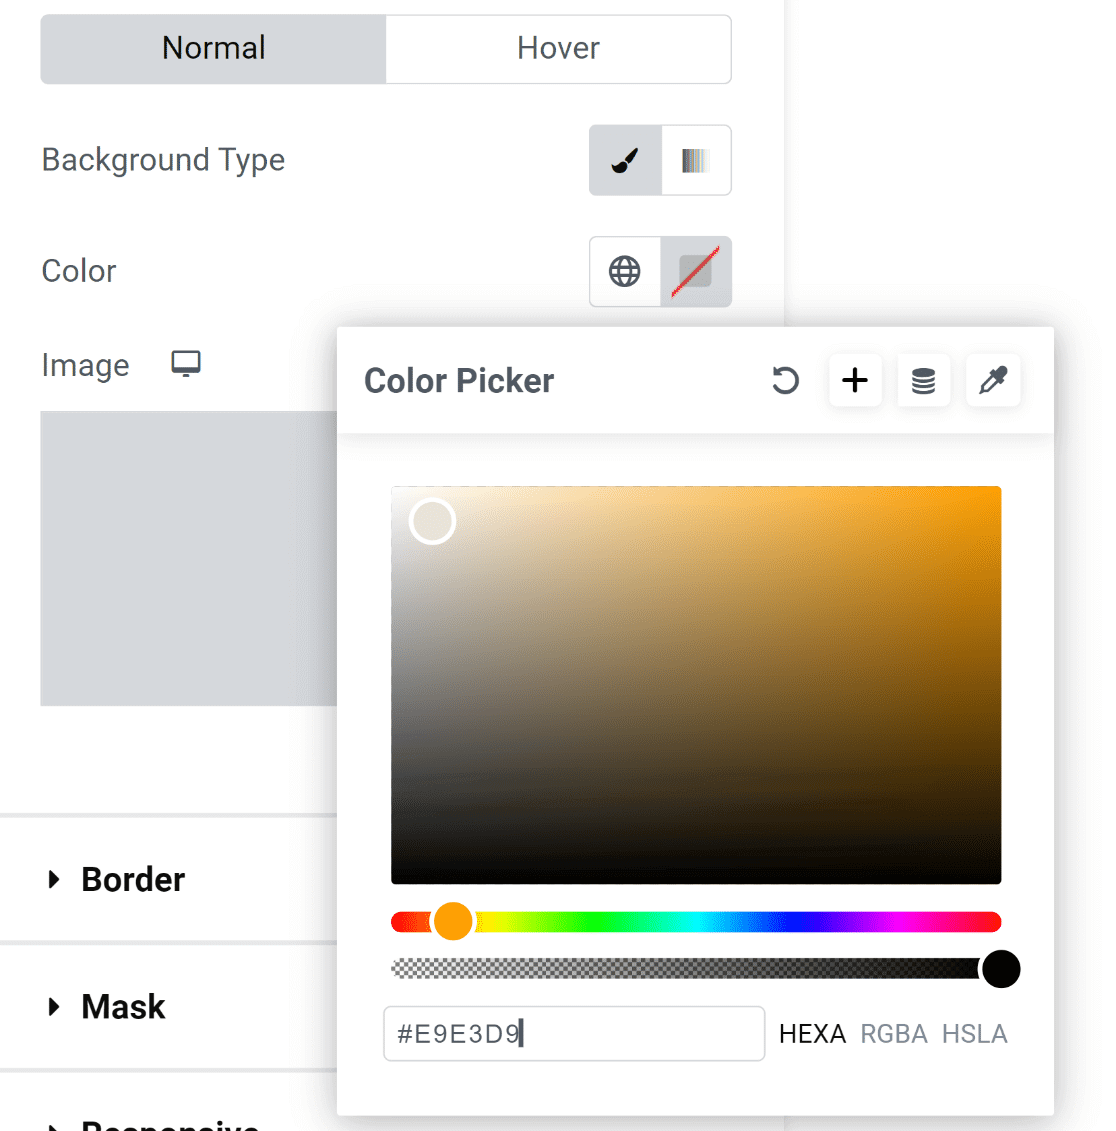
As soon as the color is chosen, the form appears a lot more inviting!
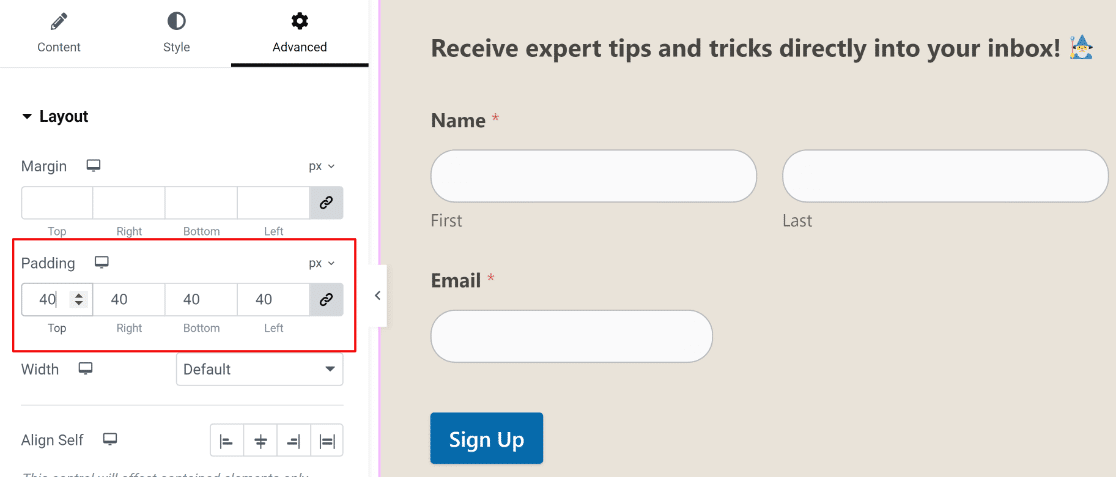
It doesn't look nice, though, because the form's elements are touching the container's edges.

This is a simple repair!
To access the margin and padding settings, select Layout from the Advanced menu on the left-hand pane. All we did was add some padding, and the outcome looks fantastic!
We're prepared to publish your form at this time. However, feel free to spend more time here and experiment with other adjustments if you'd like.
Press the bottom "Publish" button when you're ready.
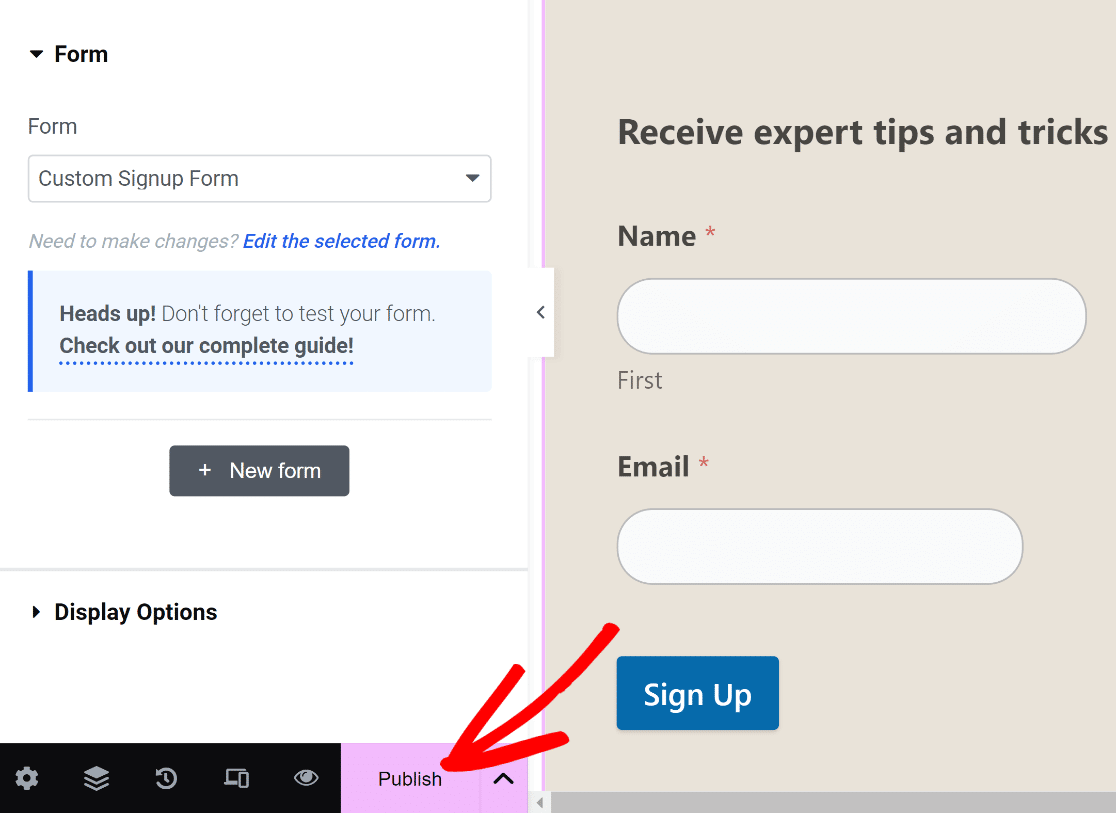
A notification will appear right away requesting you to see your published page.
Go ahead and examine your page after publishing.

That's it, too!
You've just used WPForms and Elementor to construct a personalized signup form.
With this, you can make sure that your form is customized for your website and has time-saving features built in to help you increase your email subscriber count hassle-free!
Wrapping Up
Creating custom signup forms in Elementor is a user-friendly process thanks to its flexible form widget and drag-and-drop interface. You can easily tailor professional-looking forms with customized fields, sleek styling options, and on-brand design elements. Strategic placement paired with good aesthetics leads to higher conversion rates.
Experiment with layouts and provide clear user feedback. Connect your forms to email services to easily collect submissions. Ultimately, Elementor empowers you to build signup forms that match your website and brand, facilitating impactful list building. With real-time analytics, you can continually refine your forms for optimal performance.


