
The background of your website is an essential part of your overall appearance as an online brand and plays a vital role in setting up your website design.

Moreover, a custom background allows you to offer a much more personalized experience to your visitors. In this tutorial, we will go over several ways to create a custom background for your WordPress site.
Why Should You Create A Custom Background?
WordPress themes usually come with a default background that does not offer any personalized view of your brand let alone make your website stand out from the bulk.
Moreover, you can create different backgrounds for different parts of your website to highlight and differentiate them. For example, you can use different backgrounds for different types of content, authors and categories to differentiate the content on your website.
Create Amazing Websites
With the best free page builder Elementor
Start NowYou can also add video backgrounds to your website to increase engagement. All of this helps you to be more creative with your design and put out a statement about your website. That being said, let's move ahead and understand how to create custom backgrounds in WordPress.
How To Change Background Colour With WordPress Customizer
With WordPress customizer, you can change the background colour of your website in real-time without needing any coding knowledge or experience. However, the process depends on your WordPress theme.
Head over to the WordPress customizer by going to the Appearance panel and then Customize.
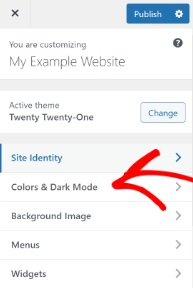
You will find numerous options to modify your website depending on your WordPress theme. To change the background colour, you need to go for the Colour and Dark Mode tab.
Next, you will have a Background Colour option. You can choose the background colour for your website from the colour palette or enter the Hex colour code for the background.
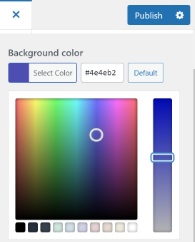
Press the Publish button when you are done choosing the background colour. Visit your website to see if it works perfectly.
If your theme does not support this option, move forward with us to see what more you can do.
How To Change Background Colour Using Custom CSS
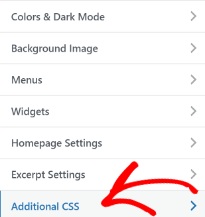
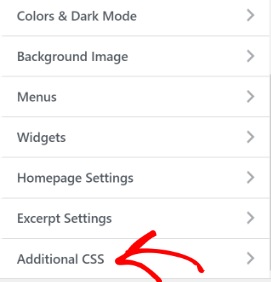
Another way to change the background colour of your website is to add custom CSS in your WordPress customizer. Just head over to the Appearance panel and then Customize to find the Addition CSS button.
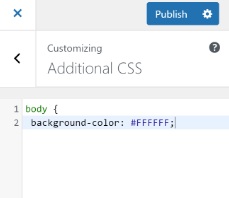
In the given field add the following code and just replace the colour code with the Hex colour code you want for your background.
body {
 background-color: #FFFFFF;
}
Once you have added the code to the Custom CSS field, make sure to publish the changes and check out your website.
Let's move ahead and explore more ways.
How To Randomly Change Background Colours In WordPress
You can also add multiple colours to your WordPress background and set up all of them to keep changing randomly in smooth transitions.
First, you will have to find the CSS Class of the area using the Inspect tool in your browser. To do that, you have to place the cursor in the chosen area and right-click to select Inspect tool.
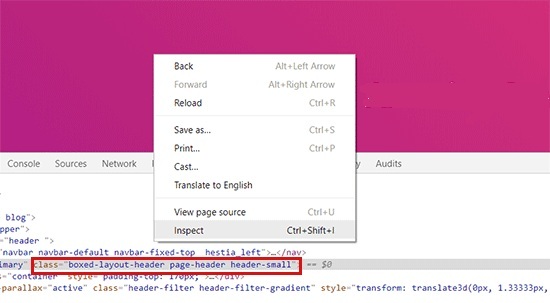
Next, you will see different CSS Classes for different areas from which you need to note down the CSS Class you want to target. For example, we are targeting the area with the page header in CSS Class in this situation.
Next, you need to create a new word file on your device using NotePad or Word Document and paste the following code.
jQuery(function($){
        $('.page-header').each(function(){
            var $this = $(this),
            colors = ['#ec008c', '#00bcc3', '#5fb26a', '#fc7331'];

            setInterval(function(){
                var color = colors.shift();
                colors.push(color);
                $this.animate({backgroundColor: color}, 2000);
            },4000);
        });
        });
When you notice the code, you will see that the page-header CSS Class is in the code and we have also mentioned four Hex colour codes to go with. You can increase the number of colours by adding the Hex colour codes and separate them using a comma and a single quote.
Now that your file is ready, save it with an appropriate title and then upload it to your WordPress theme's JS Folder. You will need a File Transfer Protocol (FTP) service. You can use FileZilla for this step as it is a free FTP client and it is super easy to use.
First, using the credentials given by the hosting provider you need to log in to your website's FTP server where you will see numerous files in the Remote Site column. Scroll down to the JS Folder.
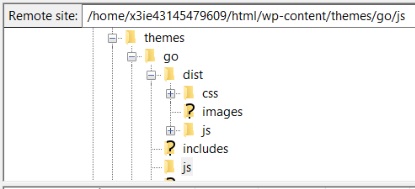
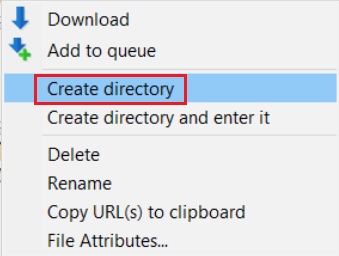
Your theme might not have a JS Folder but you can easily create one by right-clicking your themes folder in the FTP client and press Create Directory.
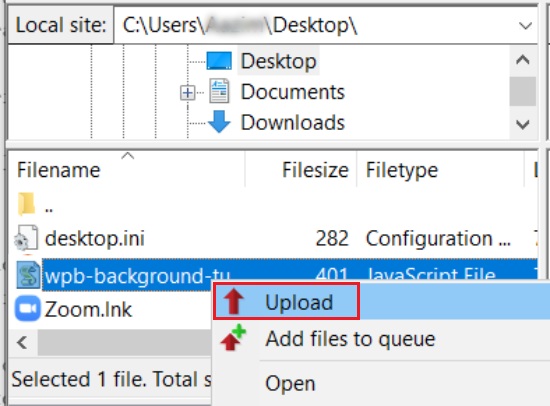
Next, under the Local Site, open your word file's location and then right-click on the file to press Upload.
Finally, you need to paste the following code to your WordPress theme's functions.php file. A plugin such as Code Snippets can be used to safely add the code.
function wpb_bg_color_scripts() {
wp_enqueue_script( 'wpb-background-tutorial',  get_stylesheet_directory_uri() . '/js/wpb-background-tutorial.js', array( 'jquery-color' ), '1.0.0', true );
 }
add_action( 'wp_enqueue_scripts', 'wpb_bg_color_scripts' );
Head over to your website to see the colour transitions in the background.
How To Change Background Colour For Individual Pages
There is also a way to choose different colours for different pages or blog posts rather than going for a single background colour all across your website.
To start, you need to find the Post ID Class by going over to the blog and right-clicking to press Inspect Element.
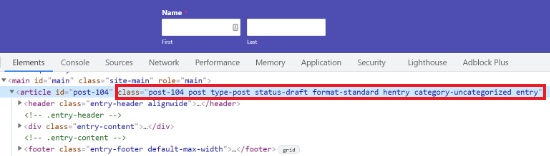
In the following Custom, CSS replace the Post ID Class with yours and the colour code with your preferred Hex colour code.
.post-104 {
background-color: #D7DEB5;
color:#FFFFFF;
}
Once you have replaced the Hex colour code and Post ID Class, you can head over to the Appearance and then Customize. Head over to the Additional CSS tab.
In the custom CSS field, paste your updated custom CSS.
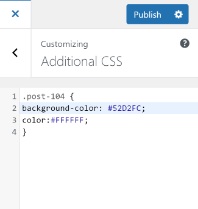
The background colour for your chosen page will be changed. Check your website to see how it looks.
How To Create A Video Background
Creating a video background on your website can help you gather a lot of customers and grab their attention for longer durations. To do so, you will need mb.YTPlayer is a free plugin that lets you add youtube videos to your background.
Once you have installed and activated the plugin, in your dashboard go to mb.ideas and then YTPlayer.
Add the URL for your Youtube video and enable the activate the background video option.
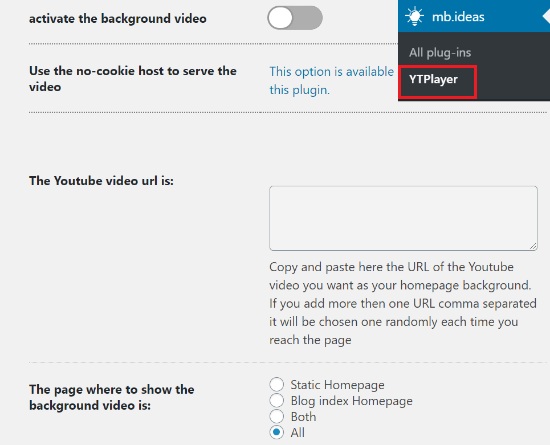
Scroll down to find an option where you can choose the location of your video.
Go ahead and visit your website to see the changes in place.
How To Create A Custom Landing Page
It is very important to create a distinct image for your website and to present a brand identity that makes your website and your brand fall into perspective for your users.
Creating a custom landing page will allow you to retain visitors, generate leads and gather control over the appearance of your website. Besides, it can also help you increase engagement on your website.
SeedProd

SeedProd is an amazing plugin using which you can create highly creative and engaging landing pages. It does not matter if you don't have experience with coding as just some simple tweaks will do. The built-in drag and drop editor is easy to use while being highly effective.
The plugin offers both; a free version and a premium version. For a simple landing page, the free version would be enough. But to be limitless with your creativity and design, we recommend you using the premium version of SeedProd.
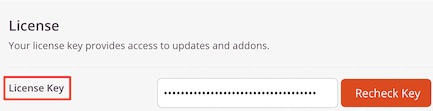
To kickstart the process, you need to install and activate SeedProd on your WordPress. For the premium version, the moment you activate the plugin you will be asked to enter the license key.
You will have the license key when you purchase the premium version of SeedProd. You can find the license key in your SeedProd account. Copy the license key and paste it in the given field on your WordPress once the plugin is activated.
Once you are done with all the steps above, press the Verify Key button for the license key to be verified.
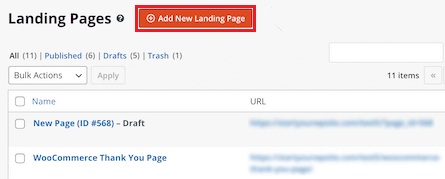
Once the premium version is activated, we move towards creating a landing page and for that head over to SeedProd in the admin panel and then press Pages. On the directed page, press Add New Landing Page.
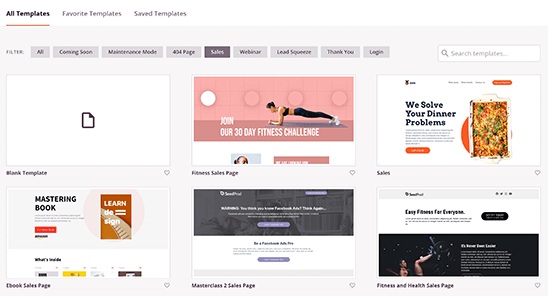
Next, you will be able to select the theme for your landing page. SeedProd has a great library with pre-built landing pages for all types of niches. You can select one according to the theme and category of your website. You can also customize these templates according to suit your website.
You can also go with the blank template and create everything newly from scratch. But hence, the process above is quick and easy, we recommend you choose a template from the given library.
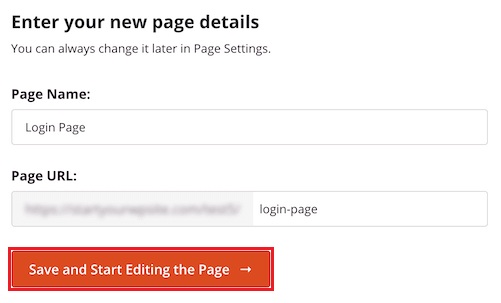
Once you have found your preferred template for the landing page, SeedProd will ask you for the Page Name and Page URL.
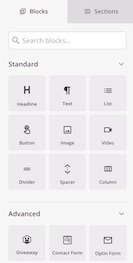
Next, you will be taken to the SeedProd page builder where you will be able to add or delete blocks from your chosen template. The range extends from adding headings to videos and buttons. All you have to do is drag a block and drop it in your preferred area on the page.
For the premium version, there are also advanced blocks including a countdown timer for CTA purposes, a social media block to increase connections and engagement, an option to add forms and collect leads and a lot more.
Using SeedProd's drag and drop builder, you can even customize the block itself. You can effortlessly change the colour, size or font of the block you want to use.
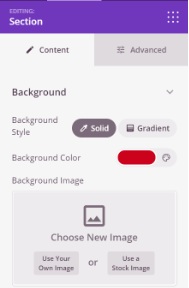
To change the background of your page, you can simply click anywhere on the page and the options will appear on the left-side panel. From there, you will be able to change the style or colour of your background. You can also add an image as the background for your landing page.
Once your landing page is ready and you are done with all the changes. Make sure to Publish the page and move ahead with Connect tab.
The Connect tab will allow you to integrate your page with third-party services email marketing services.

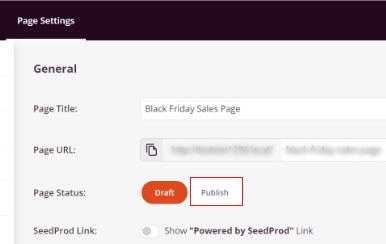
The next step is to take your page live and for that, you need to click on the Page Settings tab where you will be able to change the page's status from Draft to Publish.
Besides, there are a lot of other options that you can use for different purposes. For example, you can use SEO to rank your page better, add custom scripts, view the analytics and add a custom domain.
After you are happy with all the changes, head over to your website and check out your landing page to make sure everything is fine.
This is how you can create a custom landing page with a custom background all on your own using SeedProd. We hope this tutorial helped you understand how important personalization is to make your website stand out.
Make sure to join us on our Facebook and Twitter to keep getting updated about our Tutorials.


