
Creating a booking form in WordPress is a nightmare. There, I said it. You probably agree with me, right? You’ve spent hours trying to figure out how to make a simple form that works for your clients, but you always end up frustrated and disappointed. You wonder why WordPress has to be so complicated and unfriendly. You wish there was an easier way to create a booking form without coding or hiring a developer.

Well, guess what? There is an easier way. And I’m going to show you how to do it in this blog post. I’m going to teach you how to create a booking form in WordPress using WP Forms, a powerful and user-friendly plugin that lets you build any kind of form you want in minutes. You’ll be amazed at how easy and fun it is to create a booking form with WP Forms. You’ll never have to worry about WordPress forms again.
What is a WordPress Booking Form?
A WordPress booking form is a form that allows visitors to your WordPress website to book or schedule appointments with you or your business. A user's name, service, and the date and time they want their service are commonly collected on simple booking forms. There are numerous booking form applications. They can be used to schedule deliveries or services such as nail or hair appointments.
They can also be used to reserve tangible objects, such as booking a hotel room or renting items. Booking forms might include features like adding add-ons to their service, SMS notifications, and self-service options that allow clients to change their appointment.
Create Amazing Websites
With the best free page builder Elementor
Start NowWhy is it Important to Have a Booking Form on Your Site?
Online booking is an excellent tool to include on your website, especially if you sell services. Booking forms make the booking procedure simple for your customers. They may view your availability, choose their services, and even pay for them in advance.
Having a WordPress booking form on your website allows your business to keep a smooth procedure for your clients while also ensuring that your revenues are sustained, as your consumers will be able to easily return and book within your business.
Step-by-Step Guide on Adding a Booking Form to Your WordPress Site
In this tutorial, we'll show you how to do it with WPForms, a popular WordPress contact form plugin. WPForms has a broad feature set, making both the free and premium versions a great choice for adding a WordPress booking form to your website. Let's go over how to install this plugin and add a booking form to your website.
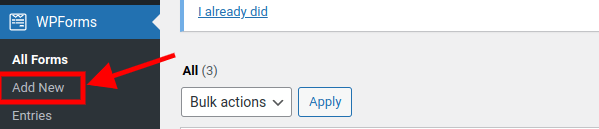
Step 1. Install and activate the plugin
The first thing you’ll need to do to start taking booking requests online is install and activate the WPForms plugin.
Step 2: Create Your Form
The next step is to build a form within this plugin. To get started quickly, you can choose one of WPForms' various appointment booking templates.
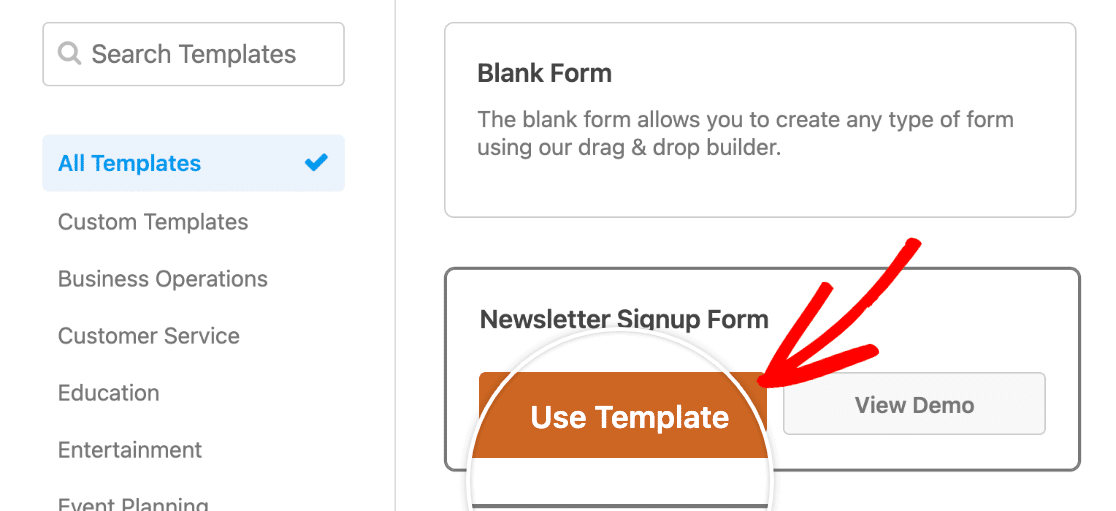
The template comes with default form fields such as Name, Email, Phone, Address, Date of Birth, and many more.
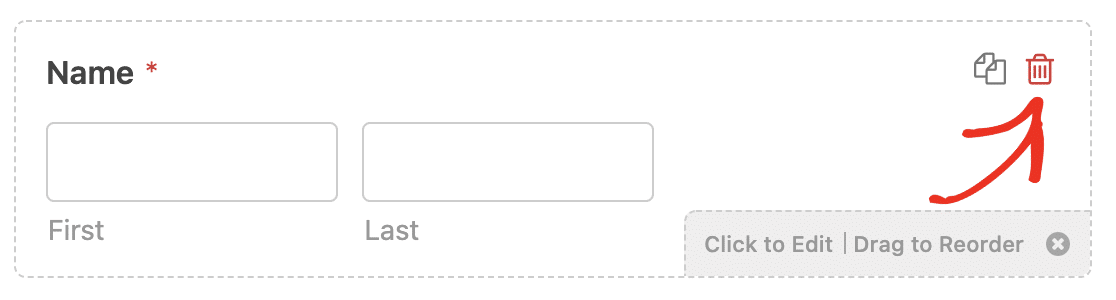
You can add or remove additional form fields by dragging and dropping from the left panel.

You may also delete any unwanted fields from the template by selecting the trash can symbol. It is entirely customizable.
Keeping in mind that, this is a booking form we are creating, you have to set up your date and time to show when you are available.

Step 3: Customize your Booking Form Settings
When developing a customer booking form in WordPress, there are various settings to configure. We'll begin with the General settings.
Go to Settings > General
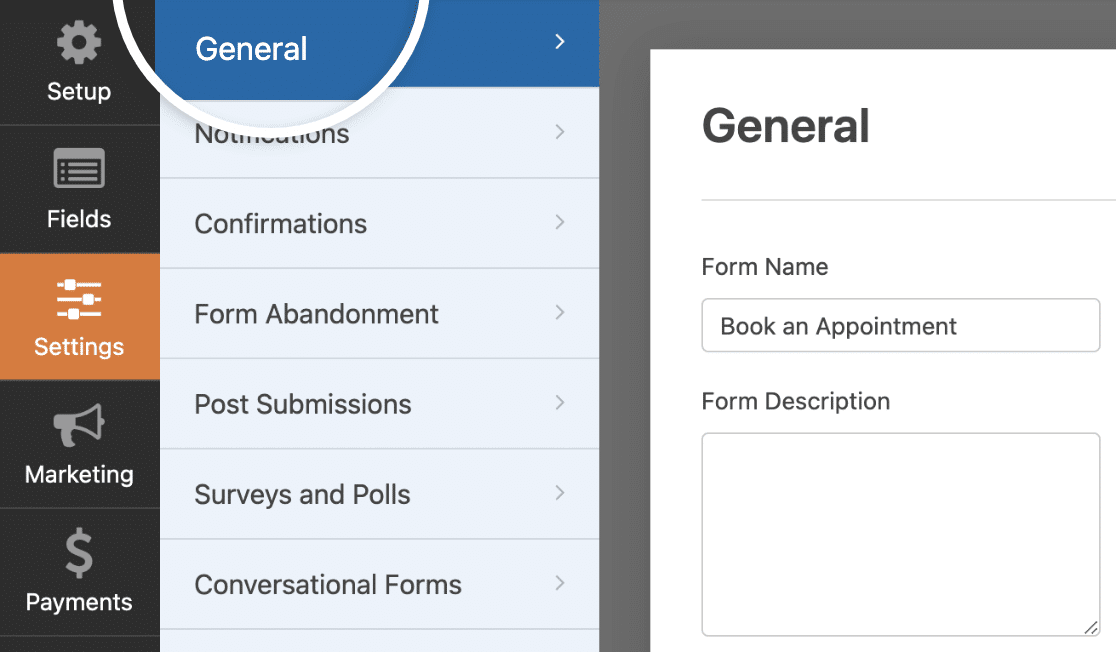
Here, you can configure settings such as; Form name, form description, submission text, tags, and many more.
Once you finish setting up all of these options, move down to the Spam Protection and Security settings.
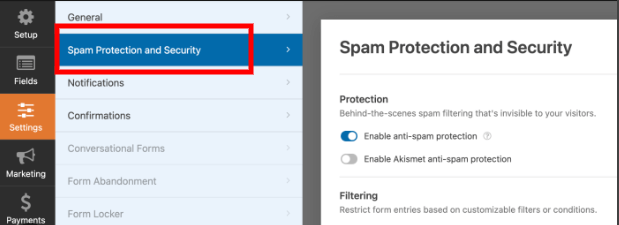
Below are some of the things you can do when you arrive at this section:
- Enable anti-spam protection — Use the WPForms anti-spam token to prevent contact form spam. On all new forms, the anti-spam setting is enabled by default.
- Enable the country filter to prevent submissions from specific countries.
- Enable Akismet anti-spam protection – If you use the Akismet plugin, you can integrate it with your form to prevent spam submissions.
- Enable keyword filtering – Prevent entries that contain specific words or phrases.
Step 4: Customize your Notification Settings
Notifications are a terrific method to send an email whenever a client uses your WordPress form to make an appointment. This simplifies the client booking process because you may contact them immediately away.
To customize this option, go to Settings > Notification.
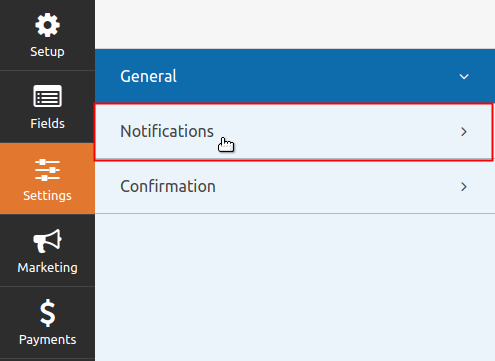
Once the notification settings are properly set up, when someone completes the booking process on your site, you will be notified via your WordPress booking plugin.
Step 5: Configure Your Appointment Booking Form’s Confirmations
Form confirmations are notifications that appear on your website when a visitor submits an appointment booking form. They notify people that their appointment request has been received and provide you the opportunity to inform them of the next steps.
WPForms offers three methods of confirmation:
- Message: WPForms' default confirmation type is this. When a site visitor sets an appointment, they will receive a brief message confirming that it was received. Look here for some terrific success messages to assist increase customer satisfaction.
- Show Page: This confirmation type will direct site visitors to a specific web page on your site where they will be thanked for scheduling an appointment. Check out our tutorial on sending consumers to a Thank You page for assistance. Also, be sure to read our post on developing effective Thank You pages to increase client loyalty.
- Go to URL (Redirect): This feature is used to redirect site users to another website.
To set up confirmations, go to Settings > Confirmations
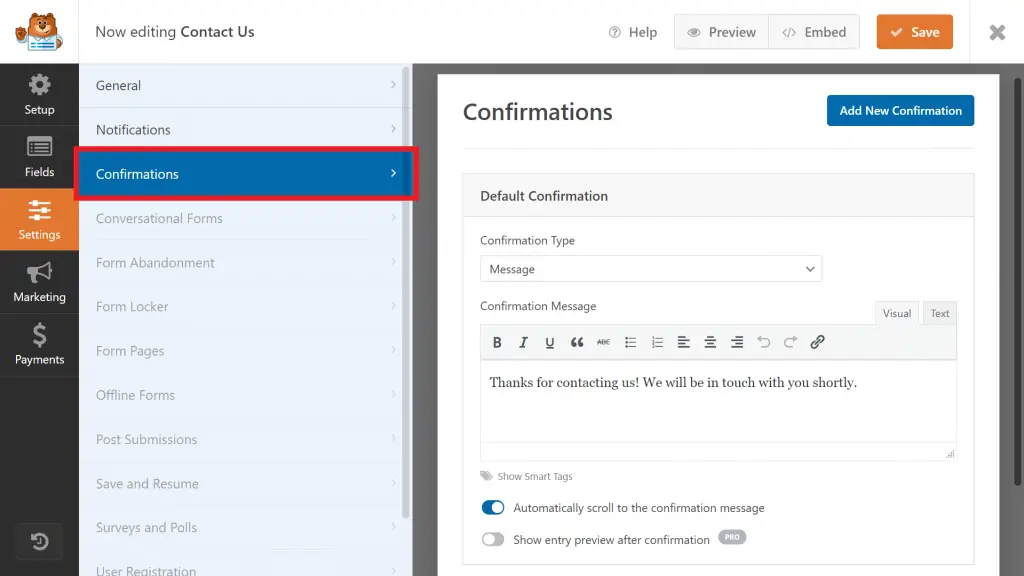
Then, choose the sort of confirmation type you want to make. In this case, we'll go with Message.
Then, when you're finished, modify the confirmation message to your satisfaction and click Save.
Step 6: Add Your Appointment Booking Form to Your Website
After you’ve created your client booking form, you need to add it to your WordPress website.
With WPForms, you have the possibility to add it anywhere on your site, including the sidebar widgets, blog posts, and your normal pages, of course.
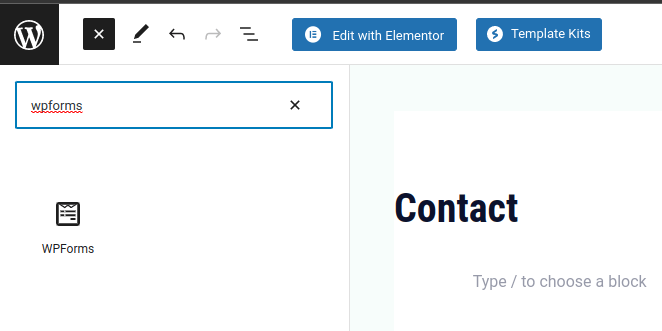
To add WPForms to your site, you can either choose the Embed option or create a new page or edit an existing page to add the form.
i) Using the Embed Option:
click on the Embed button at the top of the form builder.

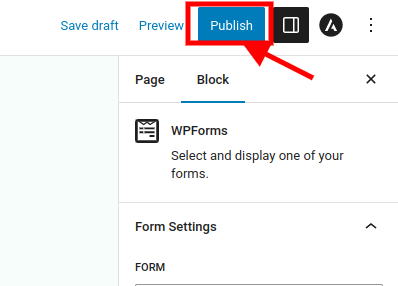
Then you can choose whether to add your form to an existing page or to build a new one. To make your form live, simply click Update or Publish in the page editor.

ii) Using the "Create New Page" or Edit Page Option
Save all your WPForm settings and head back to your WordPress dashboard.
Now, go to Pages > Add New or click on All pages to edit an existing page.
Once inside, chose a section where you wish to add the form and click on the '+' sign at the top-left of your screen to add the WPForms widget.
Once the form widget is selected, you will see a list of forms that will appear on your main screen.
Select the form by name, which you want to display on the page.
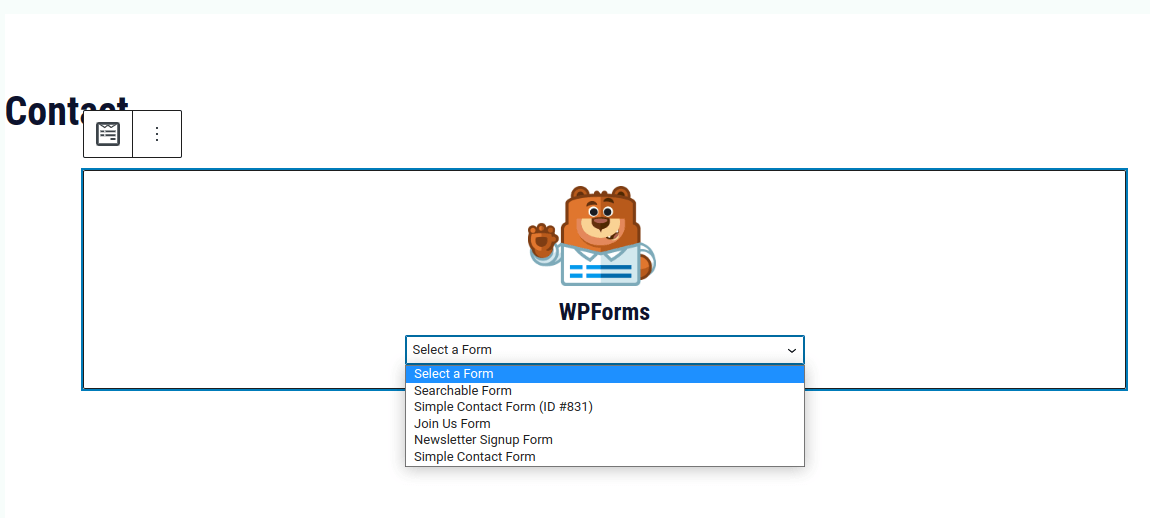
Once done, publish or update your page by clicking on the Publish or Update button at the top-right corner of the page.
Conclusion
You’ve made it to the end of this blog post. Congratulations!
You’ve just learned how to create a booking form in WordPress using WPForms with 6 easy steps. You’ve also discovered how WP Forms can make your life easier and your clients happier. You’ve taken a big step towards becoming a better WordPress developer.
But I know you might still have some doubts. You might be thinking, “Is this really that easy? Will this really work for me? What if I mess up something?” I understand how you feel. Creating a booking form in WordPress can be scary and overwhelming. But trust me, you can do this. You have the skills, the knowledge, and the tools to create a booking form that suits your needs and goals.
So don’t let fear stop you. Don’t let doubt hold you back. Don’t let perfectionism paralyze you. Just go ahead and try it out. Experiment, tweak, and test your booking form until you’re satisfied with the results. We’re here to help you succeed.
You have nothing to lose and everything to gain by creating a booking form in WordPress. You’ll save time, money, and hassle. You’ll impress your clients and boost your reputation. You’ll grow your business and your income. You’ll achieve your dreams and goals.
Happy WordPressing!


