
Are you weary of your WordPress website having the same old look? Do you want to develop a visually appealing and current design that will leave your visitors with a lasting impression? So look no further! We will go into the exciting realm of transitioning from a container-based layout to a column-based layout in WordPress in this complete guide.
What is Container and Column Design?
Container and column design are two web design elements that influence how your website's information is displayed. A container is a content block that holds several elements such as text, images, buttons, and so on. A column, on the other hand, is a sort of layout that allows for the placement of content side by side.
While containers are useful for handling several elements in a single region of your website, column design allows for even more flexibility and personalization. You may, for example, design alternative layouts for different screen sizes, change the space and orientation of your content, and add custom sidebars to your pages.
Converting from container to column can be useful in the following situations:
Create Amazing Websites
With the best free page builder Elementor
Start Now- You want to build a more streamlined and structured content layout.
- You want to increase the responsiveness and adaptation of your website to various devices
- You want to improve the speed and performance of your website.
Why Switch to Column-Based In WordPress
Columns provide an appealing approach to setting up and presenting your material. They enable you to construct visually appealing pieces that sit side by side, each with its own distinct content. Columns give a visually appealing and orderly framework for displaying your current blog entries, displaying product highlights, or presenting your portfolio.
As a site owner, it is critical to stay current with design trends and deliver an interesting user experience. While useful, the classic container layout might feel outdated and lack visual appeal at times. You may unlock a whole new level of creativity and design flexibility by switching to a column-based structure.
We will guide you through each step of the process in this article, ensuring it's simple for you to change your website from a container style to a column layout.
How to Convert From Container to Column in WordPress
Changing from a container to a column WordPress is a seven-step process that can be accomplished in a matter of minutes. However, before you begin the conversion process, you must complete several pre-conversion activities to ensure a smooth transfer.
Pre-Conversion Procedures
Before converting your WordPress website from container to column, there are some measures you must do to guarantee the process goes smoothly and without affecting the usability and operation of your website.
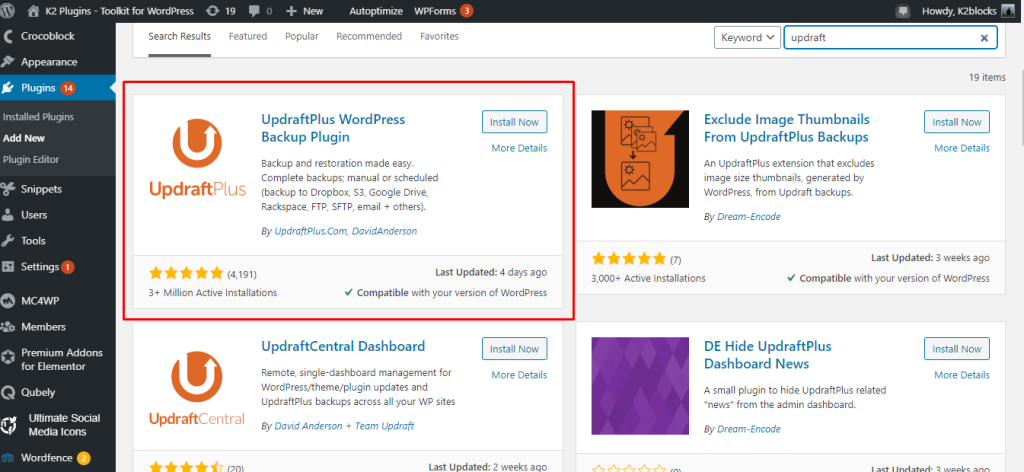
Make a backup of your website. Backing up your website ensures that if something goes wrong, you can immediately restore it to an earlier version. You may back up your website using a plugin such as UpdraftPlus.
Before making any modifications to your website, select a new theme and test it. The new theme should support column design as well as the creation of custom sidebars. Popular themes that provide this functionality to users include Elementor, Divi, and Beaver Builder.
Turn off any superfluous plugins to improve website efficiency and speed. Plugins can cause your website to slow down and cause issues with your new theme. You can detect and disable unnecessary plugins by using a plugin such as Plugin Organizer or Plugin Performance Profiler.
Make a staging environment to test the new changes before releasing them to the public. A staging environment is a duplicate of your website that can be used for testing without affecting the actual site. You can use a plugin like WP Staging, Duplicator, and Updraftplus to create a staging environment for your website.
The main 7 steps for our conversion are as follows:
Step 1: Choose a Column-based Theme or Page Builder
There are various free and premium theme options that include column functionality. There are some popular options that you can choose from, which include; Elementor, Divi, Beaver Builder, and WP Bakery.
Step 2: Install and Activate your Chosen Theme or Page Builder
Install and activate your chosen theme or page builder on your WordPress website. If you're using a page builder, you may need to install a different plugin. To ensure a successful installation, follow the instructions supplied by the theme or page builder provider.
To install Elementor, go to Plugin > Add New and search for the plugin by typing in the name.

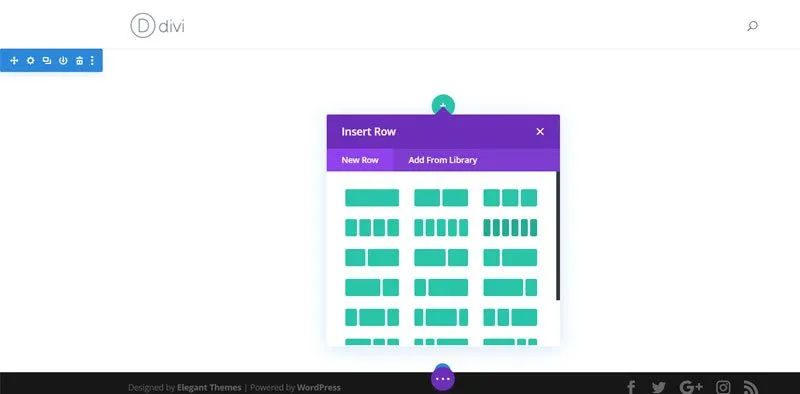
To install Divi, you need to go to their official site and purchase the plugin, then come to your dashboard and upload.
Step 3: Create a New Page or Edit an Existing One
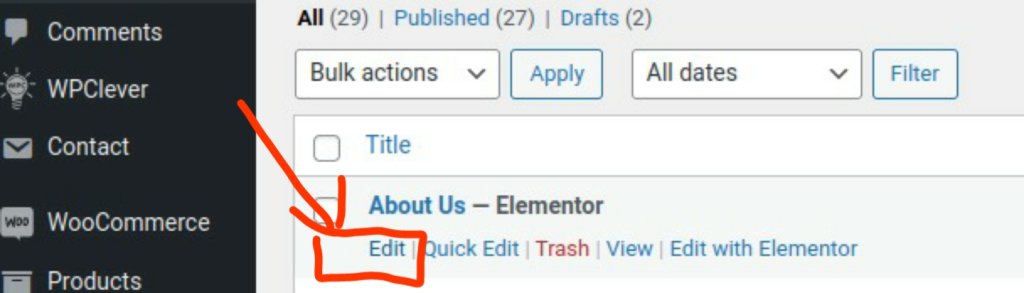
Navigate to the page you wish to change your layout to columns. Make a new page if you're beginning from scratch. To convert an existing page, navigate to it in your WordPress dashboard to Pages > All Pages.
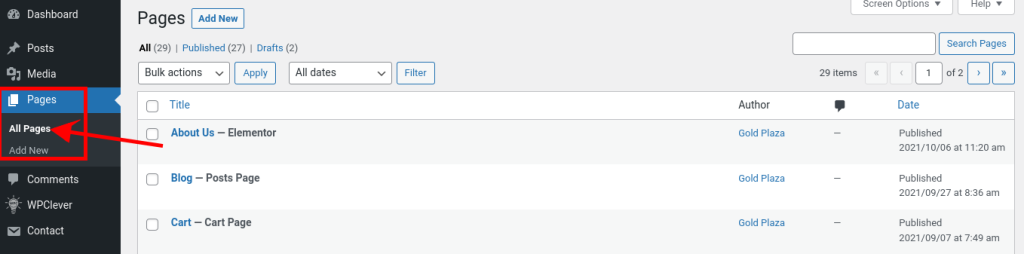
To edit a particular page, hover on the page name you see on the scree and click the "Edit" button.
Step 4: Access the Column Layout Options
The method for obtaining column layout choices may differ depending on the theme or page builder you're using. These options are typically found in the page builder interface or within the page editor. Search for buttons or settings that let you add columns.
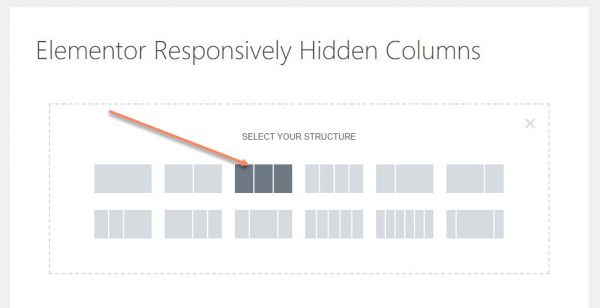
Step 5: Add and Configure Columns
After you've accessed the column layout choices, you can add and configure columns as needed. Column items may often be dragged and dropped onto your website and adjusted in width and location. Some page builders provide pre-designed column layouts from which you may choose and alter.
Step 6: Customize Column Content
Now, it's time to fill them with content. Within each column, you can put text, images, videos, or any other items you wish. Use the page builder's capabilities and options to customize the material within each column individually.
Step 7: Preview and Publish
Take time to preview your changes after you've completed modifying your column layout and content. Check that everything appears as expected and that your columns are properly displayed. Save your edits and publish the page when you're finished.
Congratulations! Your WordPress website has been successfully transformed from a container layout to a column layout. Your website will now have a current and aesthetically appealing design that is sure to catch the attention of your visitors.
Remember to test your website on a variety of devices and screen sizes to ensure responsiveness and the best viewing experience possible. Making necessary changes will assist you in achieving the ideal layout and responsiveness for all users.
Conclusion
Changing from a container to a column WordPress is an excellent tool for improving the design, responsiveness, and optimization of your website. You may easily make the conversion process seamless and painless by following the seven steps suggested in this blog post. We hope you find this tutorial to be beneficial and instructive. Please leave a remark below if you have any queries or feedback.


