
On WordPress, it is not always easy to integrate an email sending system. The cause could be that many web hosts don’t support that functionality or offer email capabilities at all. To get around this issue, you have to rely on third-party transactional email providers such as SendGrid.

This platform powers email for some of the biggest companies in the world. That means it can make short work of your WordPress website’s registration and password reset emails. In this article, we’ll show you exactly how to set SendGrid up to work with your site in three short steps.
Let’s dive in!
What is SendGrid?
SendGrid (now owned by Twilio) is used by some of the biggest names in the industry such as Uber, Spotify, Yelp, Airbnb, etc. Originally, it was an SMTP and transactional messaging API designed for developers. However, they now also offer email marketing functions. So you can use them for one or the other or for both. Today we're going to focus on the transactional side of things because that's probably what most of you are trying to set up and make work.
Create Amazing Websites
With the best free page builder Elementor
Start Now
SendGrid has a free 30-day trial period during which you can send up to 40,000 emails. After that, you can continue the free trial forever and send up to 100 emails per day.
If you need more emails than that, their Essentials plan starts at $ 14.95 / month and you can send up to 40,000 emails per month. The cost per additional email is $ 0.001. But you can also upgrade to save more money.
Some additional benefits include:
- Ability to use Web API or SMTP to send emails. The web API is faster and includes functionality to manage user unsubscriptions, manage IP addresses, create email templates, and more.
- Improve deliverability rates to reach users' inboxes with domain and link customization, whether from shared IP pools or a dedicated IP.
- Eliminate identity theft and domain name phishing with the creation of custom SPF and DKIM records.
- Benefit from a continuous mail flow through our secure, distributed, and redundant data centers.
- Live and searchable logs.
How to Send Email Using SendGrid with WordPress (In 3 Steps)
To follow this tutorial, you’ll need two things: access to a WordPress website and a SendGrid account. For the latter, you can take advantage of the free plan to test the service. Once you have both prerequisites, move on to Step 1.
Step 1: Find Your SendGrid API Key
Once you set up your SendGrid account, you’ll gain access to your user dashboard. Here, you can review which applications you’ve authorized to work with SendGrid.
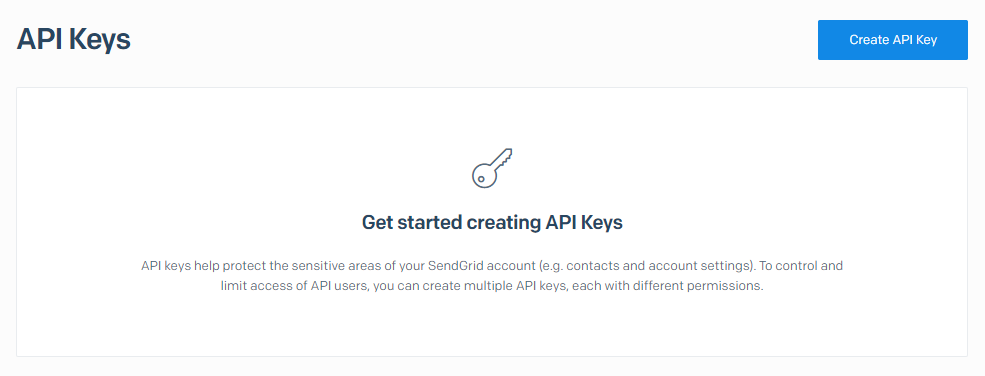
Right now, that list should be empty. To fix that, go to Settings > API Keys and click on the Create API Key button:
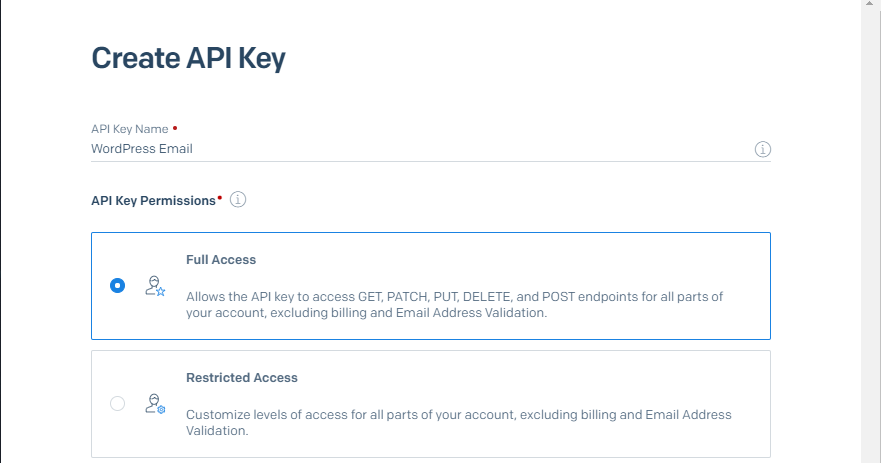
On the next page, you can set a name for the API key for internal identification purposes. The service will ask what level of permissions you want the key to give access to. We recommend the Full Access option:
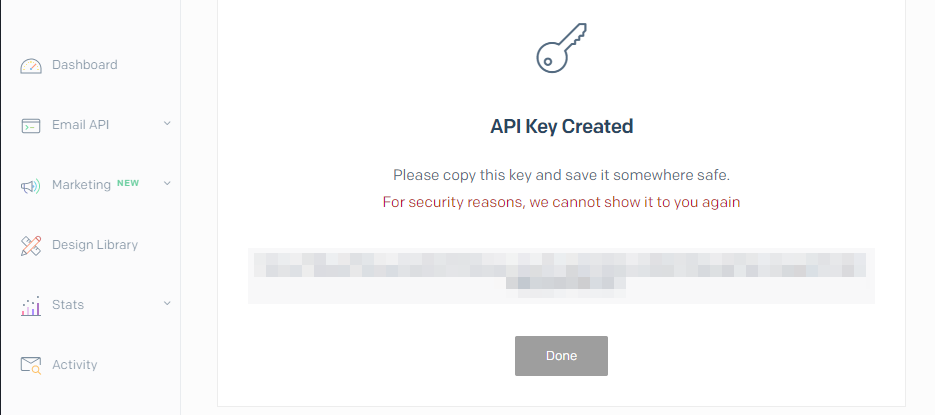
Now click on Create and View and you’ll gain access to your API key right away. Keep in mind that you only get to see the full key once for security reasons, so make sure you store it safely:
You’re going to need that key in a moment, so hold on to it.
Step 2: Connect SendGrid With WordPress
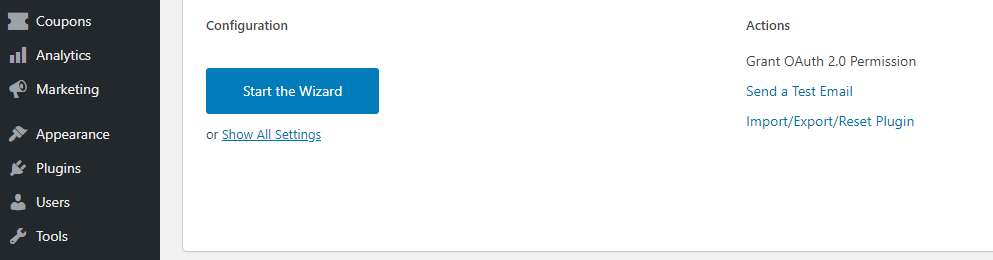
The easiest way to integrate WordPress with SendGrid is by using a plugin. SendGrid offers an official tool you can use for this, but it doesn’t receive regular updates.
Instead, we’re going to use the Post SMTP plugin, which you can connect to SendGrid using the API key you generated a minute ago:
Install and activate the plugin, then navigate to the Post SMTP tab on your dashboard. You’ll see an option to use the plugin’s configuration wizard – click on the blue button to launch it:
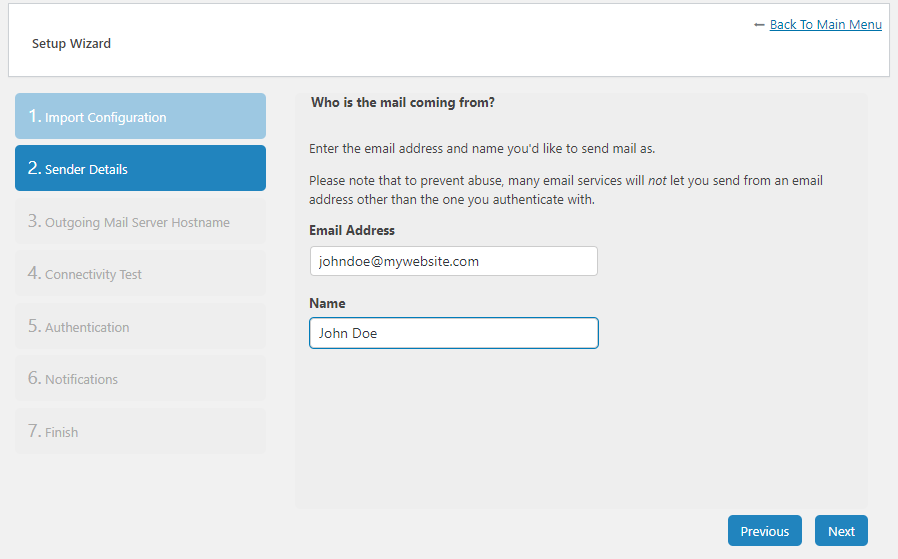
First up, the plugin will ask you to enter the sender’s email. By default, it’ll use your administrator email, which should work just fine:
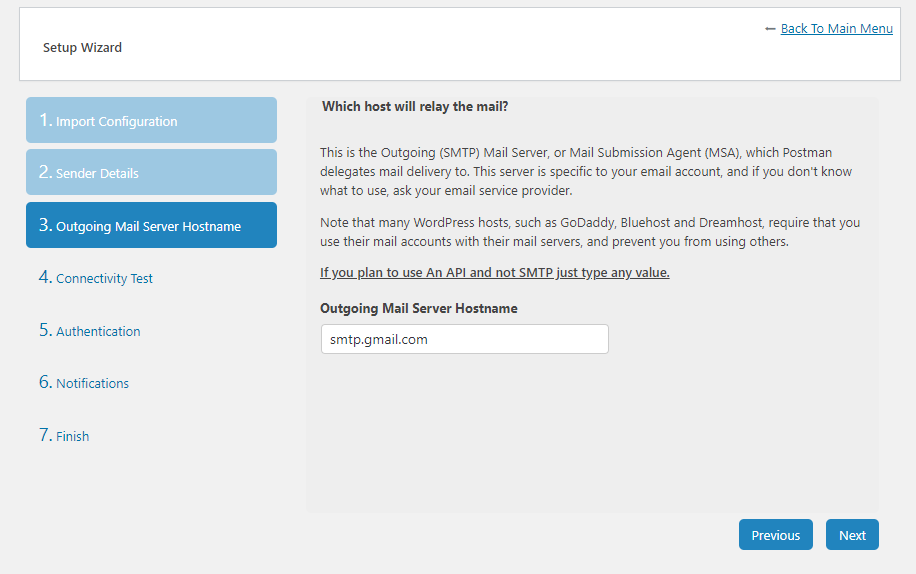
Next up, you’ll need to set up your outgoing mail server hostname. Since we’re using SendGrid’s API instead of SMTP, you can leave the default value in or enter any random string:
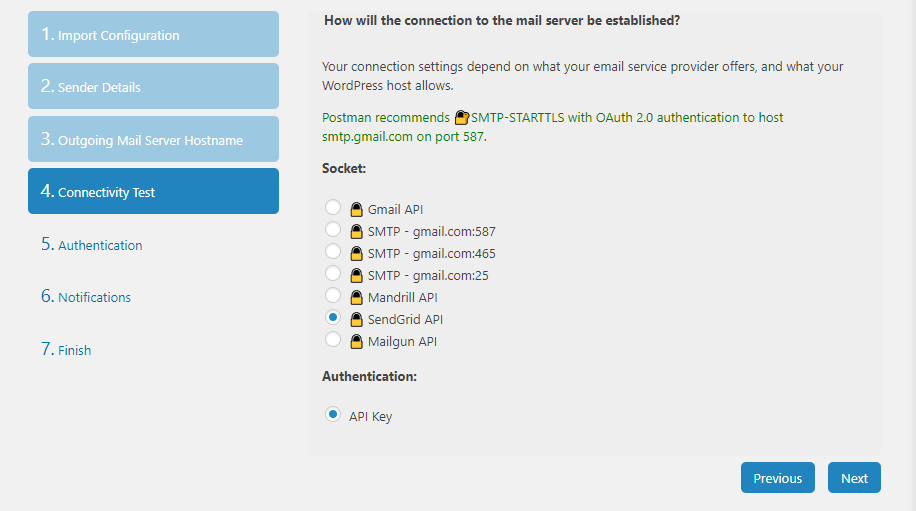
Now Post SMTP will run a connectivity test for several popular email service providers, including SendGrid. Once the plugin lets you make a choice, select the SendGrid API option under Socket:
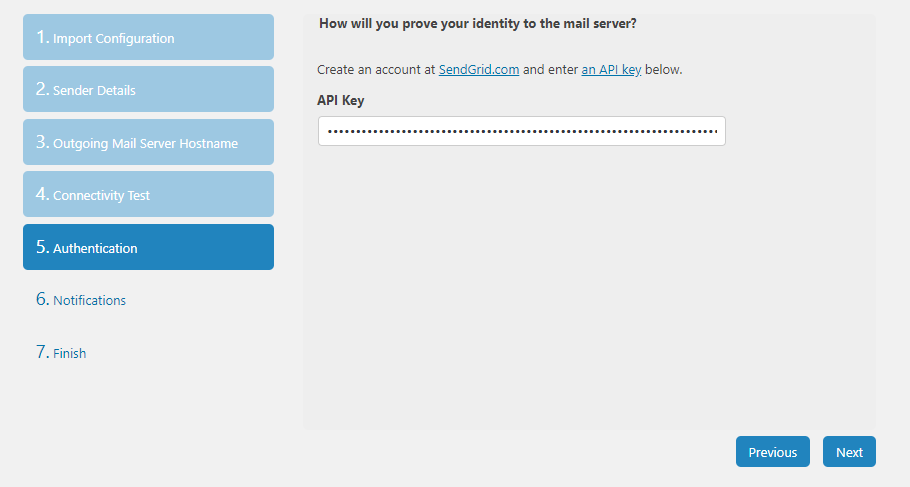
Finally, go ahead and paste the API key you generated during Step 1:
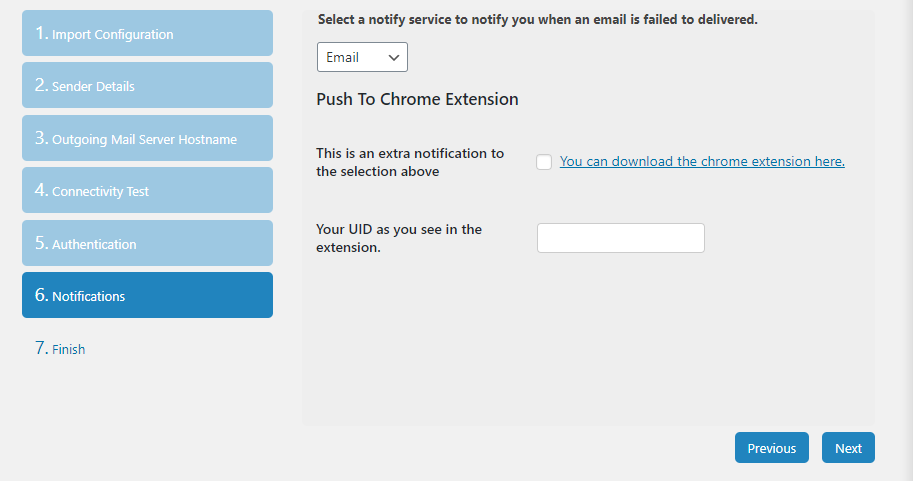
Before you wrap things up, the plugin will ask you what to do in case SendGrid fails to deliver an email. By default, it’ll notify you of that failure via email, but you can also configure it to use Chrome notifications.
Post SMTP includes an Email testing feature you can use to check if your mailing provider is working properly. However, before you do so, let’s return to the SendGrid dashboard and verify your domain.
Step 3: Authenticate Your WordPress Website’s Domain
As a rule of thumb, it’s recommended you authenticate your domain through whatever email provider you’re using. That way, your transactional emails are much less likely to end up in recipients’ spam folders.
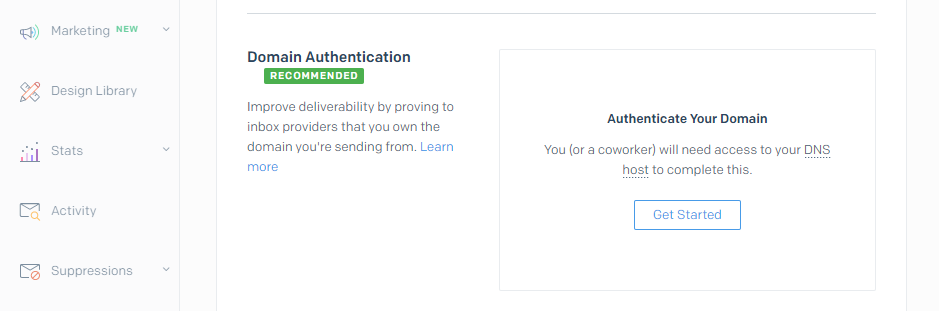
To do this in SendGrid, go to your account dashboard and jump to the Settings > Sender Authentication tab. Here, you’ll see an option that says Domain Authentication and next to it a button that reads Get Started – click on it:
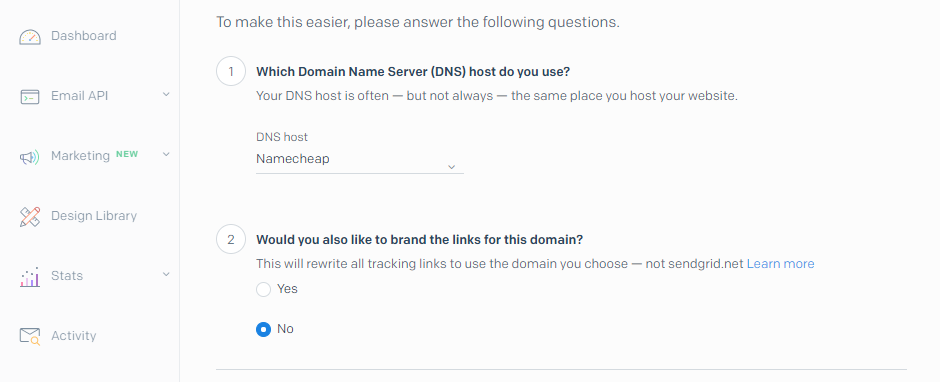
The first thing SendGrid will ask is what Domain Name Server (DNS) your domain uses. That can be either a domain registrar or your web host, depending on where you registered your domain (and if you’ve transferred it):
If your web host or registrar doesn’t appear on that list, select the Other Host (Not Listed) option.
Next up, you can choose whether to use your domain for tracking links as well. Since that doesn’t have an impact on your email’s deliverability or presentation, select whichever option you prefer.
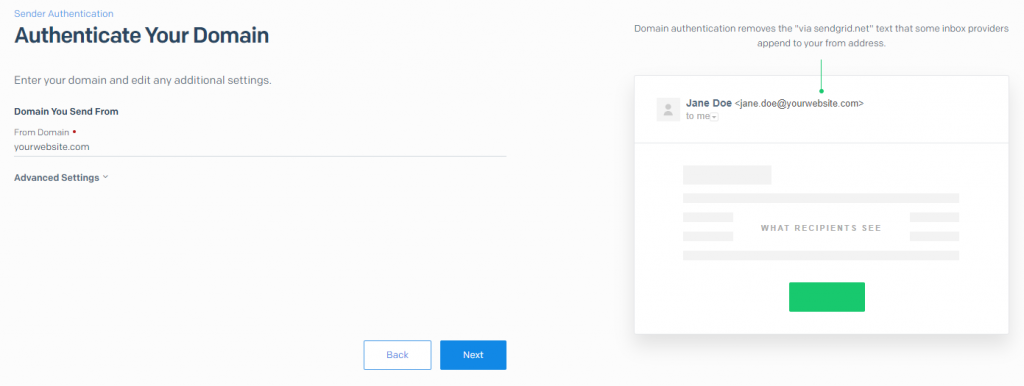
On the next page, you’ll need to enter the domain of your WordPress website:
At this stage, SendGrid will show you a set of DNS records you need to add via your registrar or web host:
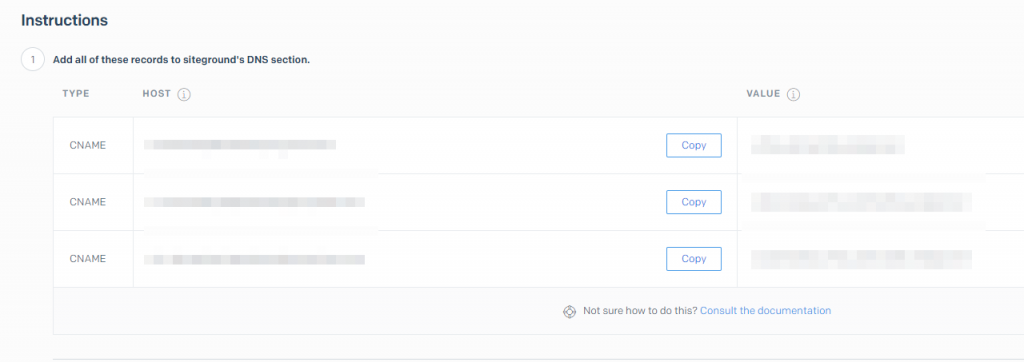
You may need to check your host’s knowledge base or contact support for help with this.
Once you add those records, you can click on the Verify button in your SendGrid dashboard. If everything is working correctly, you’ll see a success message. Now you can sit back and let SendGrid take care of your WordPress emails.
Conclusion
To summarize our article, setting up SendGrid to work with WordPress is easy and only takes three steps:
- Find your SendGrid API key.
- Connect SendGrid with WordPress using Post SMTP.
- Authenticate your WordPress website’s domain through SendGrid.
If you've liked this post, don't hesitate to share it on social networks or to follow us on Twitter and Facebook.


