If you are operating a WordPress website, it is crucial to ensure the security of your database. One effective measure to accomplish this is modifying the default table prefix. In the subsequent discourse, we will elucidate the process of altering the WordPress table prefix, encompassing a few simple steps.

Modifying the WordPress table prefix is a relatively straightforward procedure, albeit demanding careful adherence to the provided instructions to avoid any potential errors.
However, before delving into the detailed breakdown of this process, let us first establish the definition of the WordPress table prefix and present some key considerations to contemplate before undertaking this modification. Subsequently, we will explore three distinct approaches through which you can personally execute the alteration of the WordPress table prefix.
Why Change the WordPress Table Prefix?
The WordPress table prefix serves as the distinctive identifier for every table within your WordPress database. By default, the table prefix is configured as wp_.
Create Amazing Websites
With the best free page builder Elementor
Start NowNonetheless, this preconfigured setting exposes your site to potential attacks, as malicious individuals are aware of the prefix and can readily exploit it. Consequently, if safeguarding your WordPress site is of utmost importance, it is imperative to modify the default table prefix.
When Should You Change the WordPress Table Prefix?
Modifying the WordPress table prefix is permissible at any given moment; nonetheless, it is generally advisable to execute this task during the initial WordPress installation. By doing so, concerns regarding altering the prefix for an already established website are alleviated.
For individuals embarking on their first WordPress installation, the procedure is straightforward. Merely adhere to the provided instructions and input a fresh table prefix when prompted.
However, should you endeavor to modify the WordPress table prefix for an existing site, further measures need to be undertaken. These additional steps shall be addressed in subsequent sections of this post.
Things To Consider Before Changing WordPress Table Prefix
Prior to modifying the table prefix in WordPress, there are several essential considerations that should be taken into account.
First and foremost, it is crucial to create a backup of your WordPress database. By doing so, in the event of any issues or complications during the process, you will be able to swiftly restore your website to its previous state.
Secondly, it is important to acknowledge that altering the WordPress table prefix will render any currently active plugins or themes dysfunctional. This is because they are all stored in the database under the existing table prefix.
Consequently, if you opt to proceed with changing the WordPress table prefix, it will be necessary to deactivate and subsequently reactivate all existing plugins and themes. The subsequent steps for performing this action will be discussed later in this article.
Thirdly, it is imperative to note that modifying the prefix will not provide a comprehensive solution to thwarting hackers who are already capable of exploiting your site through SQL injections. Nevertheless, it will effectively prevent automated bot attacks, which constitute the majority of hacking attempts.
Furthermore, it is crucial to ensure that the prefix specified in your wp-config.php file matches the one employed in your actual database, and that every table utilizes the same prefix. Failure to maintain consistency in this regard will result in the breakage of your website. Given the potential for inadvertently causing damage, it is advisable to refrain from making such modifications unless you possess a clear understanding of the process.
Lastly, it is worth mentioning that if you frequently engage in database operations, the queries you come across online are typically formulated using the default prefix. Consequently, altering the prefix can introduce inconveniences in such scenarios.
Now that we have covered the fundamental aspects, let us proceed to explore the process of changing the WordPress table prefix.
Change WordPress Table Prefix
Method 1 - Manually
The initial technique we shall explore entails utilizing FTP to directly modify the wp-config.php file in Kinsta. We advocate employing MyKinsta as the preferred approach for this undertaking. The following steps outline the procedure:
Upon successful login, navigate to the left sidebar and select "Sites," followed by choosing the specific site for which you intend to modify the WordPress prefix. Proceed to click on "Info." Scroll down to locate the section labeled "SFTP/SSH" and meticulously copy the pertinent information, including the Host, Username, Password, and Port.
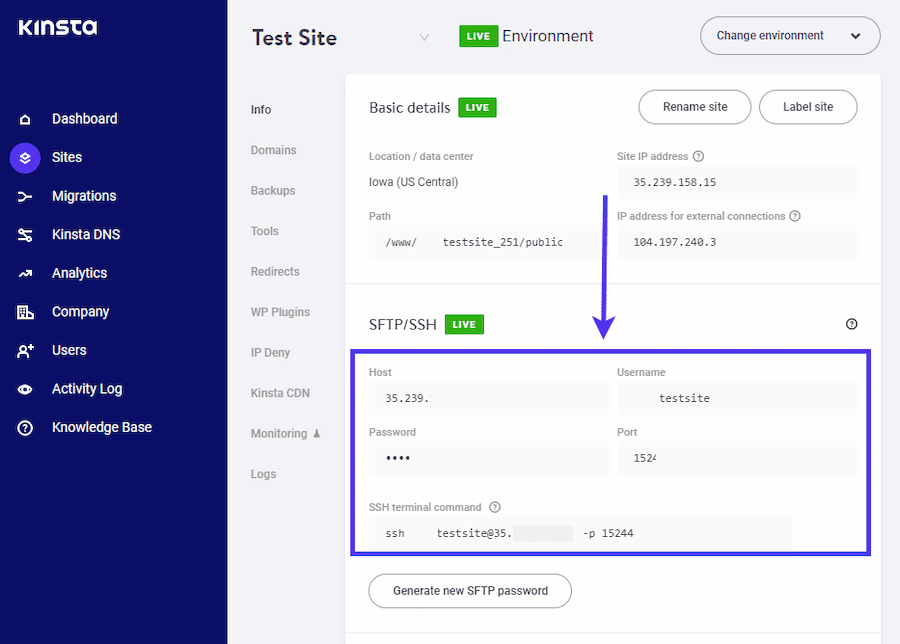
Presently, it is necessary for you to utilize this information in order to initiate a login session within an FTP client. Our suggestion is to employ FileZilla for this purpose. After installing the aforementioned software, proceed to launch the application and input the pertinent details from MyKinsta into the designated fields designated for Host, Username, Password, and Port. Subsequently, click on the "Quickconnect" option.
Alternatively, an alternative approach involves the convenient completion of steps one and two through the utilization of cPanel. To execute this method, access your hosting account by logging in, navigating to the cPanel interface, and proceeding to access the File Manager functionality.
Once you've logged in, you'll find a list of files on the right side. Look for the wp-config.php file and save it to your computer by right-clicking on it and choosing the "Download" option from the menu.
To start, open the wp-config.php file using a text editor such as Sublime Text.
$table_prefix = ‘wp_’;Look for the line that contains the"wp_" and replace it with the new prefix you prefer. Remember to save the file after you've made the change.

Now, open FileZilla and locate the wp-config.php file on your computer. Use your mouse to right-click on it, and then choose the "Upload" option from the menu.
The next thing you need to do is change the beginning part of the names for all the tables in your WordPress database. The tables that come with WordPress by default have names like:
- wp_commentmeta
- wp_comments
- wp_links
- wp_options
- wp_postmeta
- wp_posts
- wp_terms
- wp_term_relationships
- wp_term_taxonomy
You should also be careful with any additional tables created by plugins that are not part of the default list.
To change the beginning part of the table names, you have to access your database. You can do this by using phpMyAdmin in cPanel. Alternatively, if you're using MyKinsta, you can also access the database directly. Here's how: log in to your account, go to Sites > Your Site > Info, and click on the link that says Open phpMyAdmin.
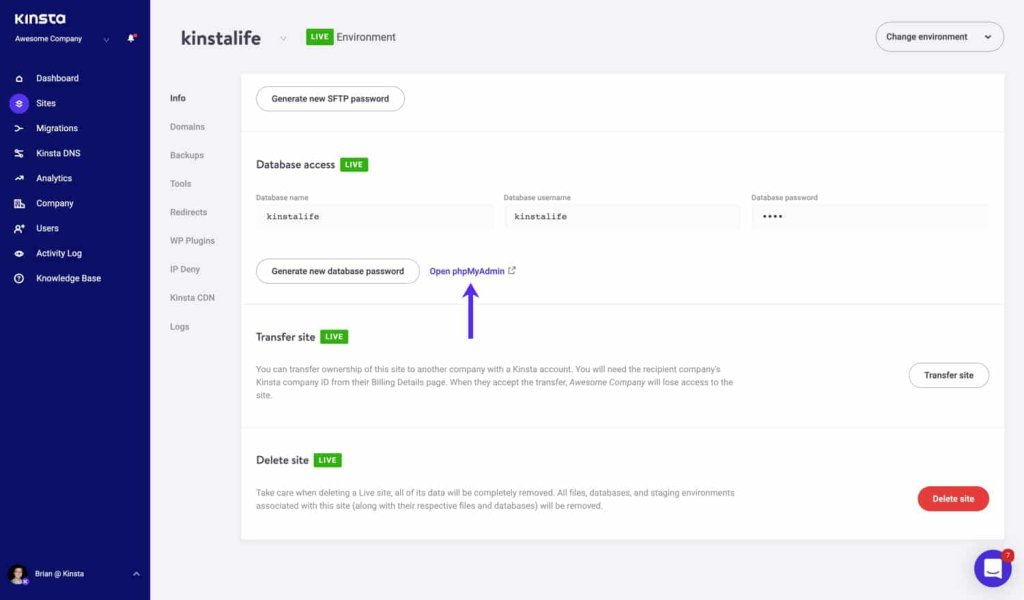
To make it simpler, here's how you can do it: First, find the name of the database on the left side of the screen and click on it. Next, go to the top of the page and click on the tab labeled "SQL." Once you're there, you'll see a text box. Just type in the query you want to enter.
RENAME table wp_xxxx TO newprefix_xxxx;Replace "new prefix" with the actual prefix, you want to use. For example, if you want to change the prefix for the wp_comments table, it would become "newprefix_comments" after you make the change.
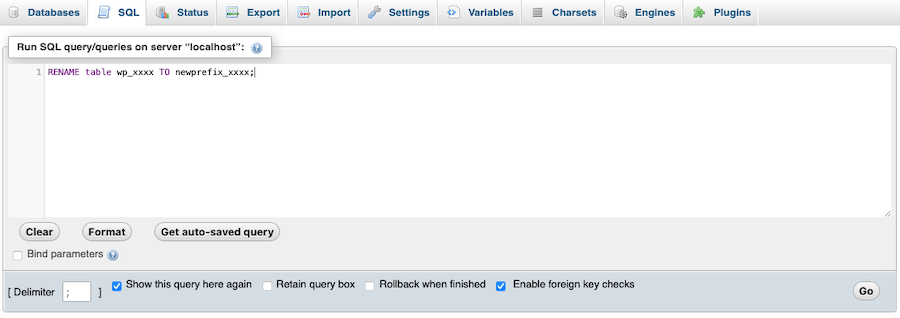
After that, click the Go button.
Do the same thing for all the WordPress tables in your database, changing "wp_" to your new prefix.
Make sure you also search the options and usermeta tables for the old prefix to make sure you've updated everything correctly.
Method 2 - Using A Plugin
If you don't feel confident working with code or directly accessing your database, there's another way to change the WordPress prefix. You can use a plugin called Brozzme DB Prefix & Tools Addons. It's easy to use and we recommend it for this task.

To get started, follow these steps:
Install and activate the plugin. You can do this within your WordPress admin area.
- Go to Plugins > Add New.
- Search for "Brozzme DB Prefix & Tools Addons."
- Click on "Install Now" and then "Activate."
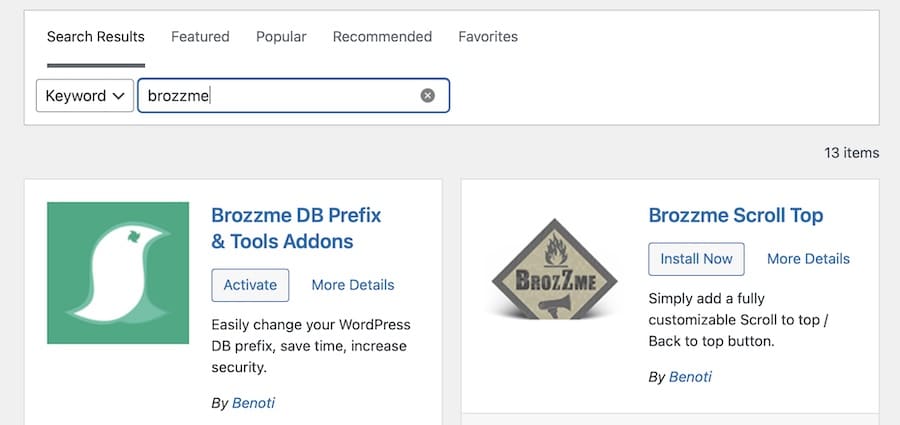
That's it! Now you're ready to use the plugin.
Once you activate the plugin, you can change the WordPress database prefix. Simply go to Tools > DB Prefix.
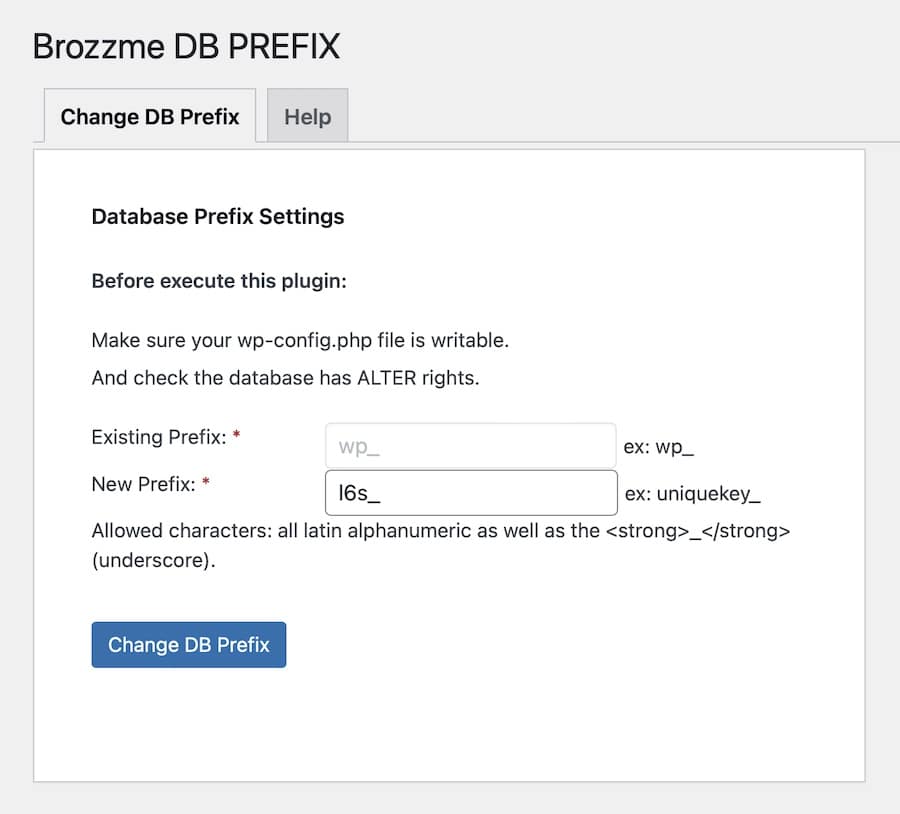
On that page, you'll find a field called "New Prefix." Enter your desired new prefix there. Then, click the "Change DB Prefix" button.
The plugin will then update all your WordPress tables with the new prefix.
After the plugin finishes updating your database, you should test your WordPress site to ensure it still works properly. Just open your web browser and go to your live site. If everything appears normal, the update was successful.
Method 3 - Using Adminer
If you don't want to use a plugin, you can still change the WordPress database prefix using a tool called Adminer. Adminer is a simple PHP script that helps you manage your databases.
To start using Adminer, you need to download the latest version from the official website. Once you have it, upload the PHP file to your website's main folder using an FTP tool like FileZilla, as we've explained before.
After uploading Adminer, you can access it directly through your web browser. The current version is 4.8.1, so if you placed the file in your website's main folder, you can go here to access it.
Once you're there, you can log in and access any database on your server. However, in this case, we only want to change the WordPress database prefix, so you can ignore all the other databases.
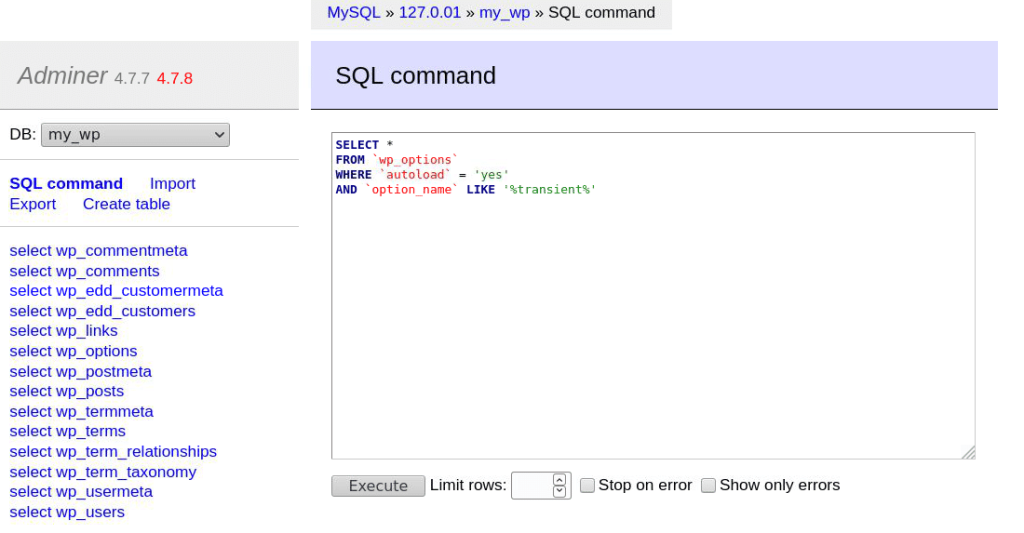
Go to this page and find your WordPress database on the left side. Then click on the tab called SQL Command at the top of the page.
In the empty box, type in the following query:
RENAME table wp_xxxx TO newprefix_xxxx;Make sure to replace "new prefix" with the actual prefix, you want to use. For example, if you want to change the database prefix for "wp_usermeta" it should be "newprefix_usermeta" after the change.
Click the "Execute" button.
Repeat these steps for all the WordPress tables in your database. Change "wp_" to the new prefix, you prefer.
Once you've changed the beginning part of all the tables in your WordPress database, you should check if your website is working correctly. Just open your WordPress site in a web browser and see if it loads without any problems. If everything looks good, you're finished!
Great job! You've successfully altered the WordPress database prefix and made the necessary updates to your site.
Wrapping Up
Changing the database prefix in WordPress can make your site more secure. Normally, the database prefix is set as "wp_", but you can easily choose a different one.
We've discussed three ways to change the WordPress database prefix: editing the wp-config.php file, using a plugin, or using Adminer.
We hope this article has taught you how to confidently change the database prefix in WordPress.


