
WordPress is a popular website and blog creation tool. WordPress includes the option to alter the appearance of your site, including the color of your links. Links are essential components of every web page since they assist users in navigating and finding relevant information. However, you may wish to modify the default link color to reflect your theme, brand, or personal style on occasion.

Change Link Color in WordPress
In this blog post, we'll teach you how to alter the color of a link in WordPress using two methods: the Customizer and CSS code. Both ways are simple and effective, and you can select the one that best meets your goals and abilities.
1. Using the Customizer
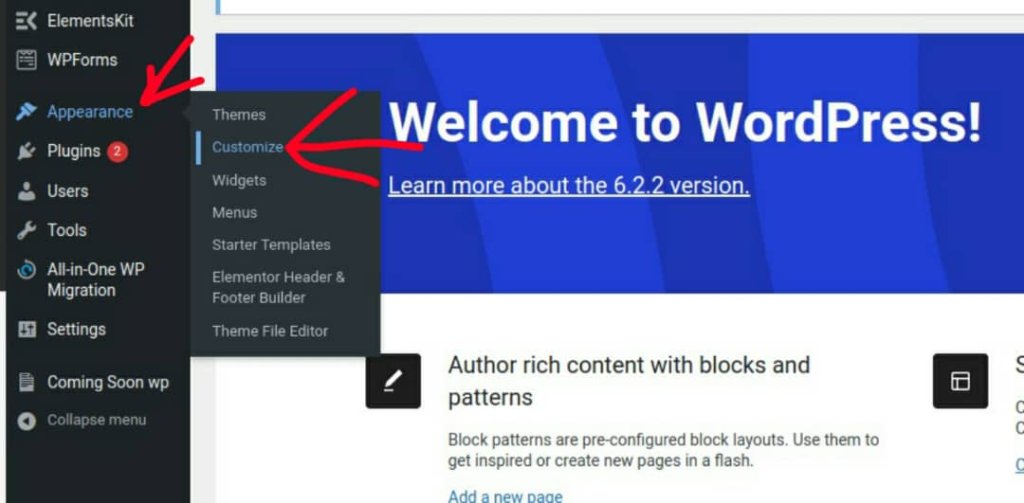
The Customizer is a tool for previewing and modifying many features of your WordPress site, such as colors, fonts, menus, widgets, and more. Go to your WordPress dashboard and go to Appearance > Customize to view the Customizer.
Once you are in the Customizer menu that appears on the left of the screen, you will see the Global option.
Create Amazing Websites
With the best free page builder Elementor
Start Now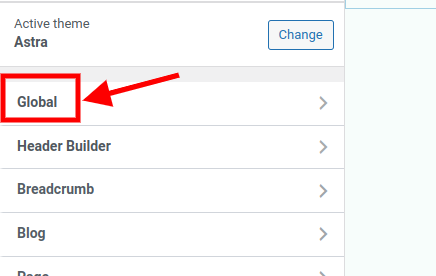
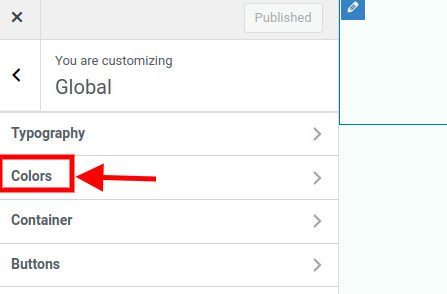
Once you are in the Global settings, click on "Colors".
When you click on Colors or Color Scheme, you will be presented with a range of options for changing the colors of various elements on your site, such as the background, header, footer, text, and links. To alter the color of the link, look for the Link Color or Link Text Color option and click on it.

You will see a color picker where you may select any color for your links. You can choose a color by using the slider and wheel, or by entering a specific hex code if you know it. As you alter the color, a live preview of your site with the new link color will appear.
When you're satisfied with your selection, click Publish to save your changes and apply them to your site.
2. Using CSS Code
CSS, which stands for Cascading Style Sheets, is a language that governs how HTML elements appear on a web page. Colors, fonts, layouts, animations, and other aspects of your site's design can all be controlled with CSS.
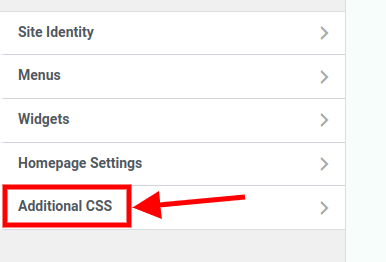
To alter the color of a link in WordPress with CSS code, you must first add some custom CSS code to your site. To accomplish this, navigate to your WordPress dashboard and select Appearance > Customize > Additional CSS.
You will see a box where you can enter your custom CSS code. To change the link color, you need to use the following code:
a {
  color: #0000ff;
}
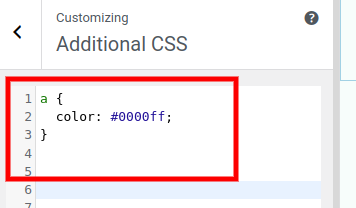
The "a" selector is used to target all links on your website. The color attribute specifies the appearance of the links. The color #0000ff is represented by the hex code #0000ff. You can change the color of your links by replacing this value.
As you type the code, a live preview of your site with the new link color will appear.
When you're satisfied with your selection, click Publish to save your changes and apply them to your site.
Conclusion
Finally, altering the link color in WordPress can improve the design, usability, and conversions of your website. Depending on your tastes and expertise, you can alter the color of your links using custom CSS code using the WordPress Customizer.
You can easily change the link color in WordPress by following the guidelines in this blog post and creating a unique and appealing website for your visitors.


