
A sitemap is usually a good idea for improving your site's rating and search engine exposure. This is because it allows the search engine crawlers to understand the overall structure of your website and thus helps them rank it better.
However, you can also use this Sitemap to communicate your website's structure or roadmap to your users by making it a visual sitemap. In this tutorial, we will see how to build a Visual Sitemap for your website in WordPress.
Visual Sitemap
A visual sitemap, also known as an HTML sitemap, is a valuable component of your website navigation that assists people in navigating your site more simply and quickly, gaining a sense of its structure. A visual sitemap can also operate as a starting point or reference point if they become disoriented between pages.
XML Sitemap and Visual Sitemap
The main difference between an XML and a visual sitemap is that it is created for search engines to make it easier to locate your content. An XML sitemap helps Google scan and index all of your pages by displaying distinct site URLs and metadata associated with them. This makes them more visible.
On the other hand, an HTML-based visual sitemap is utilized to provide actual humans with a better notion of what they may discover on your sites and posts. This type of Sitemap likewise provides all of the pages as clickable links but in a more practical, user-friendly, and visually appealing manner.
Create Amazing Websites
With the best free page builder Elementor
Start NowWhy Should You Create A Visual Sitemap
Without question, one of the most beneficial aspects of including a visual sitemap on your website is that it helps you present the whole website structure to consumers logically and friendly. In addition, it can give a beneficial visual context to people who have limited time to browse your site or have difficulty navigating websites in general, depending on the type of website you have and the number of pages.
Visual sitemaps are very beneficial for sites with a lot of content or a lot of pages, such as extensive blogs or magazines or large online marketplaces. However, even if your website has a small number of pages, it is still a good idea to have a sitemap since it will make it more accessible and user-friendly for your visitors.
How To Create A Visual Sitemap
There are many plugins that you can use in order to create visual sitemaps. However, Simple Sitemap is one brilliant, trusted, and famous solution available for free.

Simple Sitemap offers two blocks for you to create a Visual Sitemap. With this plugin, you can simultaneously review and create the Sitemap. In addition, the plugin is easy to use and does not require prior coding knowledge.
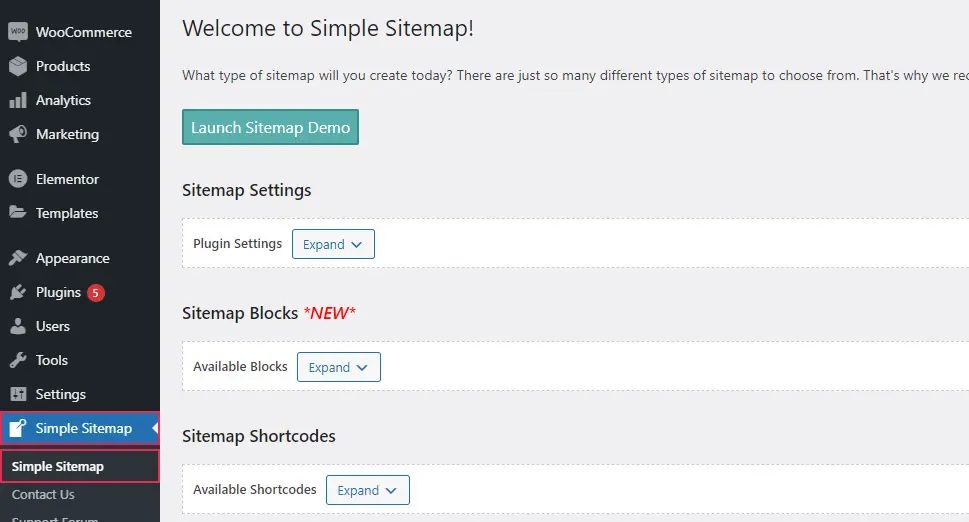
Once you have installed and activated Simple Sitemap, head to the plugin's page from your WordPress dashboard.
Once you click the Expand button in the Sitemap Settings section, a menu will appear, giving a few options.
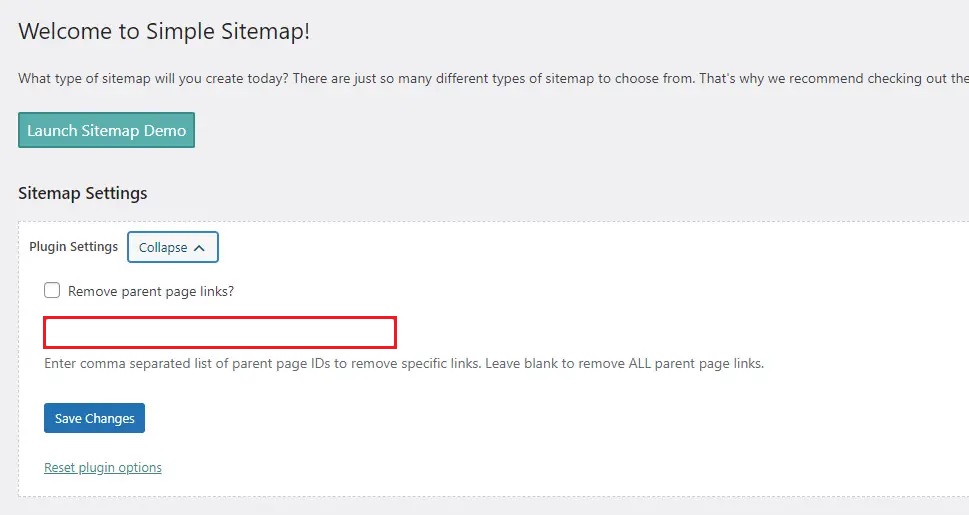
You can turn off the removal of parent page links here. In addition, you can specify a comma-separated list of parent page IDs if you wish to delete certain links. Finally, simply check the box next to the notification that says "Remove parent page links?" if you want to remove all parent page connections.
Don't forget to save the changes once you update all the settings.
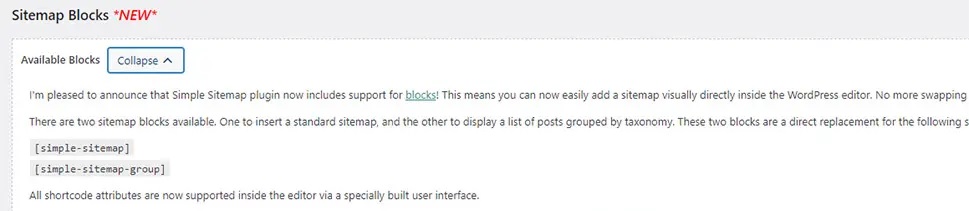
You can learn more about the two available blocks by expanding the Available Blocks field. The first is for inserting a standard sitemap, while the second displays a list of posts arranged by taxonomy. You'll also find some instructions on how to use it here.
If you want to learn more about the shortcodes that are accessible, just explore the Sitemap Shortcodes section.
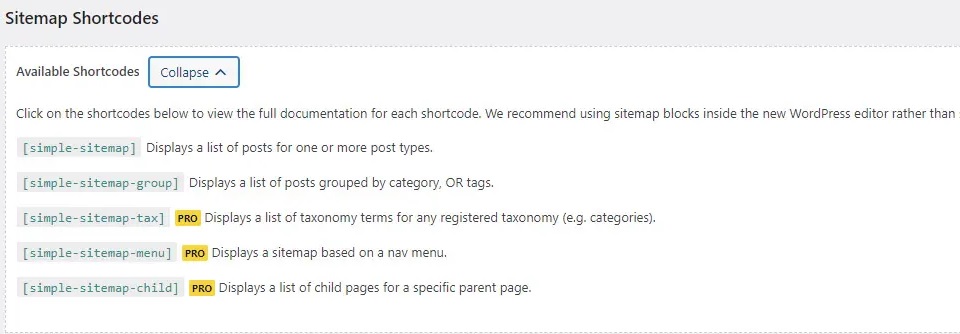
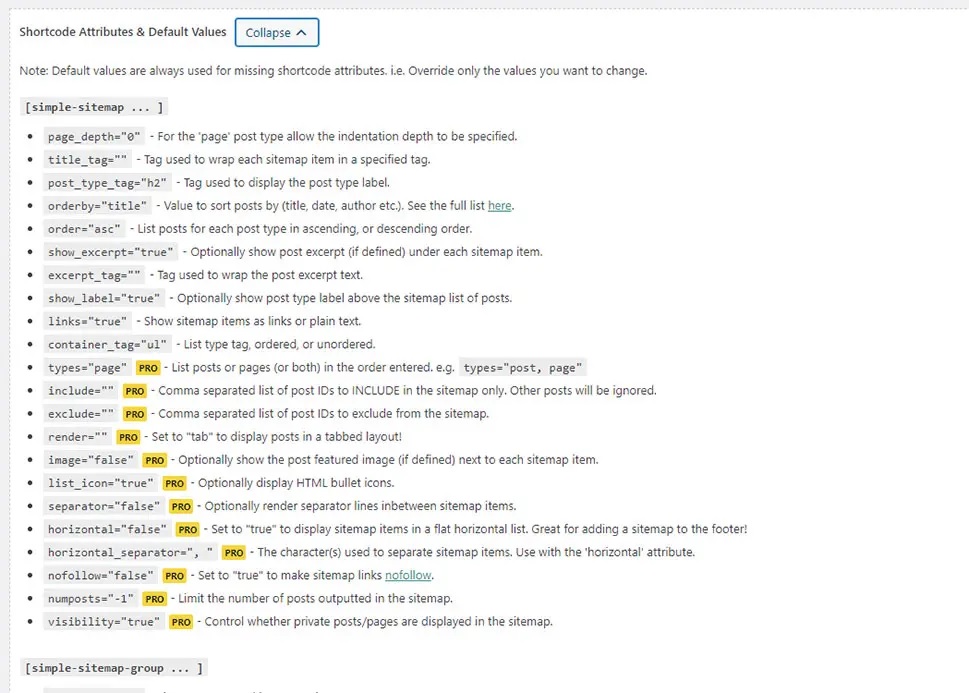
You can access the complete documentation of the shortcodes just by clicking it. Similarly, when you open the Shortcode Attributes & Default Values section, you'll find a list of all possible attributes you may use to override the values you wish to alter.
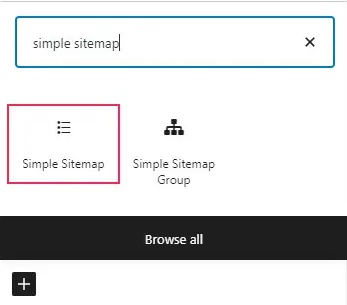
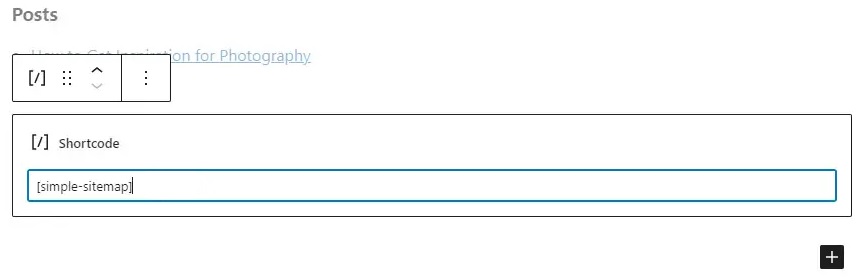
When you're ready to build your Sitemap, go to the page where you want to put it and look for a block labeled Simple Sitemap. We will be using Gutenberg Block for Sitemap.
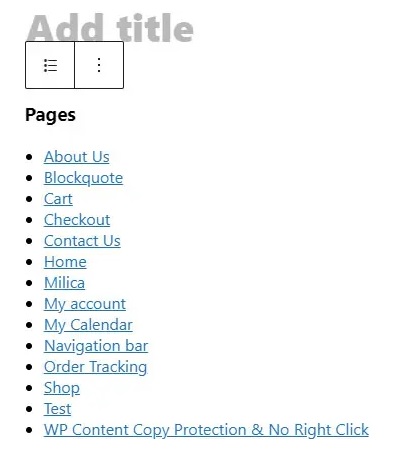
As soon as you add your block to your page, you'll see a list of links in your block.
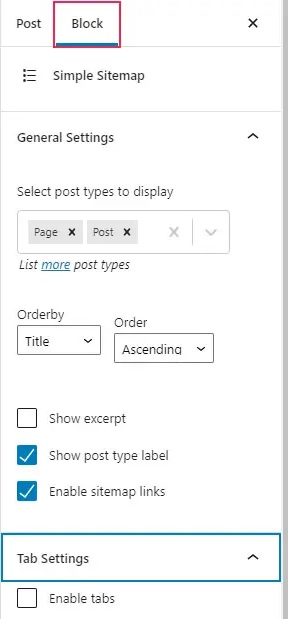
You can now use the Block tab on your page or the post sidebar on the right side of the screen to change the particular block settings. For example, you may choose which post types to show and sort them by title, date, or ID. You'll also be able to include or remove an excerpt in your Sitemap, display a post type label, and activate or disable sitemap links, tabs, and other features.
Of course, you can use any of the plugin's shortcodes to add your Sitemap instead of utilizing the shortcode block.
Once you're happy with the way your Sitemap looks, click the Publish/Update button. Then you can see how your Sitemap will appear in real-time.
If you want to use the Classic editor to create your Sitemap, you must paste the previously copied shortcode into the editor. For Elementor, you can also use the same shortcode into the Shortcode element.
This is how you create a Visual Sitemap for your website in WordPress. That's all for us from this tutorial. Make sure to join us on our Facebook and Twitter to never miss out on tutorials like these.


