
Wouldn't it be convenient for your visitors if all the page options or product pages of your website were available together? With Mega Menu, you can easily reduce the unnecessary hassle of your visitors if you want. Someone came to your website to buy a Rolex, but that option is in the Wearable outfit> Watch> Branded Watch option, now it takes time to go to that option, and we do online shopping to save time. So you understand - if this problem can be reduced through a mega menu, then it can be very profitable to your business.

Mega Menu is a large stretchable menu where you can look at everything at once. Visitors don't have to hover over an awkward drop-down menu to find the right thing or go to the footer menu separately. Megamenu is quite beneficial, and many successful websites like big publishers from reputed e-commerce sites - everyone has been using it for a long time.
WordPress will not allow you to use Mega Menu by default. If you have a mega menu in your WordPress theme, you can use that, but most of the time, there is a minimal customization facility on those built-in theme mega menu. Elementor has come to help you in this situation. This post will learn how to create a mega menu in WordPress with Elementor and The Plus Addon. You can customize all parts of your mega menu. You can also add different mega menus to different parts of the website through display conditions. You can also choose different megamenu view options for different desktops and mobile, and you will have full control over your megamenu's responsive behavior.
Why Your Website Need A Mega Menu?
Megamenu is one of the most useful things for any WordPress site. It is beneficial for navigating the website, and it is an excellent choice to bring many options under one roof. The biggest benefit is, it often helps to give the visitor the whole essence of your site at a glance.

Right Megamenu Wrong Megamenu


So, it can be said that this is a very user-friendly plugin. There is usually not much space in the navigation menu. You can add a maximum of 5 to 6 pages. To do more, the mega menu will be cluttered. If you have more pages on your site, this mega menu will be a great weapon for your users.
The huge use of mega menus can be noticed in e-commerce based sites, real estate websites. Below are some examples of mega menus to help people understand.


What Do You Need To Build A MegaMenu With Elementor?
You can create a beautiful mega menu from Element using the visual drag-and-drop feature. If you want to achieve mega menu actual functionality, you need to use a third party addon named the plus addon. There are many more plugins in the WordPress market to create mega menus. Still, The Plus add-on brings various options for creating mega menus that can be used to create vertical mega menus, horizontal menus, toggle based mega menus, etc. It offers -
- It's 100% designed for Elementor.
- It lets you build pixel perfect responsive menus.
- It has cross-browser compatibility.
- Plenty of customization options that fit your needs.
- Easy to build any interface with drag and drop features.
- Compatible with all popular WordPress themes.
So you need -
- Elementor
- Elementor Pro for Custom Header
- The Plus Addons (It has a free version, but you need the Pro version for the Navigation builder feature.)
How To Add a Mega Menu in WordPress?
With 4 Basic Steps, you can create a mega menu through Element and The Plus Add Ons. Although there are several sub-steps, they are described in detail below.
First, activate the megamenu feature and generate a mega menu using the Elementor template. Setup the native WordPress navigation to add your megamenu (Appearance > Menus). Then, build a header using the Elementor theme builder and finally set up responsiveness.
Activate Mega Menu Feature
At first, you have to activate the Mega Menu feature on the Plus Addons. It will then add a custom post type Plus Mega Menu to accommodate all your mega menu. Now, create a new post using Elementor to design everything from the post type.
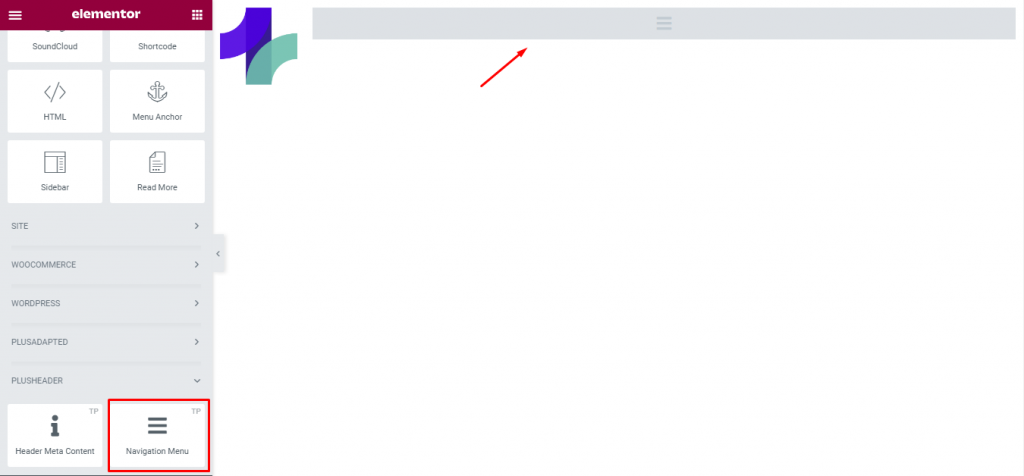
In the WordPress dashboard, navigate to the Plus Settings, Plus Widgets, and activate the TP Navigation Menu widget.
Create A Mega Menu Template
You will see a new Plus Mega Menu custom post type right after you activate the widget. It will show up as an individual option on your dashboard side menu. Click on Add New from Plus Mega Menu to create a new mega menu.
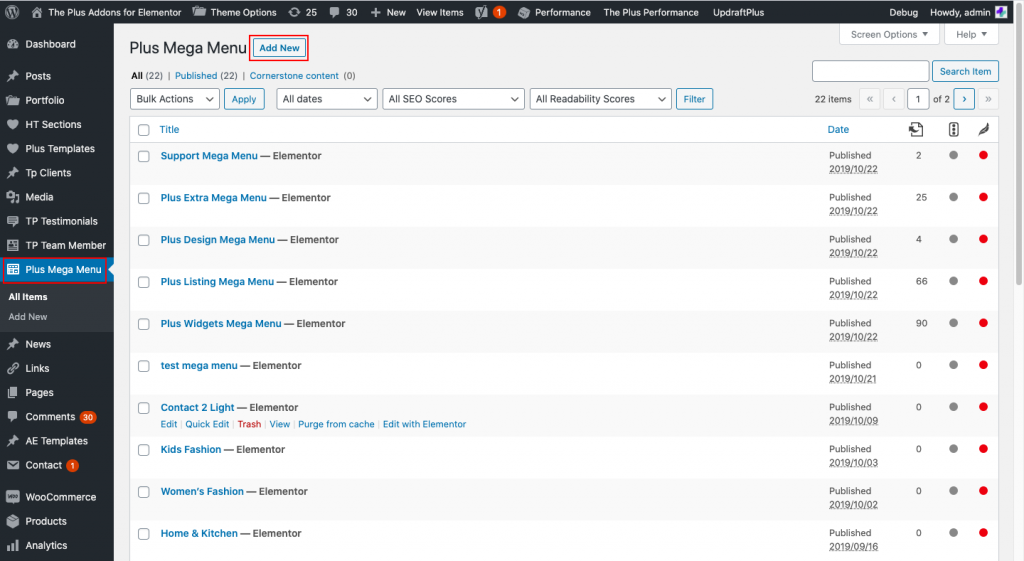
Name it as you want because this will be very helpful if you need to create a different mega menu in different places. To launch the elementor interface, click Edit with Elementor. Now you can design the mega menu layout with Elementor that will be visible to viewers.
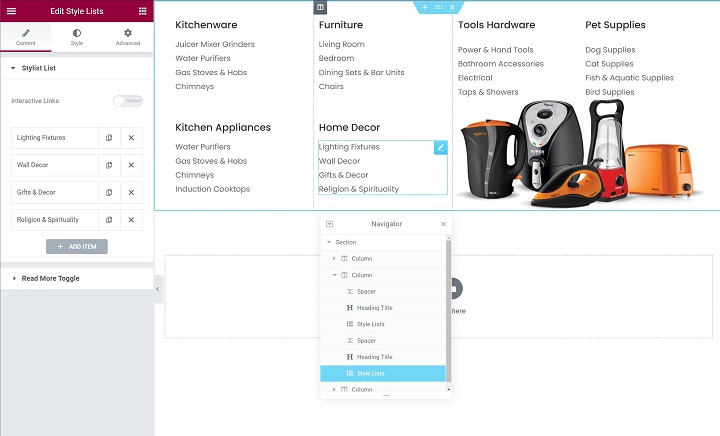
Here is an example of a basic expanded mega menu structure. You can see one parent section for the entire mega menu, and we have added various columns to control the expanded menu. You can add whatever content using the regular Elementor widget. Once you are done making the template, publish it.
Set Up Navigation Menu
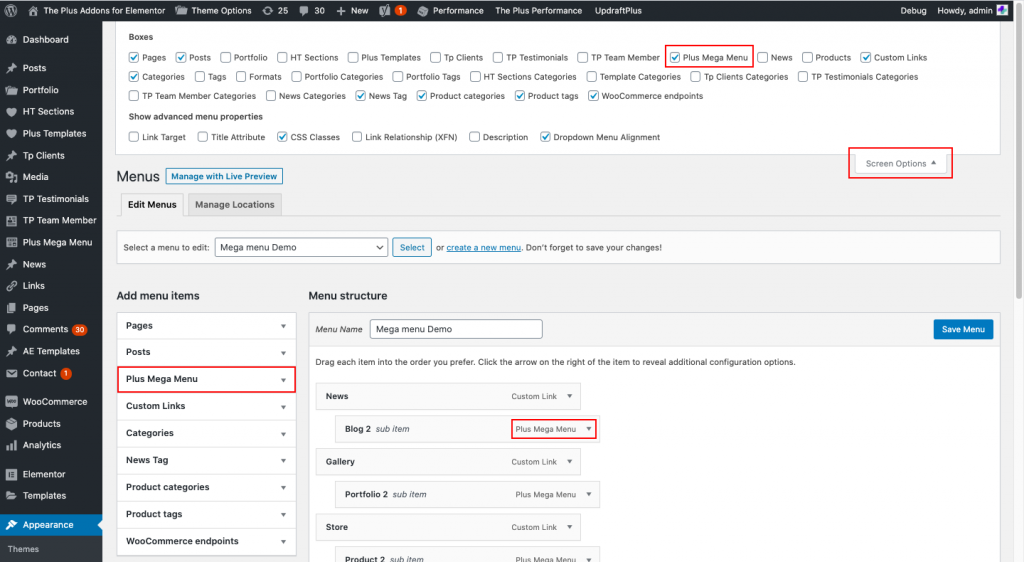
You have to configure the native WordPress navigation feature because you have already created a mega menu template. For that, go to Appearance > Menus. Create a menu if you haven't created one. Now add the contents you want in Megamenu. At the top, add essential items, these will not trigger other megamenu contents. The easiest way is to do this is directly link pages with custom links. Then open Plus Mega Menu to add the menu items sidebar and add the mega menu template you made.
Now maybe you cant see Plus Mega Menu options in the Add menu items area. Having a hard time? This is because maybe WordPress is hiding it. To reveal this, click on Screen options in the top right and check the Plus mega menu option.
You can customize the mega menu size and alignment. For size, you can choose either - Default(enter a maximum width in pixel), Container(Based on the container size of the website), and Full Width(Mega menu will expand its full regardless of any settings.)
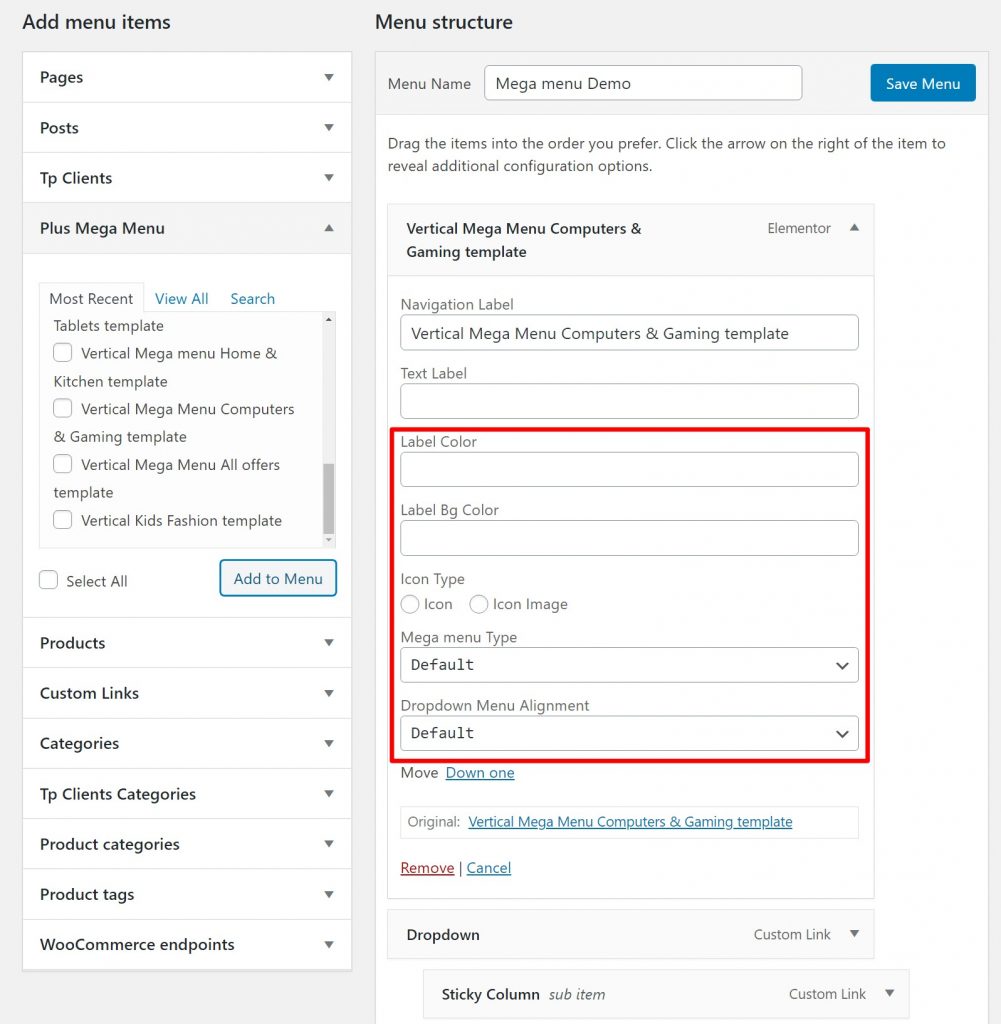
You can also customize the menu objects, label colors, and icons (if you need one.)
Create Header Template
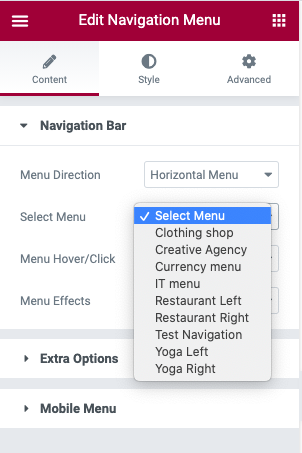
Now you need Elementor theme builder to create a custom header for your website. For that, Go to Templates > Theme builder and create a brand new template for the header. As we have already created one, we will customize our existing template. In the Theme builder, you can utilize Elementor pro’s display conditions to choose where this header will appear on your site. It can make it visible all time or only to specific pages. If you are done with the basic outline of the header, add the Navigation Menu widget from the plus add-ons.
You can use Widgets settings to control the menu direction, such as horizontal, vertical, or vertical. Then use the Select menu to choose the menu you created in the previous step. For additional customization, you can do that on the style tab.
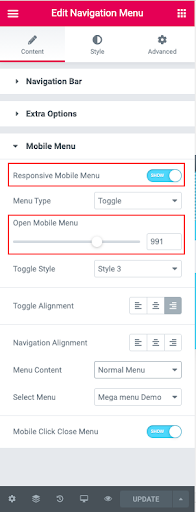
Make It Responsive
To finish out, set up the responsive behavior for the mega menu so that your visitors have a greater experience on any device. You can do this simply from the navigation menu. From there, go to Mobile Menu setting in the Content tab, enable Responsive Mobile View.
Final Words
Elementor was always a no one choice for any WordPress modification. And Mega Menu is a brilliant option to present your website at one glance. Here, Elementor is your savior. Now, what are you waiting for? Make a Mega menu using Elementor for your own website and step up in this game.
Create Amazing Websites
With the best free page builder Elementor
Start Now


