
When you create a WordPress website you have particular goals that you work for. Be it making your website famous, having huge traffic, or getting more sales, it requires a series of tactics to reach there.
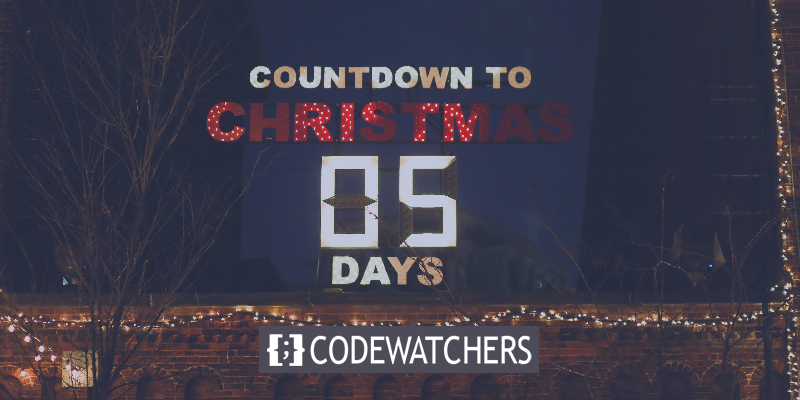
Creating a countdown popup is another trick to get your sales increased by creating urgency in the buyer's mind and making them take action quickly.
Not only that, countdown popups when created nicely can be a boost to the overall design and the impact of the website. In this tutorial, we will understand how to create a countdown popup on WordPress using Elementor Page Builder.
How To Create A Countdown Popup With Elementor
For this tutorial, we are going to be using Elementor Pro. With Elementor Popup Builder we get tons of templates and designs that can be used instantly to create a popup.
Create Amazing Websites
With the best free page builder Elementor
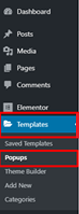
Start NowOnce you have Elementor Pro installed and activated, move ahead to your dashboard and go to Popups from the Template option.
Press Add New Popup button on the page and move ahead.

You will arrive at a form-like page where you will adding be details of your popup like the type and the name for the popup.
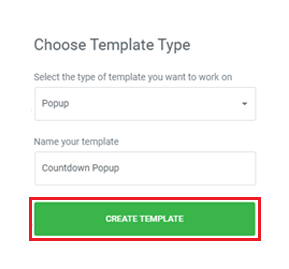
Once you entered your details, press the create popup button.
You will be redirected to the Elementor Library where you will see numerous readymade popups. Search for Hello Bar in the library and choose one from the library.
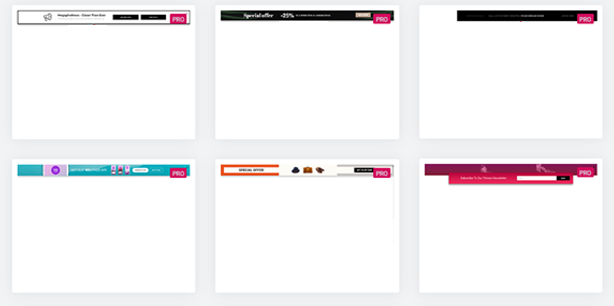
While we will be creating a popup from scratch using the Elementor. Stick with us to see how you can create your desired popup easily.
Close the popup library and go to Settings from the Elementor Menu.
In the Settings Tab, you need to replace the existing set with the ones mentioned below.
- Width: 100 VW
- Height: 300 px
- Vertical Position: Top
- Entrance Animation: Fade In
- Animation Duration: 2.2 seconds
Move to the Styles Tab and make these changes.
- Color: 4EBBC6
- Border Type: Solid
- Width: 20
- Border Color: White
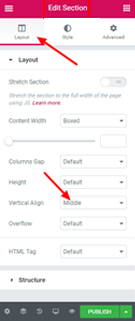
Once, you have made all the changes told above, add a section with four columns.
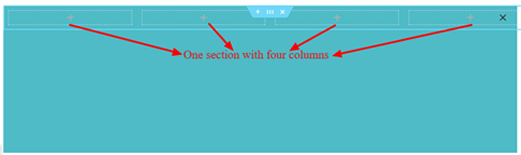
Make sure the columns are vertically aligned to middle.
To create a heading for the popup, drag the heading widget and drop it in the first column and type your heading.
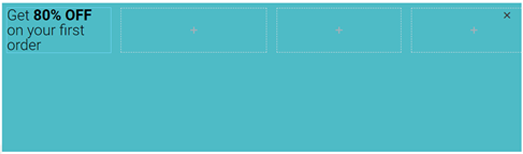
Next, you need to add a button right below the heading widget.
From the Content Tab in Edit Buttons set the button text to "Buy Now!".
In the Style Tab of Edit Buttons make the following changes.
- Background Color: Transparent
- Text Color: Black
- Border Position: Bottom
- Border Type: Solid
- Border width: 2px
- Border radius: None
- Set the padding at the bottom to 2px.

In the Elementor Library search for Countdown and drag the countdown widget and drop it to the second column.
To edit the widget, go to Edit Countdown and then Content. To start the countdown as the visitor arrives at your website, set the countdown type to Evergreen Timer, set it 24 hours, and hide the 'days'.
Come up with a message to be shown after the sale has expired such as "Sorry! The sale has expired."
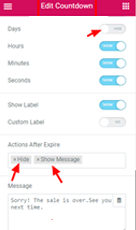
When 24 hours pass for the user, the popup will disappear and the message will be shown.
You can also change the timer design from the styles tab.
Next, drag image widgets to the columns left i.e. the third and the fourth column. And add two images to these widgets.
Your final popup will be ready. If you have used the same settings like ours, the popup will look like this.

This is how you can create a countdown popup for your website. You can change the settings and make something entirely different or choose one from the library of popups, Elementor Page Builder has all the options.
This is all from us for this tutorial. Make sure to join us on our Facebook and Twitter to keep receiving updates about our tutorials.


