
Divi image gallery is a useful module for creating fully functional galleries inside a website. If you are a fashion enthusiast or photographer, you might need a gallery on your website to showcase your projects. You may not know if Divi has all the necessary inbuilt equipment to bring an outstanding animation effect in the image gallery. Today we will try to bring ripple-off animation using anime.js with Divi builder and see a creative image gallery animation. Without wasting more time, let's get started.
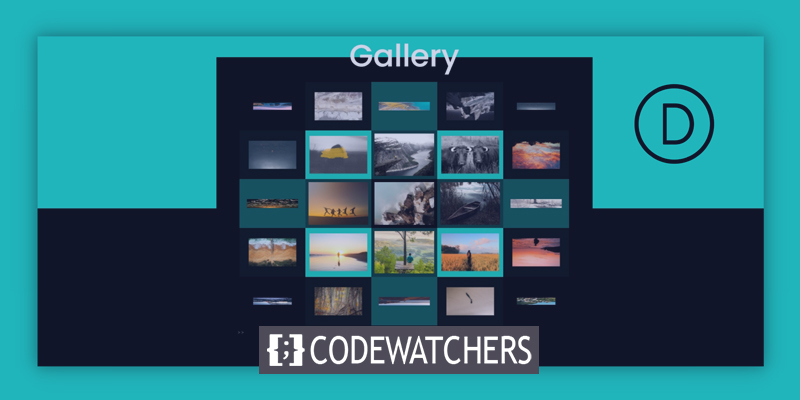
Preview
This is how our gallery will look like after we have done the full tutorial.
Add Animation to a Divi Image Gallery
Part 1: Gallery Page Layout Design
The Section
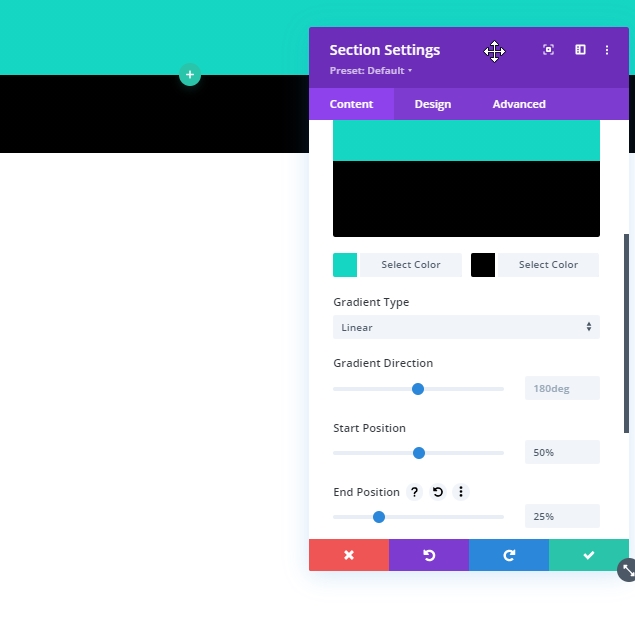
First, we will open settings for the initial section and make the mentioned modification.
- Background Gradient Left Color: #15d6c2
- Background Gradient Right Color: #000000
- Start Position: 50%
- End Position: 25%
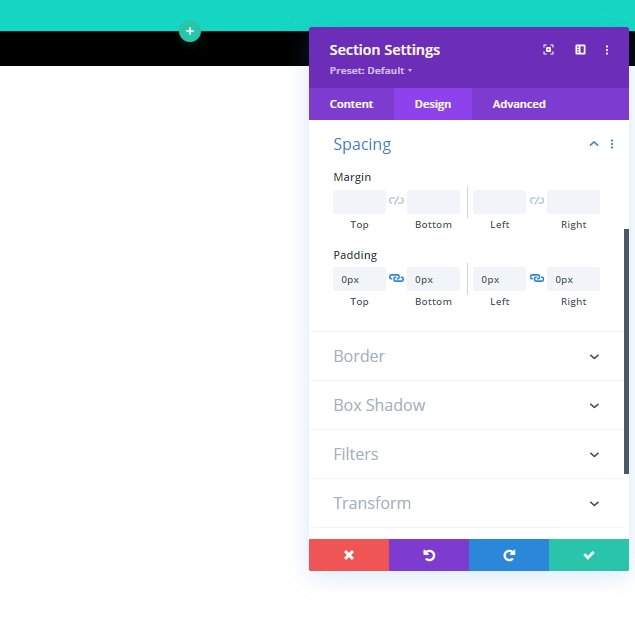
We will update the padding settings in the design tab.
Create Amazing Websites
With the best free page builder Elementor
Start Now- Padding: 0px top, 0px bottom, 0px left, 0px right
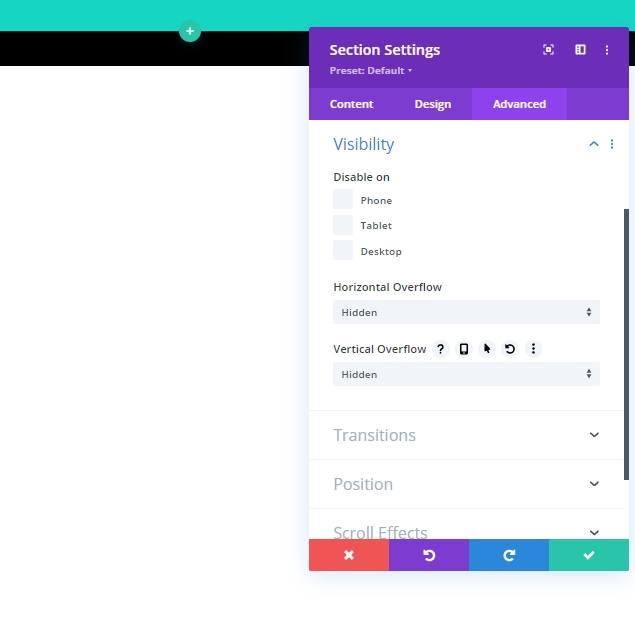
Then we will update the overflow settings from visibility on the advanced tab.
- Horizontal Overflow: Hidden
- Vertical Overflow: Hidden
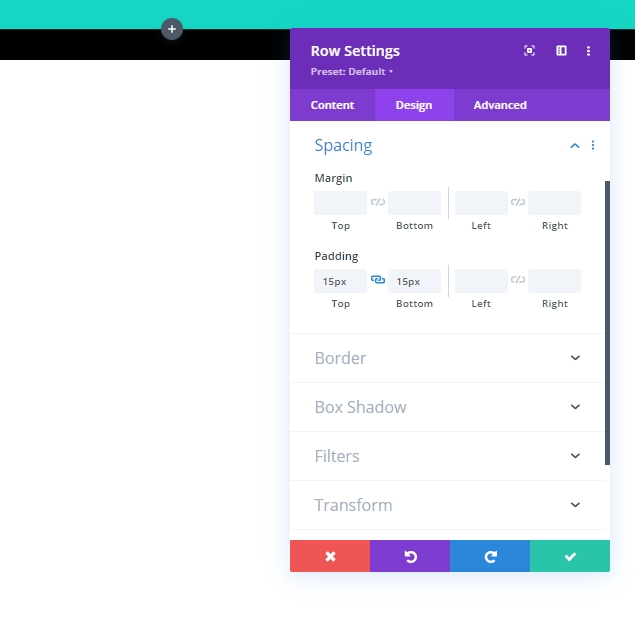
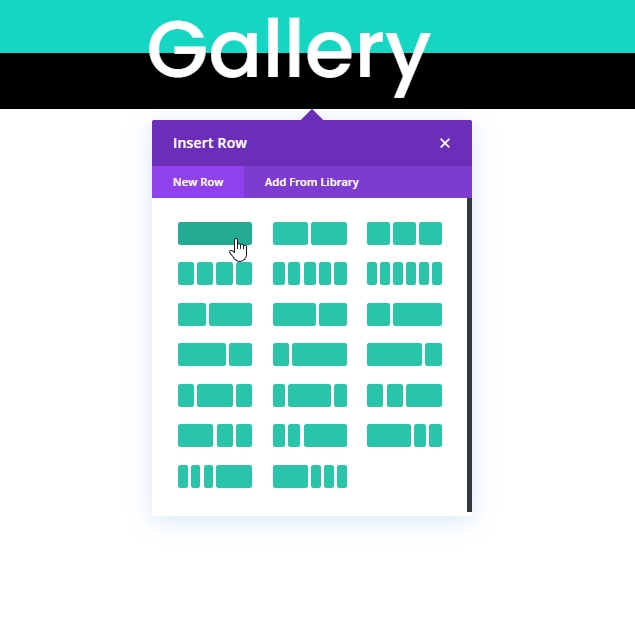
Row 1 Adding
We will add a one-column row that will hold our page title.

Then from the row settings, let's update the padding:
- Padding: 15px top, 15px bottom
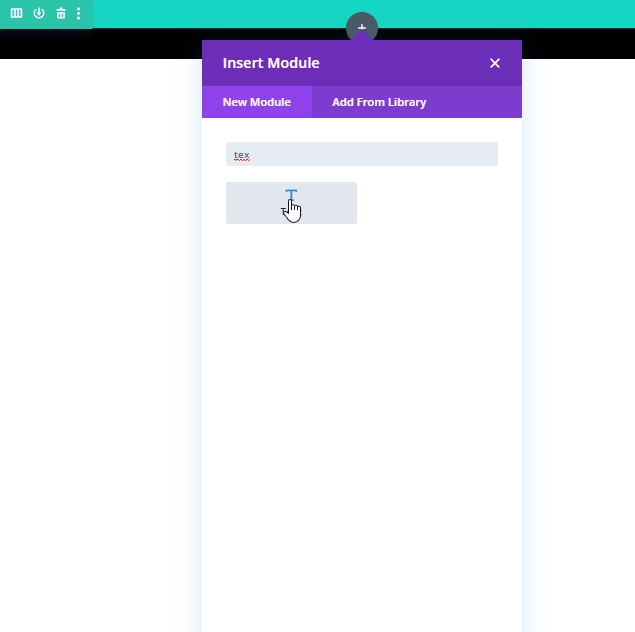
Add Text Module
The next step is adding a text module to the row. This module will act as the page title.
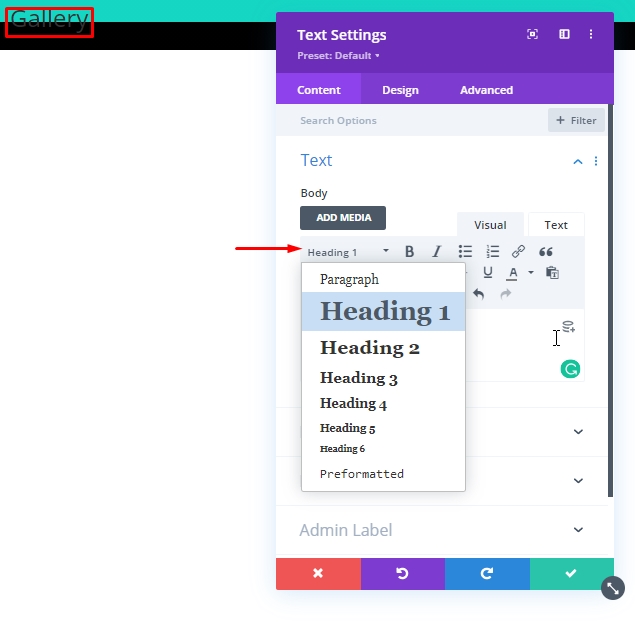
Now add the content of your choice and select Heading 1 from the shown menu on the picture.
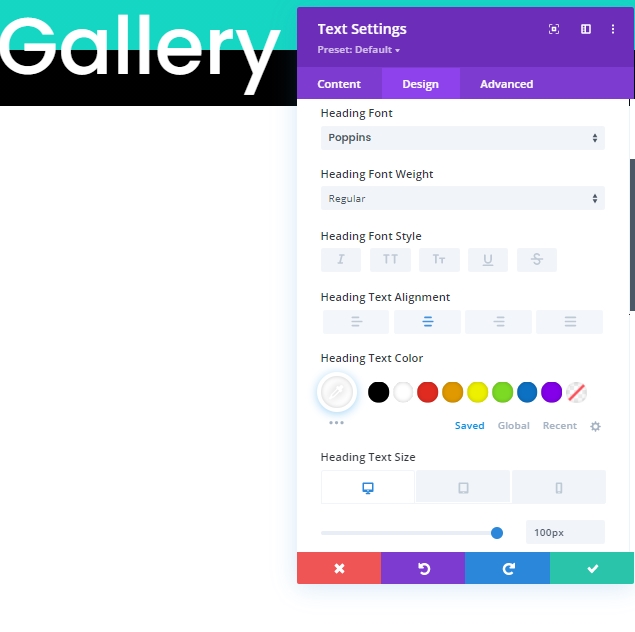
Then we will move to the design section and update the following settings for the Heading:
- Heading Font: Poppins
- Heading Text Alignment: center
- Heading Text Color: #ffffff
- Heading Text Size: 100px (desktop), 80px (tablet), 60px (phone)
Row 2 Adding
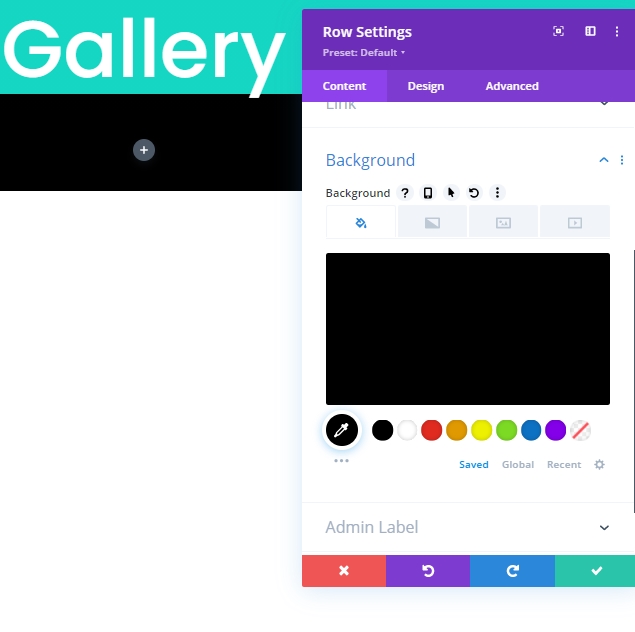
We will add another row to the same section. It will work as our gallery module.
From the row settings, add a black background color to the row.
- Background Color: #000000
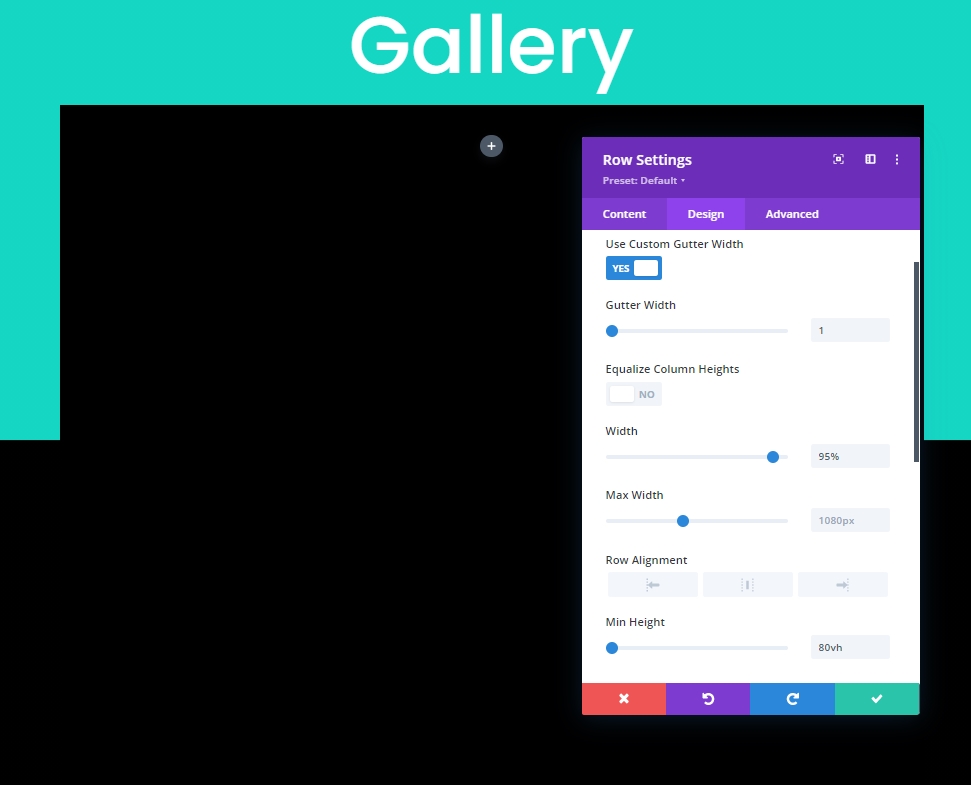
We have to do a lot of updates to the design tab. so follow carefully. First, move to size settings.
- Use Custom Gutter Width: YES
- Gutter Width: 1
- Width: 95%
- Min Height: 80vh
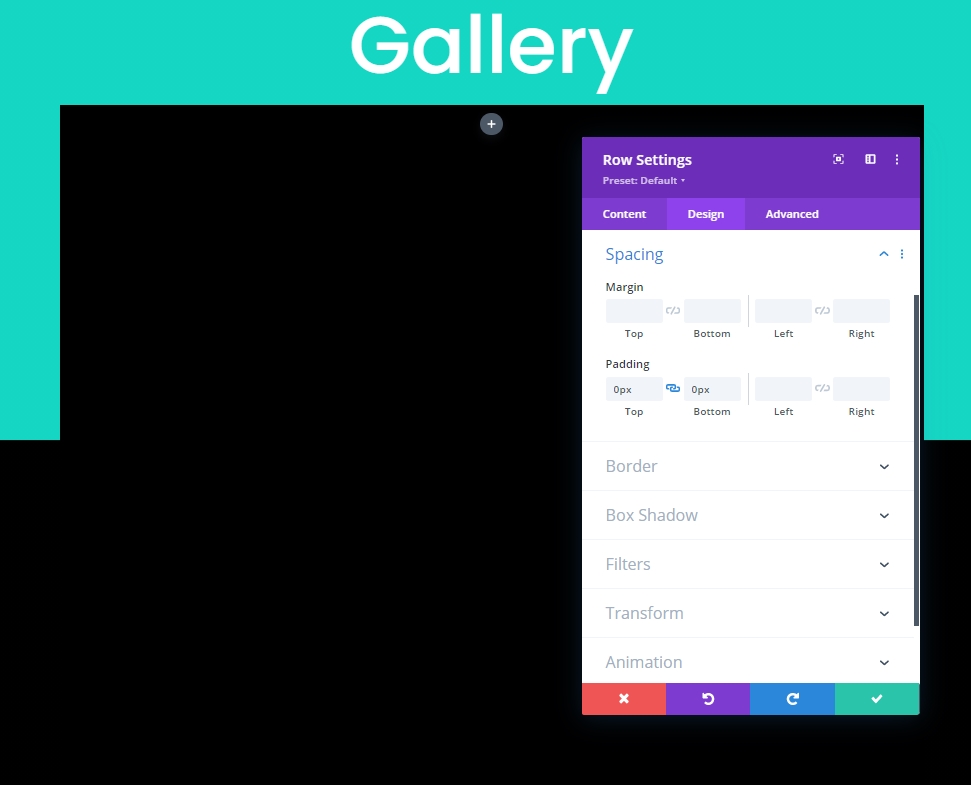
Now, add some padding to the row.
- Padding: 0px top, 0px bottom
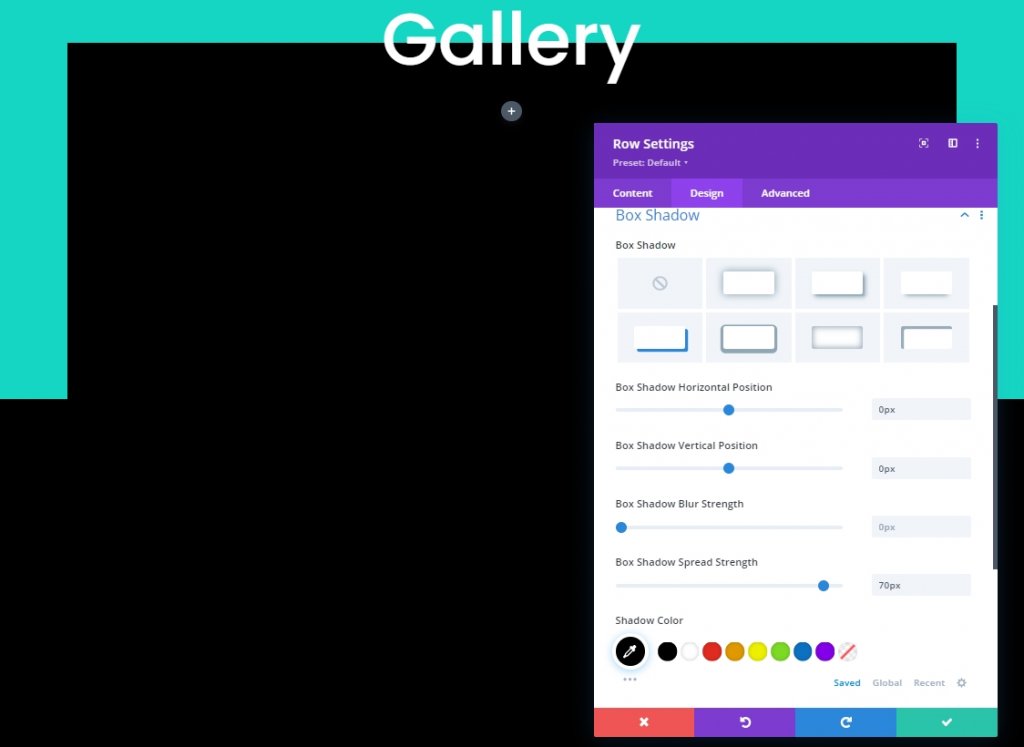
It's time to add some box-shadow.
- Box Shadow: see screenshot
- Box Shadow Vertical Position: 0px
- Box Shadow Horizontal Position: 0px
- Box Shadow Spread Strength: 70px
- Shadow Color: #000000
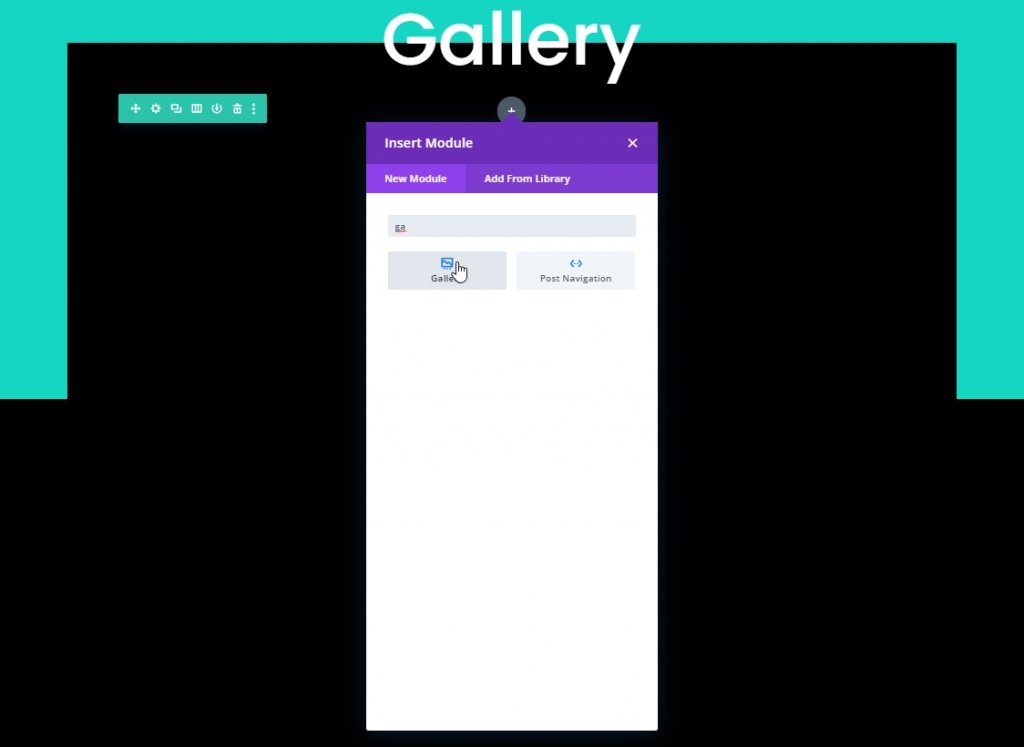
Part 2: Gallery Module Design
It's time to add the gallery module to our design.
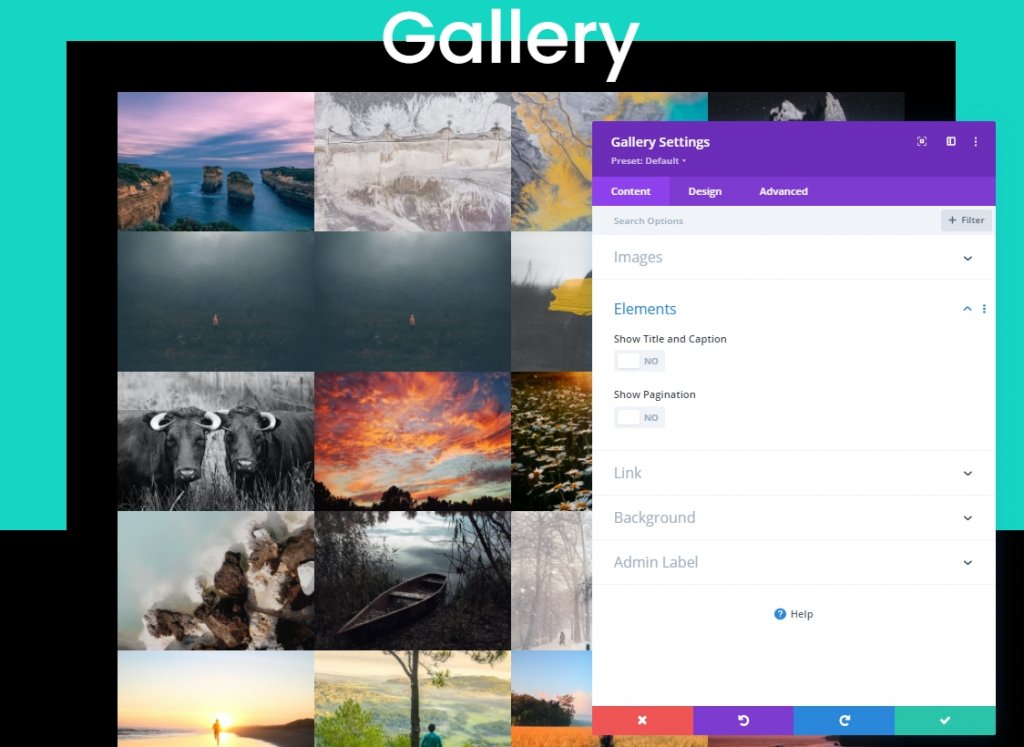
From the content tab of the gallery module. Add a minimum of 25 images. This is a pretty good amount for images to have an outstanding animation effect.
After uploading the images, do the following changes:
- Image Count: 25
- Show Title and Caption: NO
- Show Pagination: YES
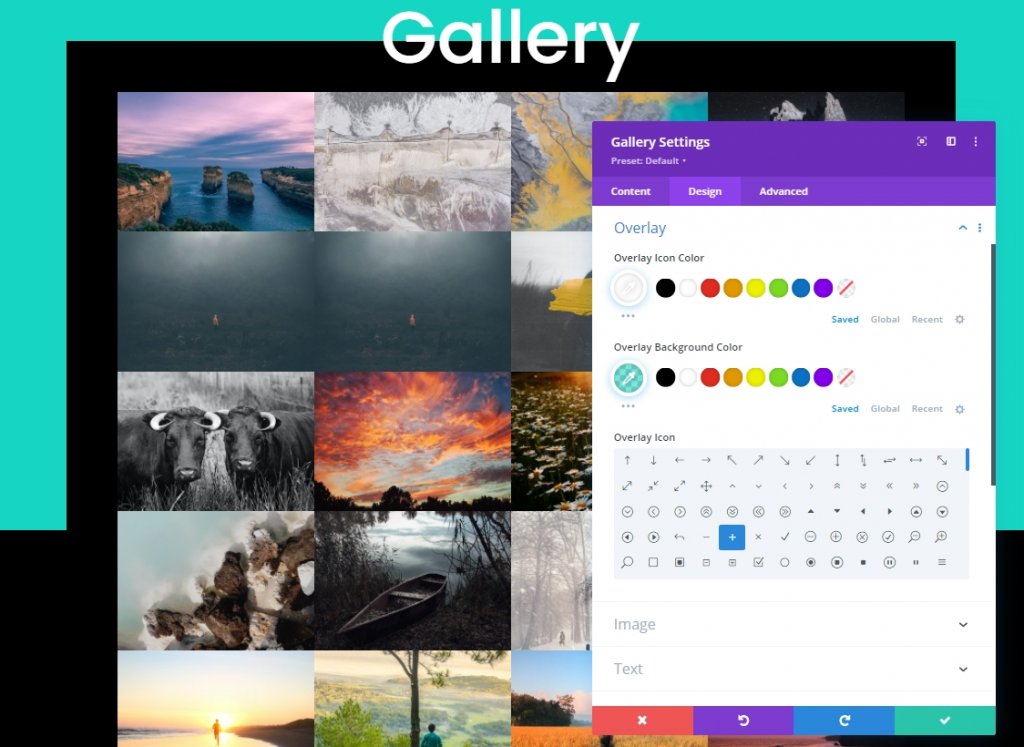
Overlay and Pagination Design
Update overlay setting from design tab:
- Overlay Icon Color: #ffffff
- Overlay Background Color: rgba(22,215,195,0.55)
- Overlay Icon: plus icon (see screenshot)
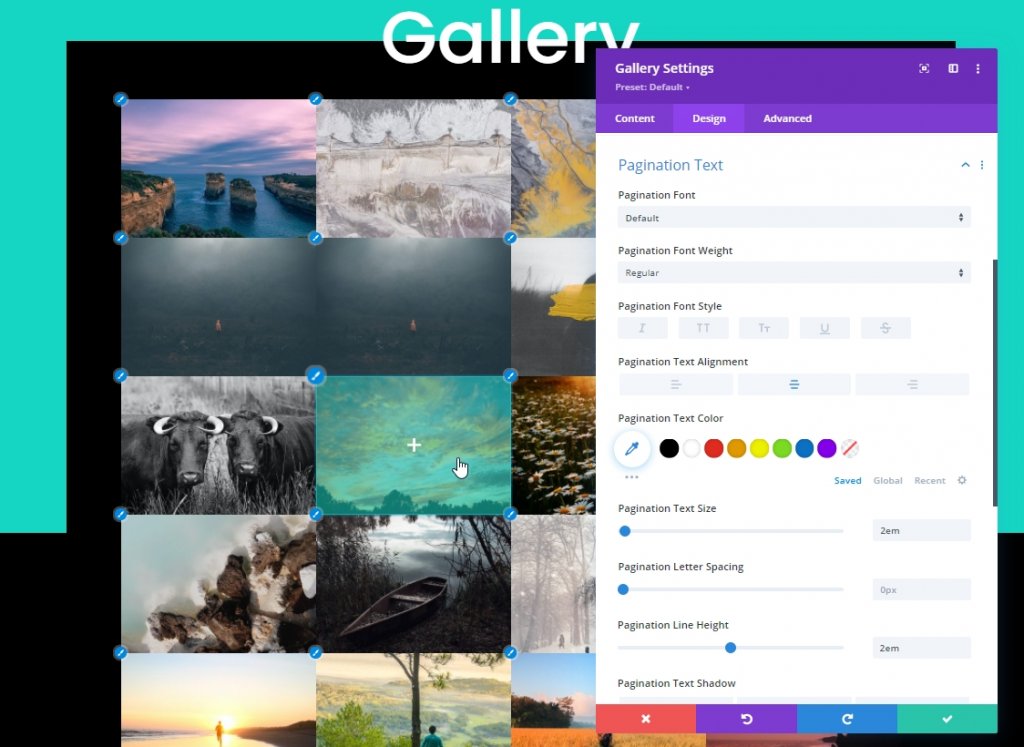
It's time for pagination settings.
- Pagination Text Alignment: Center
- Pagination Text Size: 2em
- Pagination Line Height: 2em
- Padding: 10px top, 10px bottom, 5px left, 5px right
Advanced Styling
We will now do some advanced stylization for the gallery. First, let’s add some CSS to the Gallery Item as follows:
Gallery Item CSS (Desktop)
animation: fadeLeft 0s !important;
background: #000000;
padding: 10px;
width: 20% !important;
margin: 0 !important;
clear: none !important;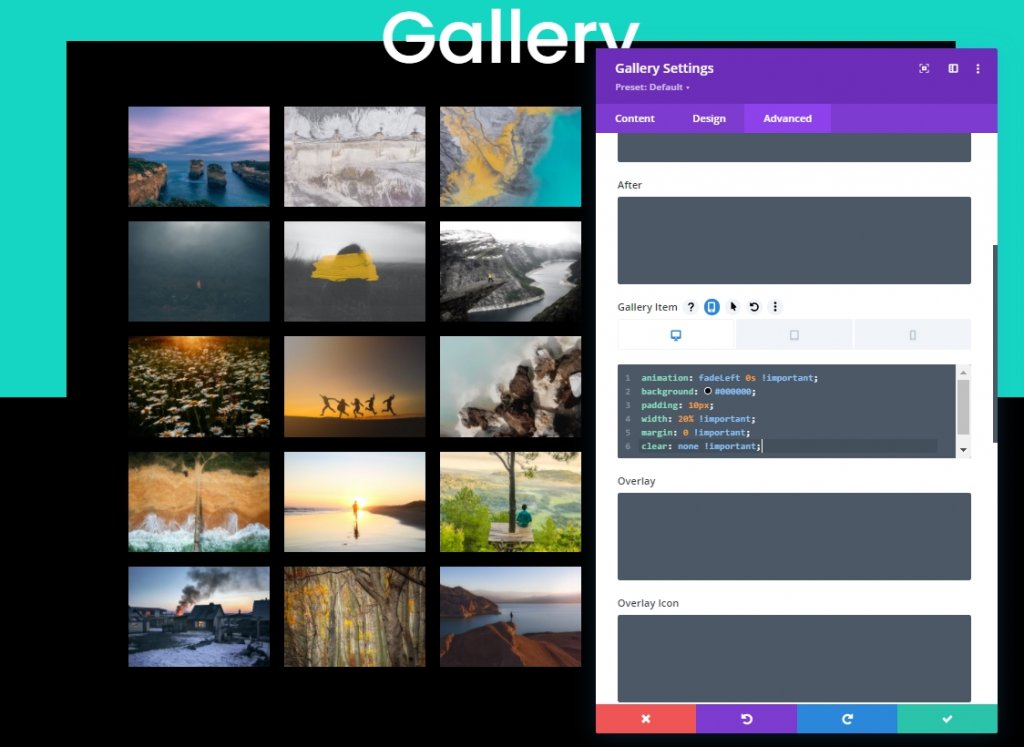
Gallery Item CSS (Tablet)
animation: fadeLeft 0s !important;
background: #000000;
padding: 5px;
width: 25% !important;
margin: 0 !important;
clear: none !important;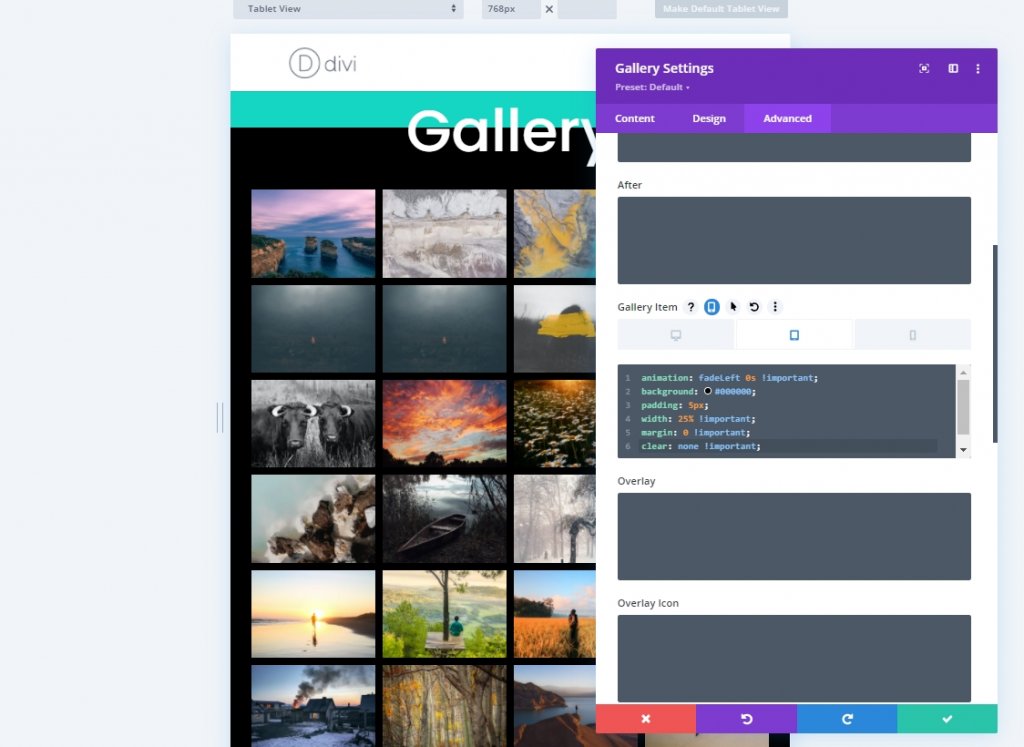
Gallery Item CSS (Mobile)
animation: fadeLeft 0s !important;
background: #000000;
padding: 5px;
width: 50% !important;
margin: 0 !important;
clear: none !important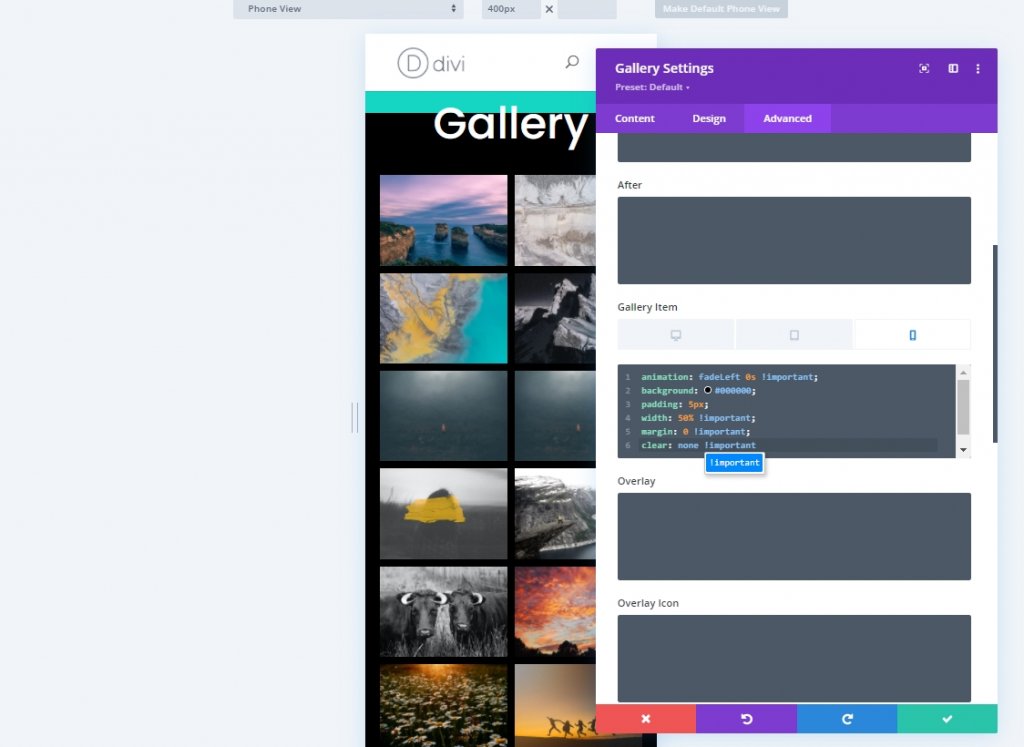
Add the following CSS code to the gallery pagination box.
border-top: 0px !important;
padding-top: 20px;
Also, put this CSS code on the pagination active page box.
color: #15D6C2 !important;
font-weight: bold;
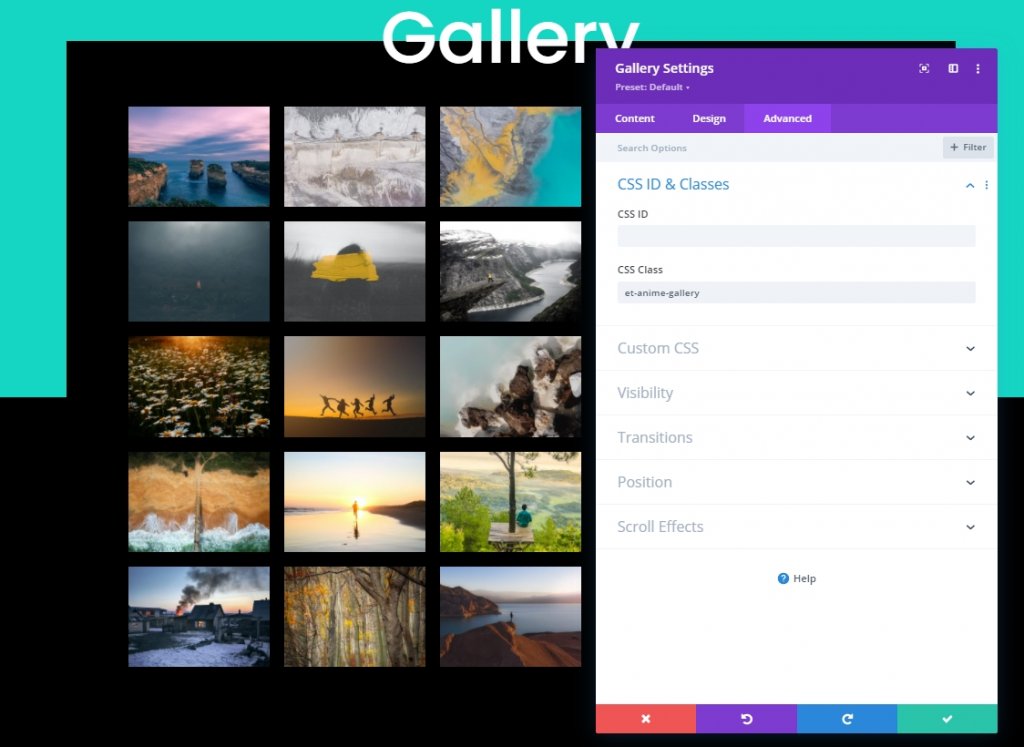
Now add a CSS class to the gallery module before we save it.
- CSS Class: et-anime-gallery
Part 3: Adding the Animation Effect with JQuery and Anime.js
We are done with our design. It's time to add simple coding to make it more attractive. That's why we will add a code module under the gallery module.

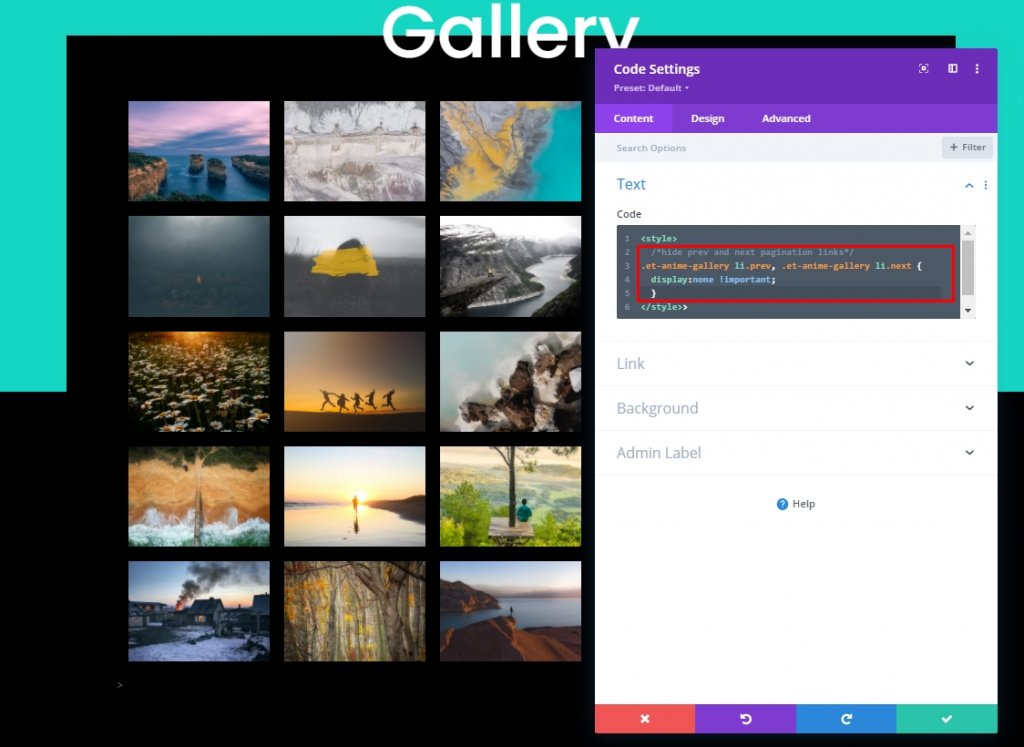
The CSS
Now paste the following CSS code inside the content box within Style tags.
/*hide prev and next pagination links*/
.et-anime-gallery li.prev, .et-anime-gallery li.next {
  display:none !important;
} 
The Anime.js Library
Below the CSS code, add this source in Script tags to add the Anime.js library to our design.
src="https://cdnjs.cloudflare.com/ajax/libs/animejs/3.2.1/anime.min.js"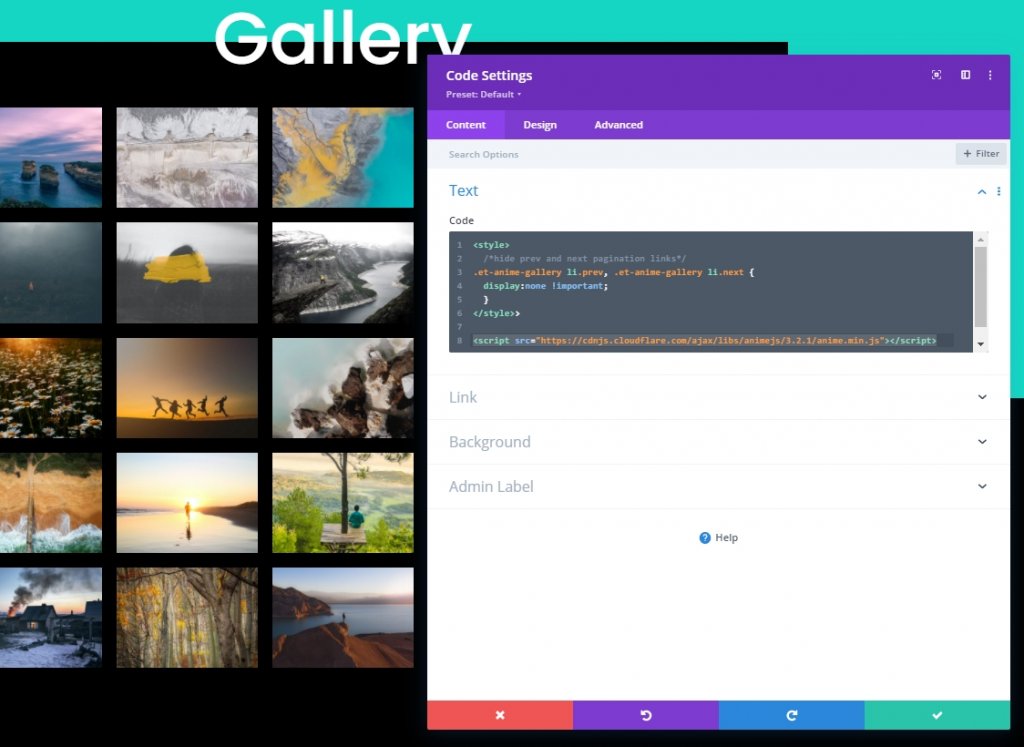
jQuery Code
Now we will add the jQuery code inside the script tags.
jQuery(function ($) {
  $(document).ready(function () {

    var fromCenter = "center";
    var animeTargetItem = ".et-anime-gallery .et_pb_gallery_item";
    var animeTargetImage = ".et-anime-gallery .et_pb_gallery_image";
    var $paginationLink = $(".et-anime-gallery .et_pb_gallery_pagination li a");

		//animate gallery on page load
    animateGalleryFunction(animeTargetItem, animeTargetImage, fromCenter);

    //animate gallery when clicking pagination number link
    $($paginationLink).click(function (e) {
      var pageNum = $(e.target).attr("data-page");
      var fromNum = pageNum*25-25; //replace 25 with image count for gallery module
      animateGalleryFunction(animeTargetItem, animeTargetImage, fromNum);
    });

    function animateGalleryFunction(targetItem, targetImage, stagFrom) {
      //animate gallery image
      anime({
        targets: targetImage,
        rotateX: [0, 360],
        scale: [0.5, 1],
        direction: "normal",
        easing: "easeInOutSine",
        duration: 600,
        delay: anime.stagger(
          200,
          { grid: [5, 5], from: stagFrom },
          { start: "100" }
        ),
      });
      //animate gallery item background
      anime({
        targets: targetItem,
        background: ["#000", "#15D6C2", "#000"],
        direction: "normal",
        easing: "easeInOutSine",
        duration: 600,
        delay: anime.stagger(
          250,
          { grid: [5, 5], from: stagFrom },
          { start: "100" }
        ),
      });
    }
  });
});
Save and close it.
Final Look
This is how our Gallery looks like, isn't it beautiful.
Final Words
If the best animation effect can be achieved through a few minor changes rather than using the default animation in the gallery to give visitors a better user experience, it is wise to do such a small thing. Through today's tutorial, you saw how we created beautiful, captivating gallery animations with Divi's built-in system and some light code. If you like this tutorial, please share it with your Divi Lover friends.


