
WordPress facilitates the creation of websites and the regular publication of blog entries. But occasionally, it's necessary to divide the blog post or page title into many portions.

A strong title should grab readers' attention right away. A title can be created as a single header line in WordPress. Nevertheless, you are not able to divide the title or posts into many pages using the usual settings. Perhaps you're searching for a catchy title or anything that grabs the reader's attention more.
However, you should be aware that a lengthy title could harm the SEO of your website. We'll talk about a couple of different approaches to segmenting WordPress posts and page names today.
How to Break Down WordPress Title?
Breaking up your WordPress title gives you a chance to make your blog posts different and more unique when compared to other bloggers.
Except concise and short titles, most of them can be broken up with ease, making them more appealing and increasing the chances of drawing attention to your website. Likewise, you can remove page titles in WordPress to improve the aesthetics or functionality of your blog.
Create Amazing Websites
With the best free page builder Elementor
Start NowIf you want to break up your WordPress titles, one of the best ways to do it is to make use of plugins.
Breaking up your WordPress title gives you a chance to make your blog posts different and more unique when compared to other bloggers.
With the exception of concise and short titles, most of them can be broken up with ease, making them more appealing and increasing the chances of drawing attention to your website. Likewise, you can remove page titles in WordPress to improve the aesthetics or functionality of your blog.
If you want to break up your WordPress titles, one of the best ways to do it is to make use of plugins. Page Title Splitter is one of such tools that can help you do it more easily and quickly, packing a lot of useful features alongside.
is one of such tools that can help you do it more easily and quickly, packing a lot of useful features alongside.
To install this plugin, go to Plugins>Add New and search for Page Title Splitter.
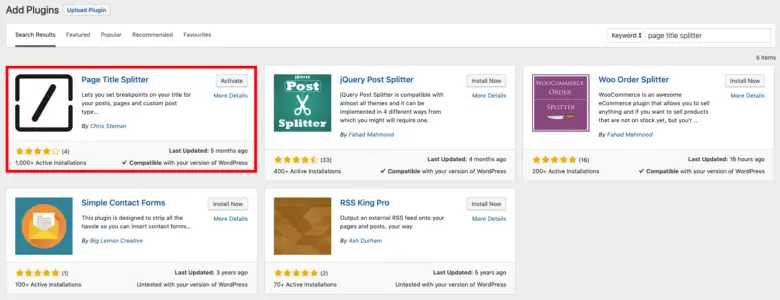
Install and activate the plugin.
Using Page Title Splitter
This is a detailed guide on using the Page Title Splitter plugin:
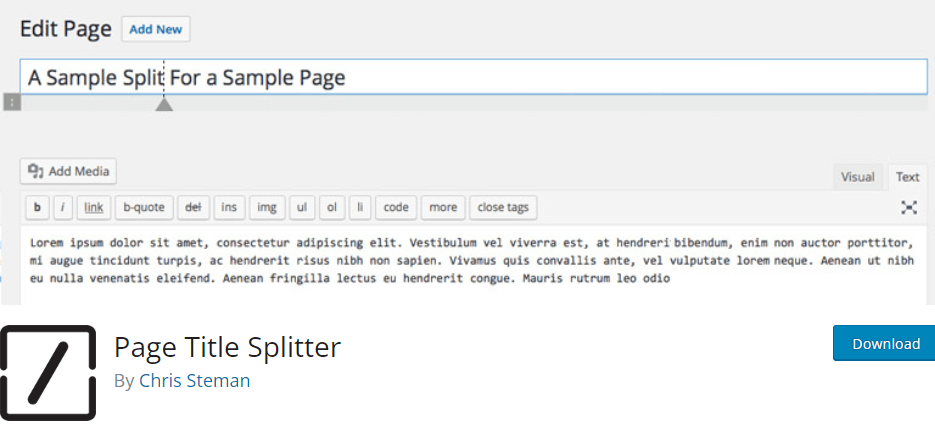
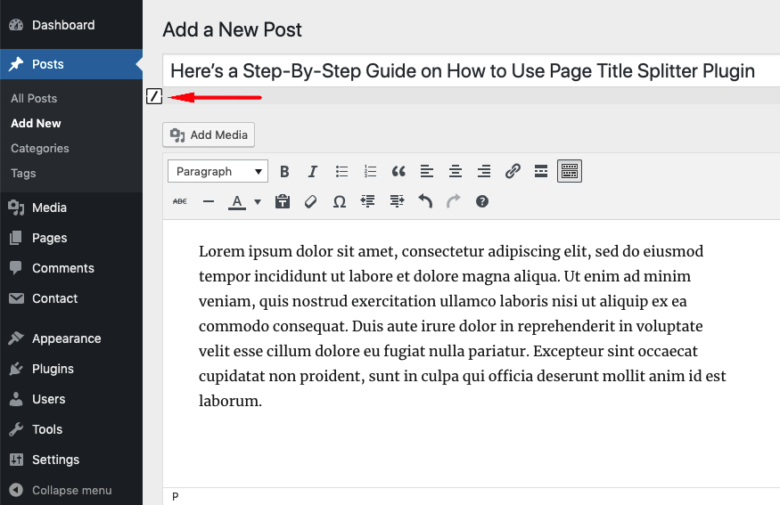
Select the blog post you wish to edit, or start from scratch. A tiny square should now appear next to the title section.
Click the little square and select the desired split location wherever you want the title line to end.
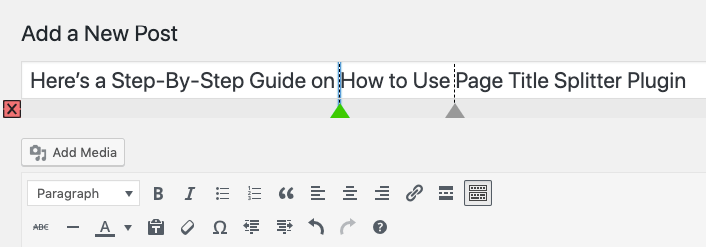
To reposition the split, just click any other portion of your title after choosing it with the triangle below the dotted line.
Similarly, you can completely delete the divide by choosing it and then pressing the red square with the ex symbol (X).
To verify that everything is right and examine your finished product, click the Preview button.
Adding a Subtitle vs. Splitting the Title
When utilizing these two phrases, the majority of WordPress users mistake one for the other. What distinguishes them from one another, then?
Splitting a post title involves dividing it into many lines or rows. Furthermore, no style or format application is made.
However, you can include two or more heads on your WordPress page or post by adding a subtitle. For instance, before the reader gets to the meat of your piece, you may give them a brief overview of the topic.
Divide Posts Into Separate Pages
You can also divide your posts into many pages. Even if you've already posted a long blog on your WordPress website, you might want to condense it for your audience. This can be accomplished with ease by dividing the content into discrete, manageable chunks.
Furthermore, the number of pages viewed during a visit increases each time a reader clicks the Next Page button.
For splitting WordPress posts into distinct pages, there are a tonne of plugin solutions available. You will discover how to use WP-PageNavi and WP-Paginate in this post.
WP-PageNavi
WP-PageNavi is a powerful plugin that enhances the navigation experience for your WordPress blog. It seamlessly integrates with most WordPress themes, offering a diverse range of flexible control options. This plugin empowers users to effortlessly manage the chronological order of their blog posts and page numbers.
Here's how you can leverage WP-PageNavi to split your WordPress posts:
Begin by installing and activating the WP-PageNavi plugin from the Plugins menu in your WordPress dashboard.
Next, navigate to your WordPress Dashboard and proceed to Settings -> PageNavi.
Customize the Page Navigation Text and Page Navigation Options according to your preferences.
Once you've tailored the settings to your liking, click Save Changes.
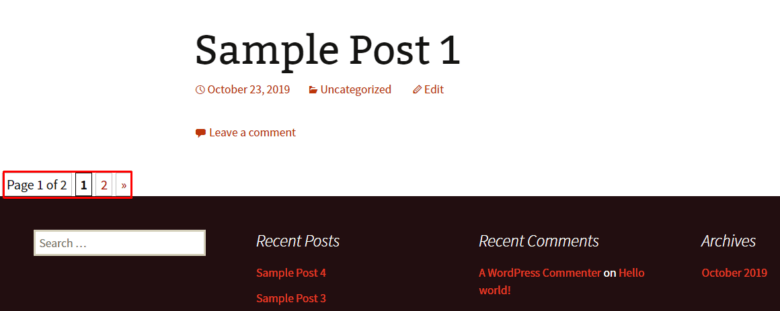
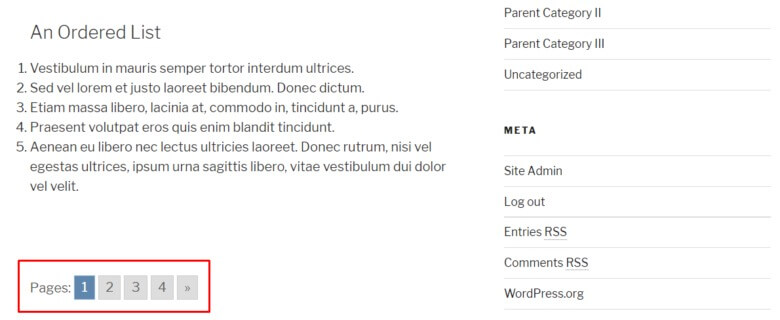
Refresh your WordPress website to preview the changes you've made. You'll now see your new pagination setup on your homepage.
However, if the plugin doesn't seem to work as expected, you might need to tweak your theme code. Follow these steps:
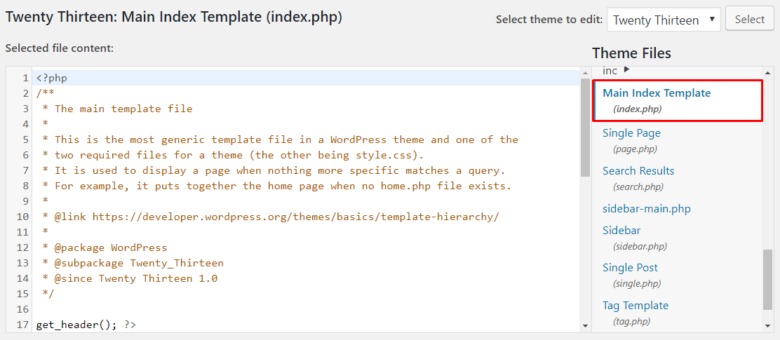
Head to your WordPress Dashboard and go to Appearance -> Editor.
Under the Theme Files section, select the Main Index Template (index.php).
Locate the PHP code - "<?php twentythirteen_paging_nav(); ?>" and replace it with "<?php wp_pagenavi(); ?>".
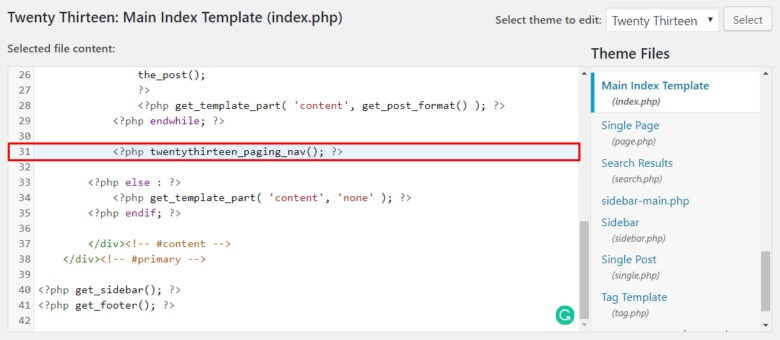
Click Update File once you've made the necessary changes.
It's worth noting that this article uses the Twenty Thirteen theme as an example. Other themes might have different PHP codes, but the overall process should be similar.
WP-Paginate
WP-Paginate is another excellent plugin that offers a visually appealing and user-friendly way to split your posts into multiple pages. It shines particularly well when it comes to implementing a gallery-style numbering system for pagination. However, it's important to note that if an article consists of less than two pages, you may not find this plugin particularly useful.
Here's how you can leverage the power of WP-Paginate:
After installing and activating the plugin, navigate to Settings -> WP-Paginate in your WordPress dashboard.
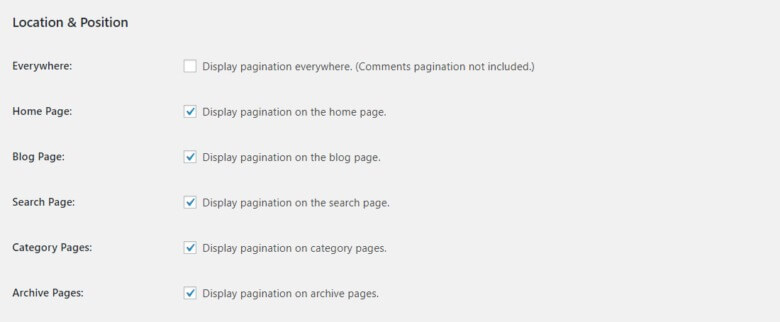
Scroll down to the Location & Position section within the Settings tab, and select the page where you want the pagination to be displayed.
Click the drop-down menu and choose the desired position for the pagination on your page. Additionally, check the Hide Standard Pagination option to conceal the default WordPress pagination.

Next, head to the Appearance section and pick your preferred font and button style to personalize the look and feel of the pagination.
Leave the remaining settings as they are, and hit Save Changes. This is how the pagination will appear on your site's pages.
Furthermore, if you wish to add a unique touch to your pagination, you can leverage the power of CSS by adding custom styles directly from the Custom CSS menu.
Final Thoughts
Enhancing the engagement of your WordPress posts involves more than just compelling content and appealing aesthetics. Improving accessibility and navigation through tools like WP-PageNavi can significantly enhance the reader experience.
By making your content easier to digest and navigate, you increase the likelihood of retaining and engaging your audience. Should you have any questions or need further assistance, please don't hesitate to leave a comment below. Your feedback and inquiries are always welcome.


