Do you want to add GTIN, ISBN, or MPN schema to your WooCommerce store or WordPress website?

The use of GTIN, ISBN, and MPN schema on your WordPress site can assist search engines in better understanding your products. This can improve your SEO ranking.
We will teach you how to simply add the GTIN, ISBN, and MPN schema to WooCommerce and WordPress in this article.
What are GTIN, ISBN, and MPN Schema?
Product identifiers such as GTIN, ISBN, and MPN assist customers and search engines in finding and comparing products online. They are bits of code that provide additional information about your products to search engines. They are also known as structured data or schema markups.
Create Amazing Websites
With the best free page builder Elementor
Start NowGTIN is an abbreviation for Global Trade Item Number, and it is a unique identification for each product that may be bought or sold. Depending on the type of product and the country where it is sold, GTINs might be 8, 12, 13, or 14 digits long. GTINs are commonly used for books, electronics, apparel, food, and other items.
There are 4 types of GTINs:
- UPC: Used for products in the United States
- EAN: Used for products in Europe
- ISBN: Used for books
- MPN: Used for manufactured products
Why Should You Add GTIN, ISBN, & MPN Schema in WooCommerce and WordPress?
GTIN (Global Trade Item Number) is a number that is assigned to trade goods such as products or services. ISBN (International Standard Book Number), on the other hand, is used to track books, eBooks, and audiobooks.
MPN (Manufacturer Part Number), on the other hand, is used to track specific electrical components and parts, such as integrated circuits and resistors.
GTIN, ISBN, and MPN schema attributes are markup codes that you may apply to your WordPress website to offer search engines detailed and accurate product information.
This markup can help increase the visibility of your content as well as the SEO of your website. When someone searches for a specific ISBN, GTIN, or MPN, your products may appear in the results.
For example, if you manage an online bookstore, you can use the ISBN schema to boost the visibility of your website.

Using schema markup in WooCommerce or WordPress will help you receive more organic search results clicks, which can lead to more purchases.
It can also improve the shopping experience of your customers by making it easier for them to find and buy your products.
After that, let's look at how to simply add GTIN, ISBN, and MPN schema to WordPress and WooCommerce. You can navigate to the approach you want to utilize by using the quick buttons below:
- Method 1: Add GTIN, ISBN, & MPN Schema to WordPress Website
- Method 2: Add GTIN, ISBN, & MPN Schema to Your WooCommerce Store
Method 1: Add GTIN, ISBN, & MPN Schema to WordPress Website
If you want to add GTIN, ISBN, or MPN schema to your WordPress website, this is the approach to use.
This schema may be quickly added using All in One SEO (AIOSEO), the best WordPress SEO plugin on the market, which is used by over 3 million websites.
You may also use the plugin to add several sorts of schema to your website, such as FAQs, recipes, articles, and product schema.
You must first install and activate the AIOSEO plugin.
Note: AIOSEO has a free version as well. The schema markup capability, however, is only available in the Pro edition of the plugin.
When you activate the plugin, it will launch the setup wizard on your screen, which will guide you through the installation procedure.

Then, from your WordPress admin sidebar, navigate to the AIOSEO » Search Appearance page and select the 'Content Types' tab.
Scroll down to the 'Products' section and click the 'Schema Markup' tab. Following that, select the 'Product' option from the 'Schema Type' dropdown menu.
Finally, click the 'Save Changes' button to save your modifications.
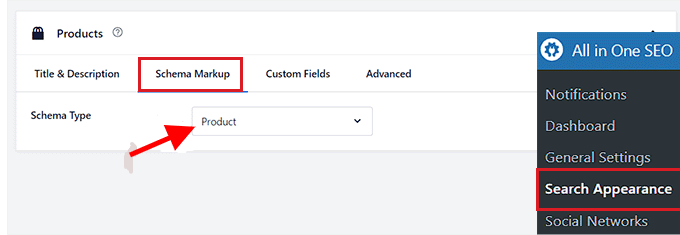
You can now provide separate schema markup for each of your goods. To do so, use the WordPress admin sidebar to navigate to the page or post where you wish to add the ISBN, GTIN, or MPN schema.
After that, in the block editor, scroll down to the 'AIOSEO Settings' section and select the 'Schema' option.
After that, click the 'Generate Schema' button.
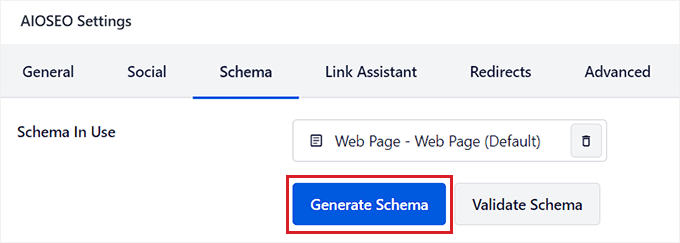
This will launch the ‘Schema Catalog’ popup on your screen, where you can select the schema template you want to add.
Go ahead and click the ‘+’ button next to the ‘Product’ option.
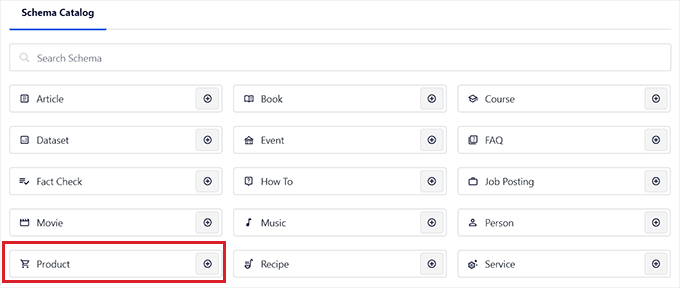
This will create a modal where you can enter your product's details and tell search engines like Google everything about it.
You can begin by giving your product a name, description, brand, and image.
After that, scroll down to the 'Identifiers' section, where you can enter the product's GTIN, ISBN, or MPN.
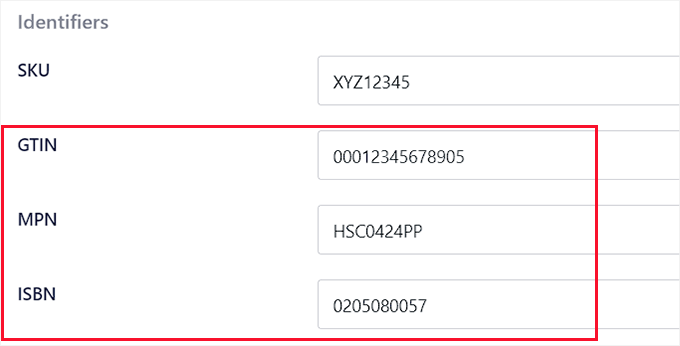
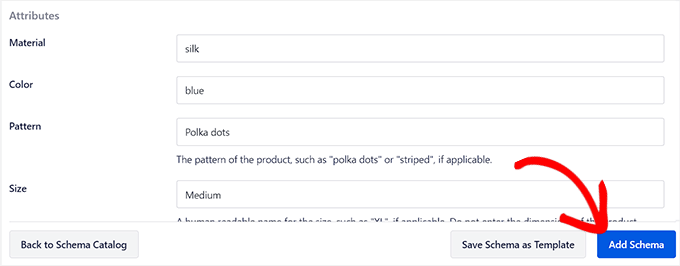
After that, scroll down to add the product's price, attributes, reviews, and shipping destination to the schema markup.
When you're finished, simply click the 'Add Schema' button to save your product's schema markup. You can now repeat the process for the other products on the page.
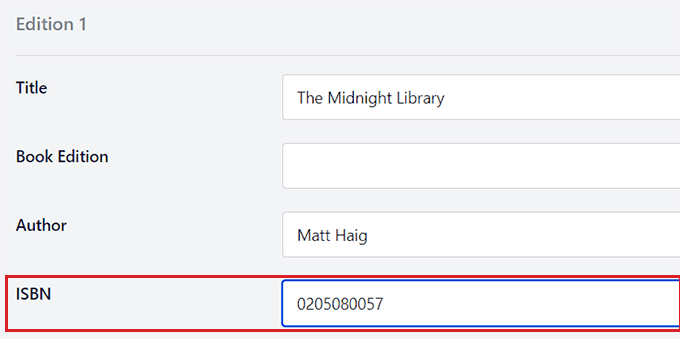
You can also select the 'Book' schema from the 'Schema Catalog' popup if you sell books online. This will open a new modal where you can enter the book's title, author, description, and image.
Scroll down to the 'Editions' area and enter the ISBN for the book. Finally, to generate the schema, click the 'Add Schema' button.
Once you've added the GTIN, MPN, or ISBN schema for all of the products, don't forget to save your changes by clicking the 'Update' or 'Publish' button at the top.
On the front end of your website, you and your visitors will notice no difference, but search engine bots will now have the ISBN, GTIN, or MPN details for the products.
Method 2: Add GTIN, ISBN, & MPN Schema to Your WooCommerce Store
To add GTIN, ISBN, and MPN Schema to your WooCommerce store, you need to install and activate the AIOSEO plugin.
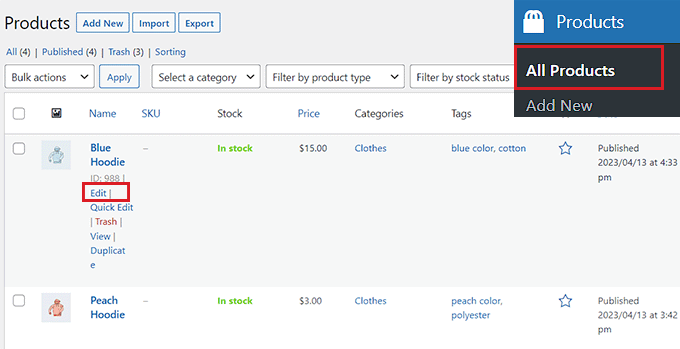
Then, from the WordPress admin sidebar, navigate to the Products > All Products page.
Once there, simply click the 'Edit' link next to the product to which you want to add the GTIN, ISBN, or MPN schema.
This will take you to the 'Edit Product' page, where you must scroll down to find the 'AIOSEO Settings' meta box.
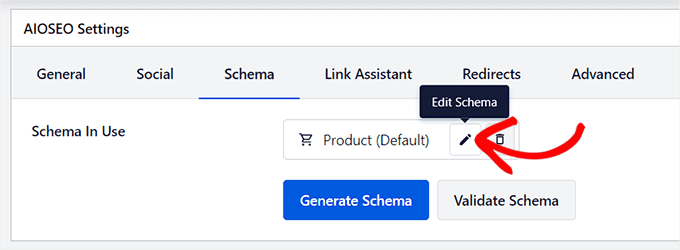
Switch to the 'Schema' tab from here, and you'll notice that the 'Product' schema is already in use by default. Simply click the 'Edit' icon to the right of the schema.
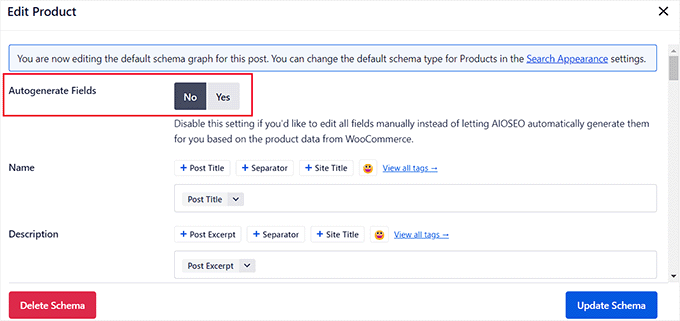
This will open up an 'Edit Product' window on the screen, where you will see that the 'Autogenerate Field' toggle has been turned to 'Yes'.
This means that AIOSEO retrieves and fills the schema data for the product title, image, and description automatically.
If you prefer to populate these forms manually, simply turn the 'Autogenerate forms' toggle to the 'No' position.
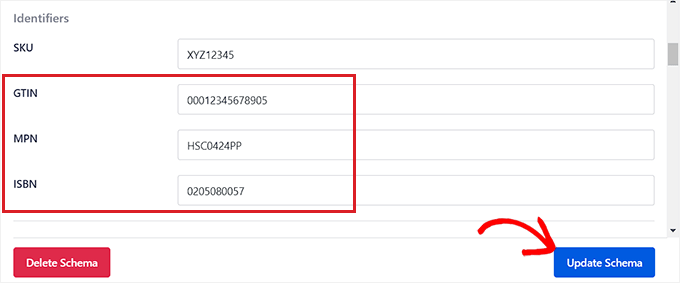
After that, scroll down to the 'Identifiers' section and enter your product's GTIN, ISBN, or MPN. Other attributes, shipping destinations, and product reviews can also be added to the schema markup.
After making your changes, remember to click the 'Update Schema' button.
If your online store solely offers books, go to the Schema tab and click the 'Generate Schema' button, then choose the 'Book' schema template from the catalog.
This will bring up the Schema Generator, where you may enter the title, image, and description for the book you're selling.
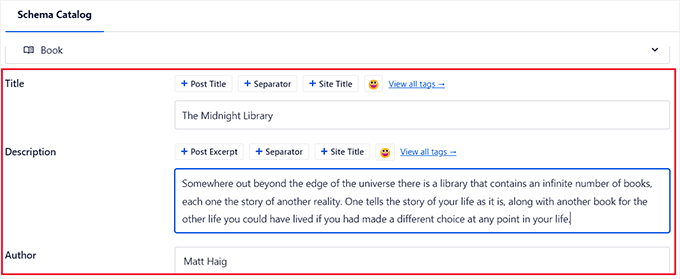
After that, scroll down to the 'Editions' section and enter your book's ISBN.
After filling out the form, click the 'Add Schema' button to produce your schema markup for books.

Finally, click the ‘Update’ button at the top to store your changes.
Conclusion
We hope you found this post useful in learning how to simply integrate the GTIN, ISBN, and MPN schema into WooCommerce and WordPress.
Keep in mind that these changes will not be displayed on the front end of your website, but will assist search engine bots in ranking your content.
That's all! With the assistance of the All in One SEO plugin, you have successfully incorporated Schema into your WordPress website and your WooCommerce store.


