
Using Divi's new backdrop options has opened up a whole new world of possibilities for its users. Thanks to the new gradient builder, we can now design any gradient we want with as many colors as we want. It's not all there is to be creative. The Gradient Builder design can be used in conjunction with backdrop masks and patterns to create a plethora of breathtaking and one-of-a-kind website background designs.

To create a stunning background, we're going to use Divi's Background Gradient Builder in conjunction with background masks and patterns. Every backdrop design element (background gradient, masks, and patterns) will be added to a section, and we'll show you how to do it. With only a few simple clicks, you can vary the design combinations and have a lot of fun.
Come on, let's have a good time!
Design Preview
Here is how amazingly we can design various sections of our website.
Create Amazing Websites
With the best free page builder Elementor
Start Now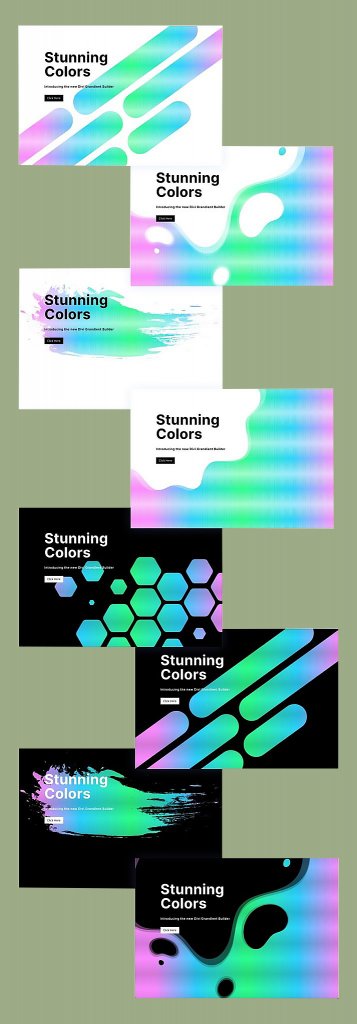
Changing patterns and masks is a cinch with this design in place!
Design Structure
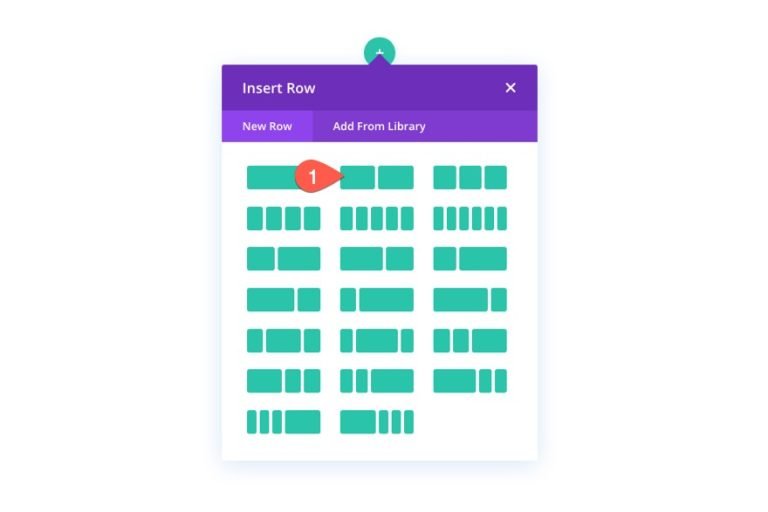
On the left, we'll put a headline and an arrow that leads to a specific action. Divi's backdrop options will be used to construct our visual design. Creating a two-column row is necessary first.
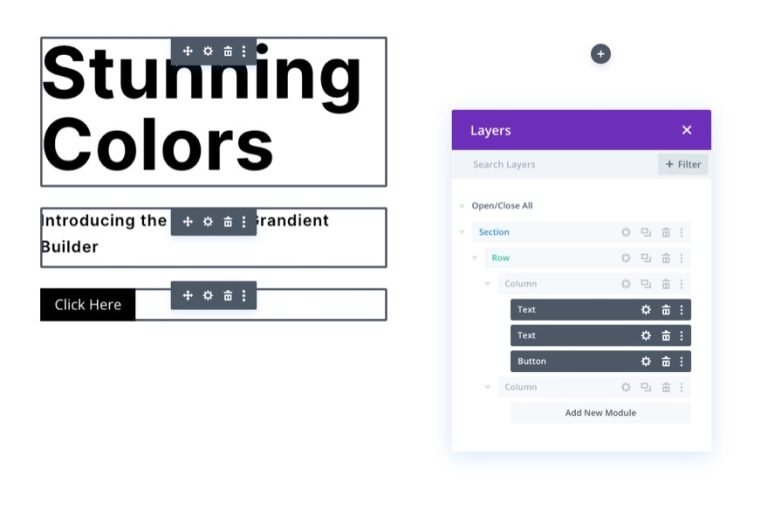
Add Content and Copies
Your main title, subheading, and the button should be placed in the left column (column 1) of this table.
These design settings can be found by downloading the layout and checking it out at a later date if that's what you'd like. We'll focus on the background design for the time being.
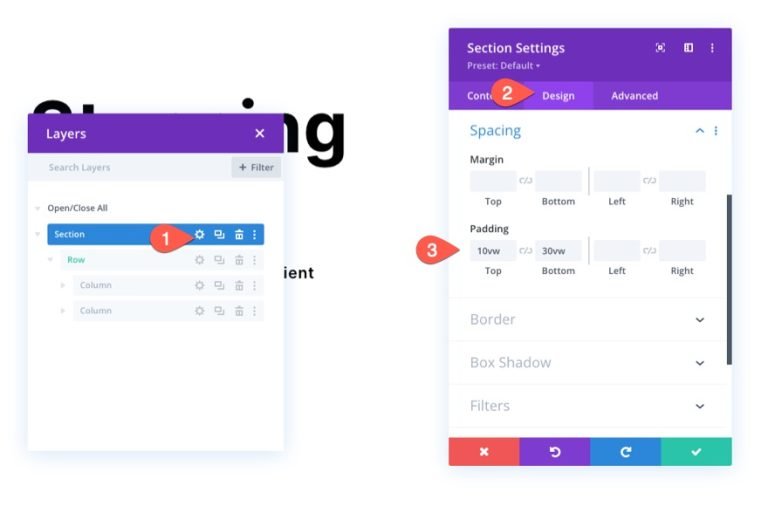
Section Vertical Spacing
We must increase the section's vertical height in order for our backdrop design to full fill the browser. Padding the section's top and the bottom is an easy way to accomplish this.
The section's settings can be accessed here. Update the padding as follows in the design tab:
- Padding: 10vw top, 30vw bottom
If you want to change the backdrop design after the columns stack vertically, you may have to alter the padding on tablet and phone displays.
Add Gradient Color On Background
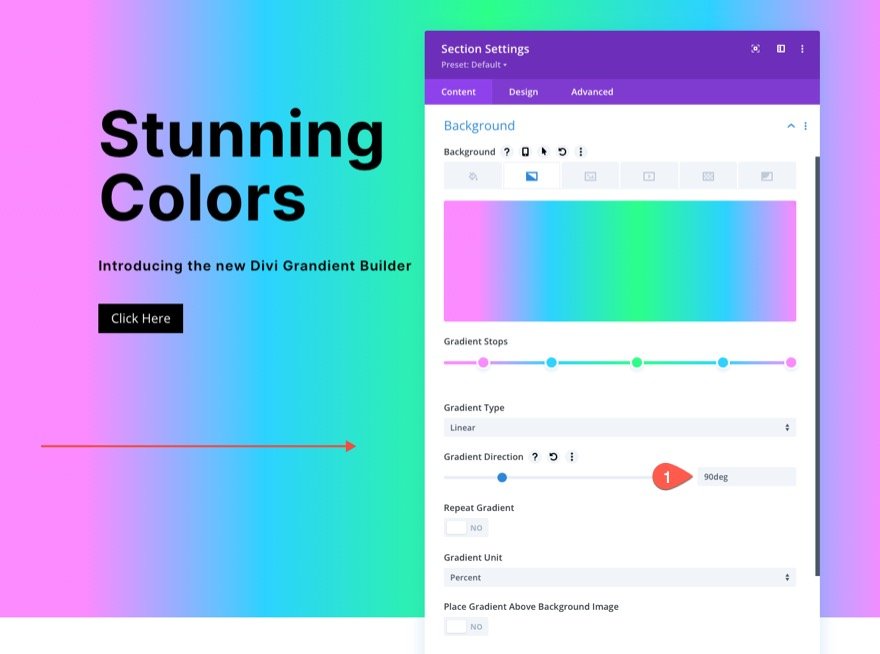
The next step is to apply a custom gradient to the section background. A total of five gradient stops are being added for the purpose of this gradient. The color of the first and last gradient stops will be the same. The blue color of the second and fourth gradient stops will match. The gradient's third (and last) stop will be green. Our background design will have a stunning multicolored gradient created using these five colors.
Gradient Pick 1
Make sure the section settings beneath the content tab are open before adding the first gradient stop. To create a new gradient, go to the Gradients tab and click the + sign. The default gradient colors will be increased by two. To change the color and position of the first gradient on the left, click and drag it as follows:
- Gradient Stop Color: #fa8bff
- Gradient Stop Position: 10%

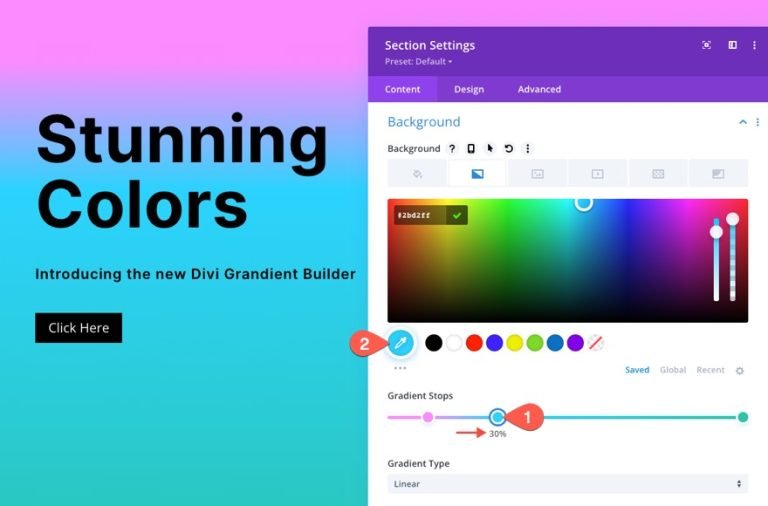
Gradient Pick 2
In order to add a second gradient stop, simply click on the gradient color line. In order to move it into position, you must first change the color.
- Gradient Stop Color: #2bd2ff
- Gradient Stop Position: 30%
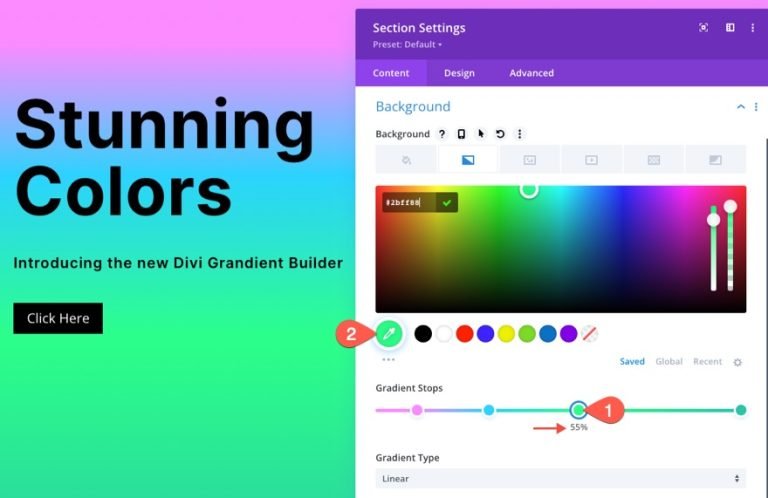
Gradient Pick 3
You can add a third gradient stop by simply clicking on the gradient color line (around the middle of the line). In order to move it into position, you must first change the color.
- Gradient Stop Color: #2bff88
- Gradient Stop Position: 55%
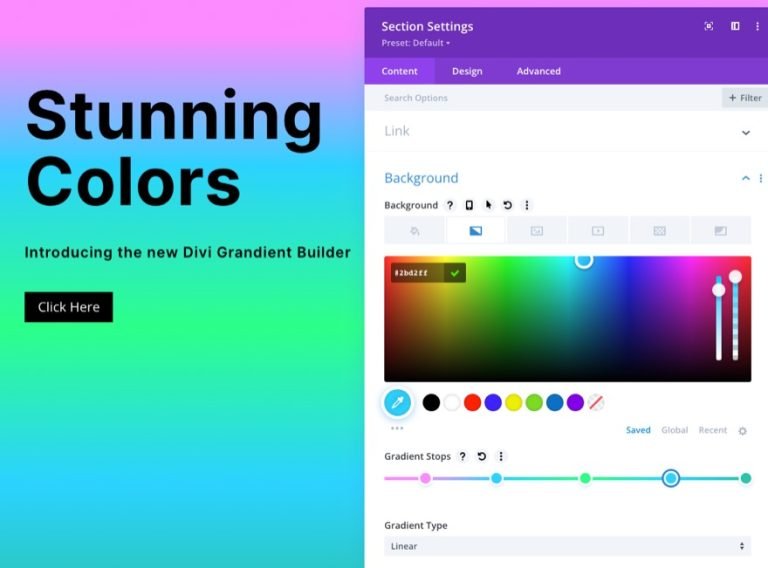
Gradient Pick 4
In order to add a second gradient stop, simply click on the gradient color line. In order to move it into position, you must first change the color.
- Gradient Stop Color: #2bd2ff
- Gradient Stop Position: 80%
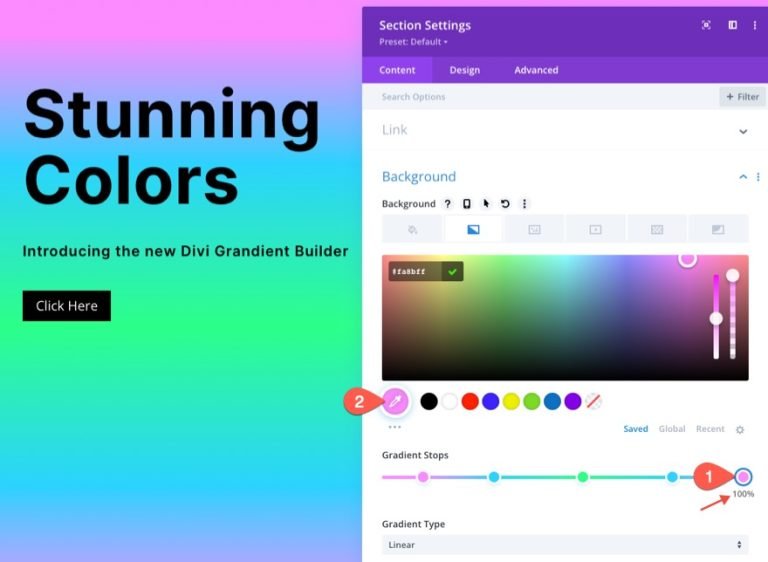
On the far right, you should have the original gradient stop at the left, which is on the far left. The final gradient stop can be made by clicking on the gradient color stop and changing the color as follows (you can leave it at the default position of 100%).
- Gradient Stop Color: #fa8bff
- Gradient Stop Position: 100%
Keep the default Linear Gradient option for this design. The following code has to be updated in order to reverse the linear color pattern:
- Gradient Direction: 90deg
Background Pattern
We can now add a backdrop pattern to our design after our gradient is complete. Use the diamond pattern in a novel way to produce this subtle but effective pattern.
Make the following changes to the patterns tab:
- Background Pattern: Diamonds
- Pattern Color: rgba(255,255,255,0.52)
- Pattern Size: Custom Size
- Pattern Width: 8px
- Pattern Height: 15vw
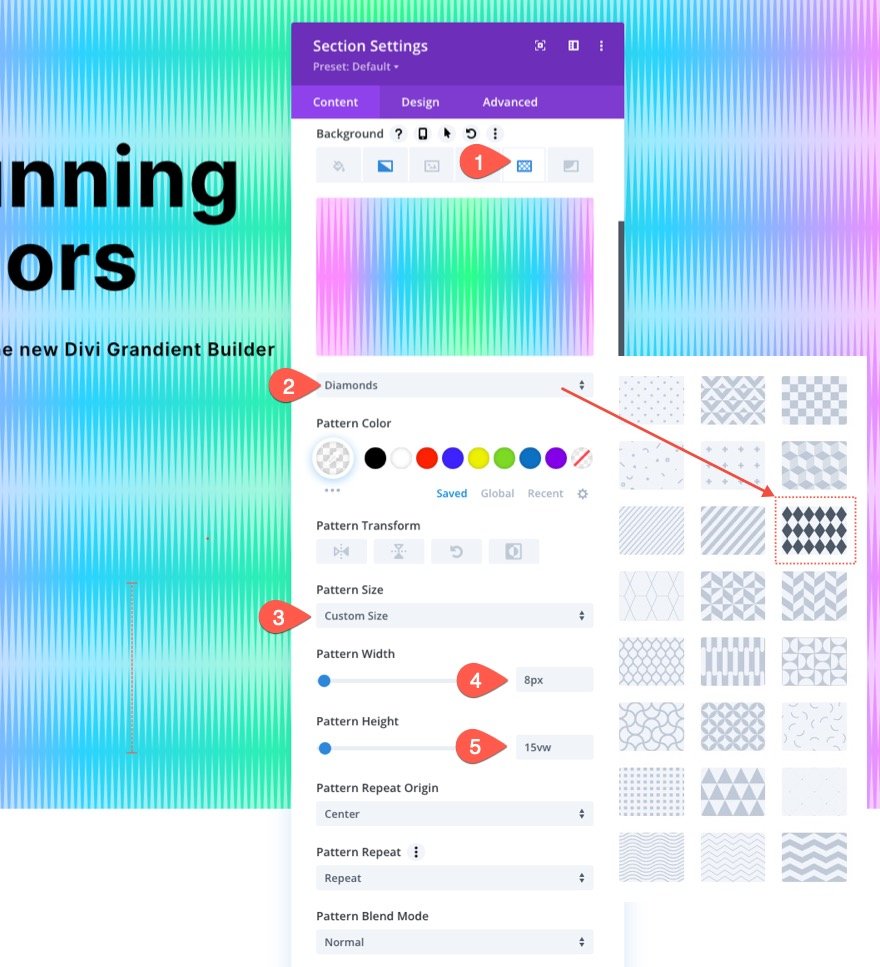
As you can see, there's a lot of room for interpretation with the pre-existing design. A diamonds pattern was chosen in this case. As a result, we created a unique pattern that looks like sound waves due to the diamonds' vertical stretching.
If you want something else, there are plenty of options available, and they're all just a click away.
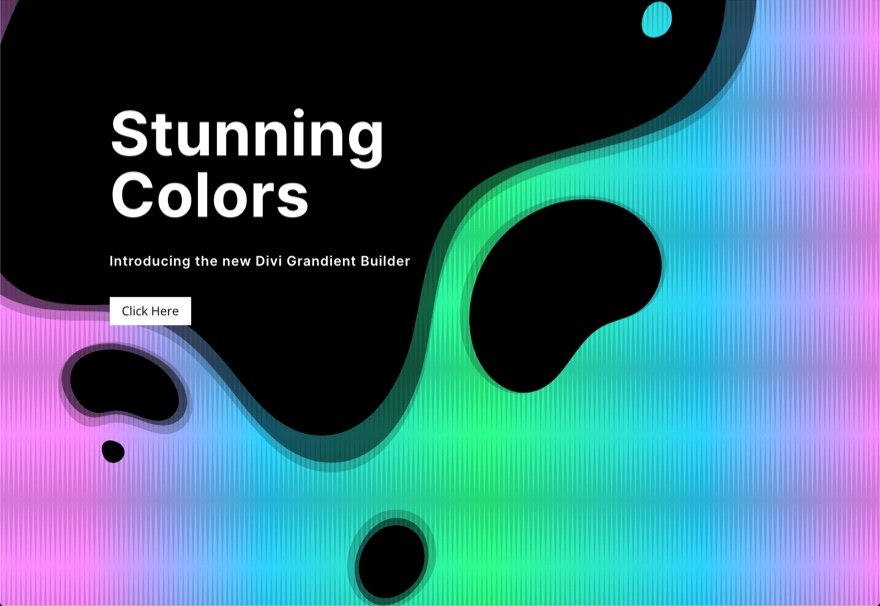
Background Mask
Our background pattern is now in place, so we can finally add a mask to finish our background combination design. There is a slew of alternatives and variants available. We'll be using the Paint mask for this example (at least to start with).
You'll need to make the following changes to the masks tab:
- Mask: Paint
- Mask Color: #ffffff
- Mask Transform: Rotate
- Mask Size: Cover
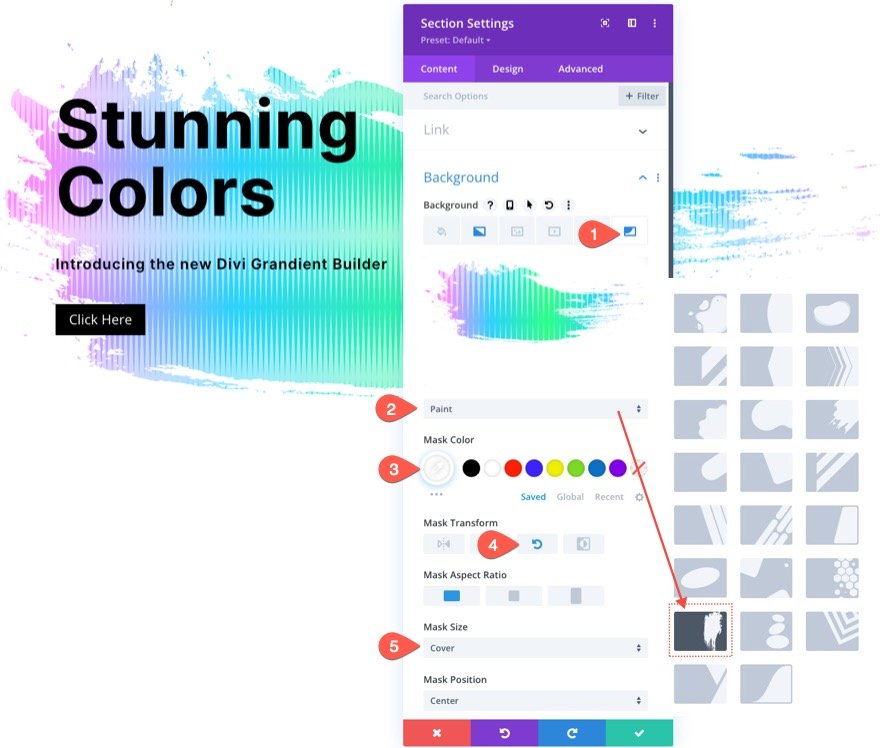
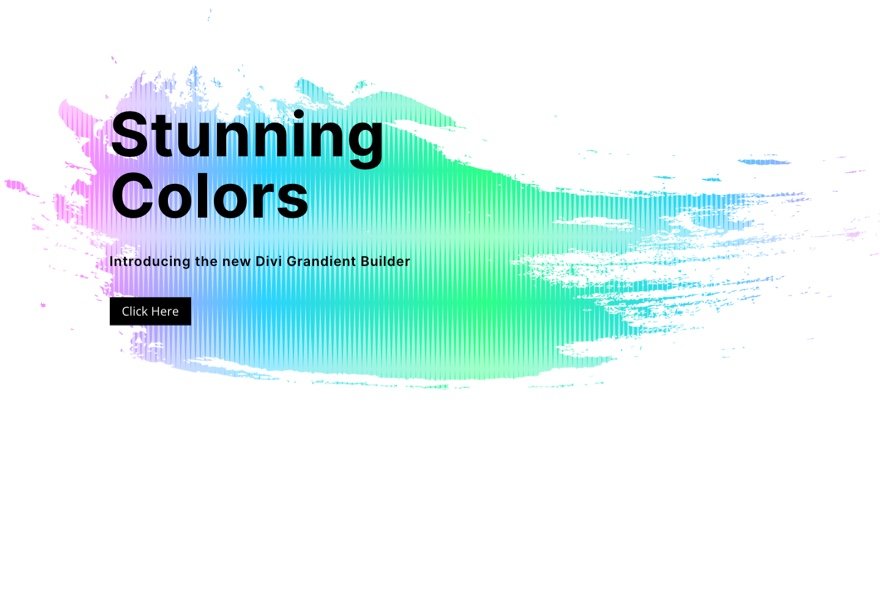
And the outcome is something like this.
Similar to patterns, there are numerous masks that would complement this design and can be found by just clicking on the "Masks" tab.
Dark Version
Simply change the background mask color to a dark hue if you want a dark version of this design (like black). Use a darker hue for the motif. Then, make the headline and the subheader text white. You may also want to change the color of the buttons.
These are the results of applying various masks to create a dark version of the image.
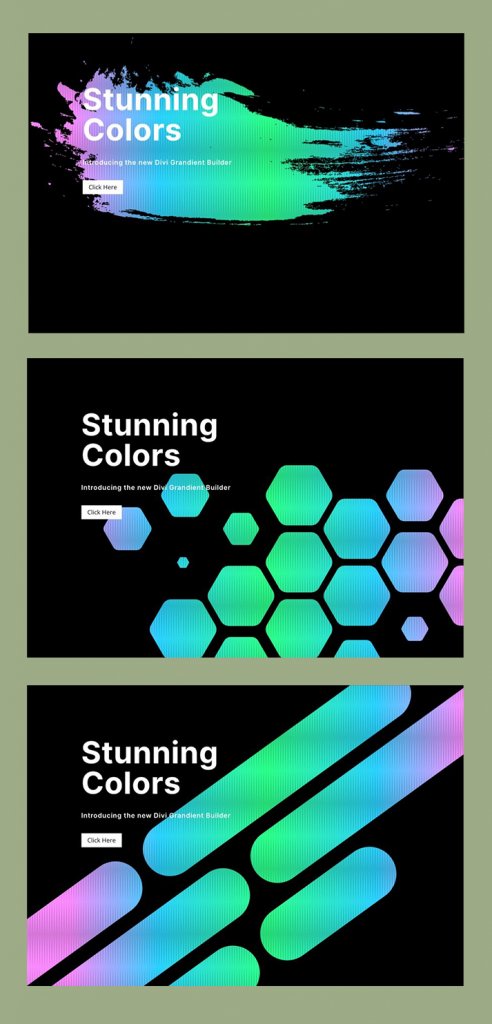
Also, this is how the dark version looks with an inverted mask.
More Gradient Options
In order to make these layered backdrop designs stand out, use the Gradient Builder to create many additional colors and gradient kinds.
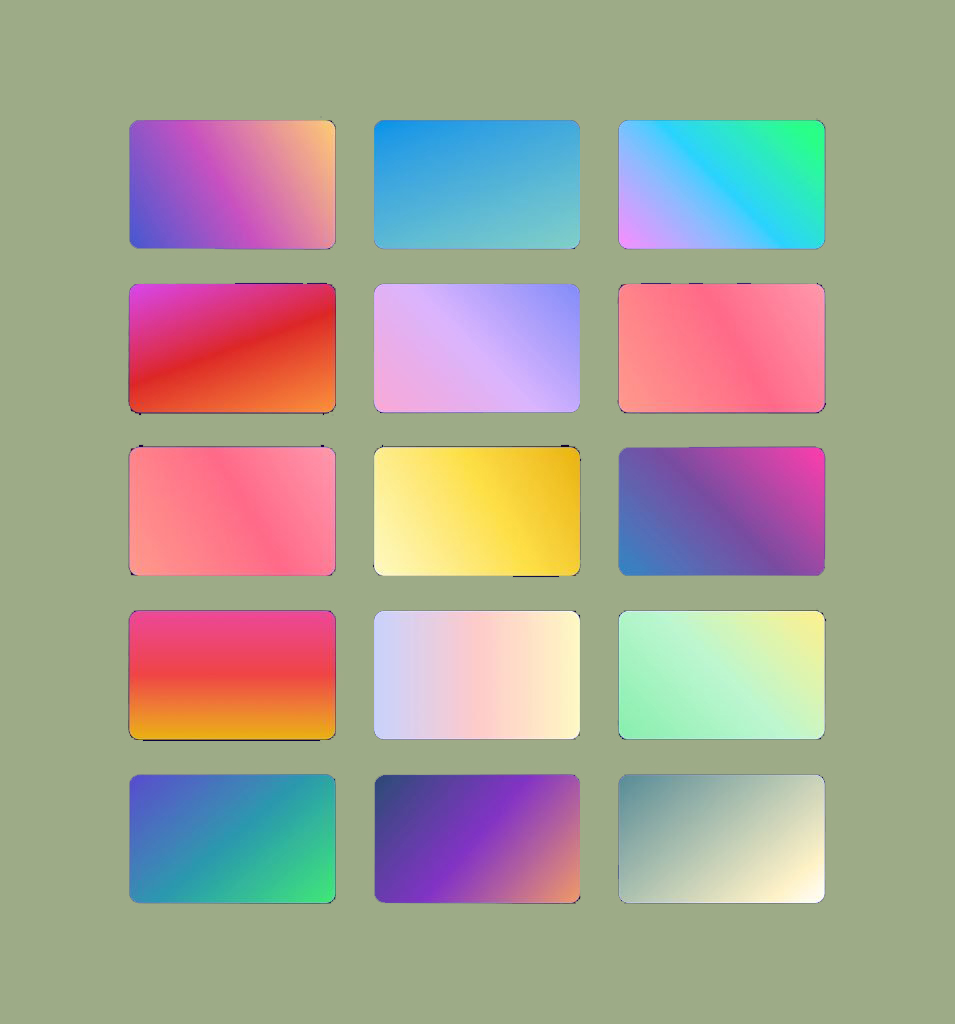
Final Result
Here are all the design options that you can explore.
Final Thoughts
It's a lot of fun to experiment with Divi's complex background choices. In addition, it's astonishing how simple it is to make such gorgeous background designs without the need for Photoshop or Illustrator. With a few clicks, you may adjust the background to make the design exactly how you like. Even more options (such as blend modes) are available to you in order to create truly unique background designs. Additionally, not only sections but any Divi element can have masks and patterns applied to it. So go ahead and play around with it!


