
Sometimes we wish to use a different post template just for a specific blog post. There are numerous significant reasons to do so, and thankfully, the Divi Theme Builder makes it simple. In this article, we'll look at how to use Divi to assign a particular blog post template to select posts.
Design Preview
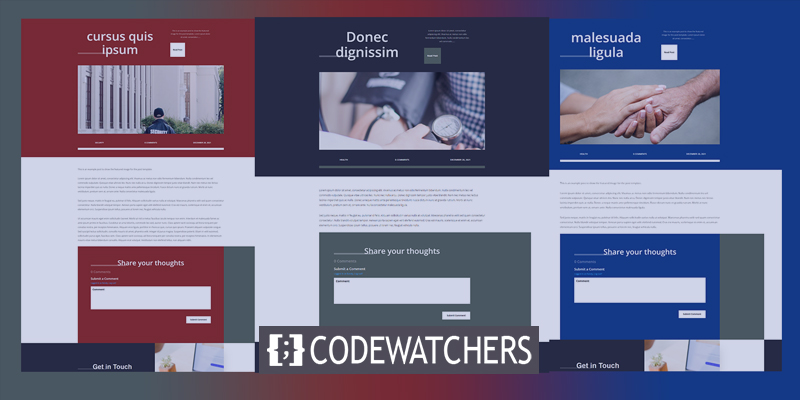
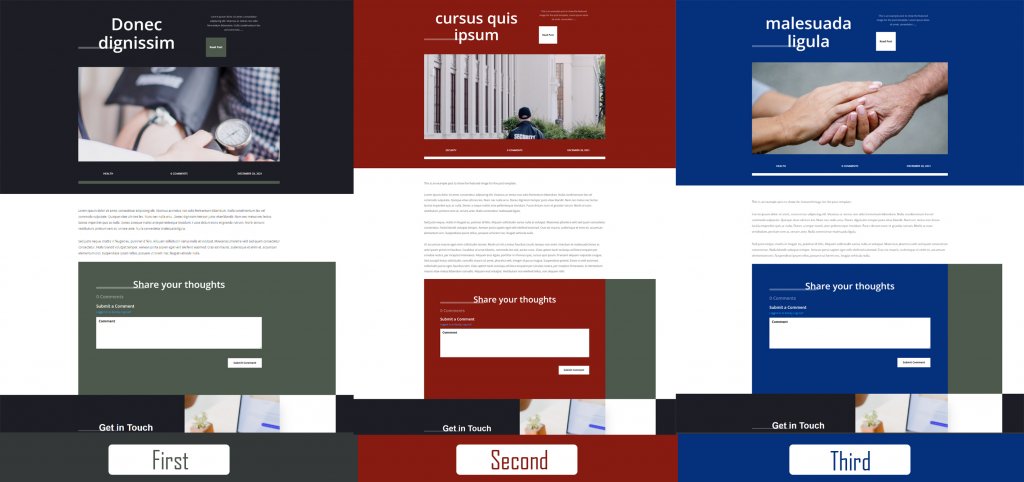
Here are the blog post designs that we will use. The first will apply to all posts. The next two will be assigned to specific posts.
Why do we need a different template for a specific blog post?
There are numerous advantages to using a distinct template for specific blog posts from the rest of your postings. The key reason is that they stand out from the rest of your website's content. Visitors can tell right away that this post is unlike any other.
This is useful for sales posts that feature a product or service. For example, if you're planning a sale, an e-book, or a webinar, you can design a layout to promote these posts. Sale posts are particularly useful for this, as you may not want to create a category for the sale and then allocate layouts based on categories.
Create Amazing Websites
With the best free page builder Elementor
Start NowIt's also useful for indicating when a blog article is a part of a larger piece or series. For example, if you compose posts in sections, part 1 could have one layout and part 2 could have a different layout. Users can obtain a visual queue of where they are in the series this way.
Free Blog Post Templates
To begin, download and unzip your blog post template. The Divi themes have a plethora of free blog post styles. Look for a "free blog post template" on the blog. There are also a number of paid blog post templates available in the Divi Marketplace. Look for "blog post templates" on the marketplace to see what's available.
Upload Blog Post Templates
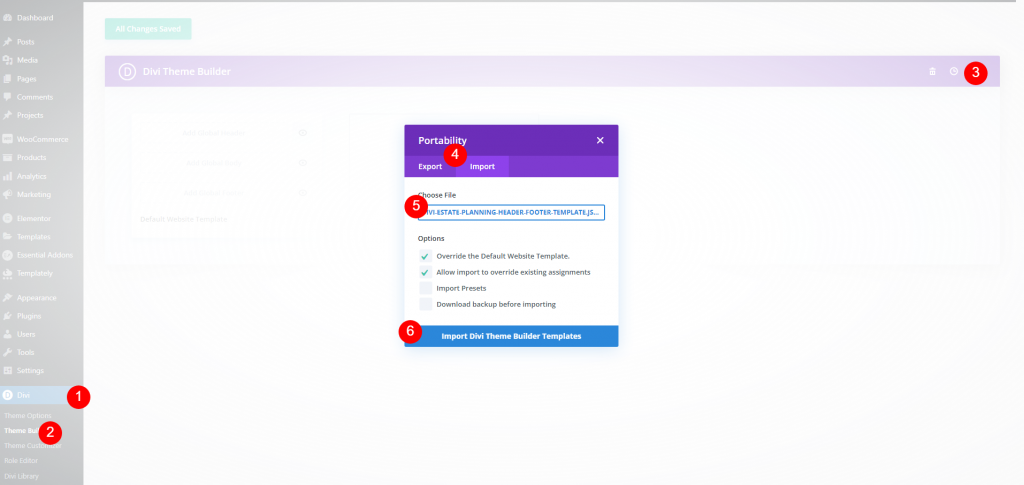
In the WordPress dashboard, navigate to Divi > Theme Builder to upload your blog post template. In the upper right corner, click the Portability button. In the modal that appears, click the Import tab. Click the Choose File button, then navigate to your unzipped JSON file on your computer and pick it up. Wait for the upload to finish before clicking Import Divi Theme Builder Templates. Finally, click Save Changes.
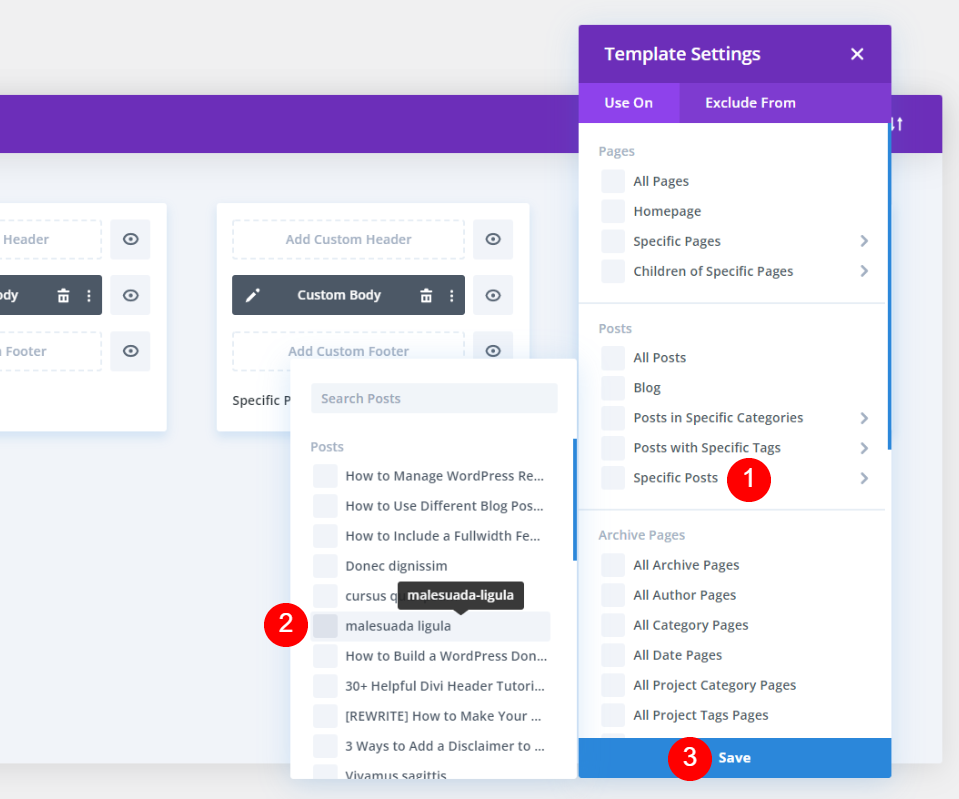
Assigning to Specific Posts
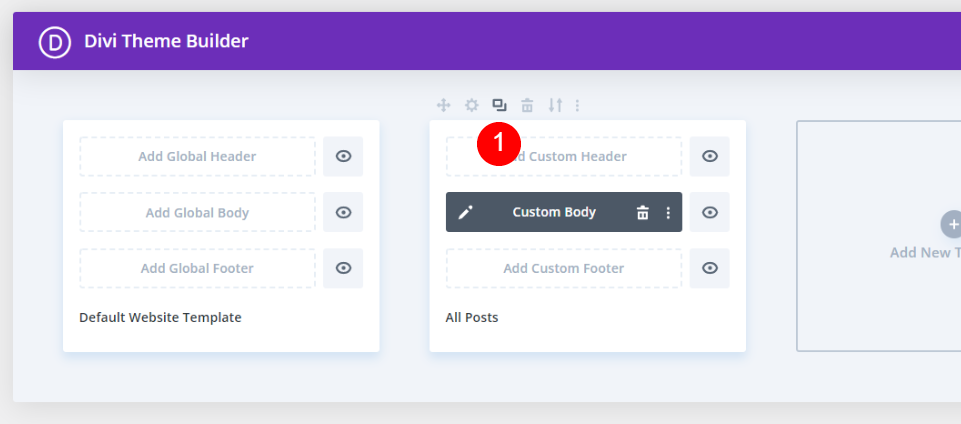
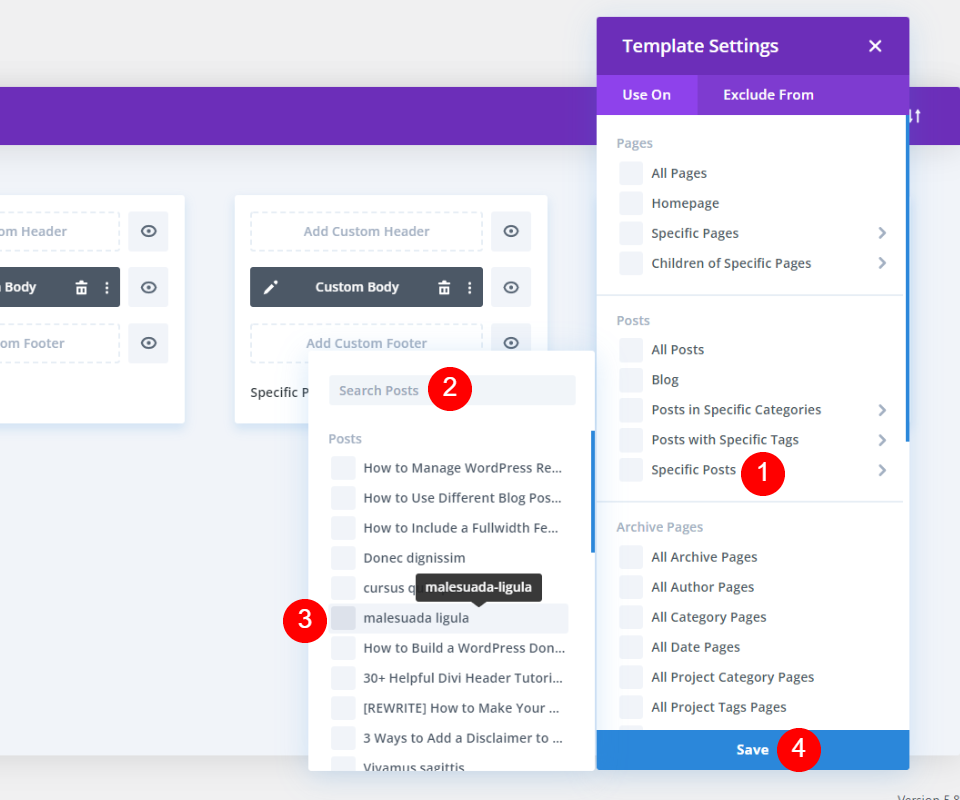
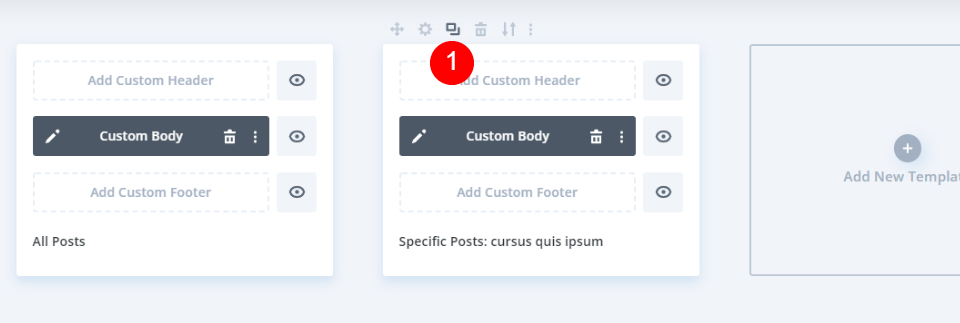
All Posts are automatically set in the template. Every blog post that hasn't been assigned to a different template or isn't excluded from using this template will be displayed in All Posts. We'll leave the template as is and make copies to tweak and assign. Hover your mouse over the template and click the Clone icon.
A modal window will appear, displaying the template parameters for your new template. Hover over Specific Posts in the Posts section. This displays a list of your website's blog postings. You may either search for a certain post or scroll down to locate it. Select the post to which you wish to apply this template. You are free to assign to as many posts as you wish. I've assigned it to a single thread.
We'll make another clone of this one, but first, we'll personalize it.
Customize the First Cloned Template
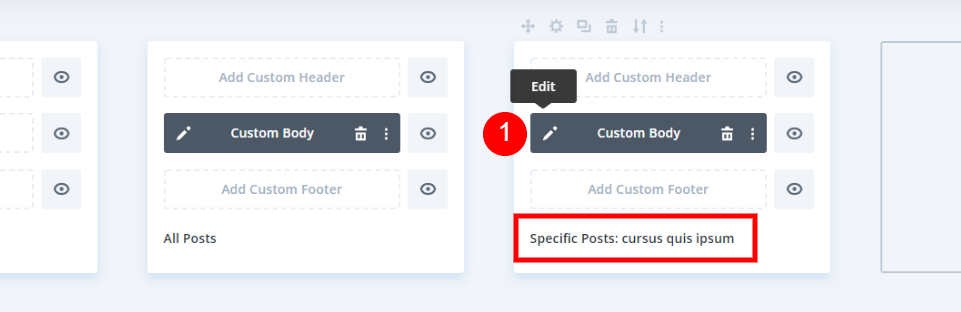
The template is now allocated to the blog post I selected. Then, to customize this design, click the edit icon.
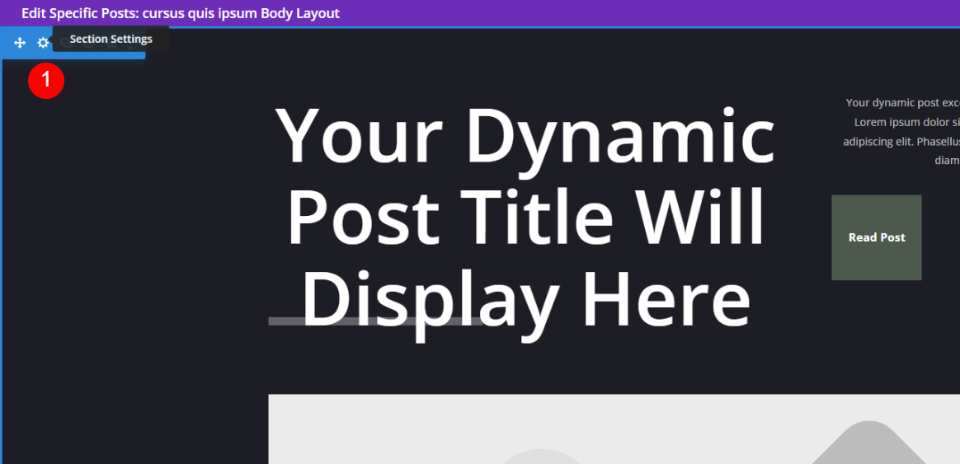
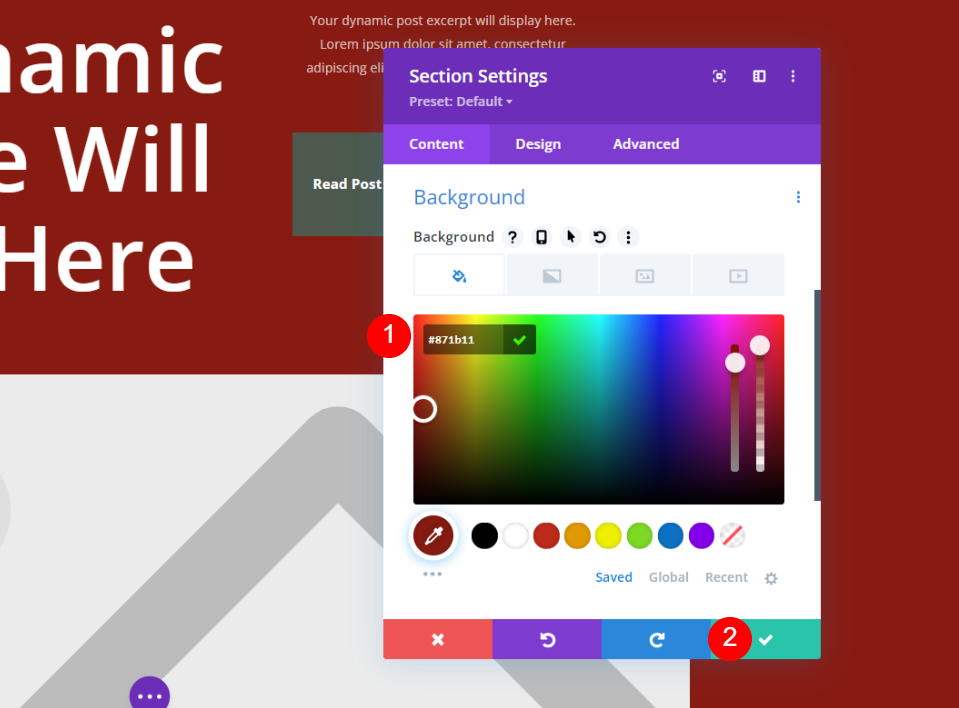
Open the first section's Section settings.
Set a new background color.
- Background: #871b11
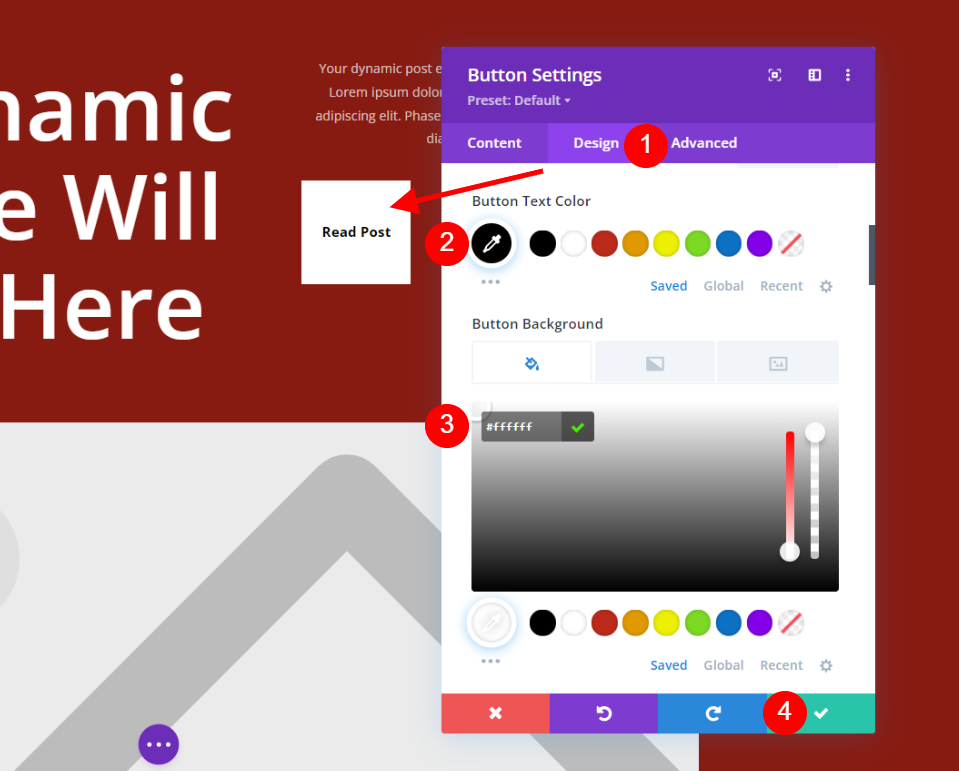
Modify the Read Post button settings. Select the Design tab and make the following changes.
- Button Text Color: #000000
- Button Background: #ffffff
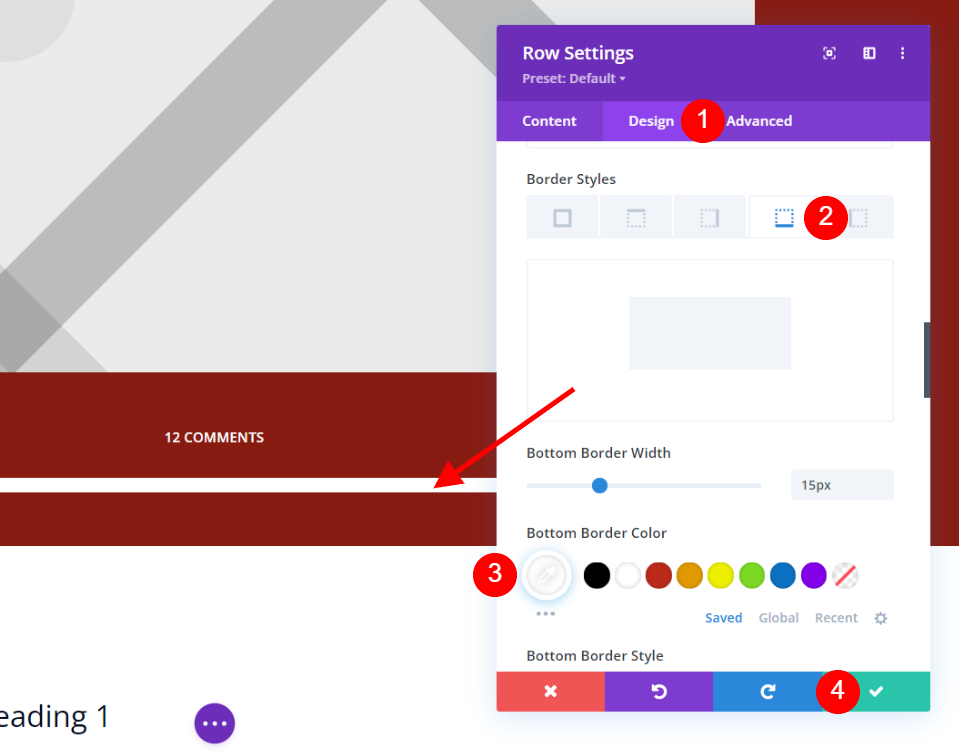
Open the Row settings. This contains the post meta information. Select the Design tab and make some changes to Border styles.
- Bottom Border Color: #ffffff
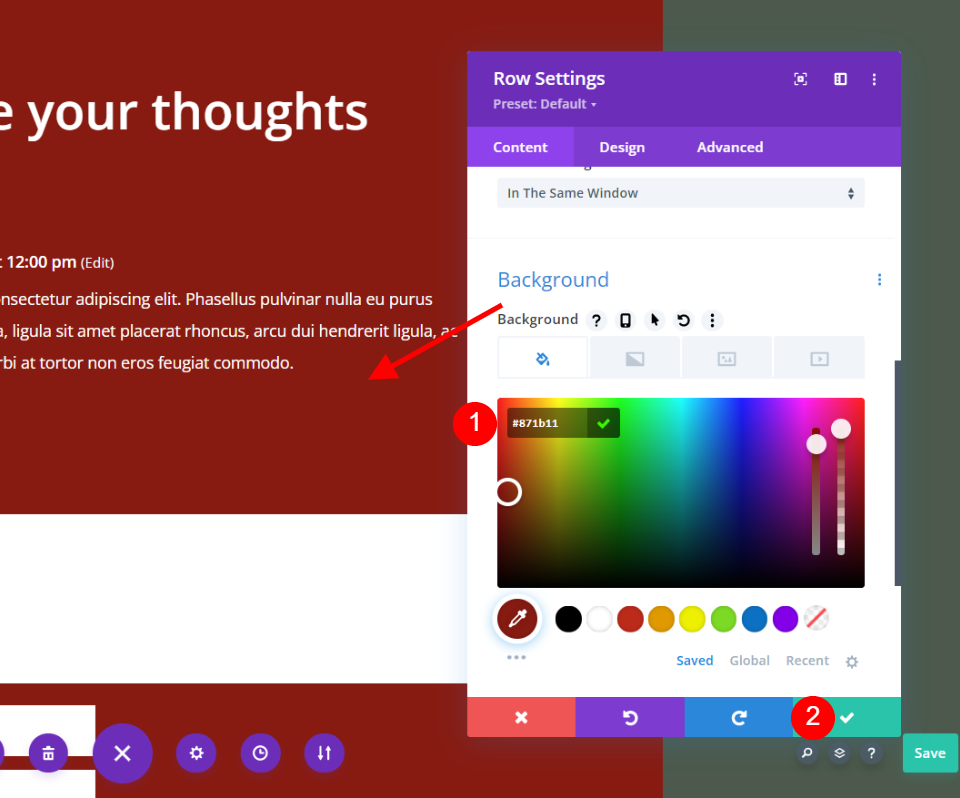
Scroll down to the Row containing the Comments module and click the Settings button. Change the background to the same dark red as in the first section. Take note of the green section of the background. I'll leave it as is because it connects the blog article to the original layout. Save your layout after closing the settings.
- Background: #871b11
Customize the Second Cloned Template
Then, we'll replicate our personalized post template. Hover your mouse over the template and select the clone icon.
The settings modal window will appear. Hover over Specific Posts under Posts. Look find your post in the list or search for it and choose it. Save your preferences. You can assign it to as many posts as you like, just like the first copied template. As before, I've assigned it to a single post.
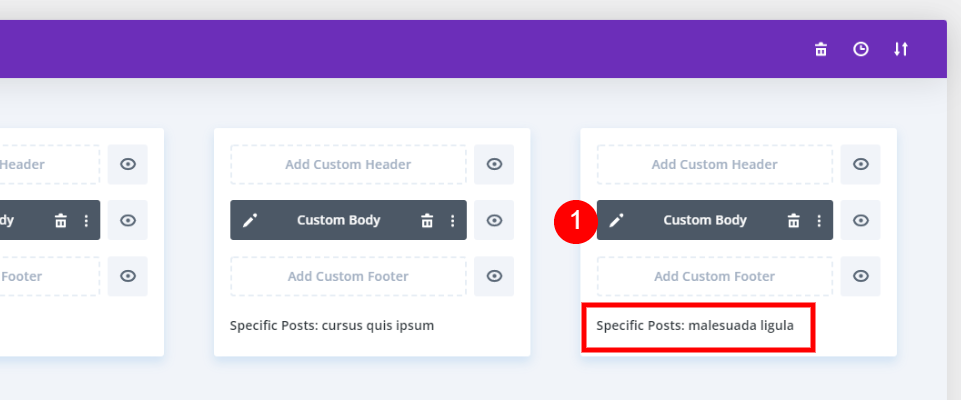
The second cloned blog post template will display the post name to which it has been allocated. Then, to make changes, click the edit icon.
Change the background color in the first section.
- Background: #04307c

Now move to the comment module and expand Row settings and change the background color.
- Background: #04307c
Final Output
So the first design is available for all blog posts. The next two are for specific blog posts.
Final Thoughts
That concludes our look at how to use Divi to apply a distinct blog post template to individual blog posts. The samples I used merely modified the background colors, but you can use templates with totally new layouts if you choose. To keep the layouts consistent, I propose employing comparable design elements. Users will not believe they have navigated to a separate website this way. Fortunately, Divi makes it simple to use multiple layouts for different blog posts.


