
Mastering the art of arranging images side by side can significantly enhance the visual appeal of your website. Whether you're a blogger, photographer, or business owner, knowing how to effortlessly align and display images can elevate your content.
In this comprehensive guide, we'll delve into the intricacies of placing images side by side in WordPress, utilizing both traditional methods and the power of plugins.
From enhancing user experience to optimizing your site's aesthetics, this tutorial will equip you with the skills to create visually captivating layouts that leave a lasting impression on your audience.
No matter if you are using any page builder like Elementor or Divi, these tricks will work in any way.
Create Amazing Websites
With the best free page builder Elementor
Start NowWhy Arrange Picture Side-By-Side On WordPress?
Enhancing the visual allure of your WordPress website is as simple as incorporating side-by-side images, enriching your layout with captivating appeal.
Not only do side-by-side images optimize space efficiency, maximizing your visual content within confined areas, but they also elevate the aesthetic presentation of your photography website, showcasing your portfolio in a visually engaging manner.
Moreover, facilitating image comparison for users on your WordPress blog becomes seamless when images are juxtaposed side by side, enabling effortless analysis and comprehension of differences.
Let's delve into the straightforward process of adding images side by side in WordPress, exploring two distinct methods:
- Method 1: Utilizing the Block Editor for Side-by-Side Image Arrangement
- Method 2: Incorporating a Plugin for Effortless Side-by-Side Image Display
Method 1: Utilizing the Block Editor for Side-by-Side Image Arrangement
If you seek a straightforward approach to arranging images side by side within the Gutenberg block editor, this method is tailor-made for you.
Within the editor, a dedicated Gallery block simplifies the process of showcasing images in rows and columns seamlessly.
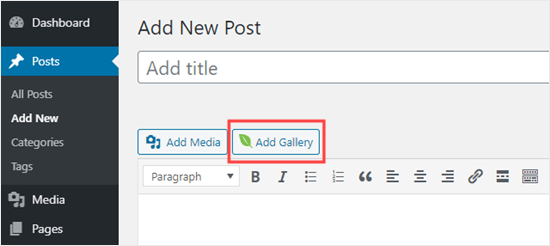
To begin, either initiate a new post/page or access an existing one to enter the content editor interface. Once inside, navigate to the top left corner of the screen and click the 'Add Block' (+) button, which will unveil the block menu.
Subsequently, effortlessly locate and integrate the Gallery block onto the desired page or post from this menu.
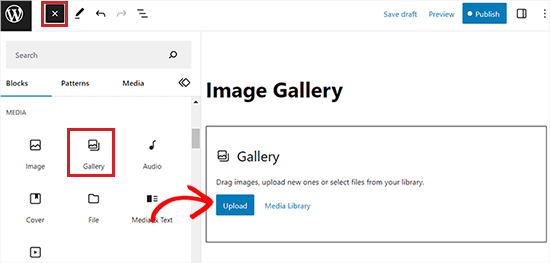
Following that, adding images to your gallery block becomes effortless. Simply click the ‘Upload’ button to add images directly from your computer.
Alternatively, you can choose images from your WordPress media library by selecting the ‘Media Library’ button.
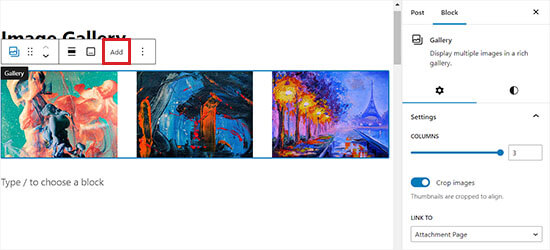
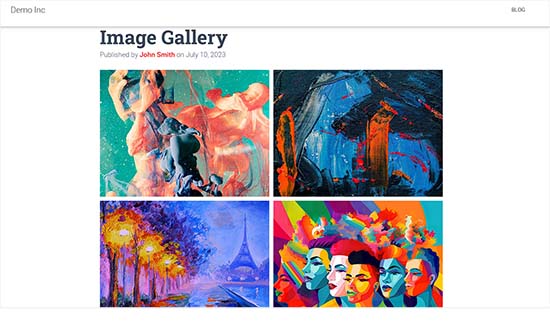
As illustrated, two images have been seamlessly integrated into our Gallery block, automatically aligning them side by side with the assistance of WordPress.

If you opt to include a third image, click the 'Add' button located in the block toolbar at the top.
This action will prompt the media library to open, allowing you to select and add a third image to your Gallery block. Once added, you'll notice WordPress automatically resizes the images, seamlessly arranging them side by side for a visually appealing display.
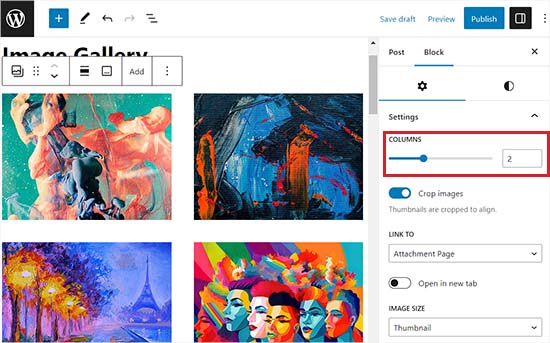
If you opt to insert a fourth image into the Gallery block, it will automatically be positioned below the existing images.
To address this, you can adjust the number of images WordPress displays side by side within a single column.
For example, if you prefer two images aligned horizontally with two more stacked vertically below them, simply set the Columns option to 2.
This straightforward adjustment ensures your images are arranged exactly as desired, allowing for greater flexibility and control over your WordPress gallery layout.
Additionally, you have the option to crop images for proper alignment, tweak their sizes, link them to various pages, and alter the background color via the block panel.
After completing these adjustments, remember to click either the 'Update' or 'Publish' button to save your modifications.
Now, simply navigate to your website to observe the images displayed side by side.
Method 2: Incorporating a Plugin for Effortless Side-by-Side Image Display
If you're using the classic WordPress editor or aiming to craft more intricate galleries beyond the default Gallery block, this method is tailored for you.
We endorse for Envira Gallery as the premier WordPress gallery plugin, offering unparalleled functionality. While Envira Gallery offers a free version, we'll use the Pro plan in this tutorial. Begin by installing and activating the Envira Gallery plugin.
After activation, navigate to your WordPress dashboard and access the Envira Gallery » Add New page.
Here, assign a title to your new gallery; for demonstration purposes, we've labeled ours as 'Example Gallery.'
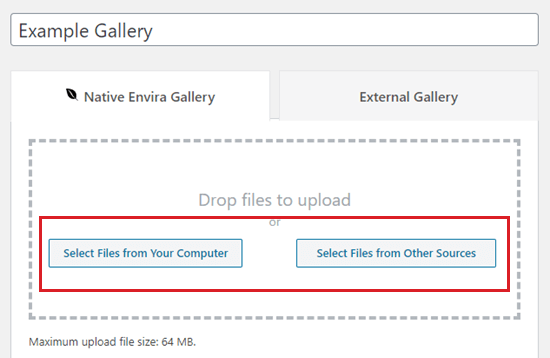
Next, select the images you wish to utilize from your computer by clicking on the 'Select Files From Your Computer' button.
To upload images from the media library, simply click on the 'Select Files from Other Sources' button.
Upon uploading the images, navigate down to the Gallery section to preview them.
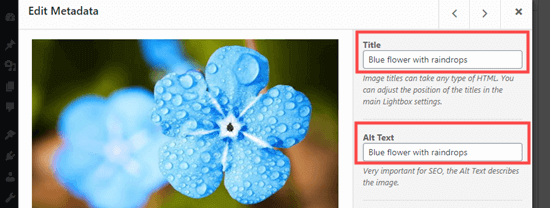
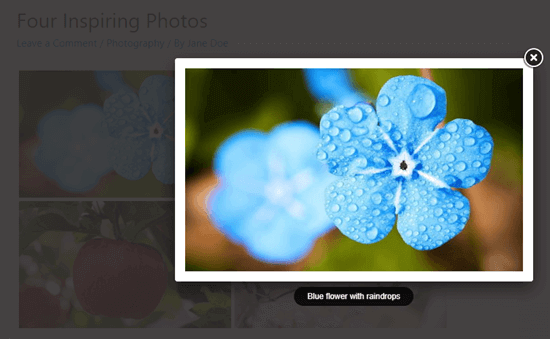
At this point, you have the option to assign titles and alt text to your images. The title will be displayed beneath your image when a user hovers their cursor over it.
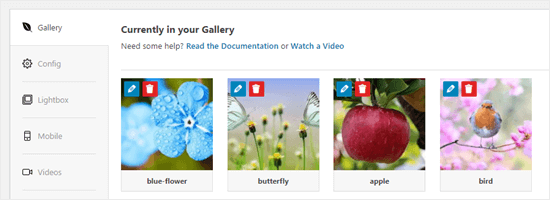
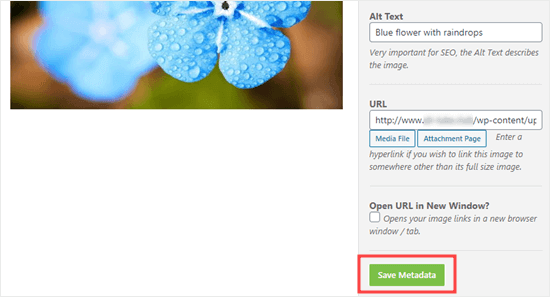
Below the image in the lightbox popup mode, you'll find the title displayed. We'll explore this further shortly.
To modify the title and alt text, simply click the 'Edit' button on an image within the gallery.
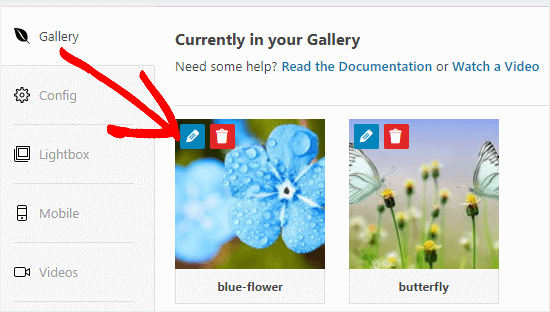
Here, you'll be able to adjust the image title and provide alt text, which is beneficial for your WordPress site's SEO.
If the title adequately describes the image, you can use it as the alt text as well.
After completing your edits, be sure to click the 'Save Metadata' button before closing the window. Neglecting this step will result in your changes not being saved in the gallery.
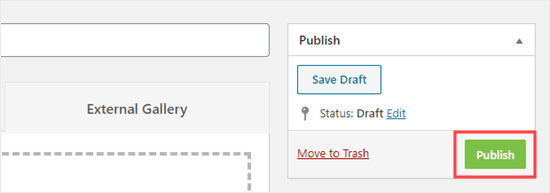
Next, return to the top of the page and select 'Publish' to save the newly created image gallery. Then, navigate to the desired WordPress page or post where you intend to add it.
Once you've navigated to the desired location, click on the 'Add Block' (+) button situated in the top left corner of the screen to access the block menu.
From there, find and insert the Envira Gallery block onto your page or post.
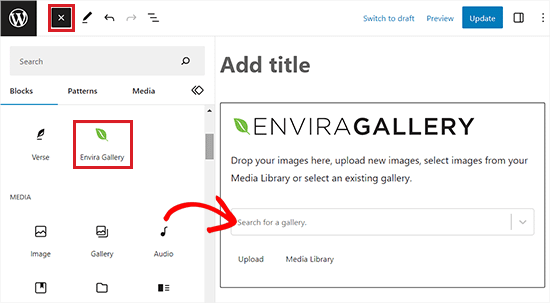
Then, select the gallery you've previously created from the dropdown menu within the block itself.
To arrange the images from the gallery side by side, navigate to the block panel located in the right corner of the screen.
Scroll down to the 'Select Layout' section and pick the desired number of columns from the dropdown menu. Your images will now appear side by side on your WordPress page.
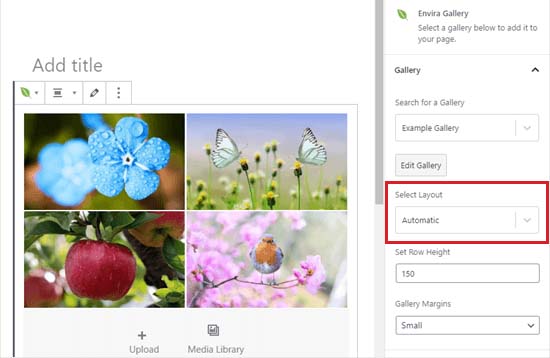
Additionally, you have the option to adjust the gallery margins, activate Isotope, and customize lightbox settings directly from the block panel.
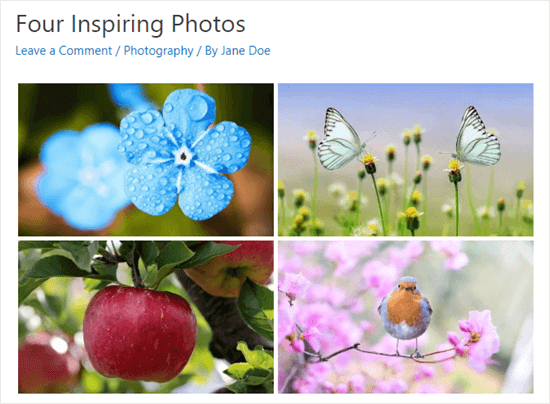
After making these adjustments, remember to save your settings by clicking on the 'Publish' or 'Update' button.
Now, you can visit your website to see the images beautifully arranged side by side.
Users now can click on any image and view it in full size within a lightbox. Additionally, they can seamlessly navigate through the images using the lightbox feature.
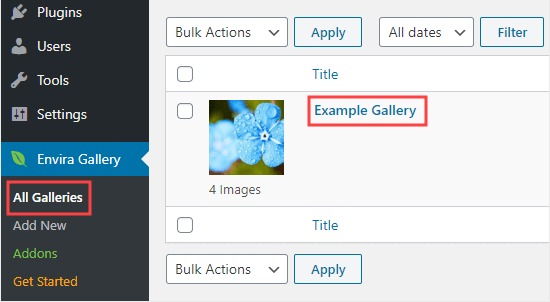
To add more images to your gallery, access the Envira Gallery » All Galleries page within your WordPress dashboard. From there, simply select the desired gallery by clicking on its name to initiate editing.
Modifications made to your gallery will automatically reflect in all instances where it's embedded across your posts, pages, or sidebars, eliminating the need for reinsertion.
Pro Tip: If you're utilizing the classic editor rather than the block editor, Envira Gallery remains accessible. Simply locate the 'Add Gallery' button above the classic editor to incorporate an existing gallery into your post.
Upon completion, ensure to click the 'Publish' or 'Update' button to save your configurations.
How to Keep Your Image Aligned in WordPress?
When positioning two images side by side, it's crucial to ensure they align seamlessly for a polished and visually cohesive appearance.
Even when inserting a single image into your WordPress blog, aligning it with your content maintains visual equilibrium.
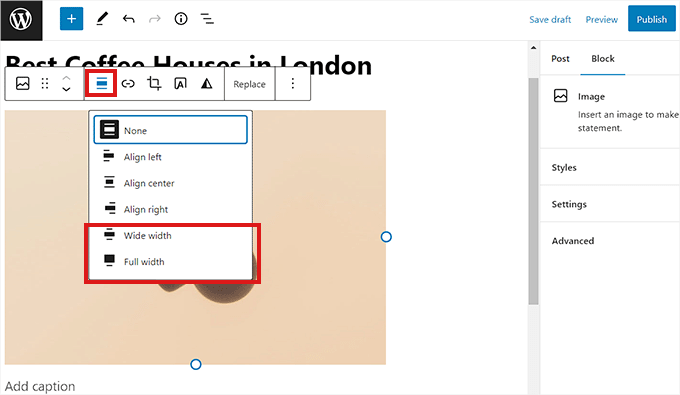
In the WordPress block editor, achieving alignment is simple: just click the 'Align' button on the toolbar above the block.
This action opens a menu with various options allowing you to adjust the image's positioning—shift it left or right, match it with the container's width, or select the full-width option for consistent width across the entire page.
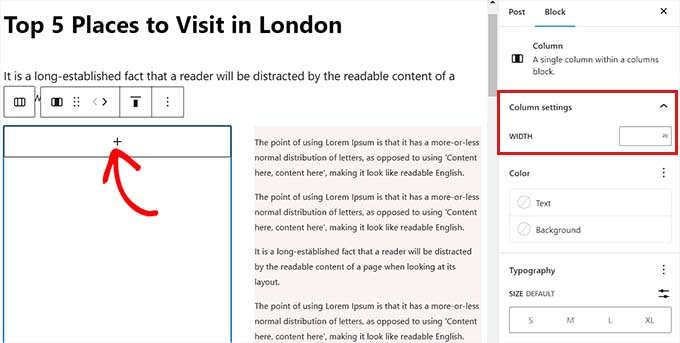
Additionally, you can utilize the Column block to position your image alongside the content. Simply choose the 50/50 variation. Afterward, insert an image block that aligns seamlessly with your content.
Furthermore, you have the option to wrap text around the image, utilize the group block, incorporate the cover block, or explore various other methods to align images together or separately.
Wrapping Up
By following the step-by-step guide outlined in this blog, you can effortlessly create a visually stunning website or blog that captures the attention of your audience.
Whether you're showcasing products, sharing portfolio pieces, or simply enhancing your storytelling, the ability to arrange images side by side adds a professional touch to your online presence.
Embrace these techniques, experiment with layouts, and watch as your WordPress site transforms into a captivating visual experience.


