
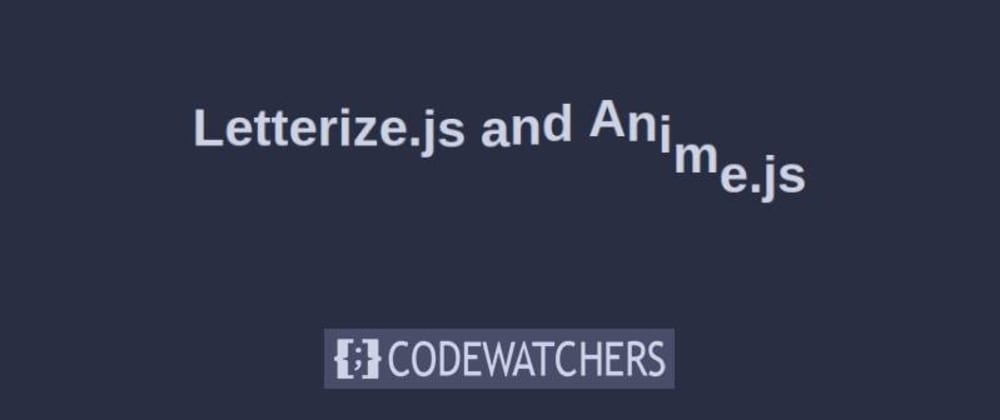
DIVI comes with tons of animations possibilities when it comes to giving dynamism to a website. However, you can only add these animations once at a time to a container. If for some animation it's perfectly enough, time on time, you can quickly find that limited. For example, sometimes, you might want to add more than one text animation and that's what we'll cover today using the text module, Letterize.js & Animate.js which are javascript libraries that give CSS animation to DOM elements. With that approach, you'll be able to create such animation with any other Divi module.
Let's get started.
Possible End Result
Here is a possible result we can reach at the end of the tutorial.
1. Create a Hero Section Design
We'll start by creating a big section also named "Hero Section", and add a unique section to it.
Create Amazing Websites
With the best free page builder Elementor
Start NowAdd New Section
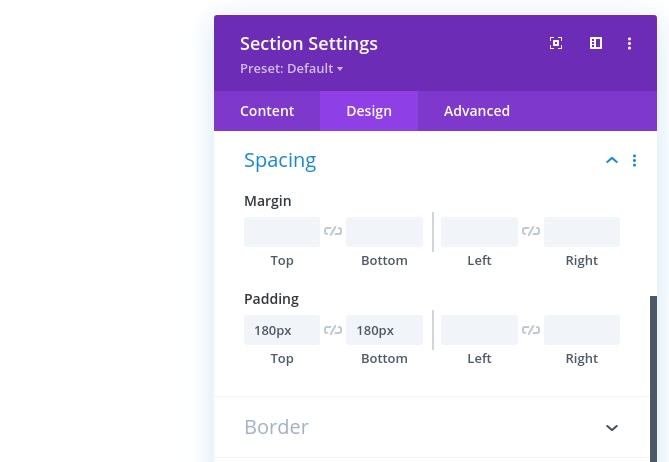
Spacing
Start by creating a new page. Inside that page, add a new section. Open the section settings and modify the top and bottom padding as it follows :
- Top Padding: 180px (Desktop), 100px (Tablet), 50px (Phone)
- Bottom Padding: 180px (Desktop), 100px (Tablet), 50px (Phone)
Add One Row
Single Column Structure
Proceed by adding a new row using the following column structure:

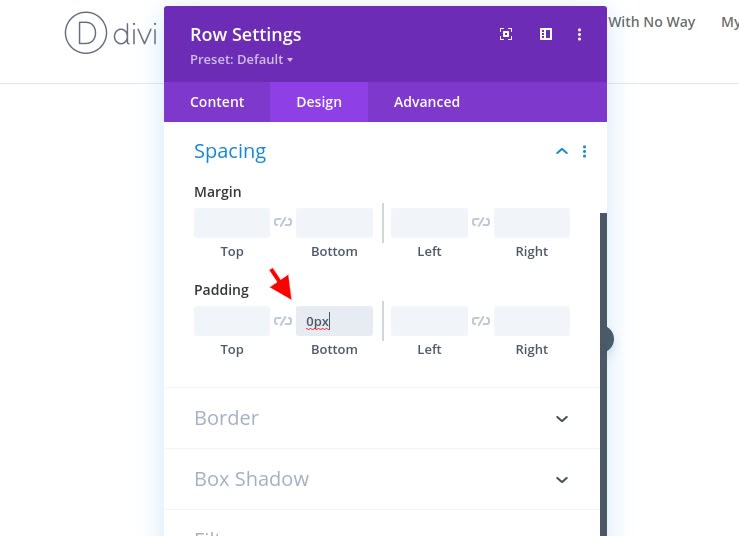
Configure Spacing
We won't add any module now but instead, define padding settings.
- Bottom Padding: 0px
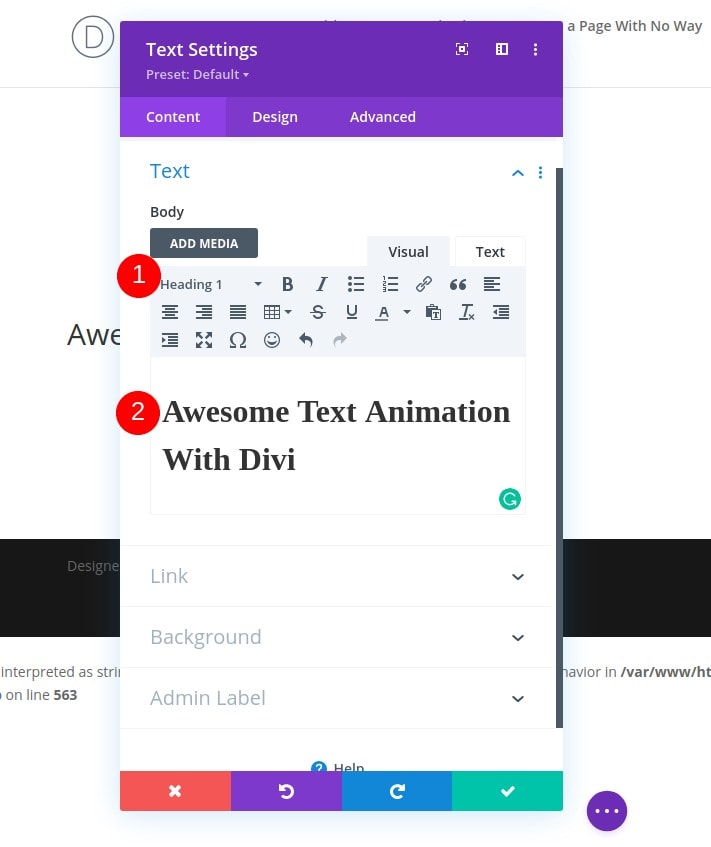
Add Text Module To The First Column
Add H1 Copy
The only module we'll add to this row is a Text Module. Add some H1 content of your choice.
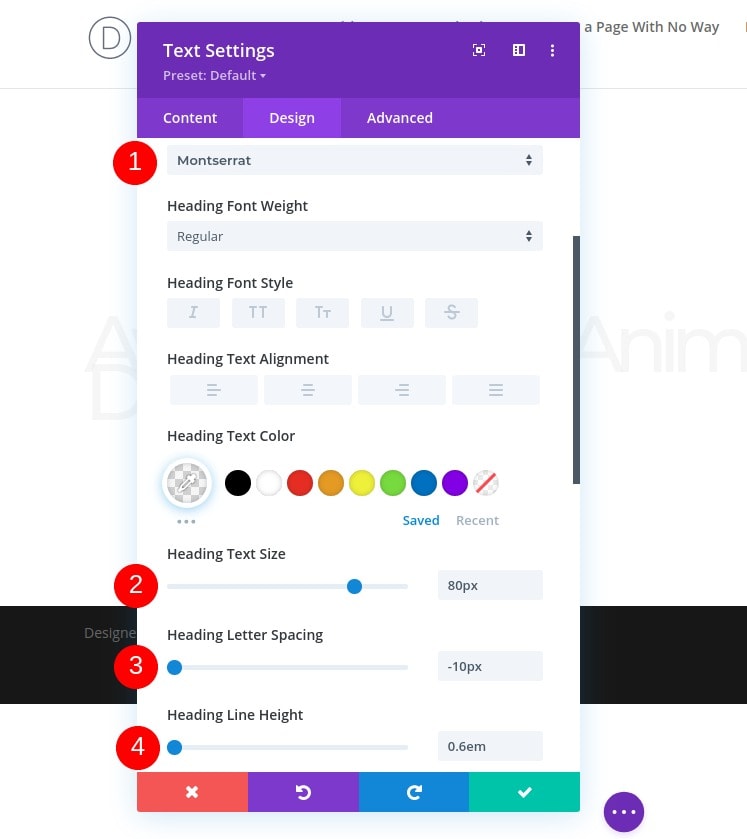
H1 Text Settings
Switch to the module design tabs and let's change the following text settings :
- Heading Font: Montserrat
- Heading Text Color: rgba(232,232,232,0.41)
- Heading Text Size: 80px (Desktop), 50px (Tablet), 40px (Phone)
- Heading Letter Spacing: -10px (Desktop), -4px (Tablet), -3px (Phone)
- Heading Line Height: 0.6em (Desktop), 0.7em (Tablet), 0.8em (Phone)
Add A Second Row
Column Structure
Let's add another row right below the previous one with the following column structure:

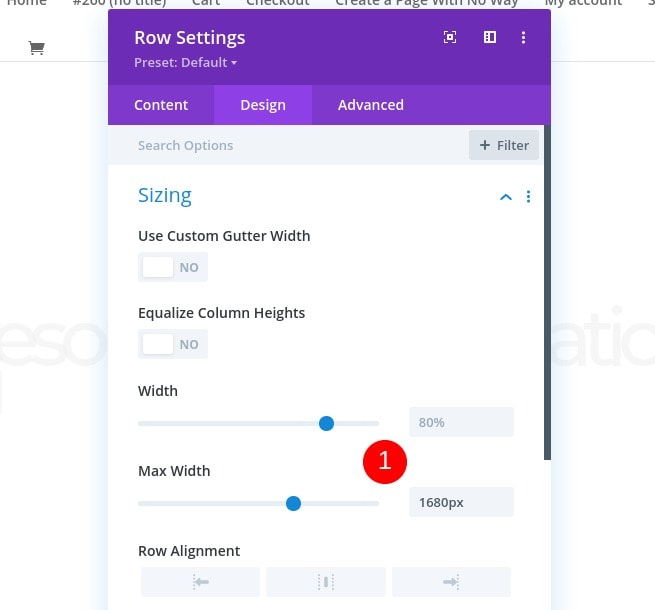
Sizing
Open the row settings and change the max-width in the sizing settings.
- Max Width: 1680px
Spacing
Remove all bottom margin and padding next.
- Bottom Margin: 0px
- Bottom Padding: 0px

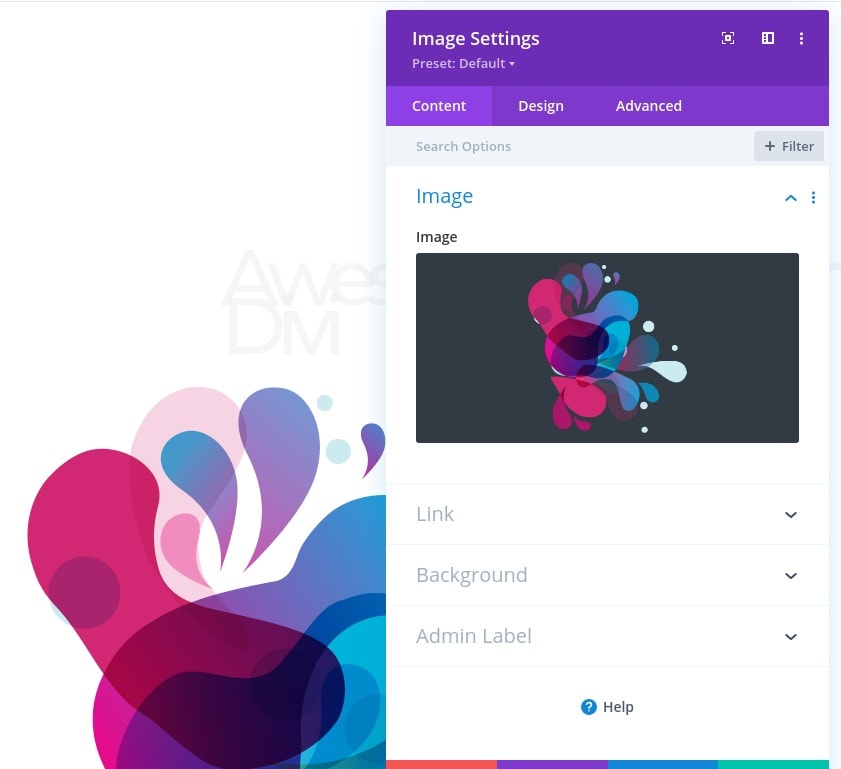
Add An Image Module To The Second Column
Upload An Illustration
Then, let's add an Image Module and upload an illustration of your choice. That should looks like a background illustration.
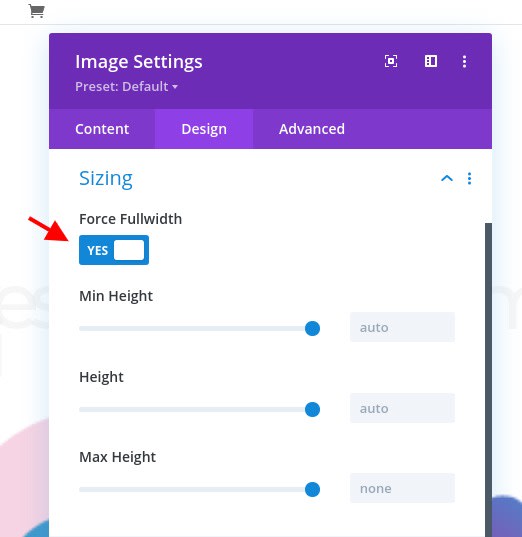
Sizing
Now switch to the module’s design tab and force fullwidth on the image.
- Force Fullwidth: Yes
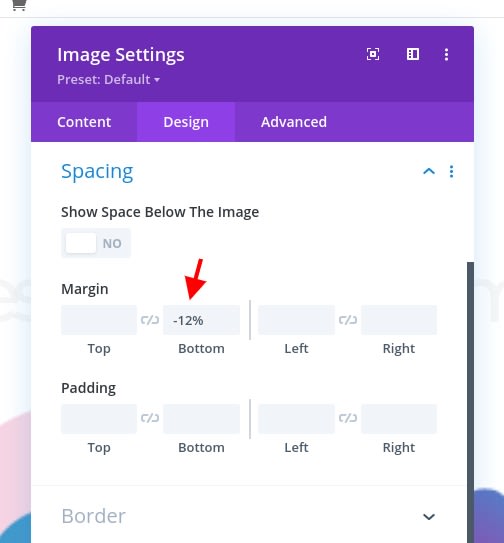
Spacing
Add some negative bottom margin next.
- Bottom Margin: -12%
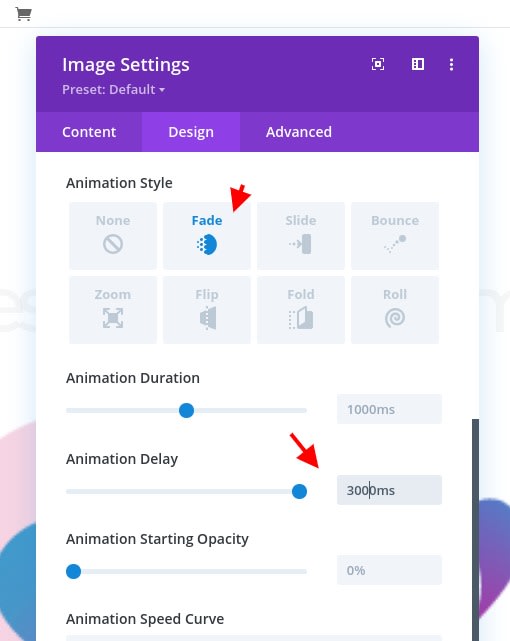
Animation
Let's complete the module settings by adding the following animation settings:
- Animation Style: Fade
- Animation Delay: 3000ms
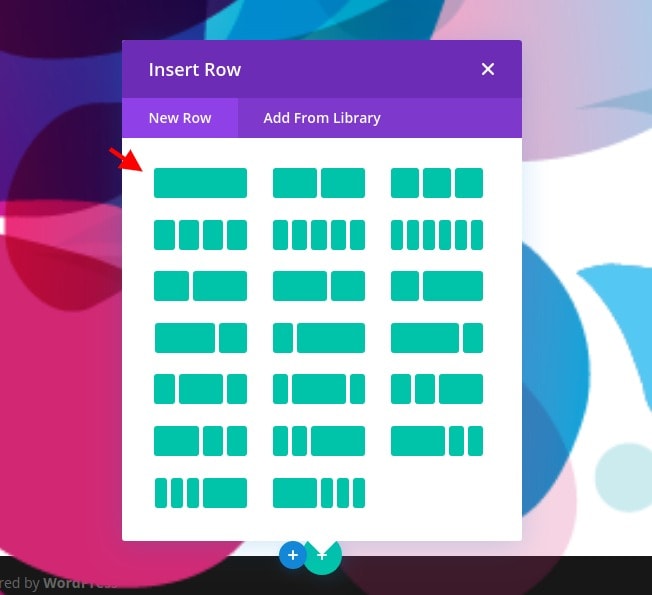
Add the Third Row
Define The Column Structure
On to the next and last row. Use the following column structure:
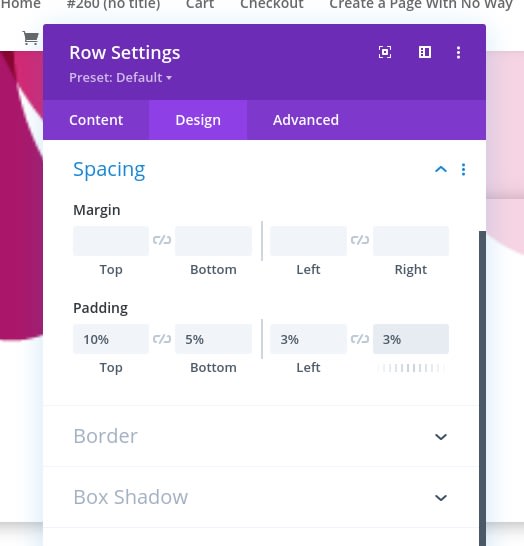
Spacing
Move on to the row’s design tab and add some custom padding values.
- Top Padding: 10%
- Bottom Padding: 5%
- Left Padding: 3%
- Right Padding: 3%
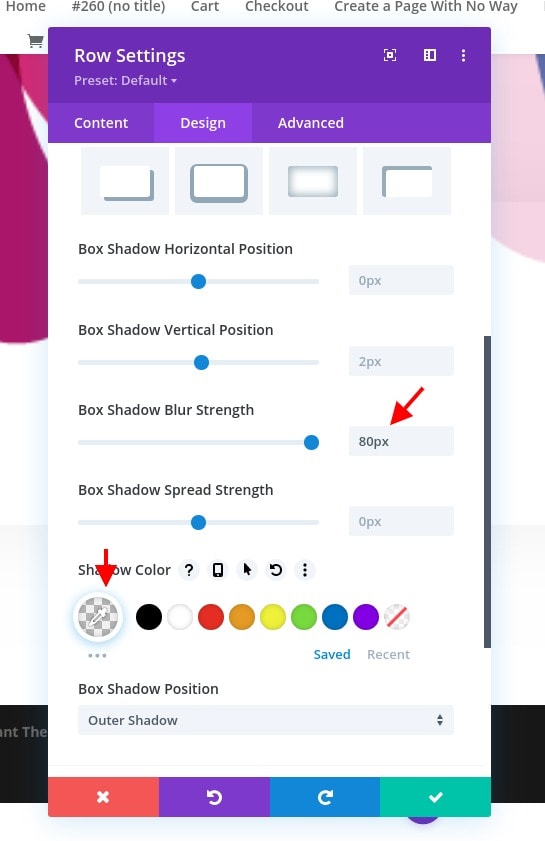
Box Shadow
Then, select a subtle box-shadow.
- Box Shadow Blur Strength: 80px
- Shadow Color: rgba(0,0,0,0.06)
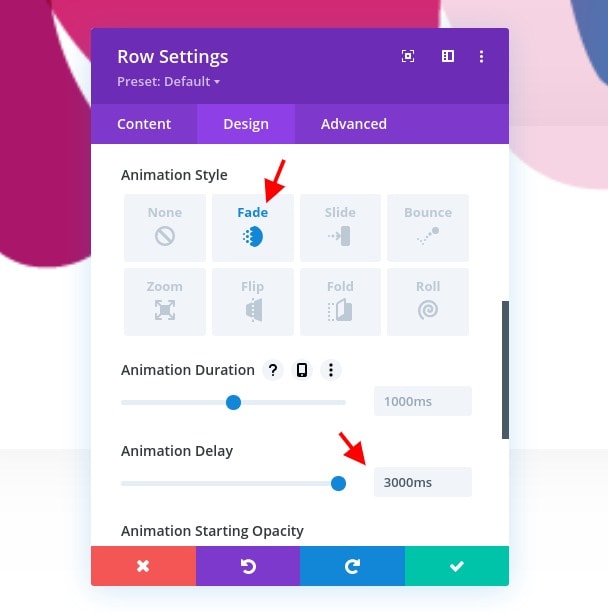
Animation
And complete the row settings by adding the following animation:
- Animation Style: Fade
- Animation Delay: 3000ms
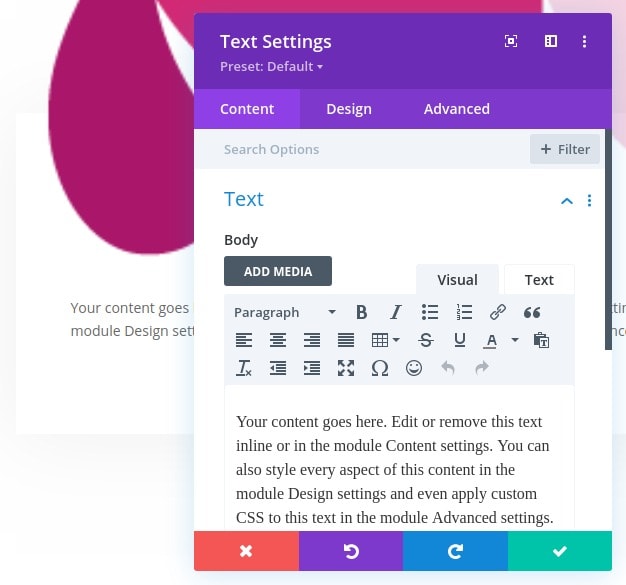
Add Text Module To The Third Row
Provide Content
Let's not add modules. The first module we need is a Text Module with some content.
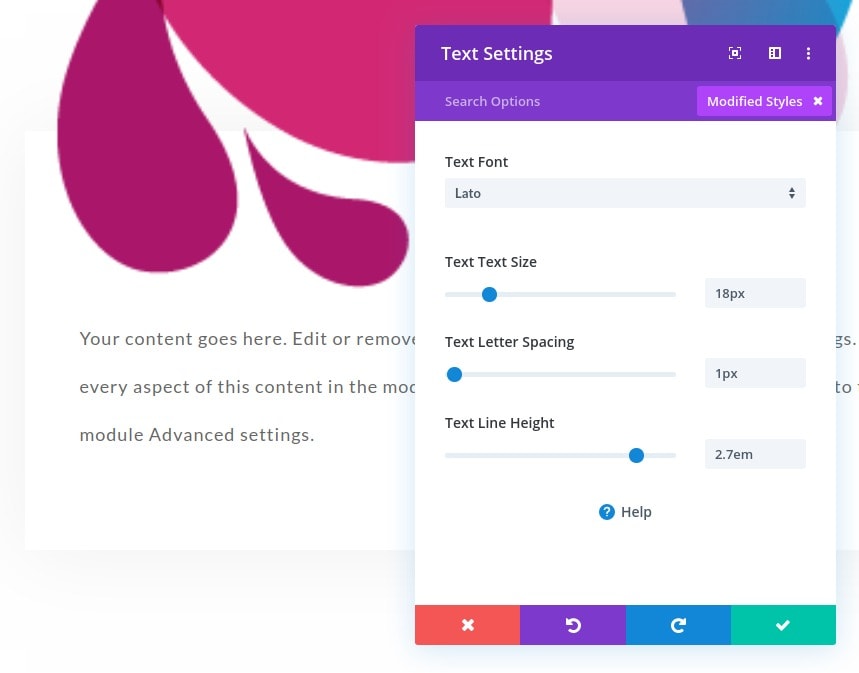
Text Settings
Move on to the module’s design tab and modify the text settings accordingly:
- Text Font: Lato
- Text Size: 18px
- Text Letter Spacing: 1px
- Text Line Height: 2.7em
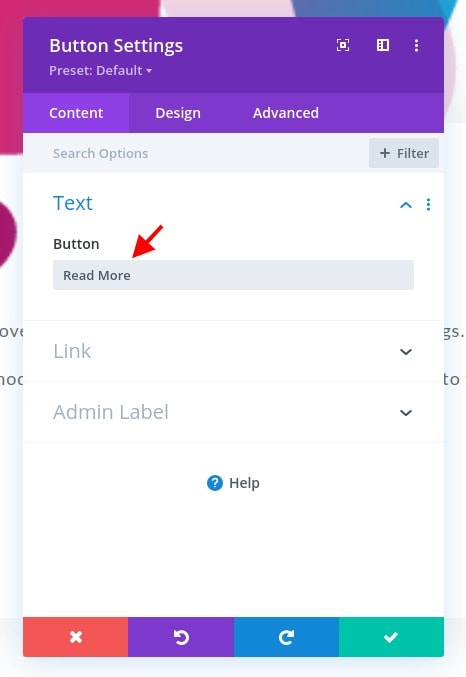
Add A Button Module To The Column
Provide Text
The last module we need is a Button Module. Enter a text of your choice.
Button Settings
Move on to the module’s design tab and change the button settings as follows:
- Use Custom Styles For Button: Yes
- Button Text Size: 16px
- Button Text Color: #171cff
- Button Border Width: 0px
- Button Border Radius: 0px
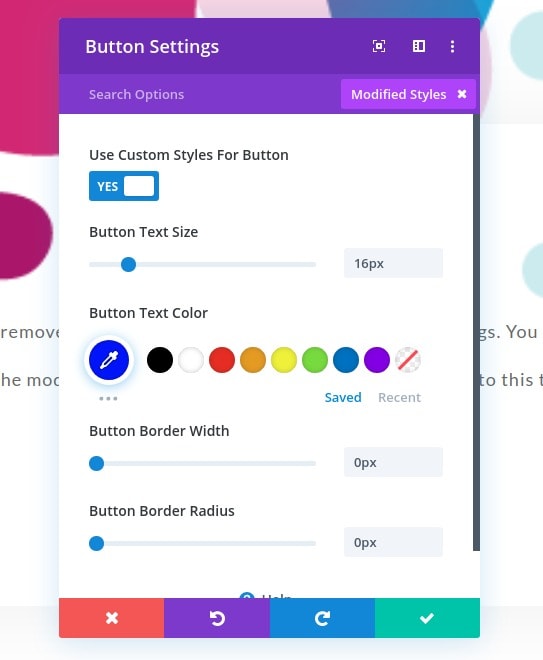
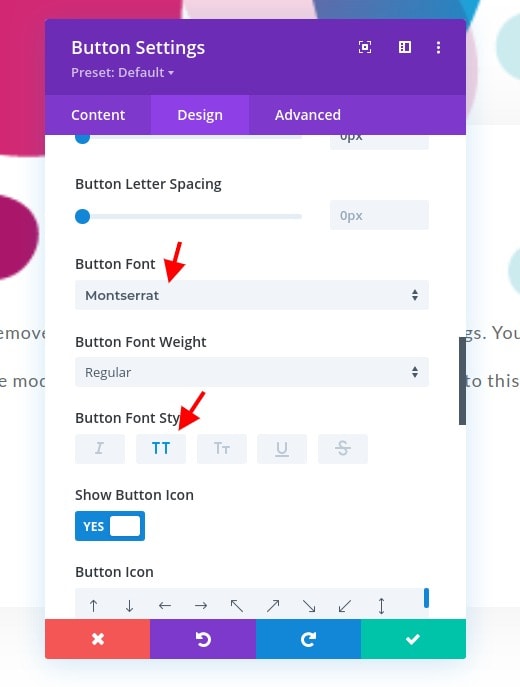
- Button Font: Montserrat
- Button Font Style: Uppercase
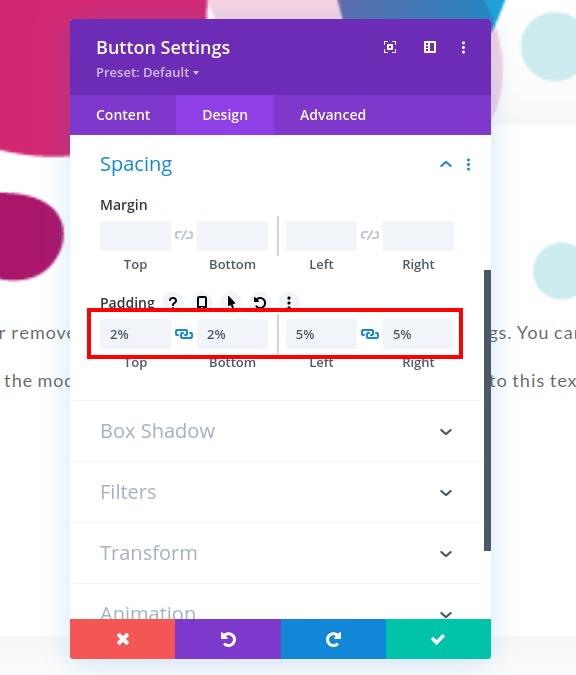
Spacing
Then, apply the following padding values inside the spacing settings:
- Top Padding: 2%
- Bottom Padding: 2%
- Left Padding: 5%
- Right Padding: 5%
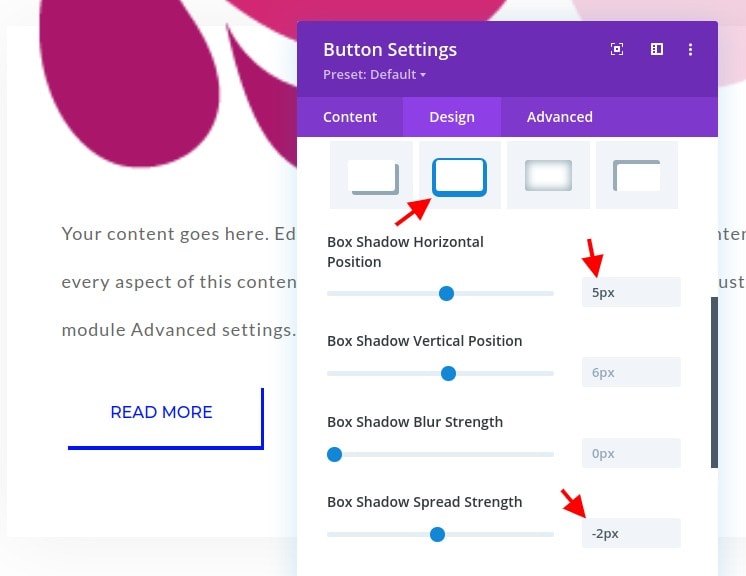
Box Shadow
Complete the module settings by adding the following box shadow:
- Box Shadow Vertical Position: 5px
- Box Shadow Spread Strength: -2px
- Shadow Color: #171cff
2. Add CSS Class to Headline
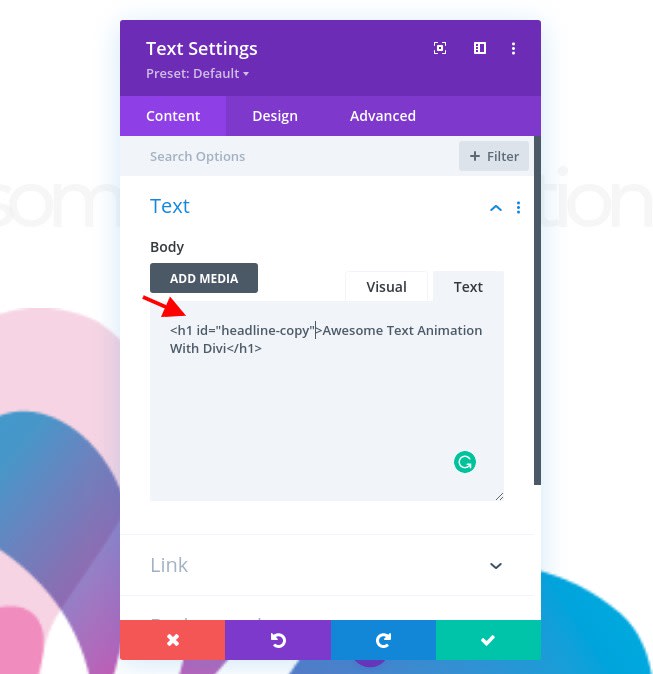
Open First Text Module And Click The Text Tab
Now that we have all design elements in place, it’s time to add the advanced text animations to our headline. Open the Text Module containing the H1 copy and select the text tab.
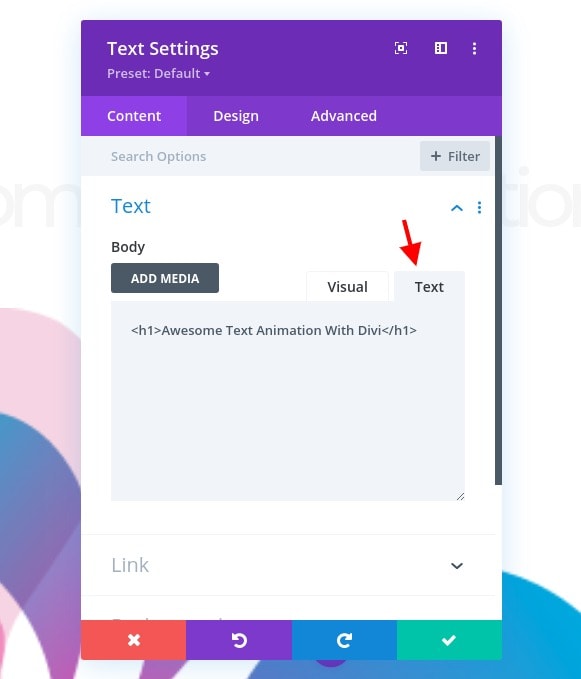
Add ID attribute to The H1 Tag
Inside the H1 add a custom ID attribute.
- ID="headline-copy"
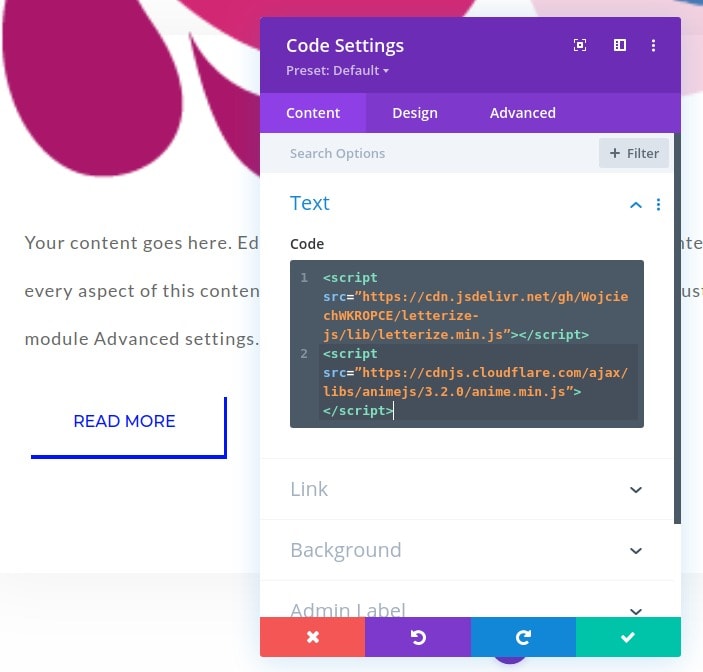
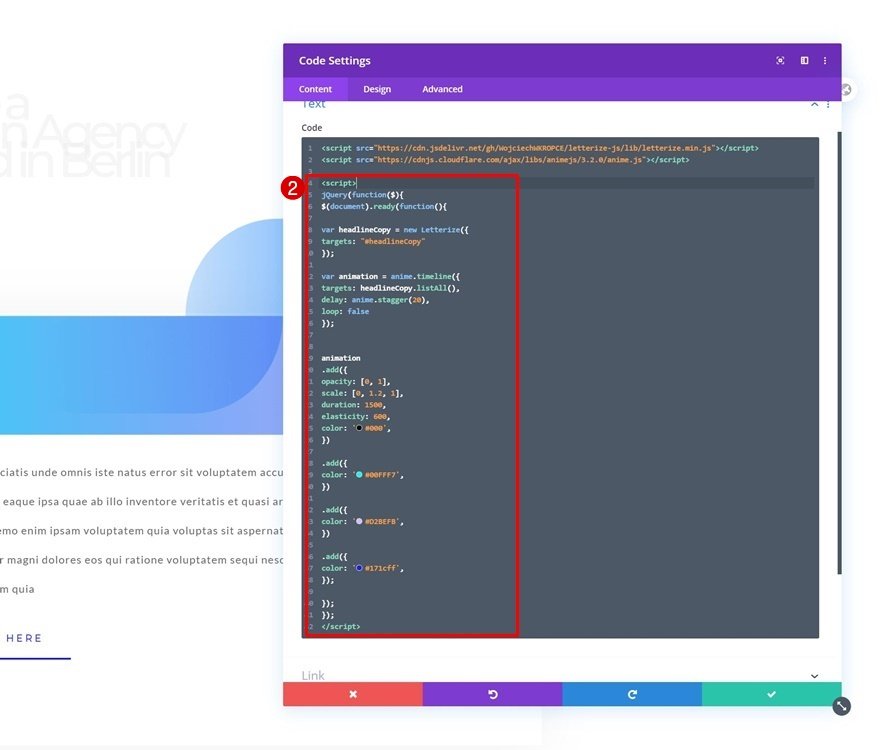
3. Add Letterize & Anime Libraries
Add Code Module to Column
To create the animations, we’re using the letterize.js and anime.js libraries. To add these libraries, insert a new Code Module in your last row’s column.

Include Both Libraries
Then, add two different script tags containing the following sources that lead back to the libraries:
- <script src=”https://cdn.jsdelivr.net/gh/WojciechWKROPCE/letterize-js/lib/letterize.min.js”></script>
- <script src=”https://cdnjs.cloudflare.com/ajax/libs/animejs/3.2.0/anime.min.js”></script>
4. Add Animation Code
Animation for Letter on Individual Level
For the last part of this tutorial, we’re going to add the animation code and it will work for both of the letterize.js and anime.js libraries. To achieve a nice effect on the texts, we’re going to apply two types of animations. The first animation is applied to each letter individually and consecutively. This is achieved with the letterize.js library. This library, in combination with the first part of the code below, places each letter in your copy inside a separate span. These spans will, then, be separately targeted throughout the animation process. Make sure you place the code below in between script tags.
jQuery(function ($) {
   $(document).ready(function () {
          var headlineCopy = new Letterize({
          targets: "#headline-copy"
       });
       var animation = anime.timeline({
          targets: headlineCopy.listAll(),
          delay: anime.stagger(20),
          loop: false
       });
      animation.add({
          opacity: [0, 1],
          scale: [0, 1.2, 1],
          duration: 1500,
          elasticity: 600,
          color: '#000',
      }).add({
          color: '#00FFF7',
      }).add({
          color: '#D2BEFB',
      }).add({
         color: '#171cff',
      });
   });
});
Each "add" function represents an animation in a timeline of animations. These animations apply to each letter singularly. You can modify these add functions as you want following the Letterize API, add new ones or remove current ones, just make sure that the last add function is closed properly with a ‘;’ at the end (as you can see in the code above).
You can add different CSS properties inside these "add" functions. You can find out more about the properties and how they’re used in the anime.js documentation examples.
In this tutorial, we’ve purposely added multiple animations to show how the timeline works, but you might want to go with something more subtle or shorter for your own projects.
Animation for Sentence
Once you’ve added the first part of the animation, which targets each letter individually, we’ll move on to the second part of our animation. This part targets the entire copy as a whole. The animation approach is the same as above; we’re placing the entire module inside a timeline animation. Each add function represents a different animation inside that timeline. You can modify these add functions, add new ones or remove current ones. Make sure you place this new code before the ending of the script code as you can notice in the print screen below.
anime.timeline({loop: false}).add({targets: '#headline-copy',lineHeight: '1em',delay: '1500'}).add({targets: '#headline-copy',translateX: ['-5%', 0],letterSpacing: '-2px',});
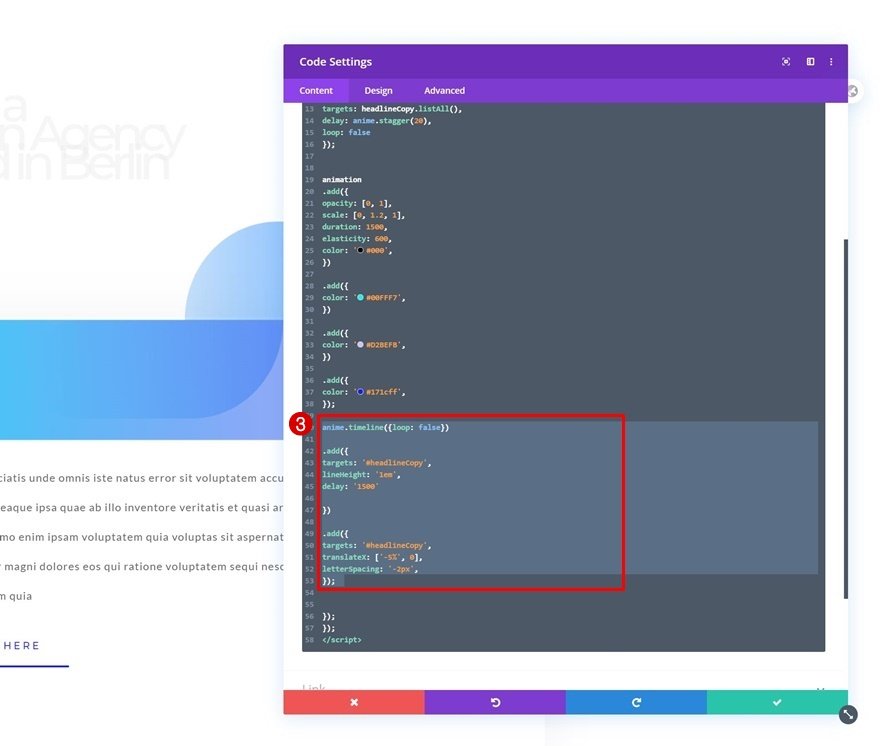
Add Custom CSS for Span
Now, since we’ve created a separate span for each one of our letters, we’ll need to change the display property of each span to allow the letters to appear next to each other. To do that, we’ll add some CSS code to our code module. Make sure you place the code in between style tags.
#headline-copy span {display: inline-block;}

Final Preview
Now that we’ve gone through all the steps, let’s take a final look at the outcome across different screen sizes.

Final Thoughts
So throughout this post, we’ve shown you how to create text animations to your headline. We’ve built the entire design inside Divi and combined the framework with the letterize.js and anime.js libraries. Will you test this animation on your blog ? Do you have any other animation to share with us ? Let us know.


