
Everyone is a big fan of creative design and animations. Well-designed animations are the most captivating section of any website that grabs visitor's attention. If the design is applied properly, an adequate animation is capable of establishing a strong bond between the user and the content on the site. Divi has built-in professional tools to process powerful animations and effects. You don't need any expertise to apply these effects. Today we will see how to add beautiful animation to any page particle-like sections and rows in Divi using built-in features.

Design Preview
From this post, you will know how easy it is to design animations on Divi. Before that, let's see what our design will look like today.
Page Preparation
Designing animation on a page on Divi is very simple, and you can apply animation effects on any page element if you want. We will try to do animation on a premade template, but you can give an animative look on the pages on your website in this way.
Create a new page and start with "Browse Layouts".
Create Amazing Websites
With the best free page builder Elementor
Start Now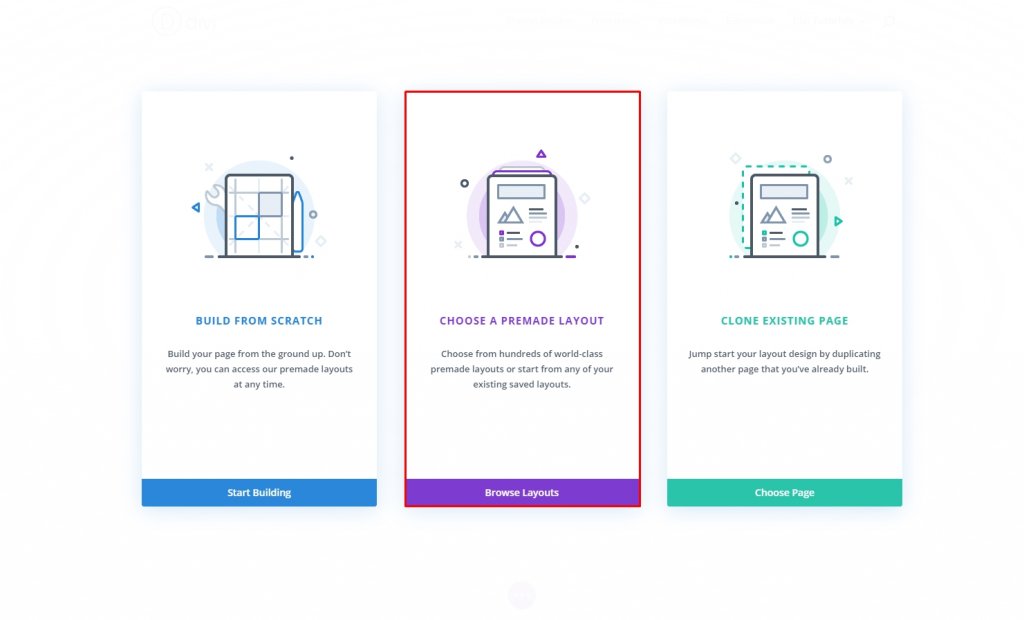
Now, let's pick a premade template for our today's design. We will be using the Tennis club layout pack for today's tutorial, but you can use anything! Click on "Use this layout", and it will be ready to edit.

After the design is implemented, we are just good to start our today's tutorial.
Intoduction To Animation Options
Area Selection
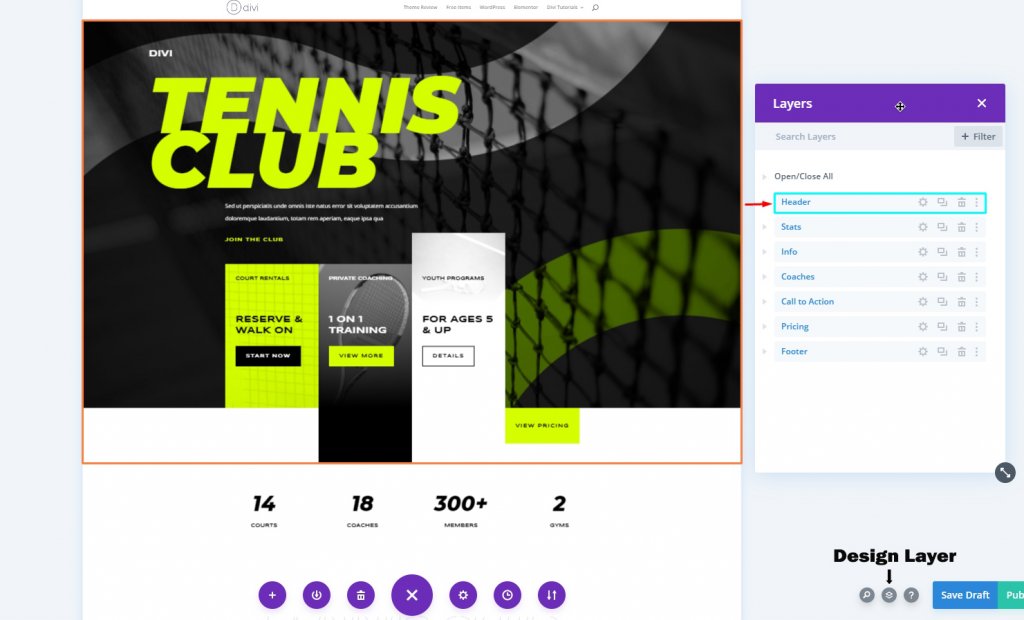
The design system is pretty basic. Here we have selected the header section for our today's design. To make this design happen, we need to find every element/row/column on the area. From the design layer option on the down-right corner, you can see every element individually.
Setting 1 - Add Animation To Section & Rows

Divi has built-in animation options for designing. Select any page element and move to the design tab. Keep scrolling, and you'll see the animation option.
Animation Module
There are 8 different options to give animation effect to the element. Let's have a short discussion about them.
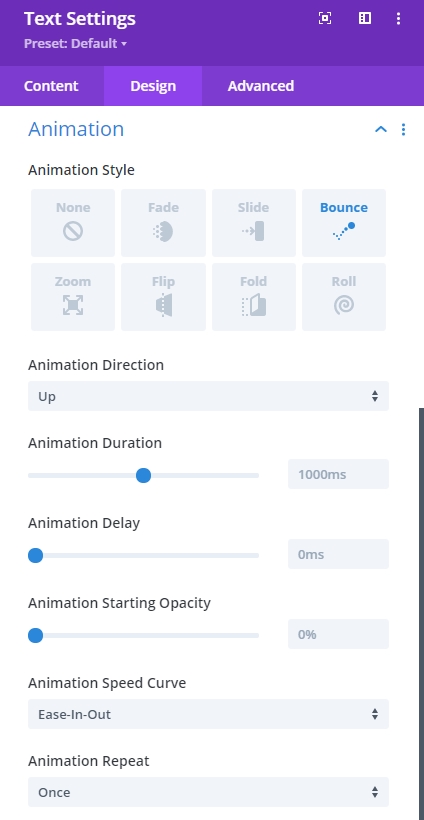
- Animation Style - Here you can select animation for appearence of your item. You can select one style for your item and most common styles are - Fade and Slide.
- Direction - From this option you can determine the direction of the animation.
- Duration - This option allows you to determine how long your animation will last. This counts in milliseconds and your animation will last long as you wants.
- Delay - This option is very useful if you want to start the animation from a certain time because it prevents the animation from starting as the page loads.
- Intensity - Intensity defines how you want this animation to appear. If the value is lower, the animation willbe smooth. Higher the value, the aggressive the animation.
- Starting Opacity - 0 means the animation is invisible and about to start and 100 means its fully visible and the animation is complete.
- Speed Curve - This will indicate the smooth beginning and ending of animation.
- Repeat - You can redo the animation with this option.
Settings 2 - Add Animation To Section & Rows
The next thing is Scroll Effects that trigger the animation during scrolling. Thus the way the animation starts when the element is on screen and happens during scrolling.
Enable Scroll Effects
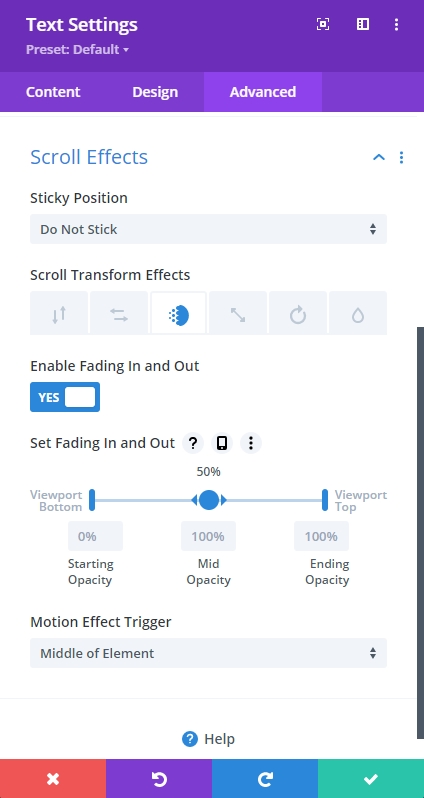
You can set scroll effects in various styles to make scrolling animation.
- Sticky Position – The section or row might become unresponsive as the user scrolls past it.
- Transform Effects – The above effects are real animation techniques.
- Set [Feature] – You will be able to set where the effect is most visible on screen and when/where it occurs
- Motion Effect Trigger – It is important to find out when the animation begins; this may be done by examining where the top of the element first enters the viewport, where the centre of the element is, or where the bottom of the element is.
There are major differences between the two methods, even though both methods operate Animation settings. The main distinction is whether you want the animation to run automatically or on every action performed by the user. You may use the Scroll Effects and Animation settings to mix animations. These will be applied in the main tutorial, as you will see.
Page Animation Design
Animation Combination For Sections And Rows
Creating stunning effects on Divi using these options is very easy. With the animation-delay option, you can make a series of animations together on different elements and come up with some fantastic visuals.
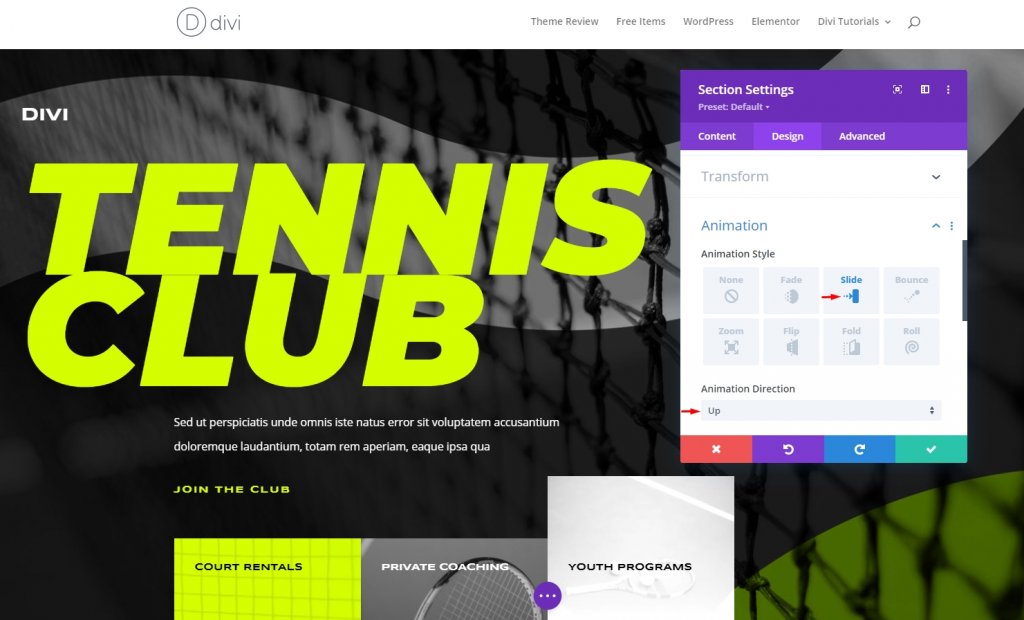
For the entire heading section, follow these settings.
- Animation Style: Slide
- Animation Direction: Up
Row 1 Animation Setting
We will start with the Row 1 animation. Make the following adjustments.
- Animation Style: Slide
- Animation Direction: Down
- Animation Delay: 500ms
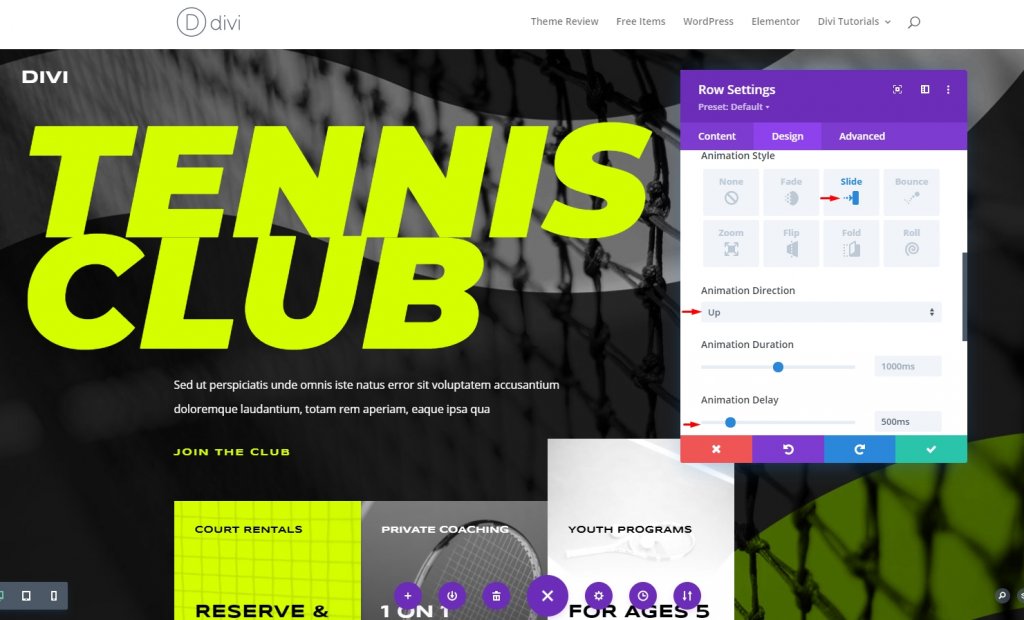
To prevent the triggering of the row before the animation, we have to shift the row's position slightly.
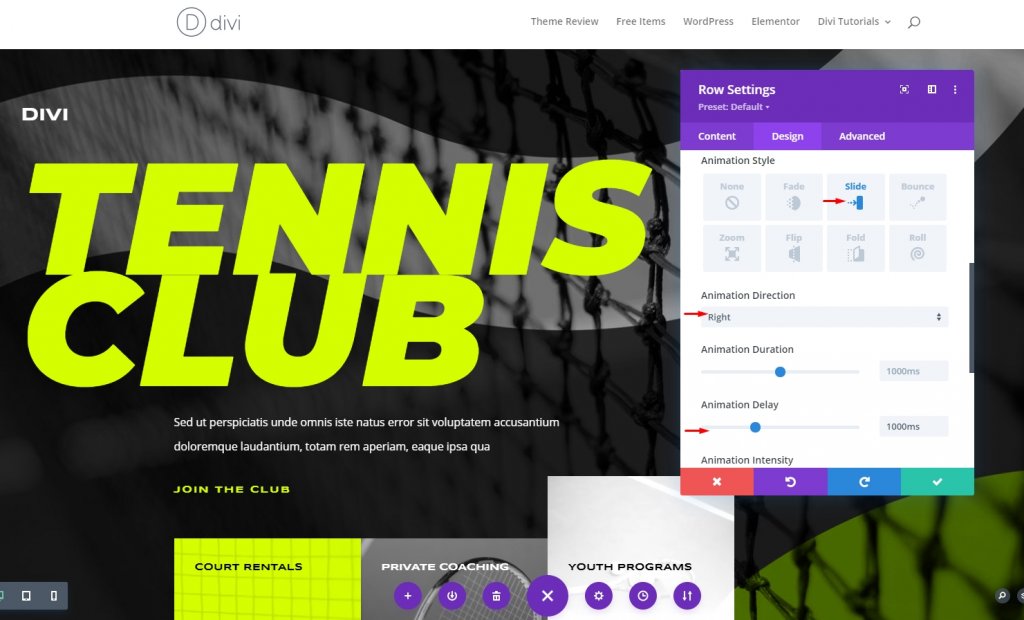
Row 2 Animation Setting
On Row 2, apply the settings mentioned below.
- Animation Style: Slide
- Animation Direction: Right
- Animation Delay: 1000ms
Row 3 Animation Setting
We will use scroll effects for Row 3 because, when the 3rd row appears, most of the items for the first 2 rows will move up, and using the time delay module doesn't worth it where we can use only scroll effects to make the design more pleasant.
Animation Settings
Make the animation adjustments.
- Animation Style: Fade
- Animation Duration: 500ms
- Animation Delay: 1500ms
- Animation Starting Opacity: 0%
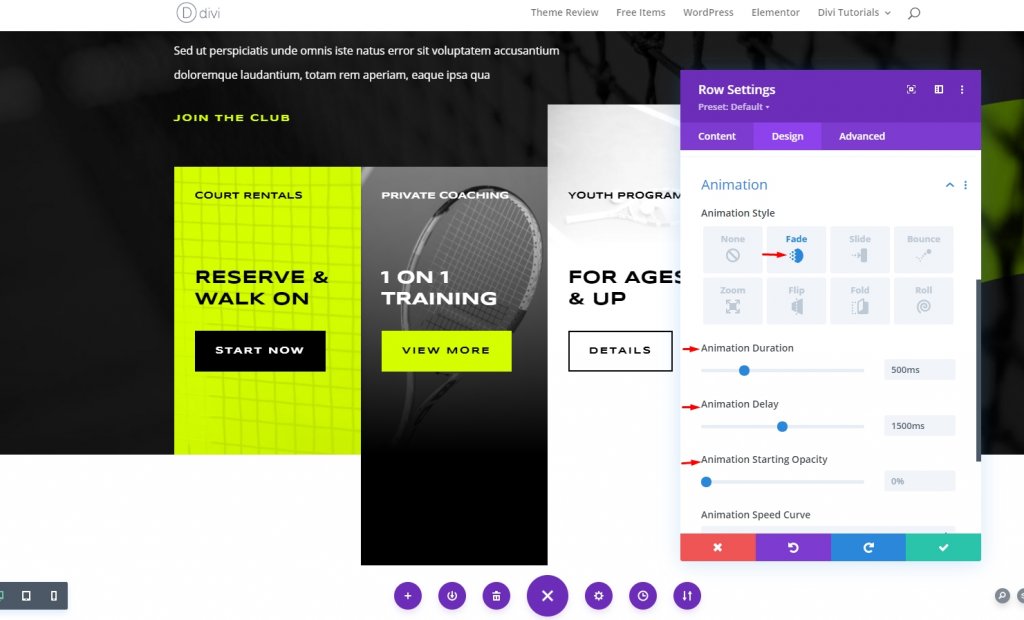
Starting opacity 0 means it won't be seen until it's meant to be.
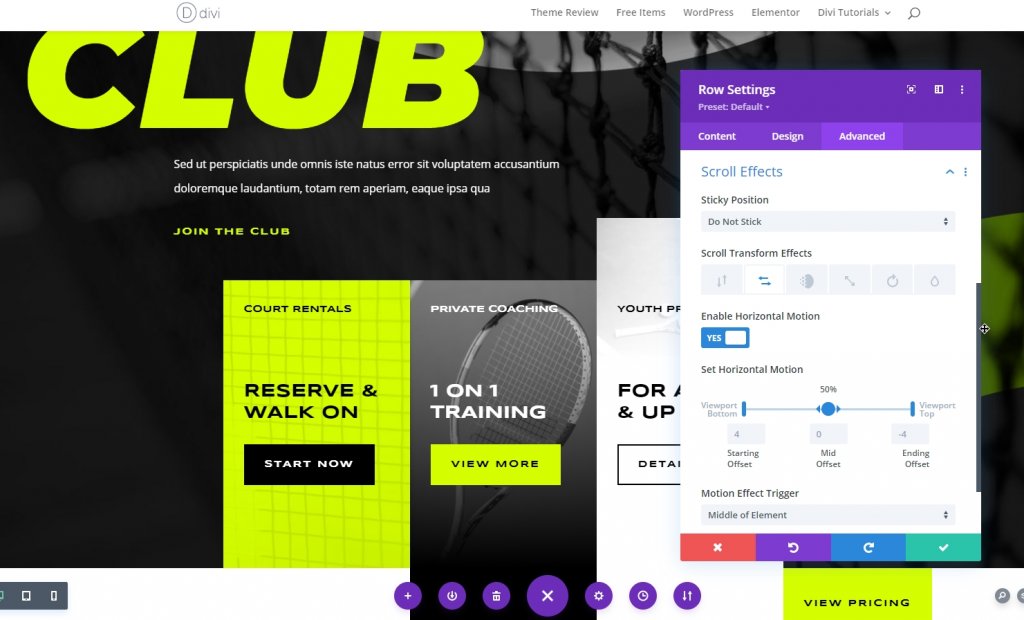
Scroll Effects Settings
Click on the advanced tab to get started on the fun! Move to the scroll effects tab and find the Horizontal motion. And follow the rest.
- Sticky Position: Do Not Stick
- Scroll Transform Effects: Horizontal (2nd)
- Enable Horizontal Motion: Yes
- Motion Effect Trigger: Middle Of The Element.
Everything is set. We have finished the animating process. When the user scrolls, the animation will take place.
Final Preview
Here is the final result of our design.
Conclusion
Through a present animation effect, the website can make certain approaches towards the visitor, enhancing the dynamics, visuals, and readability. Creating cool animation doesn't need coding knowledge, it only needs Divi builder. And it would be best if you had some patience to try new styles. I hope you will the post, and if so, a share will be Marvelous!


