
The Divi blurb module offers a convenient solution for showcasing images or icons alongside a header and descriptive text. This versatile tool is ideal for drawing attention to key features, services, or illustrating steps within a process.
With a comprehensive range of customization options within the blurb module settings, you have the power to tailor the style to your liking and introduce captivating animations to make your blurbs truly stand out on your website.
In this informative guide, we will unveil four distinct methods for incorporating captivating animation effects into your blurb modules. If you're eager to infuse your website design with dynamic motion using Divi, then you've stumbled upon the perfect tutorial.
Getting Started
Install the Divi Theme, activate it, and make sure your website is running the most recent version of Divi before we start. You are now prepared to begin!
Create Amazing Websites
With the best free page builder Elementor
Start NowAnimate Your Divi Blurb Module
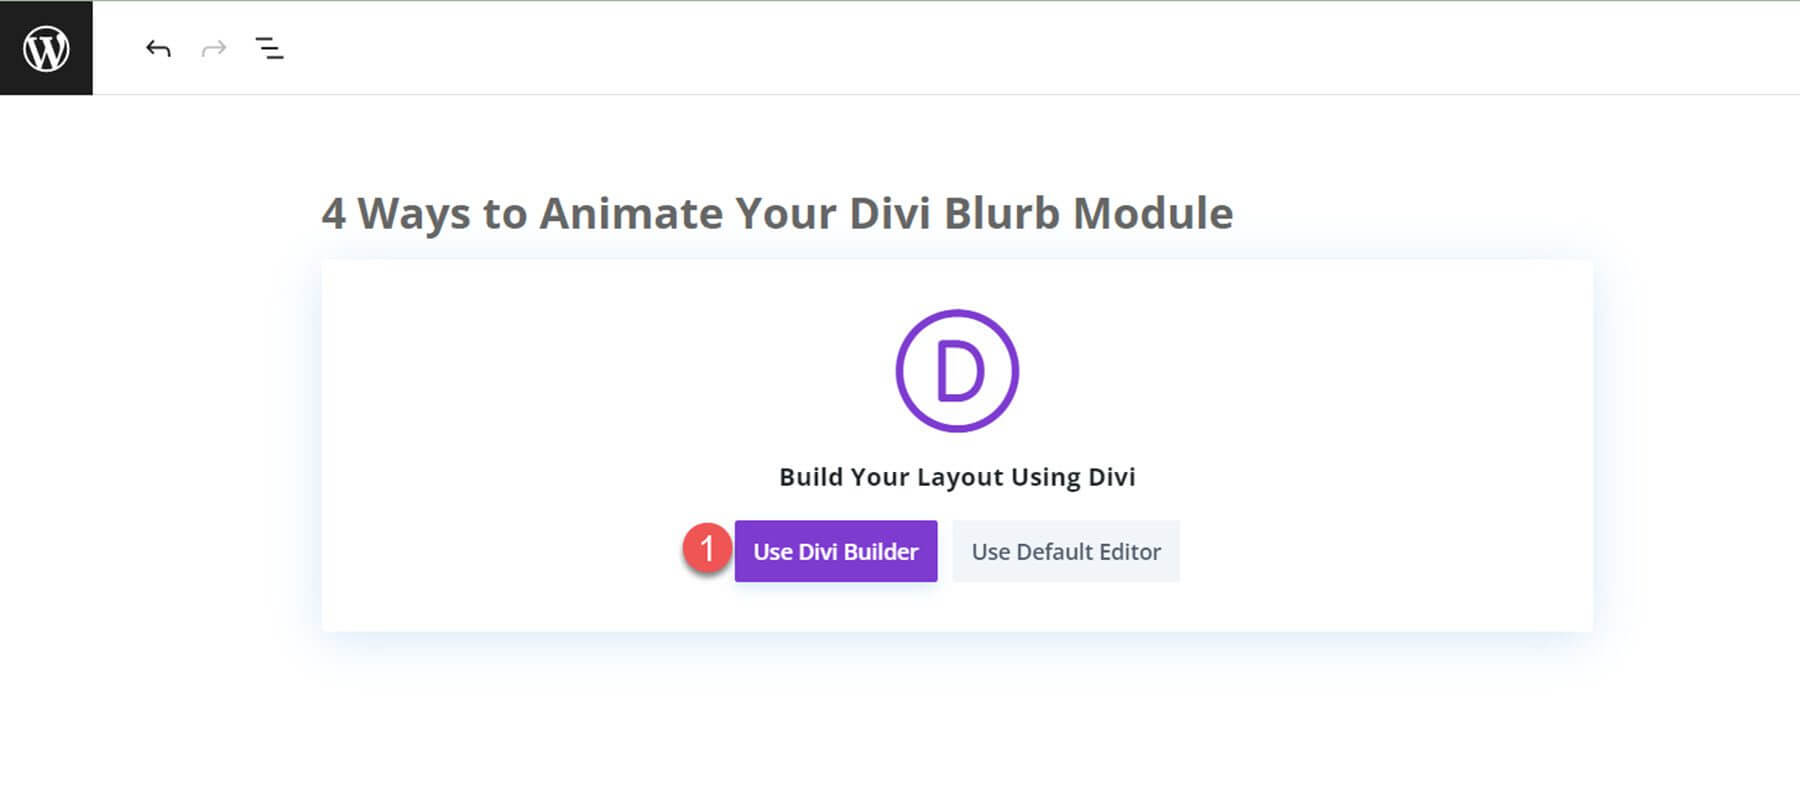
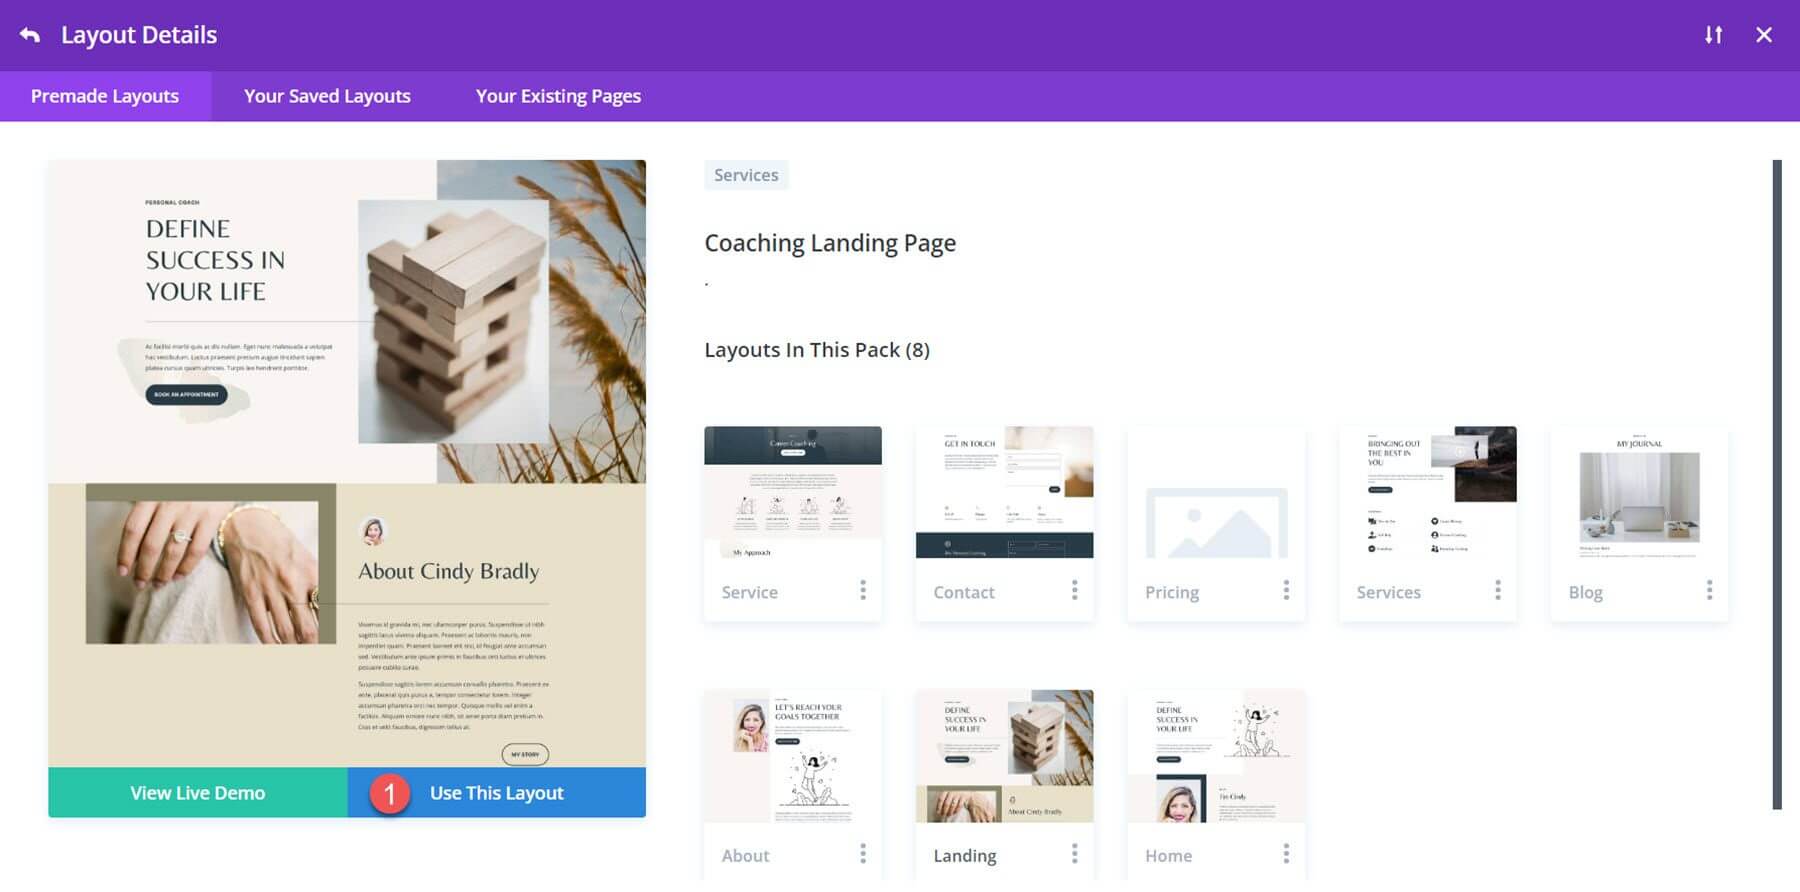
Use a readymade layout from the Divi library to get things started. We'll utilize the Coaching Landing Page from the Coaching Layout Pack for this design. Start by creating a new page and giving it a title on your website. Next, choose to use the Divi Builder option.
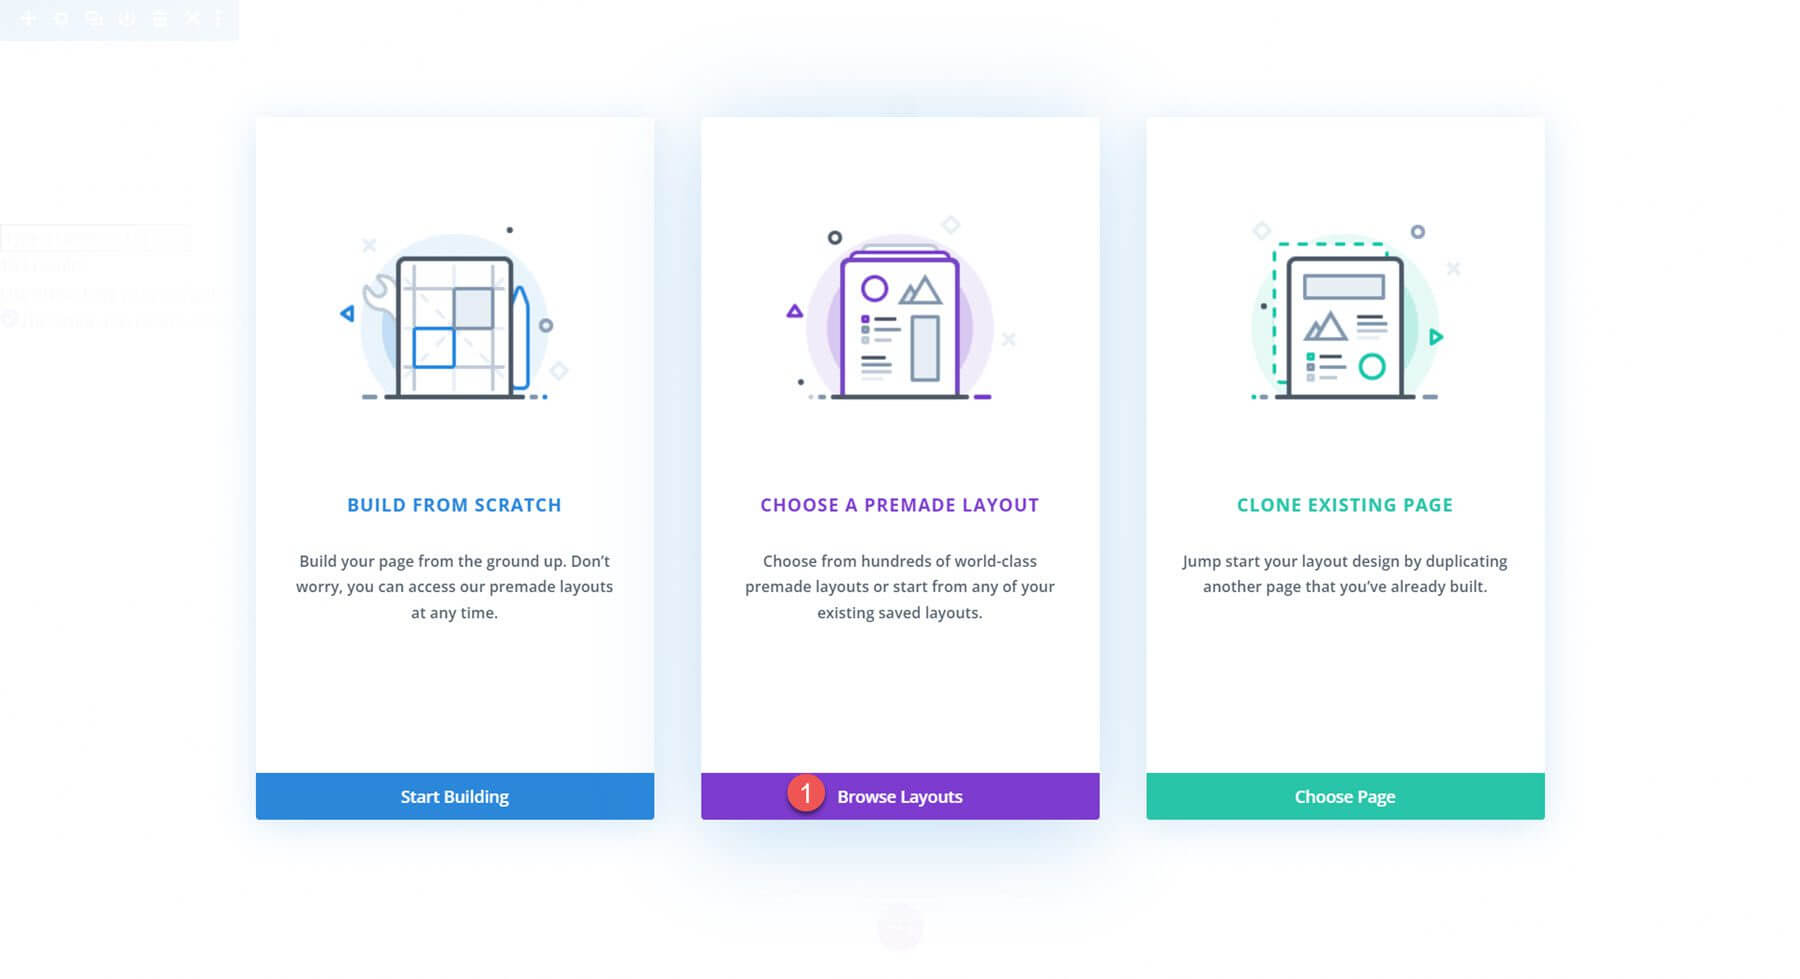
For this example, we'll utilize a readymade layout from the Divi library, so choose Browse Layouts.
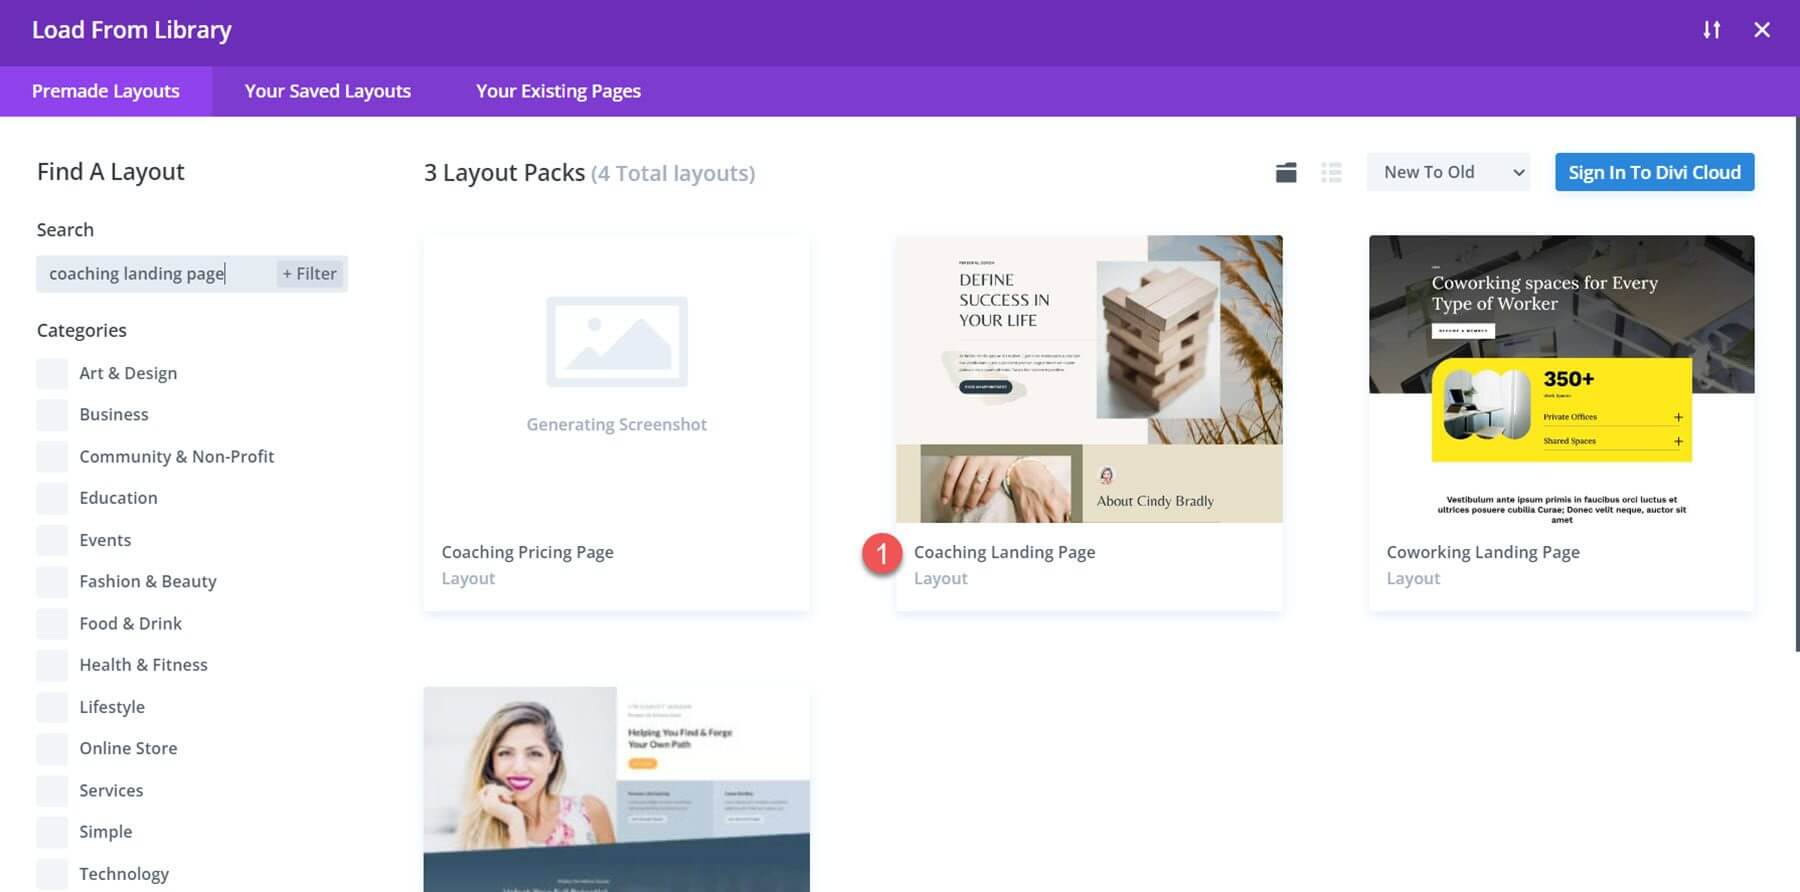
The Coaching Landing Page layout should then be located and chosen.
To add the layout to your page, select Use This Layout.
We can now start building our design.
Slide Animation
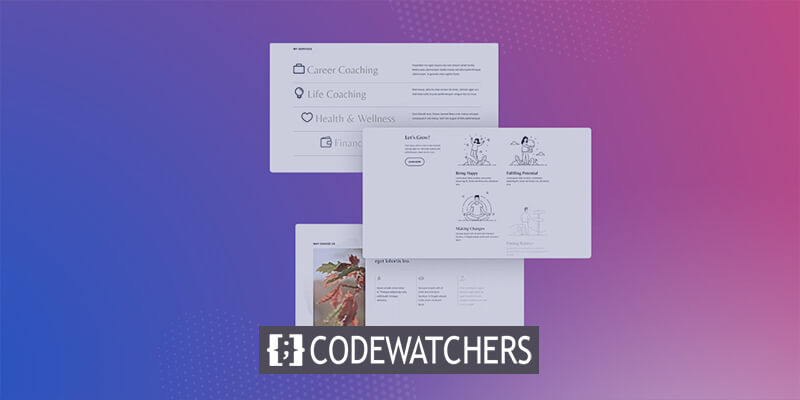
We will use the information in this page's My Services section for our first blurb animation tutorial. Blurb modules are used in this area to display the service title and icon.

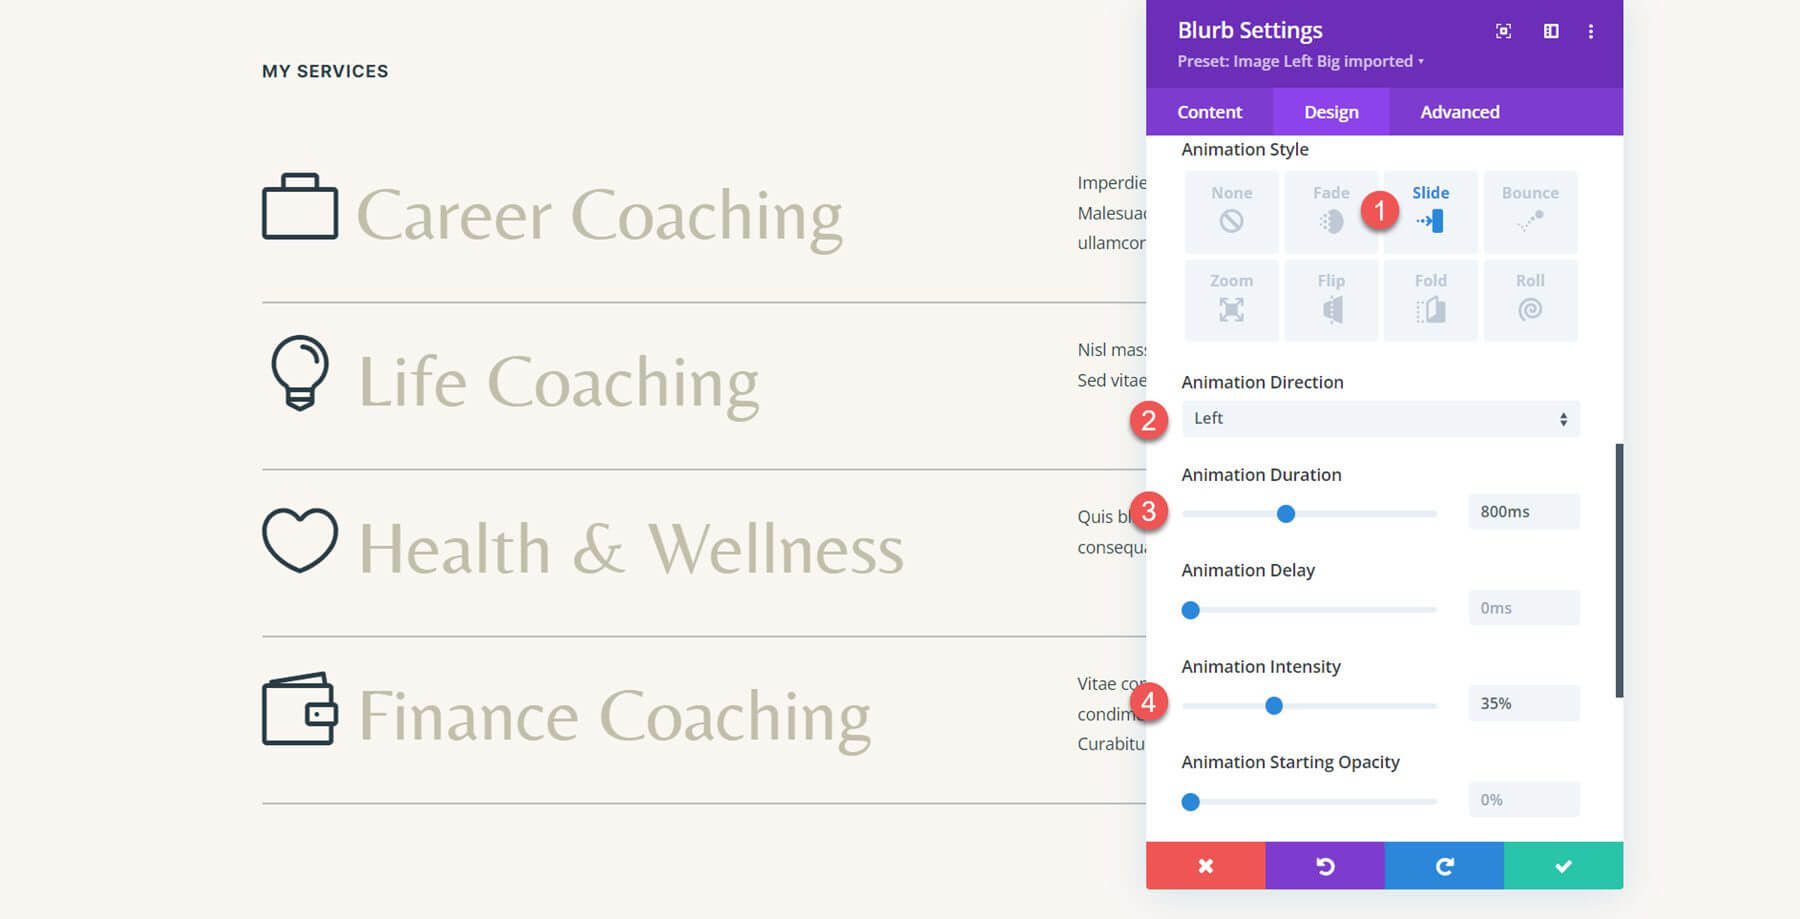
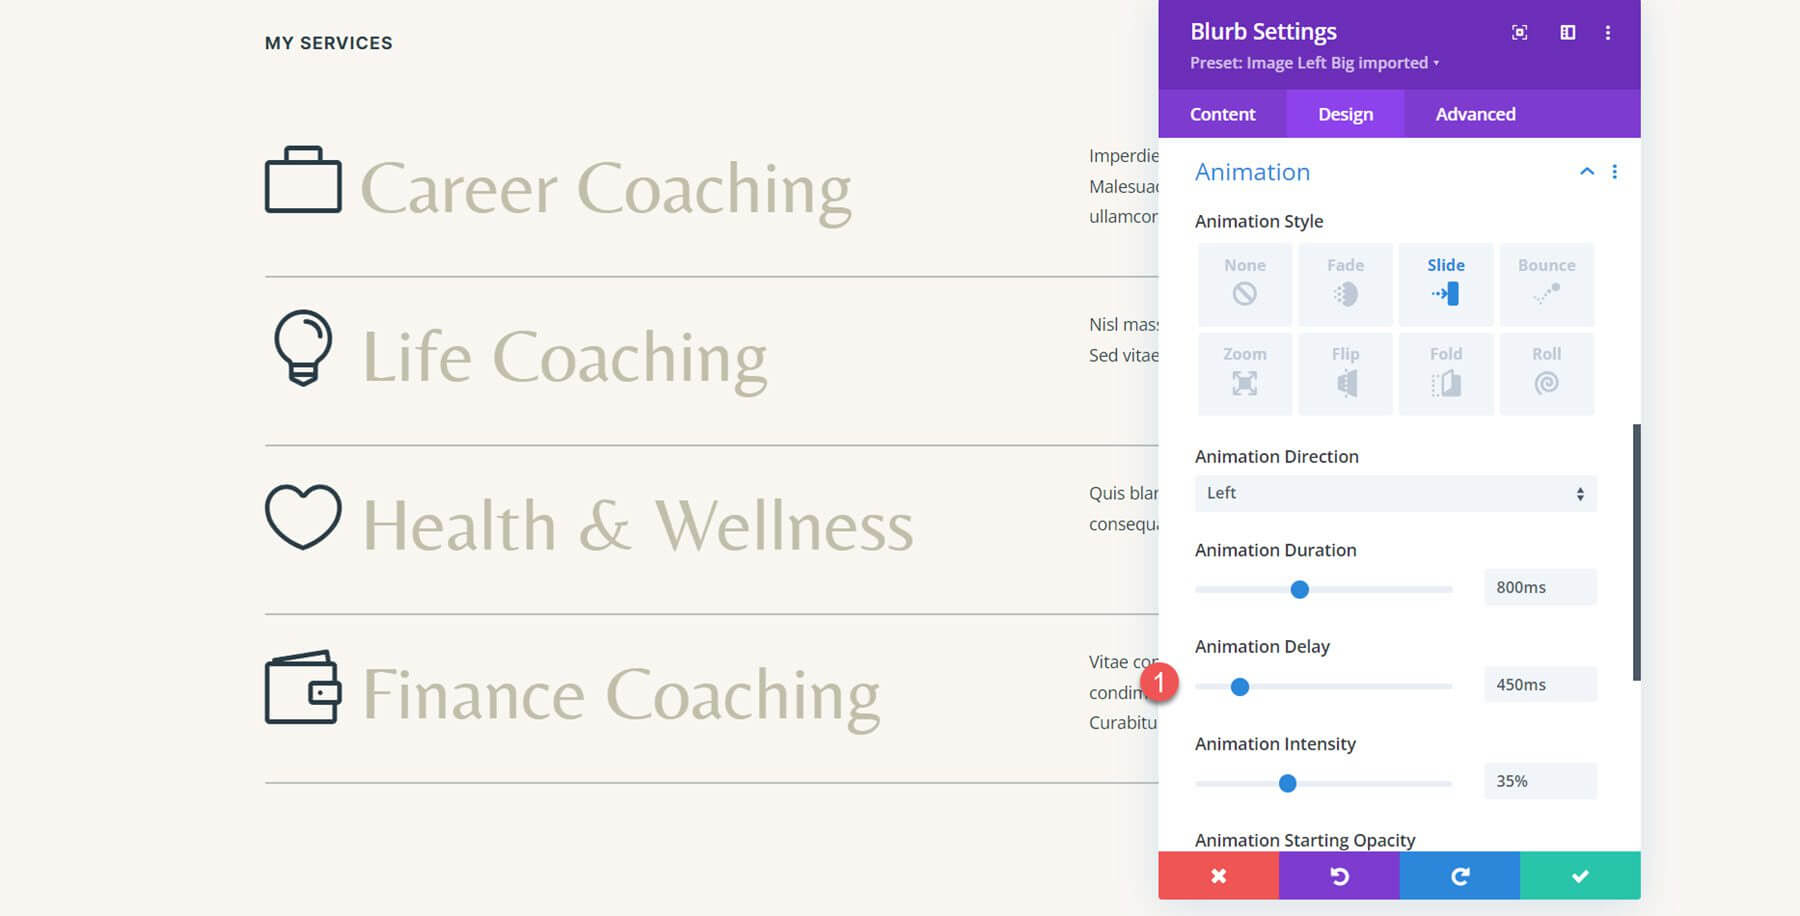
Our content is already in a blurb module, so we can start implementing the animation right away. Open the career coaching service's initial blurb module's settings, then go to the design tab's animation settings. Choose the slide animation style for this design.

We can further alter how the animation appears and functions once the slide animation style has been chosen. I'm moving the animation intensity to 35%, moving the animation duration down to 800ms, and moving the animation direction to the left.
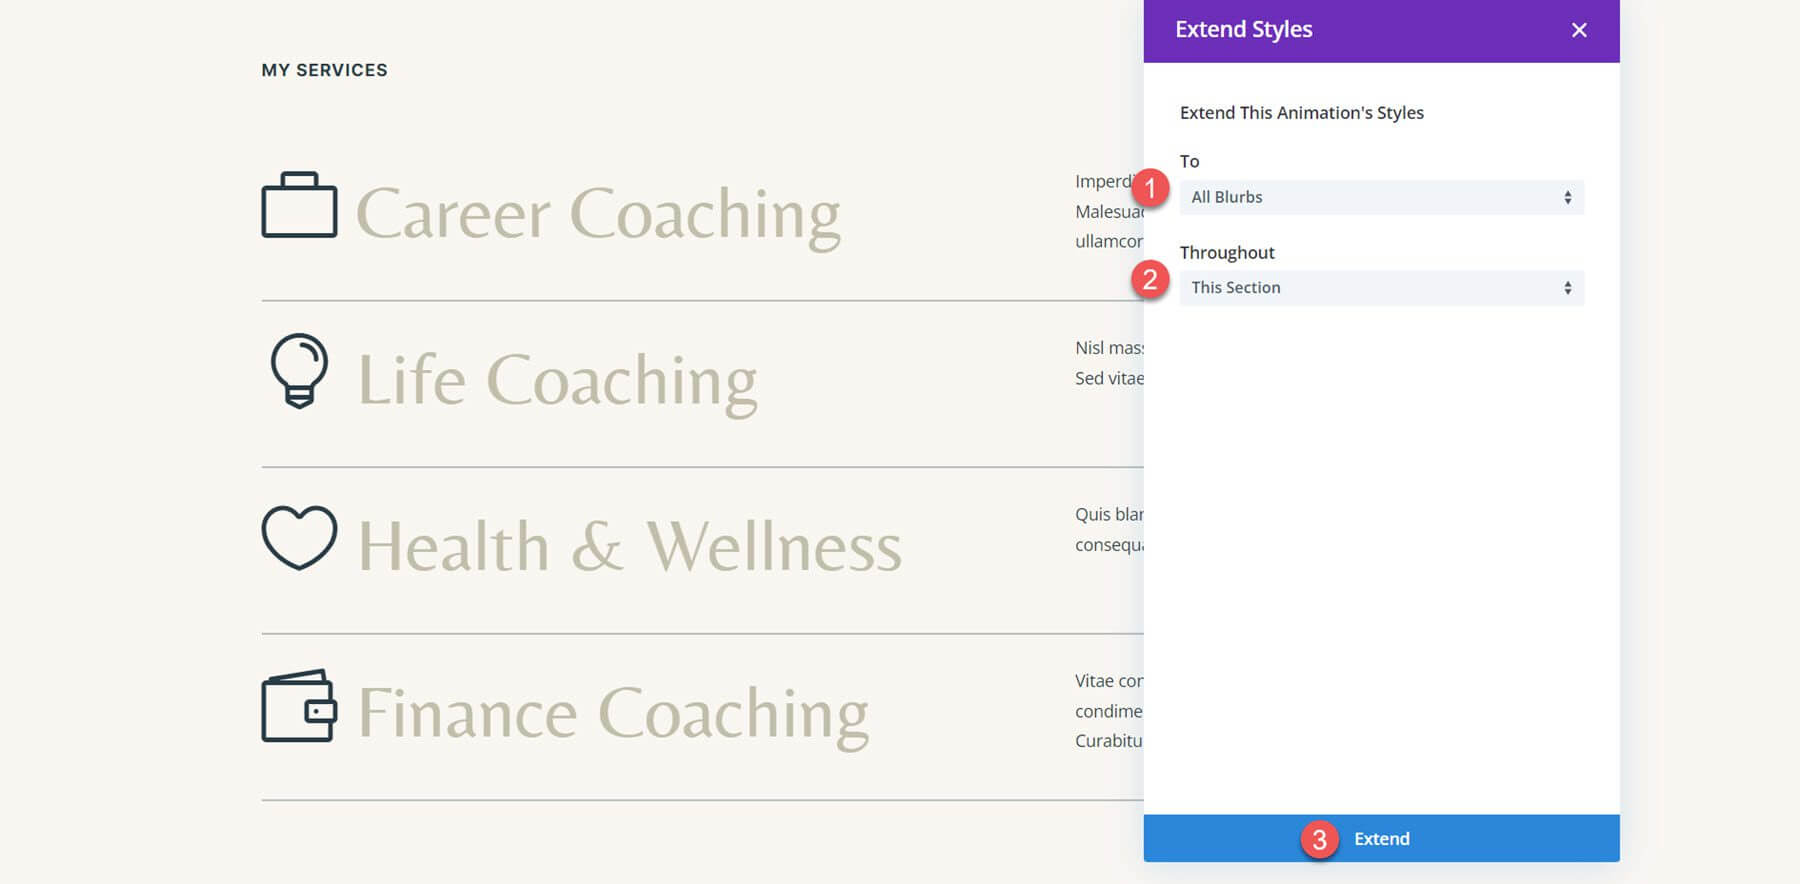
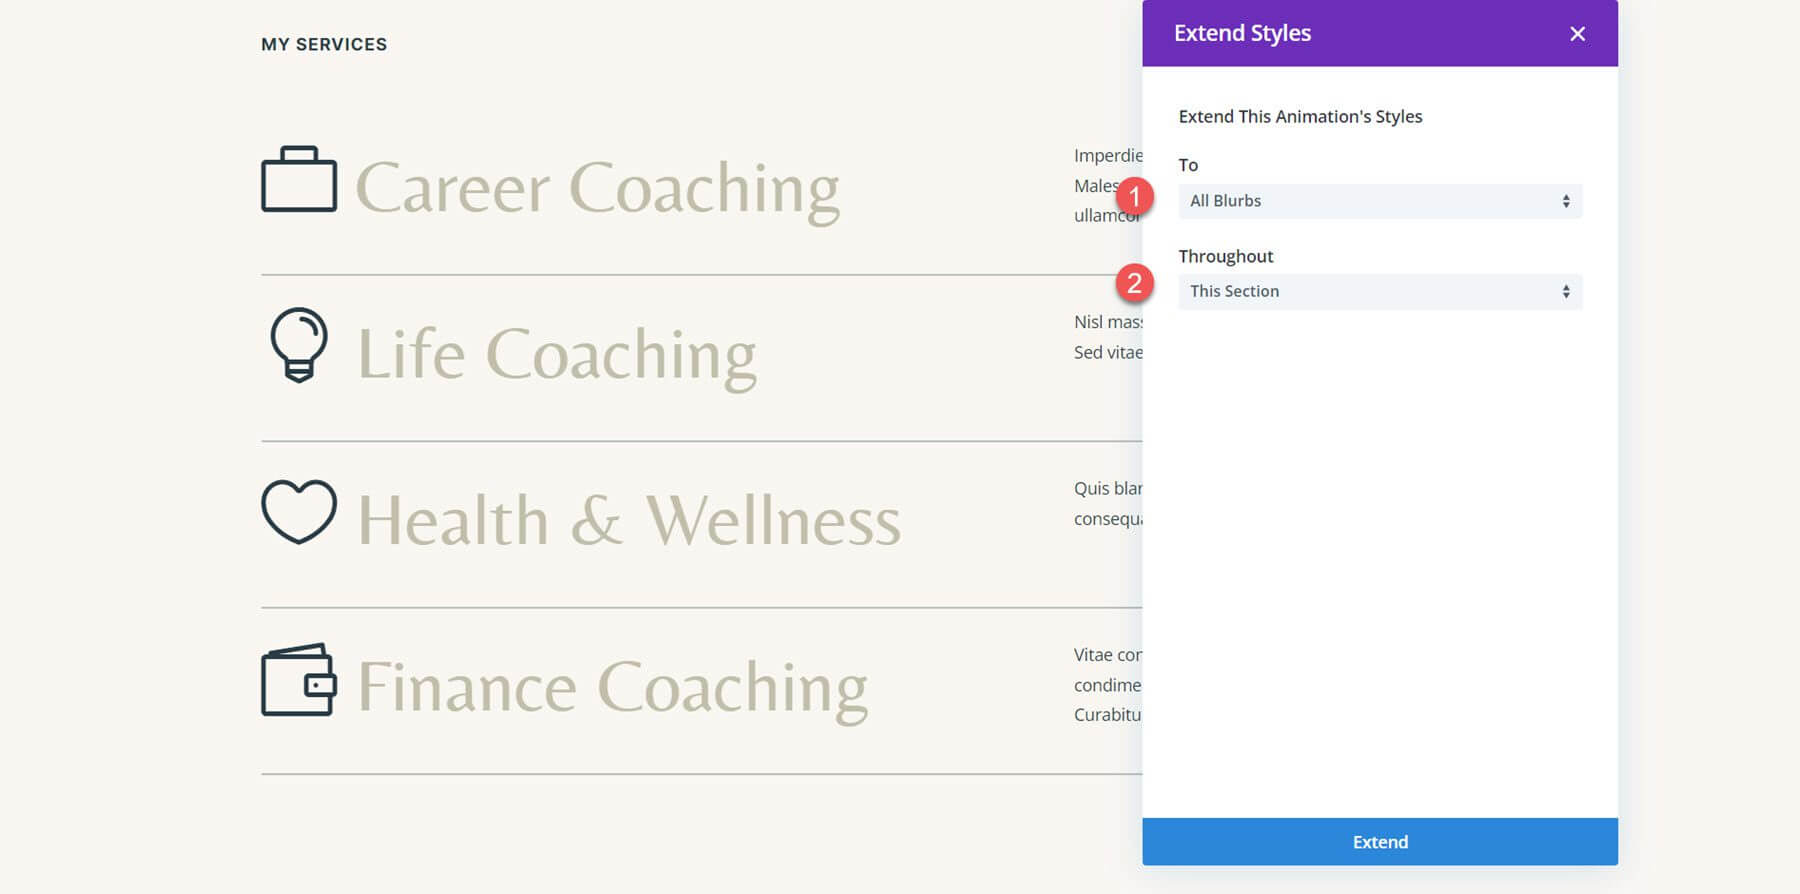
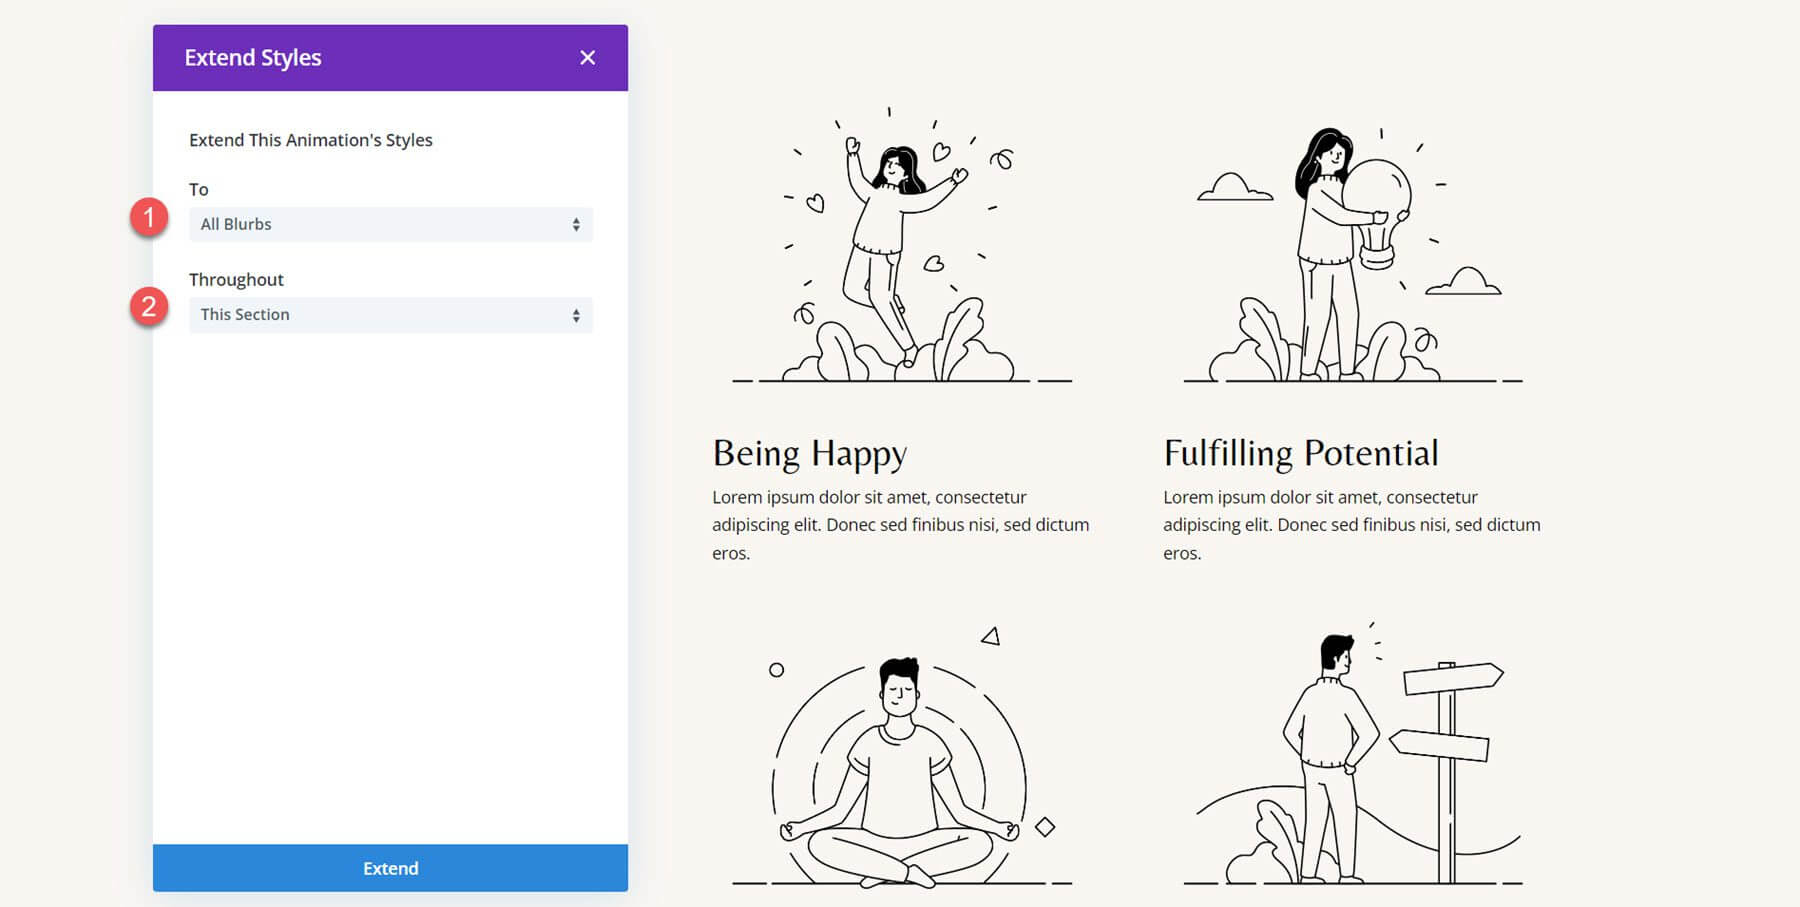
The other blurb modules in this area will now receive the same animation. Extend Animation Styles can be chosen by clicking the three dots in the Animation section header.

Next, choose All Blurbs in This Section to apply the animation styles to, then click Extend to make the adjustments.
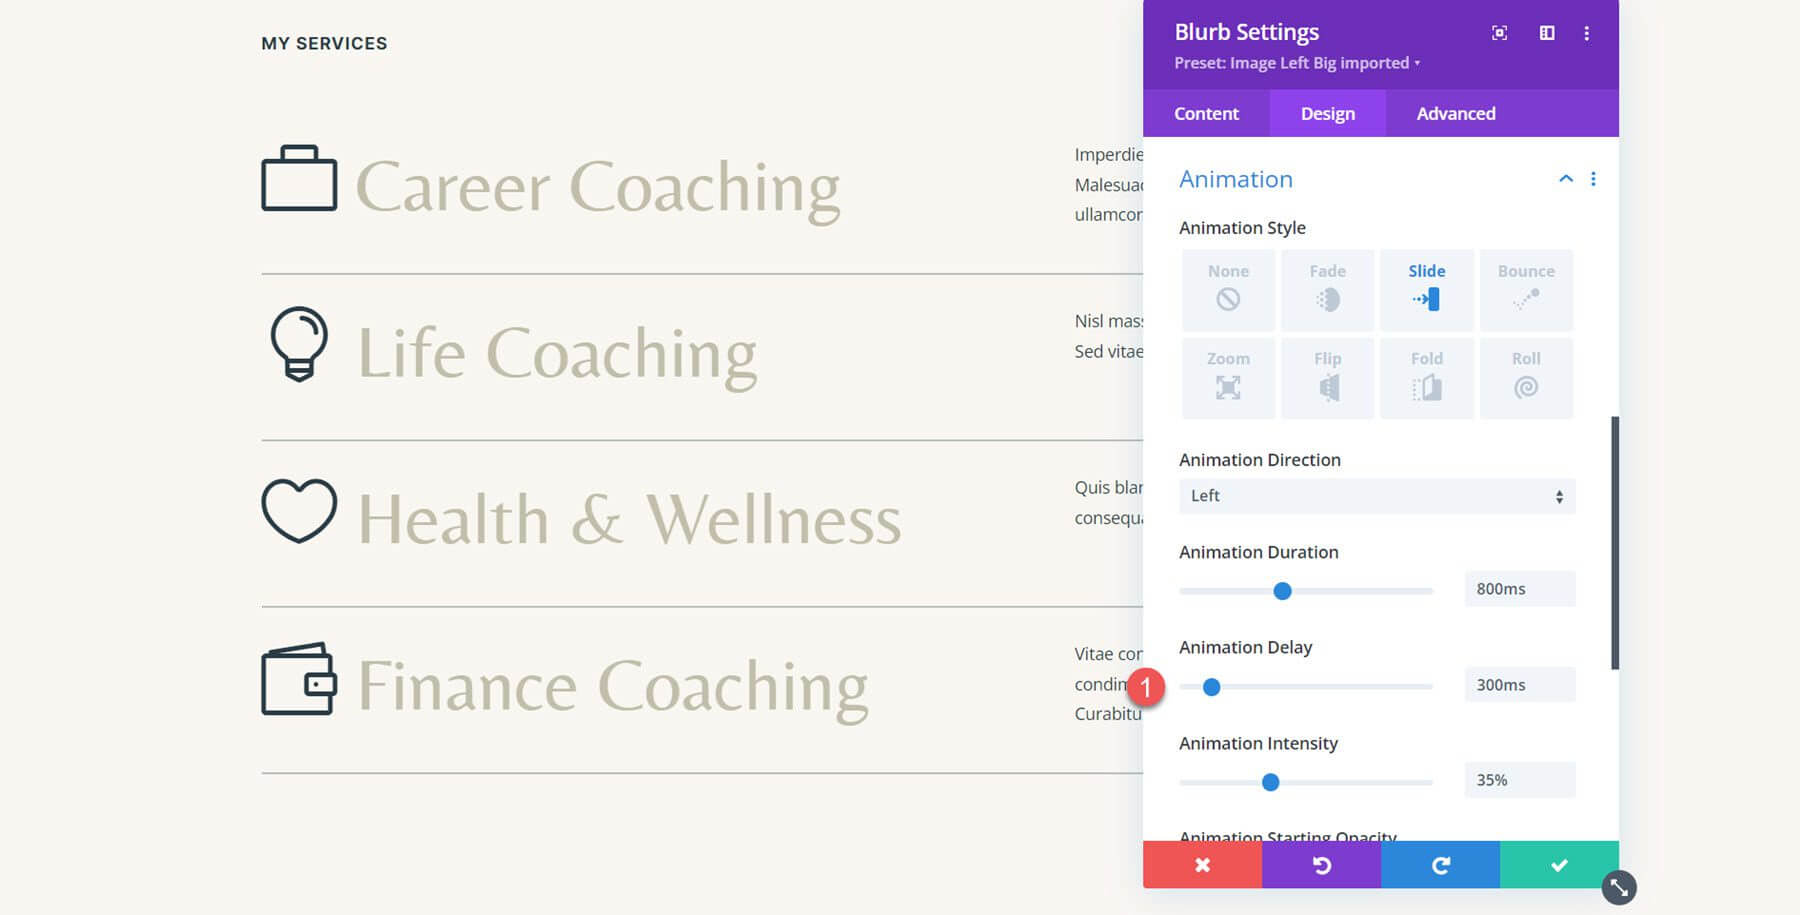
The animation effect is now the same for all blurbs. To give the motion a staggered feel and provide some visual contrast, I'll add a small delay. Set the Animation Delay to 150ms after opening the Life Coaching blurb's animation options. By including this delay, a lovely delayed effect will be produced where the Life Coaching blurb animates a little after the initial Career Coaching blurb.

The next step is to give the final two blurbs an Animation Delay. Set the Animation Delay for the third blurb, "Health & Wellness," to 300ms.
Set the Animation Delay to 450ms for the final Finance Coaching blurb.
The finished design, complete with slide-left animation, is shown here.
Flip Animation
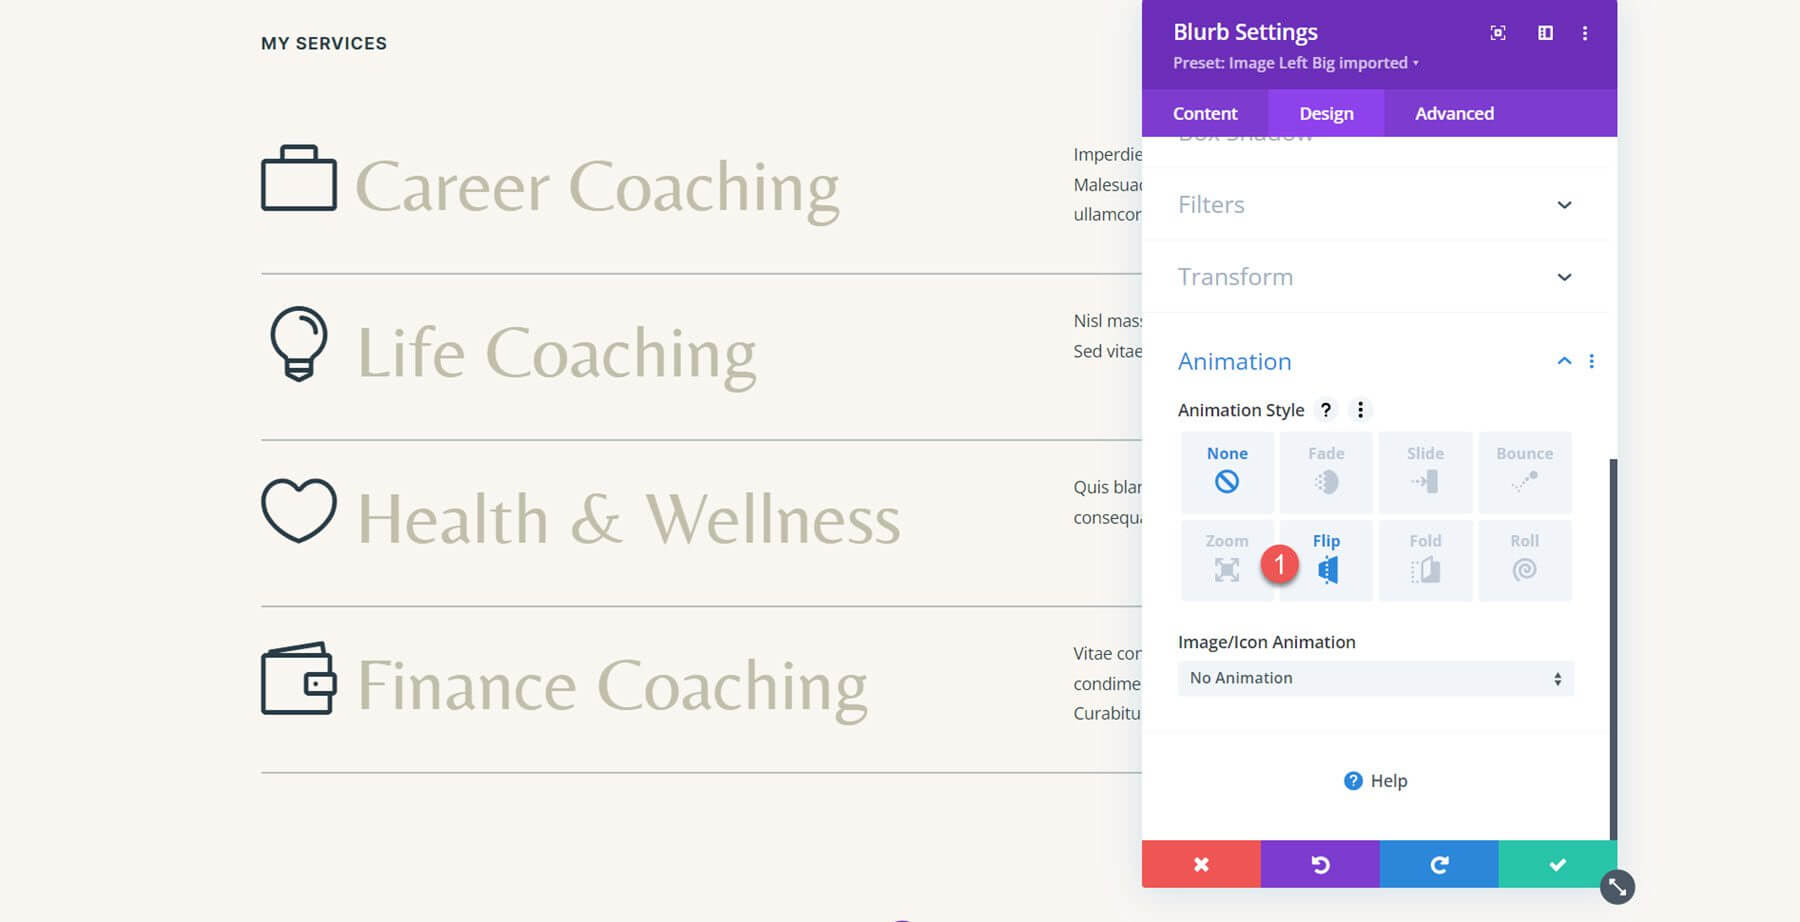
We'll take the identical services section for the second blurb animation and give each blurb a flip-style animation. Navigate to the Animation options under the Design tab after opening the settings for the first blurb. The flip animation style can then be chosen.
Centre the animation direction. Set the Animation Intensity to 100% after that. Increase the Animation Starting Opacity to 70% as well. The Animation Speed Curve should then be lowered.

Next, include all of the section's blurbs in the animation style.
Here is the layout with all of the blurbs animated in a flip-style.
Bounce Animation
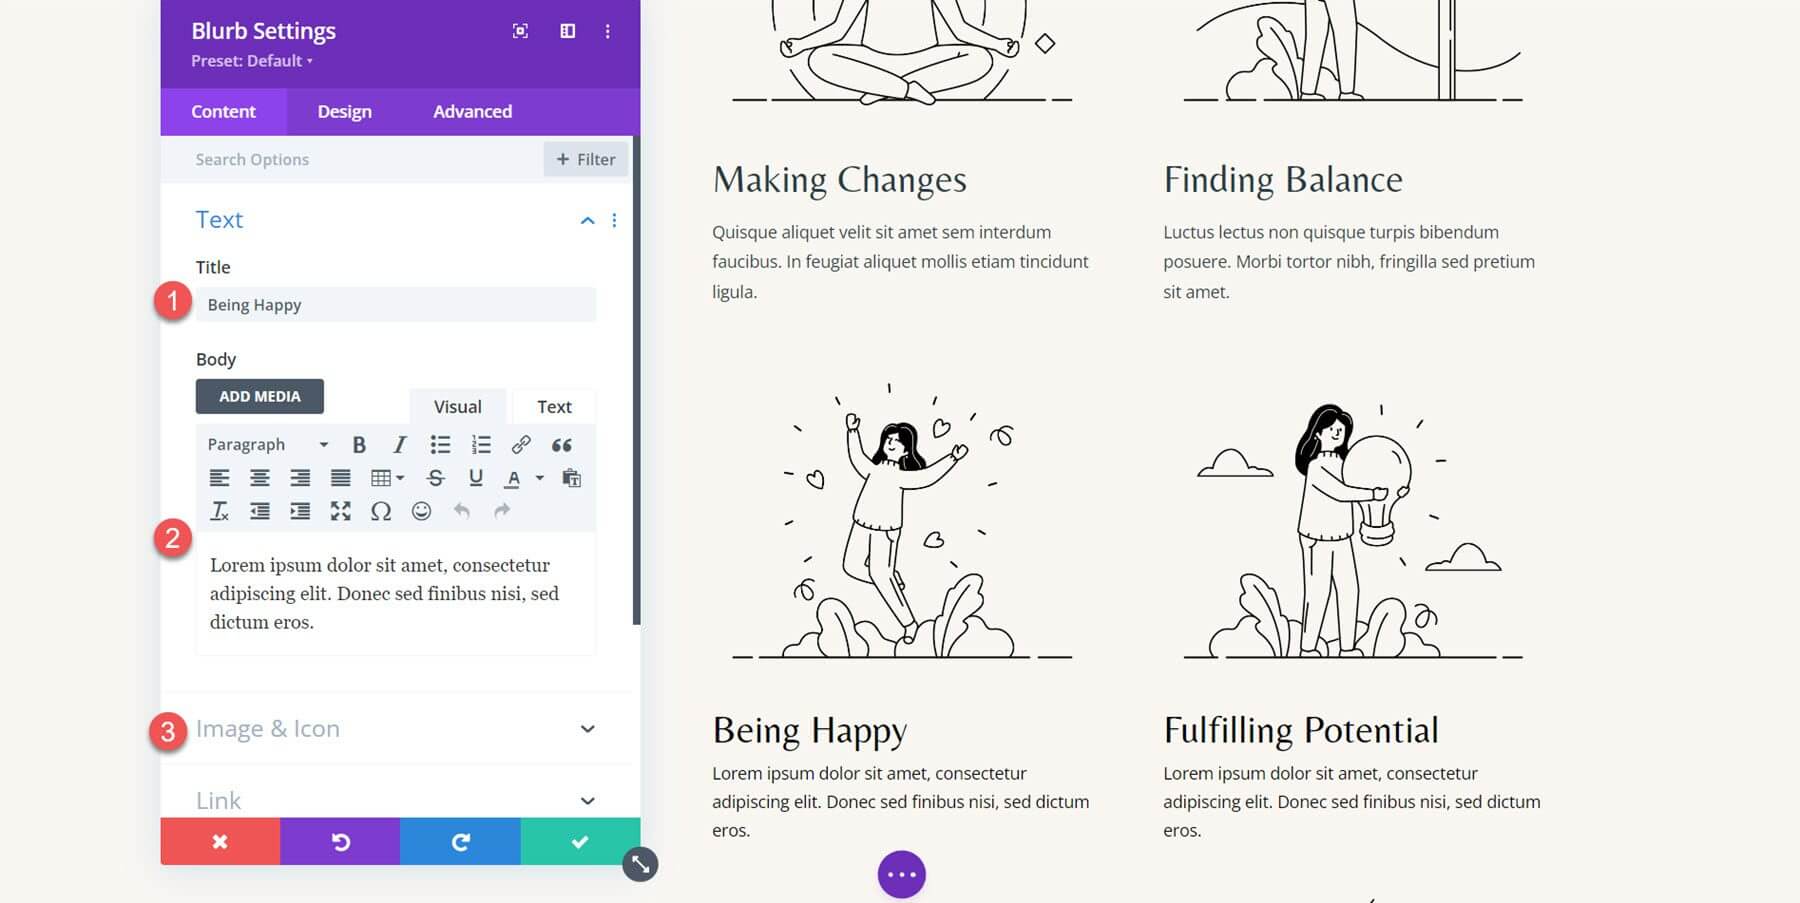
Let's go to the layout's Let's Grow area for the third animation. We must first reconstruct the layout using blurb modules since it was created using image and text modules.
Begin by including a fresh blurb module in the design.

After that, change the text to reflect the original example.
- Title: Positivity
- Body: Consectetur adipiscing elit, lorem ipsum dolor sit. Rather than dictum eros, do nec sed finibus nisi.
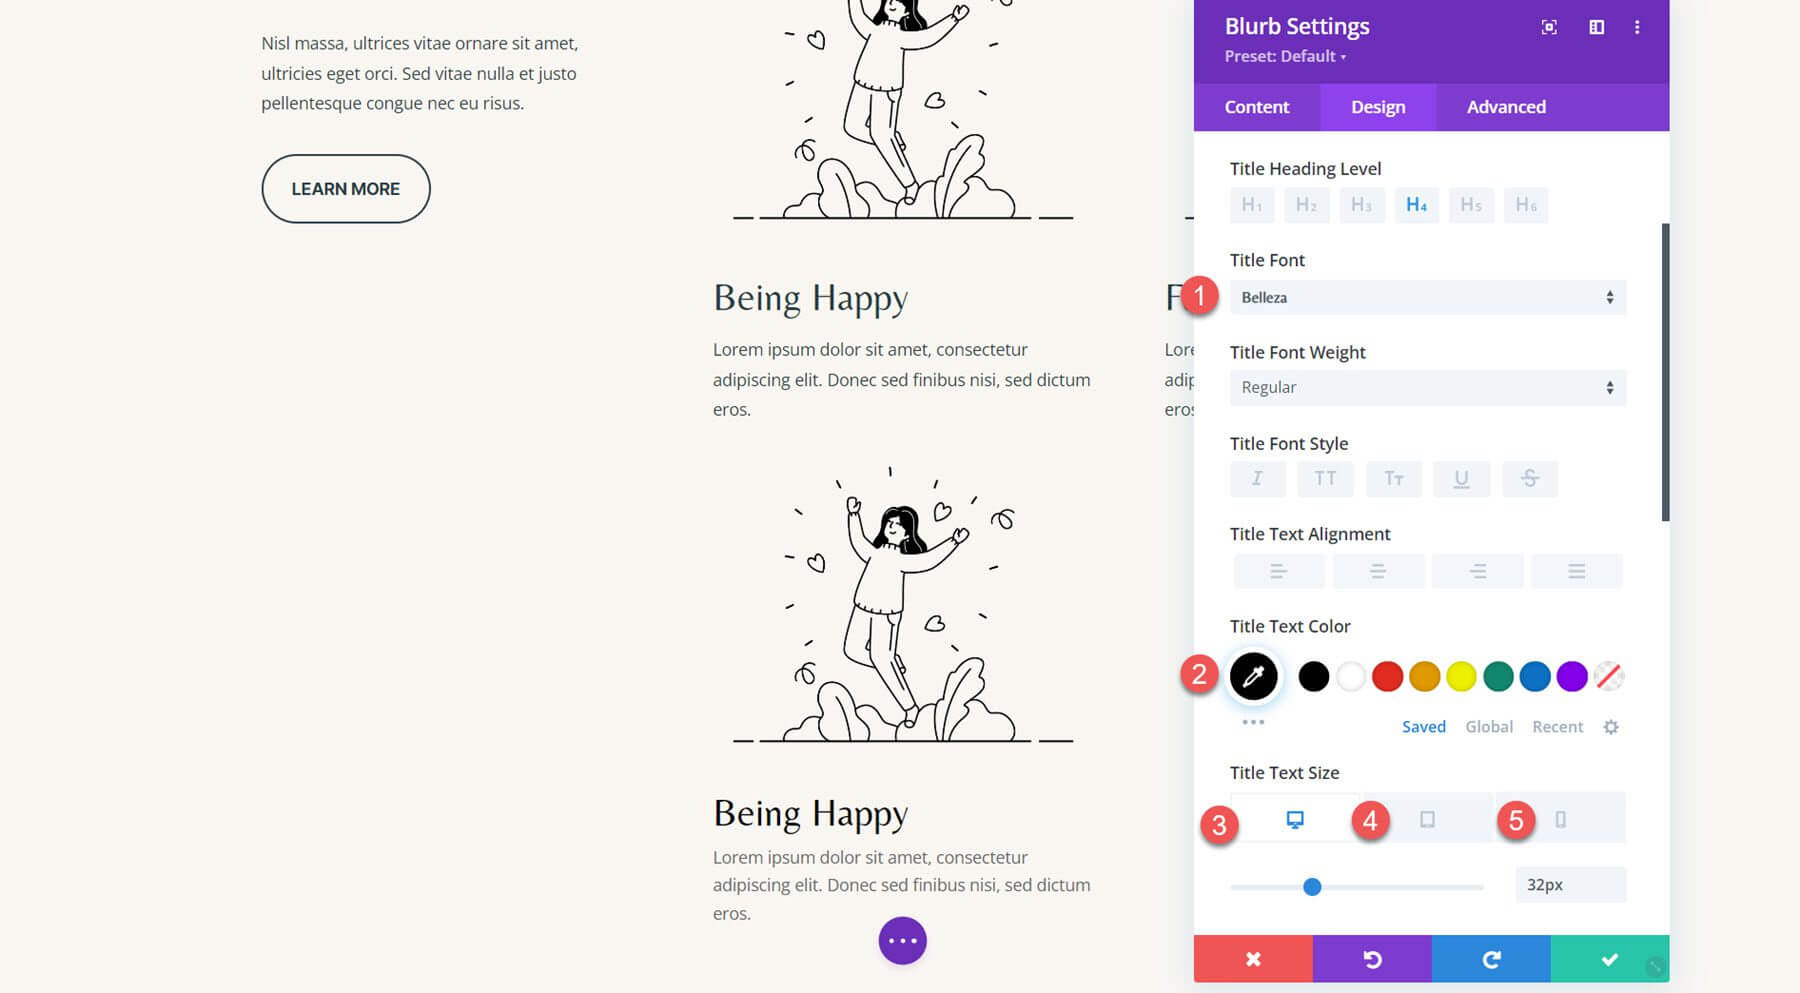
Change the following parameters under the Title font settings in the design tab.
- Title Font: Belleza
- Title Text Color: #000000
- Title Text Size Desktop: 32px
- Title Text Size Tablet: 16px
- Title Text Size Mobile: 15px
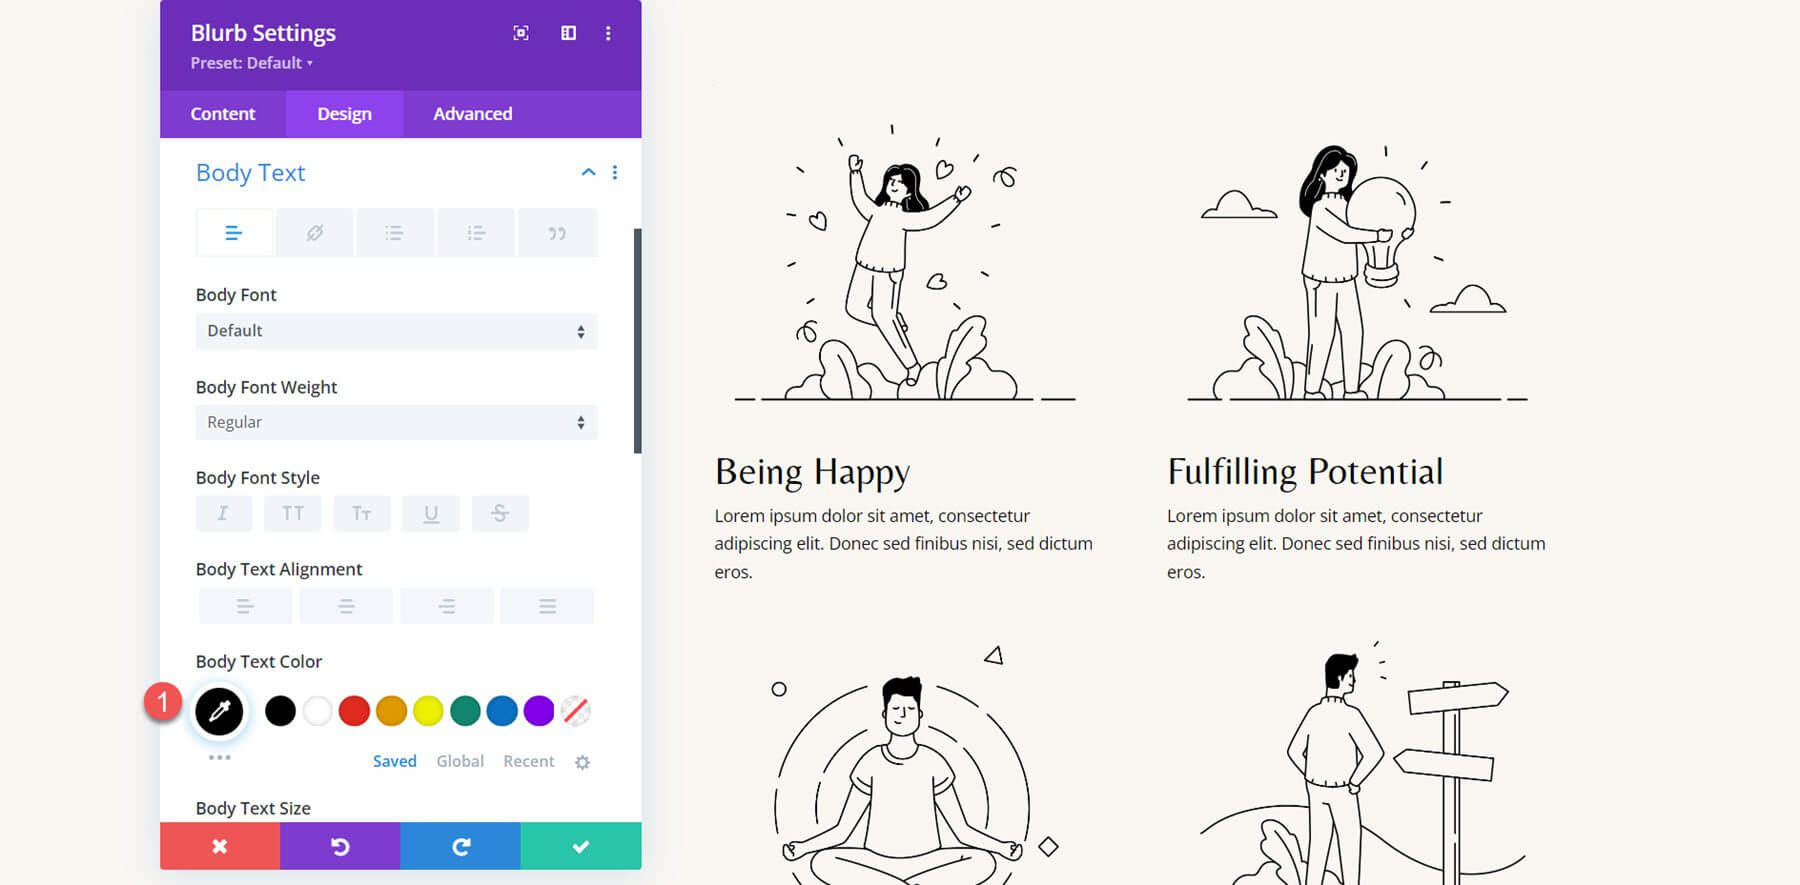
Now its time to modify the body text color.
- Body Text Color: #000000
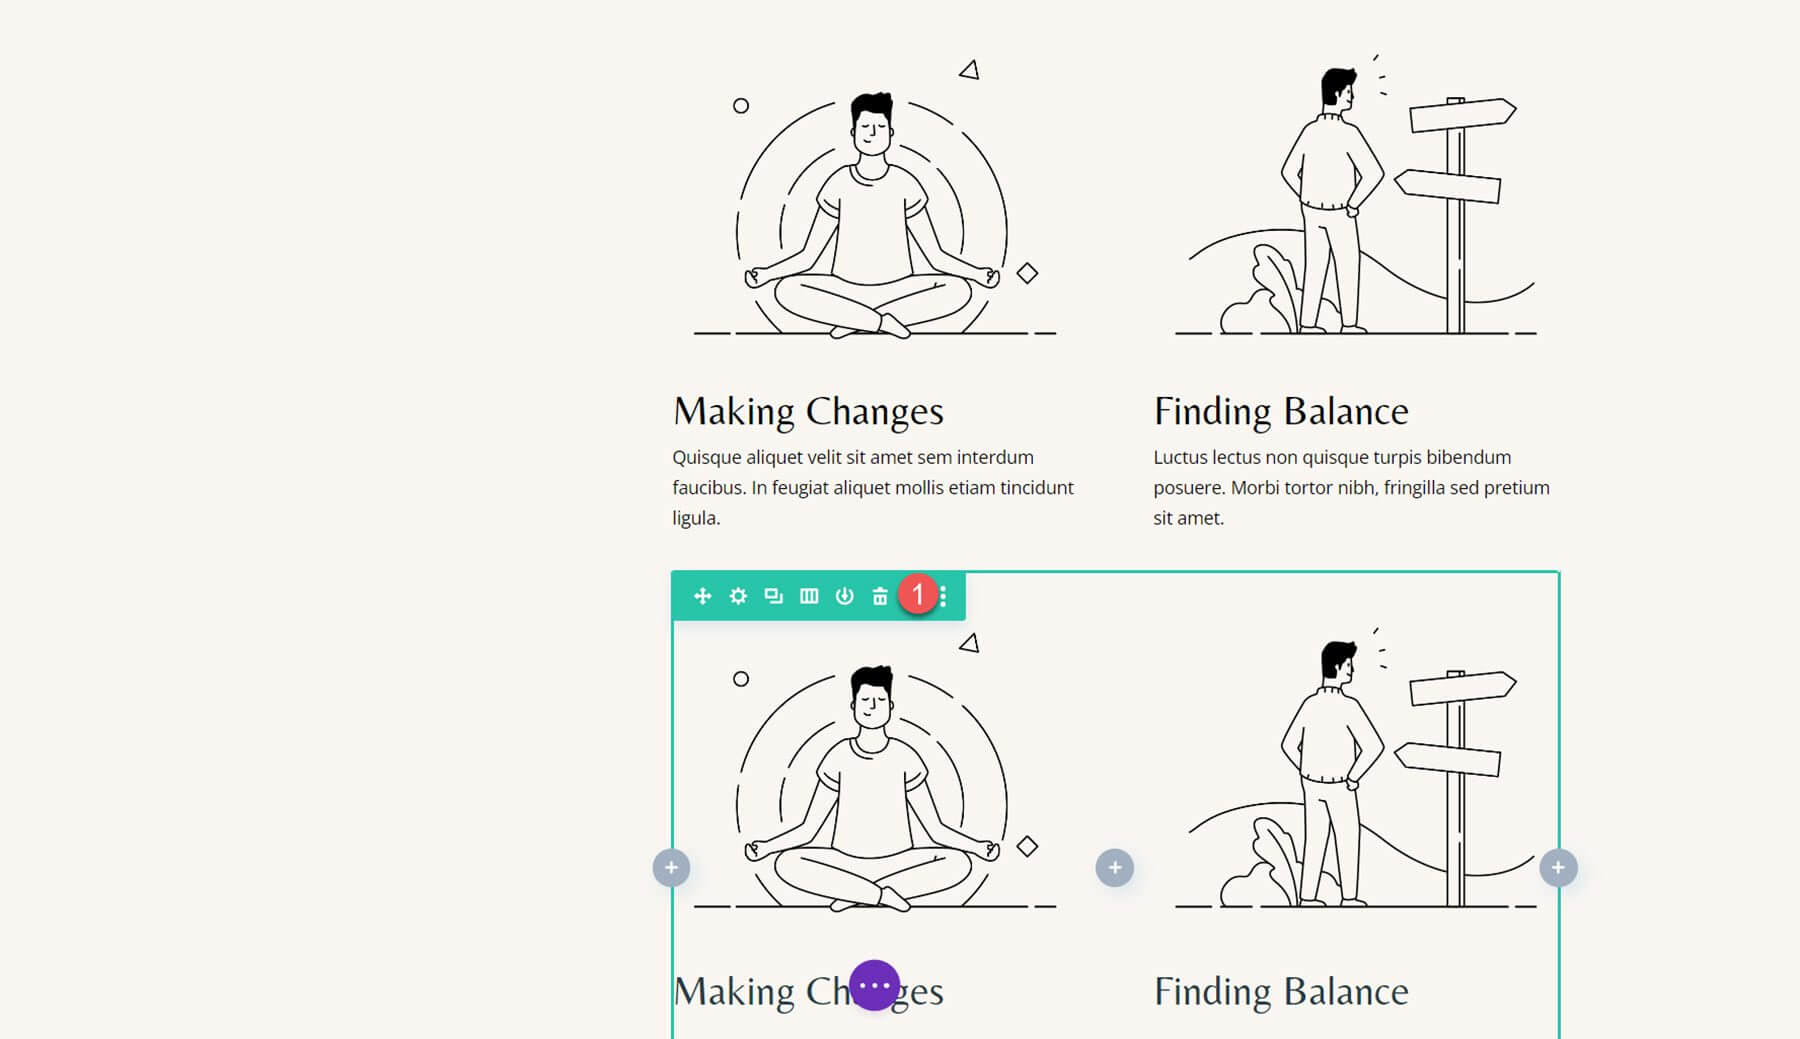
Using the blurb module, repeat these steps to generate all 4 sections. After that, erase the previous sections.
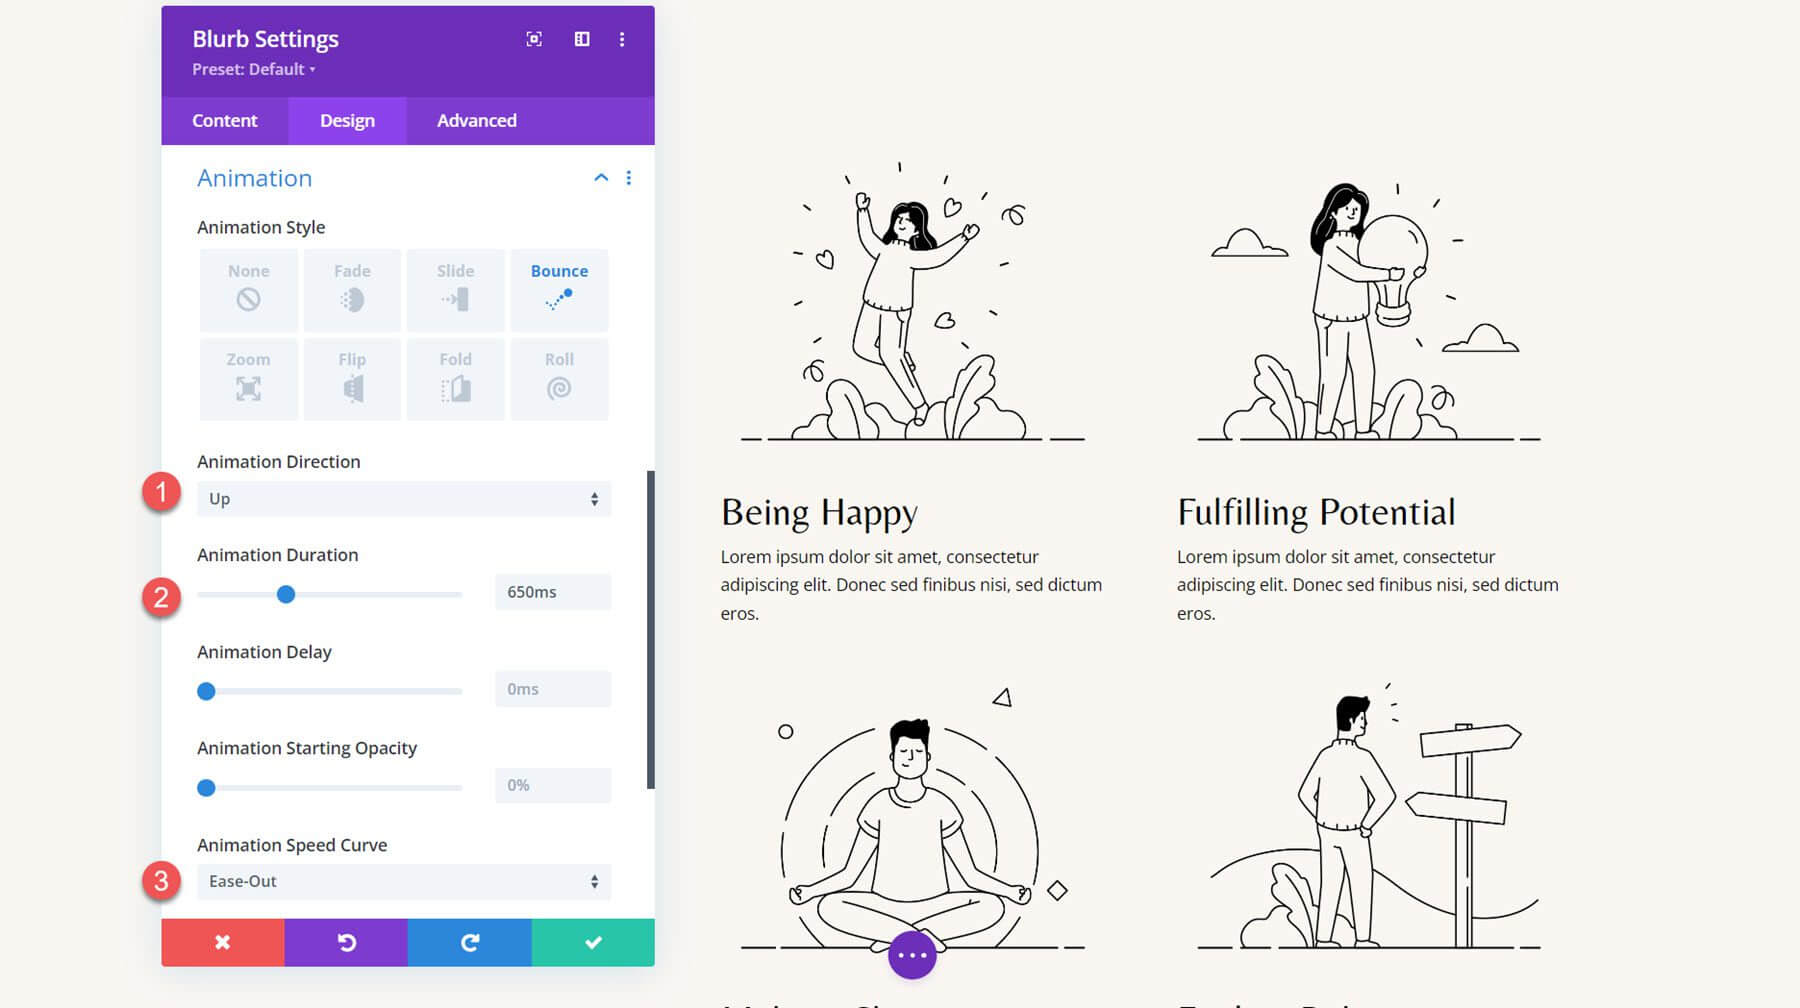
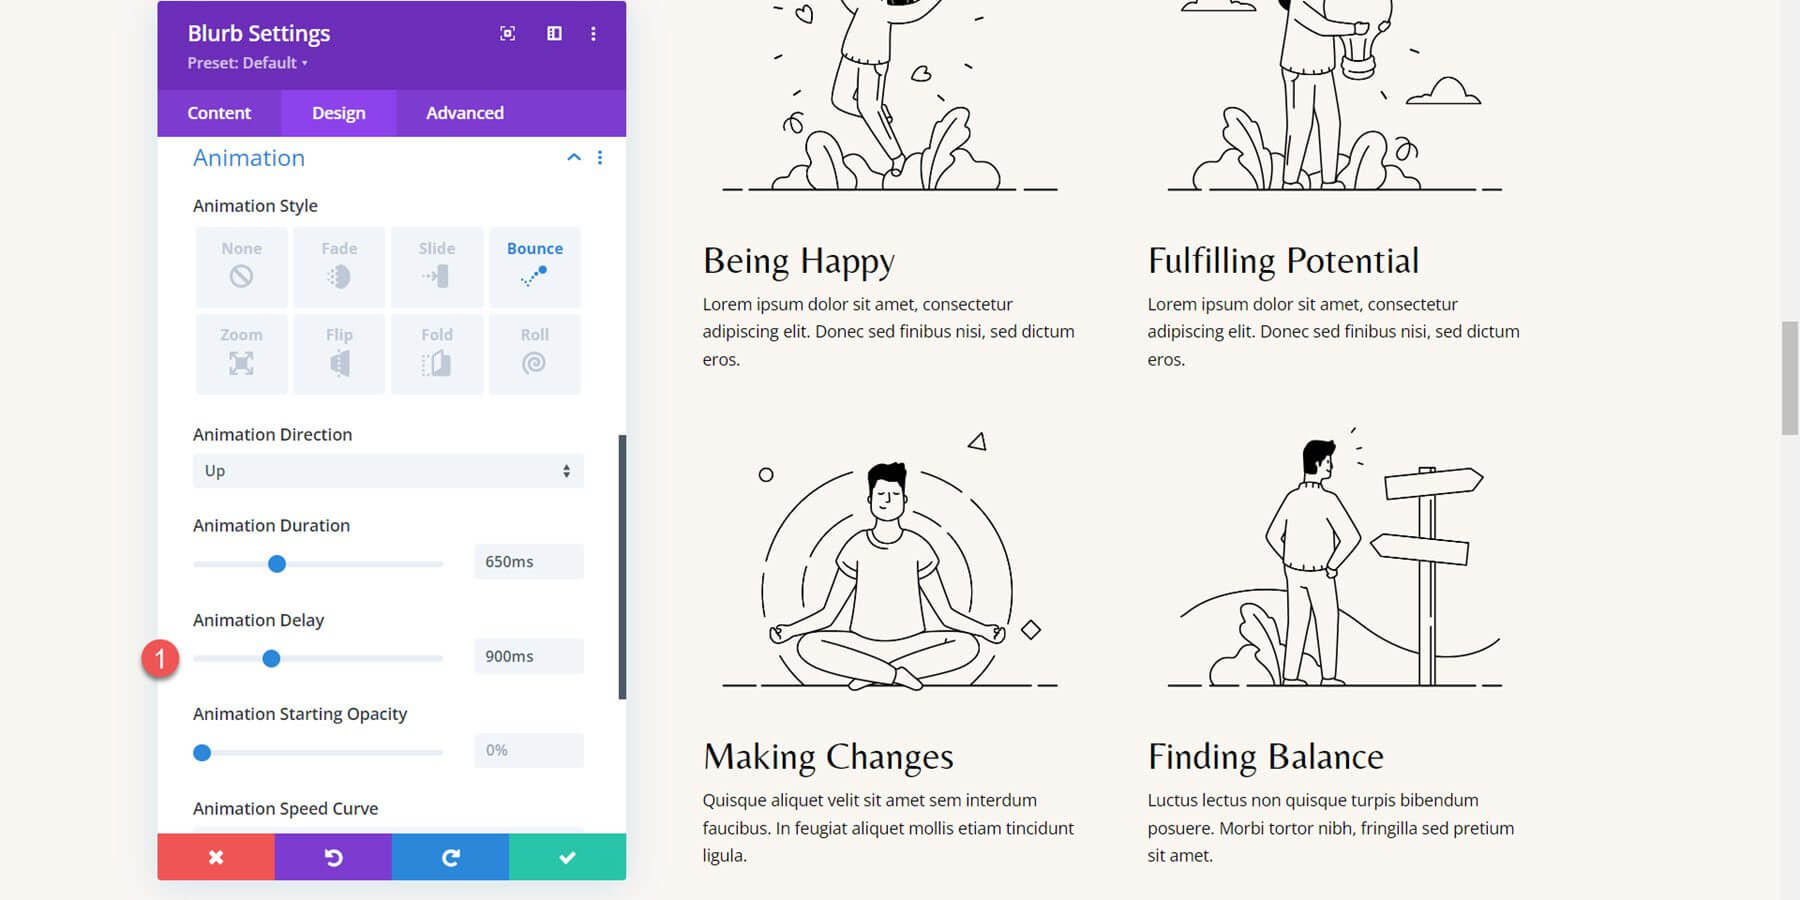
We can add our animation parameters once our layout is complete. Open the first blurb's options, go to the Design tab's Animation settings, and choose the Bounce animation type.
The animation styles should then be configured as follows:
- Animation Direction: Up
- Animation Duration: 650ms
- Animation Speed Curve: Ease-Out
Include the other blurbs in the animation styles.
To prevent the animations from occurring at the same time for each blurb, I want to add a staggered delay. Set the blurbs' animation time to the following value.
- Animation Delay for Blurb 2: 300ms
- Animation Delay for Blurb 3: 600ms
- Animation Delay for Blurb 4: 900ms
The finished design, complete with bounce blurb animations, is shown below.
Final Thoughts
Using Divi's blurb module, you may showcase your services or prominently display important information on your website. Additionally, you can emphasize the blurbs and direct users' attention to that text by including animations in your design. We only discussed four alternatives for animating your blurb module in this tutorial, but Divi's design options and the flexibility of the animation settings allow you to create countless designs.


