
Acceptance and appreciation are critical components of every eCommerce page. The user is inquiring as to what occurred following their click on a button to buy goods. Additionally, customers want a simple way to view the contents of their cart. For your WooCommerce product pages, the Divi Woo Notice module gives these precise functionalities. We'll show how to style and add a Woo Notice module to your Divi Product page in this article. Additionally, we'll cover why you need one and the optimum place for one.
Let us begin.
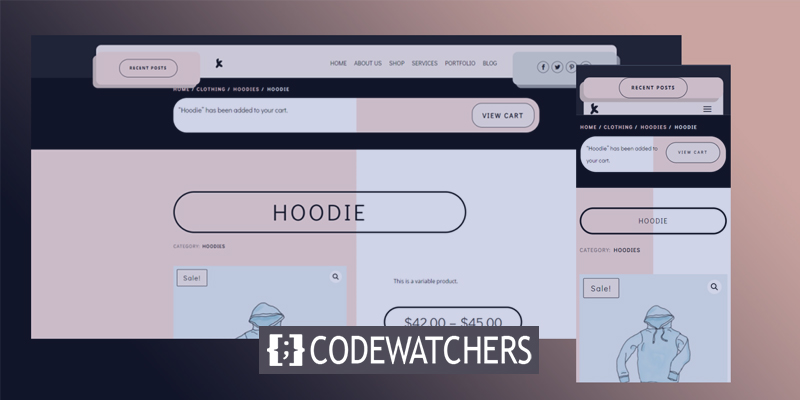
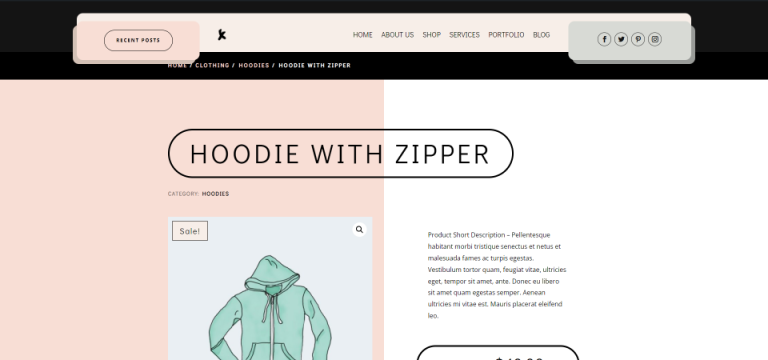
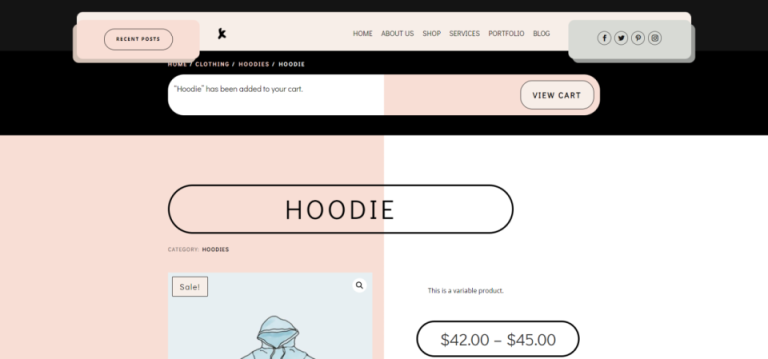
Design Preview
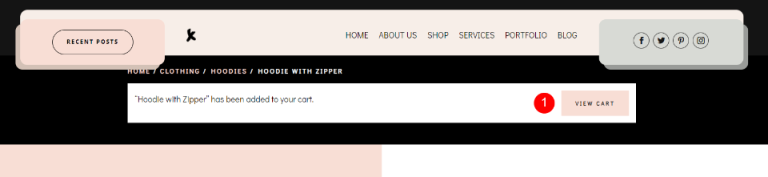
This is what our design will look like. The top section of the product page will have a notice board where when notices will be shown.

What A Woo Notice Module Does
The Woo Notice module performs two significant tasks: it notifies the user that the item has been successfully added to their shopping cart. Additionally, it includes a link to their shopping cart, which allows them to view the products in their cart.
Create Amazing Websites
With the best free page builder Elementor
Start Now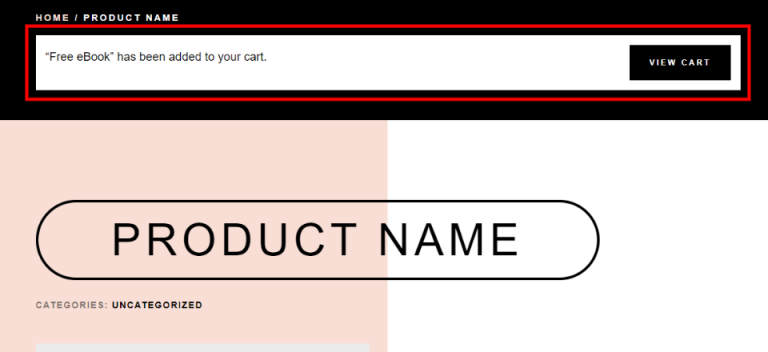
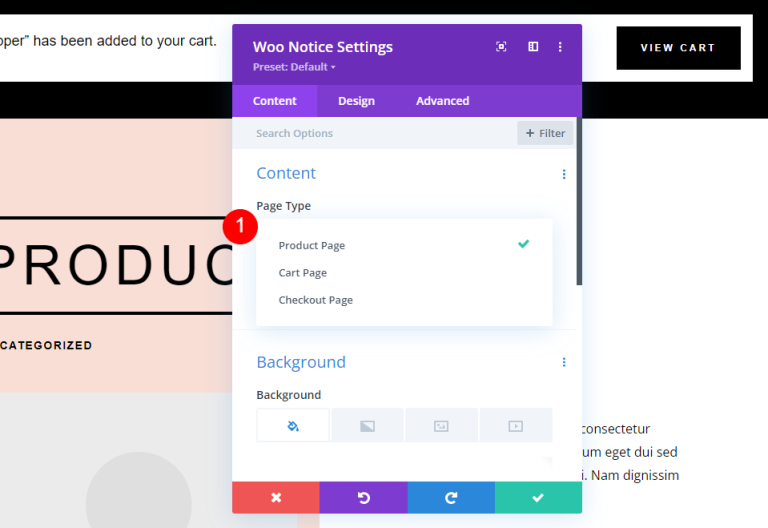
The Woo Notice module includes settings for Woo Product pages, Cart pages, and Checkout pages. The other option displays the condition of the cart and information about the coupon. The third section has a login area and a discount field. We're going to go with the first option — Product Page.
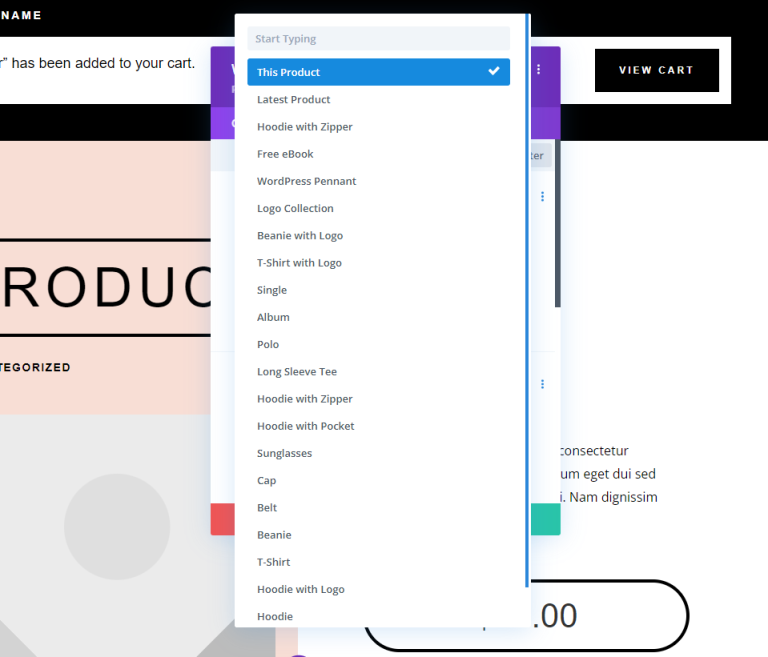
It can be set to show for the currently selected product, the most recently added product, or any product from the list.
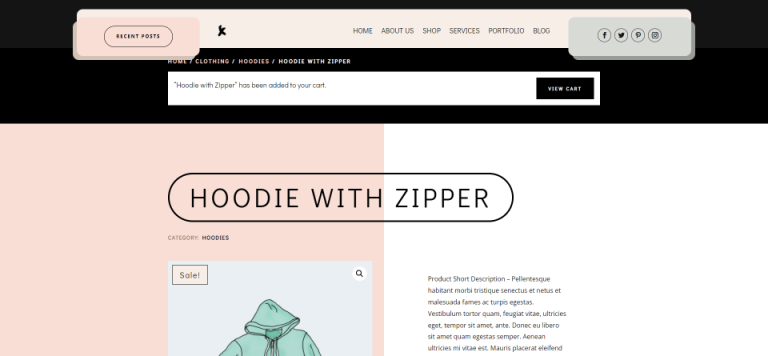
Unlike other Woo modules, the Woo Notice module appears on the page only under specific circumstances. It becomes displayed only after the user adds the item to their cart. This example displays the product page without adding the item to the cart.
Once a customer adds something to their cart, the notice panel appears.
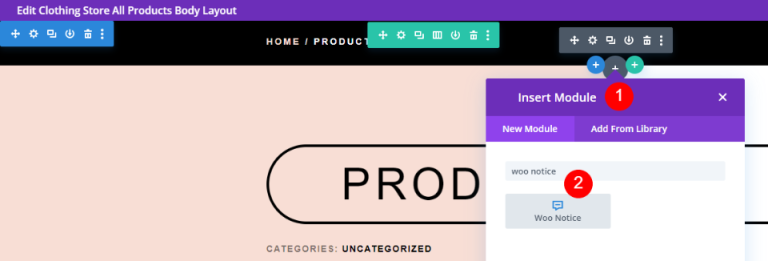
Adding A Woo Notice Module
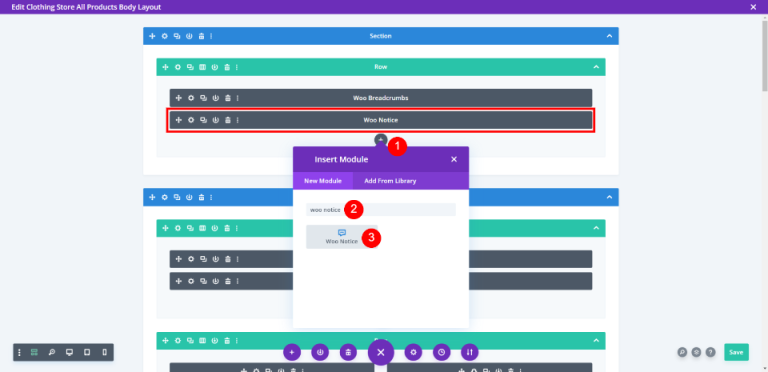
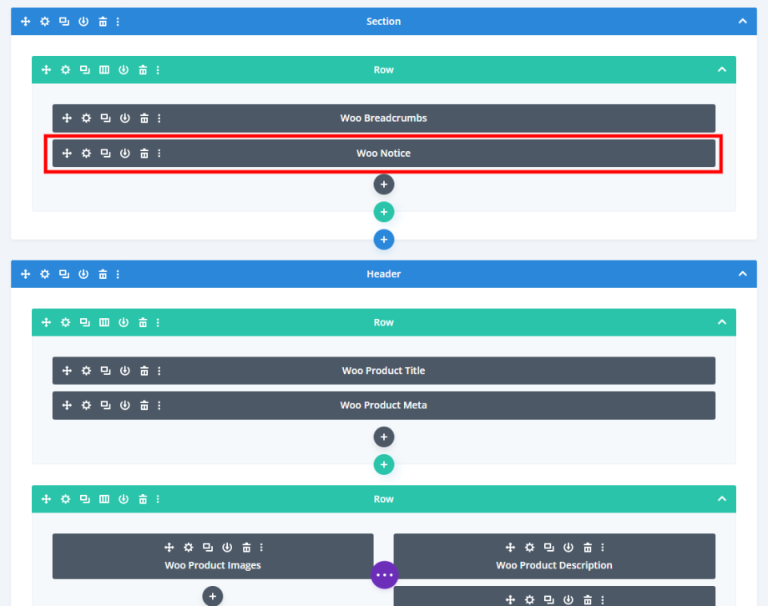
As is the case with all WooCommerce modules in the Divi Builder, the Woo Notice Module would be only available if WooCommerce is installed. To insert the module, click the gray + icon, type Woo Notice into the search bar, and then choose the module. The Woo Notice module is included in a large number of the Divi Product page designs.
Placement Of Woo Notice Module
The Woo Notice module is ideally placed at the top of the page, beneath the breadcrumbs. This will be noticeable to the user because it is where they would expect to see this type of information.
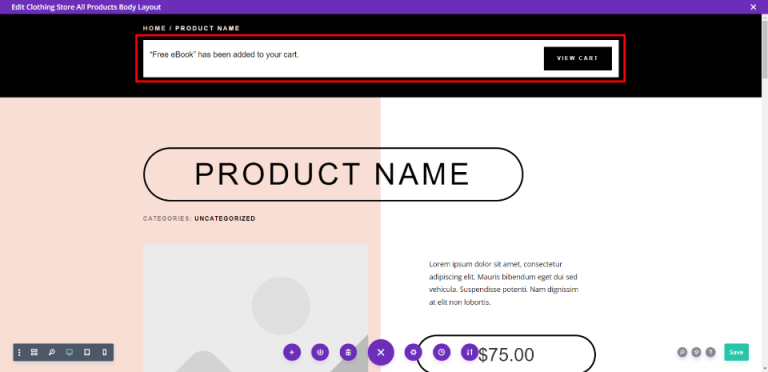
Here you can see the module is placed above the products information.
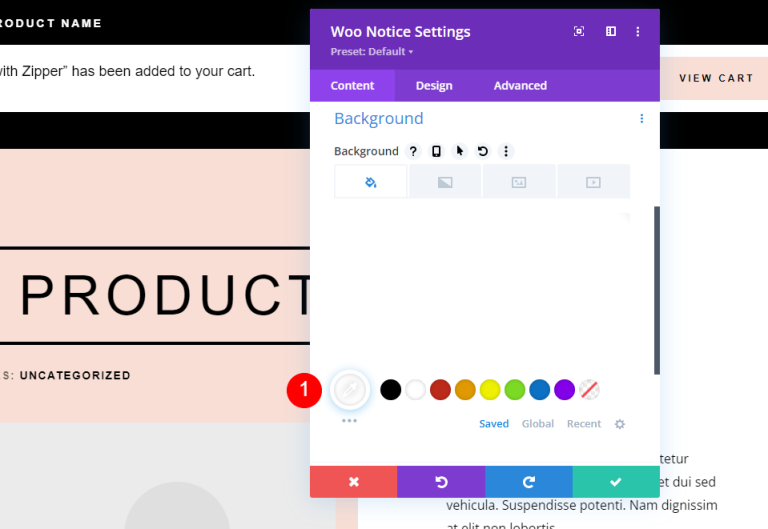
Woo Notice Module Styling
The module is already styled in the template that I'm using. We'll examine this styling in case you wish to create your own, and then style it differently using design queues from the layout pack, as well as header and footer templates for the Fashion Store Layout Pack. It has a button that changes color when the user hovers over it.
First, change the background color.
- Background: #ffffff
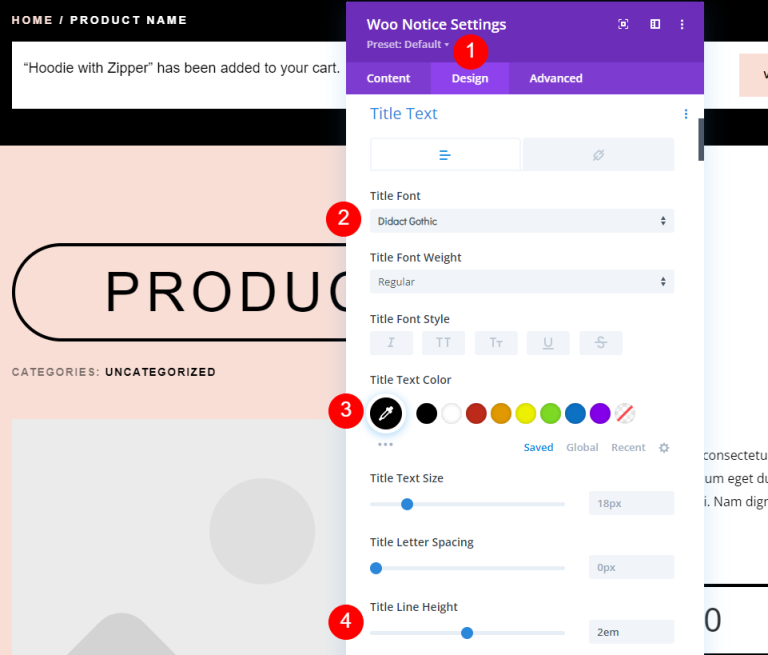
Move to the design tab and make the following changes.
- Title Font: Didact Gothic
- Color: Black
- Line Height: 2em
Scroll down to the button to make it match the outer design.
- Use Button: Yes
- Text Size: 12px
- Text Color: #ffffff
- Background Color: #000000
Now, move to the hover section and make some adjustments.
- Hover Text Color: #000000
- Hover Background Color: #f8ded5
Then make the following changes to the border.
- Border Width: 0px
- Border Radius: 0px
- Letter Spacing: 3px
- Font Weight: Bold
- Font Style: TT
Do some stylization to buttons.
- Show Button Icon: Yes
- Icon: Small Right Arrow
- Only Show Icon on Hover for Button: Yes
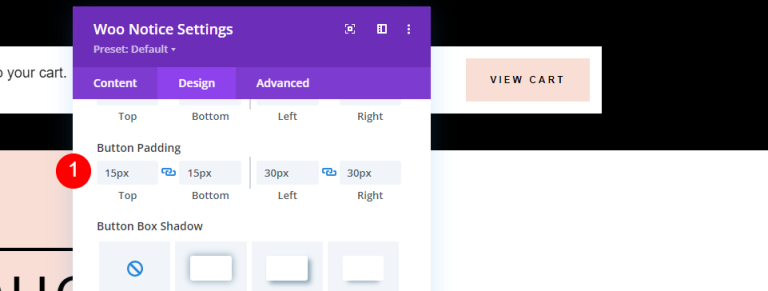
Next, we'll add some button padding. Remember that, this is not the padding for the module. We’ll add that in a minute.
- Button Padding: 15px (Top, Bottom), 30px (Left, Right)
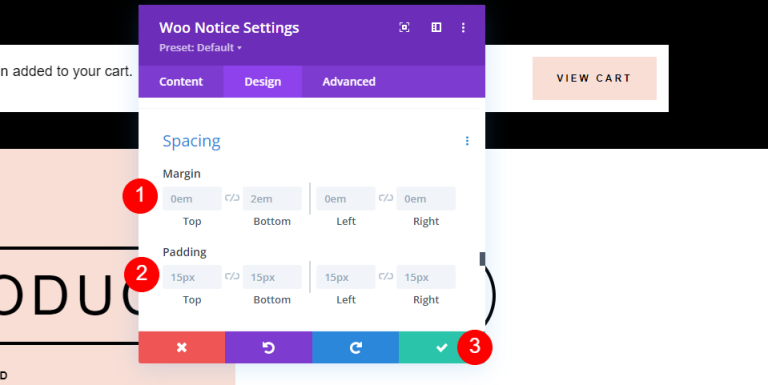
Make some value adjustments to the spacing section.
- Margin: 0em (all sides)
- Padding: 15px (all sides)
Row Settings
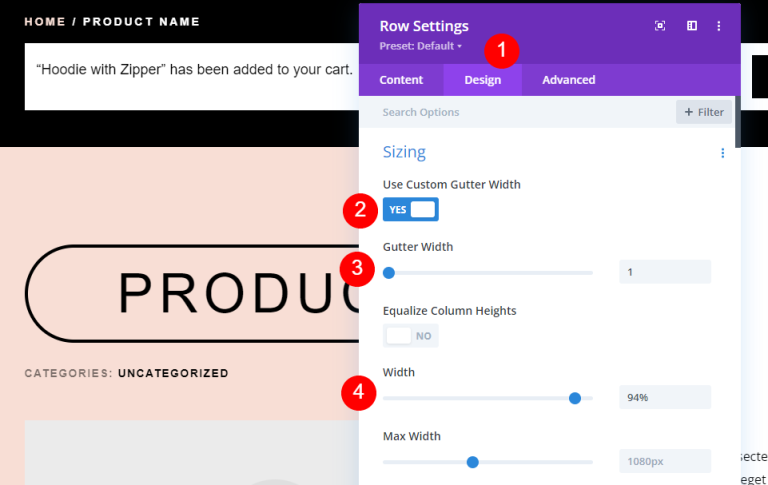
Next, we'll do some changes to the Row settings.
- Use Custom Gutter Width: Yes
- Gutter Width: 1
- Width: 94%
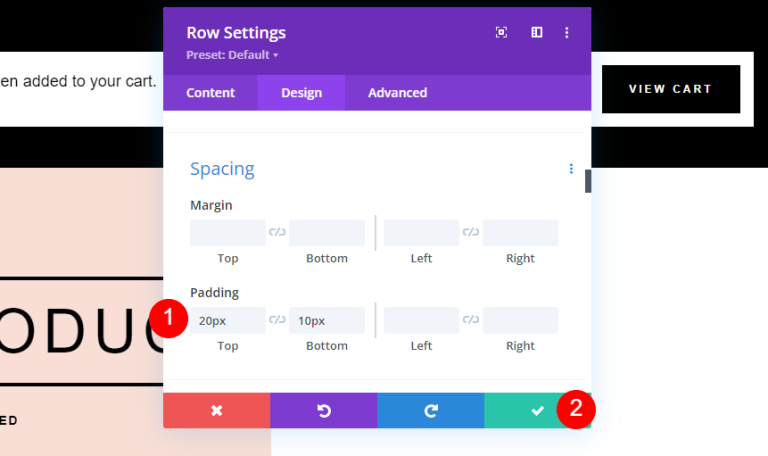
Finally, come down to spacing and change these values.
- Padding: 20px Top, 10px Bottom
Custom Style To Woo Notice Module
Following that, let's create another design for a Woo Notification module from scratch. For this one, we're going to erase the original and replace it with our own. Add Woo Notice to the top Row under the Woo Breadcrumbs module by clicking the gray addition symbol, searching for it, then adding it. To create this one, we'll draw inspiration from the layout. We'll reuse the original Row, so its parameters will be identical to those in the prior example.
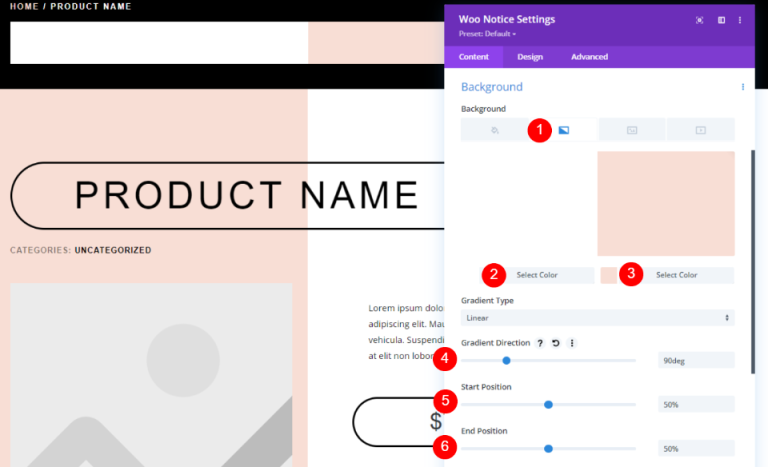
In the Woo Notice settings, add a gradient background and customize it as follows.
- First Gradient: #ffffff
- Second Gradient: #f8ded5
- Gradient Direction: 90deg
- Start Position: 50%
- End Position: 50%
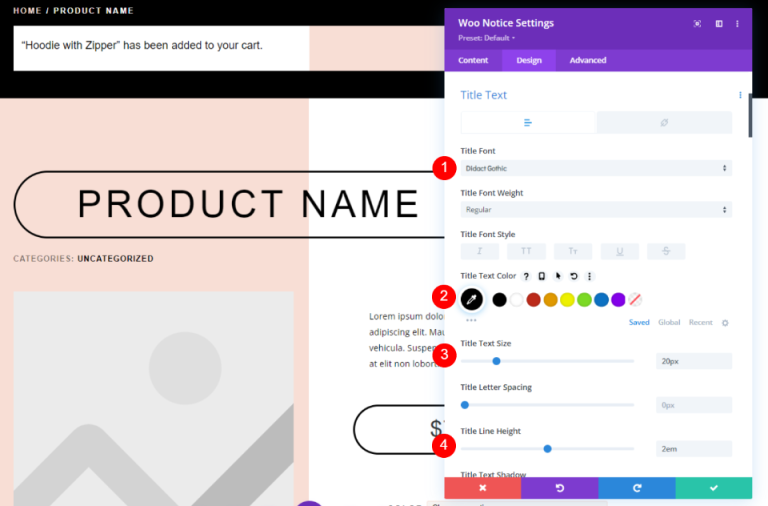
Under the Design tab, change the text settings like mentioned below.
- Title Font: Didact Gothic
- Color: #000000
- Text Size: 20px for Desktop, 15px for Phone
- Line Height: 2em
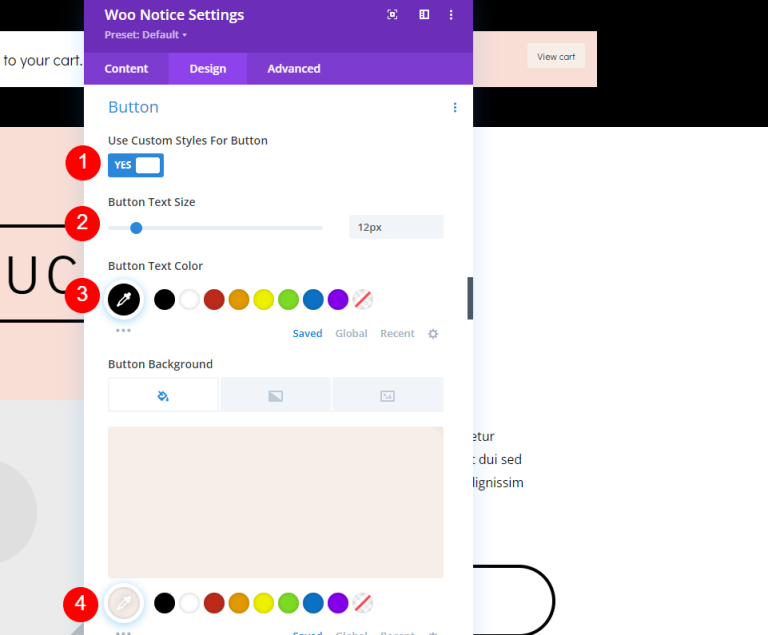
Change the button style. Adjust the text size and color.
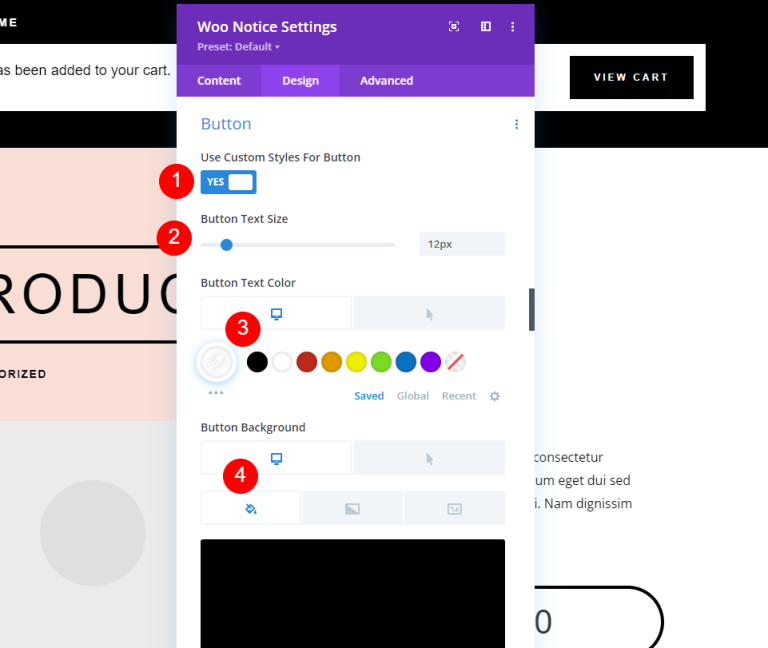
- Use Custom Styles for Button: Yes
- Text Size: 12px (10px for Phone)
- Text Color: #000000
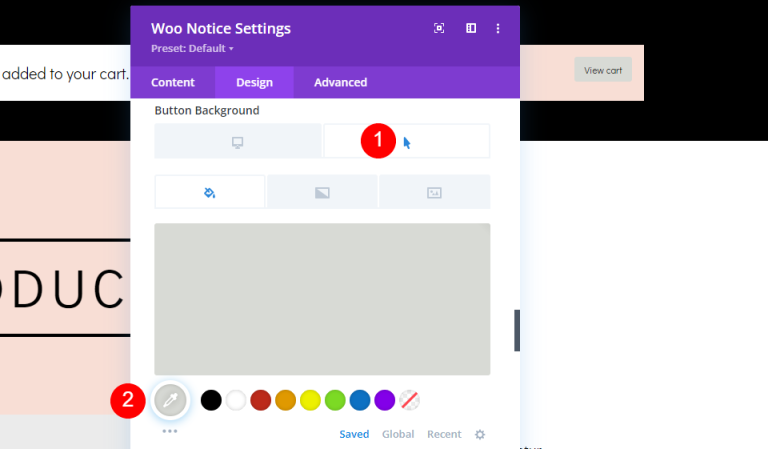
- Background Color: #f7eee8
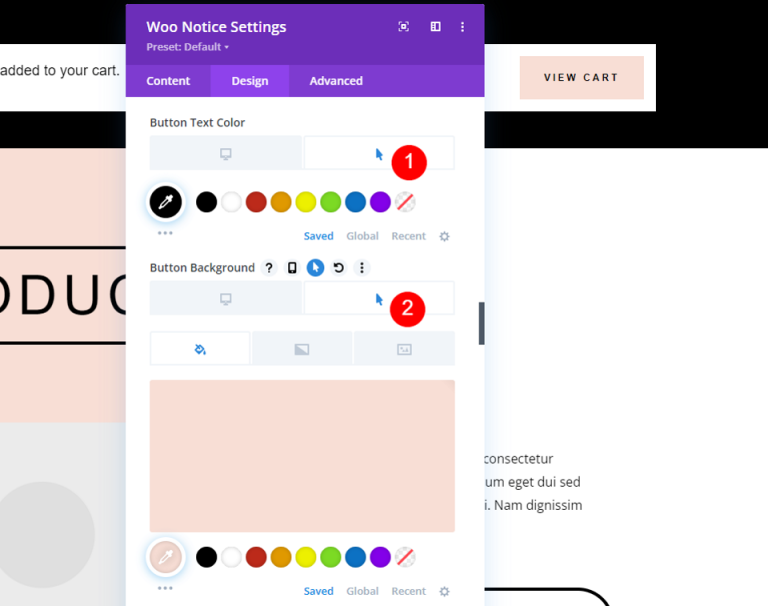
Move to the hover option and change the settings as mentioned below.
- Hover Background Color: #d8dad5
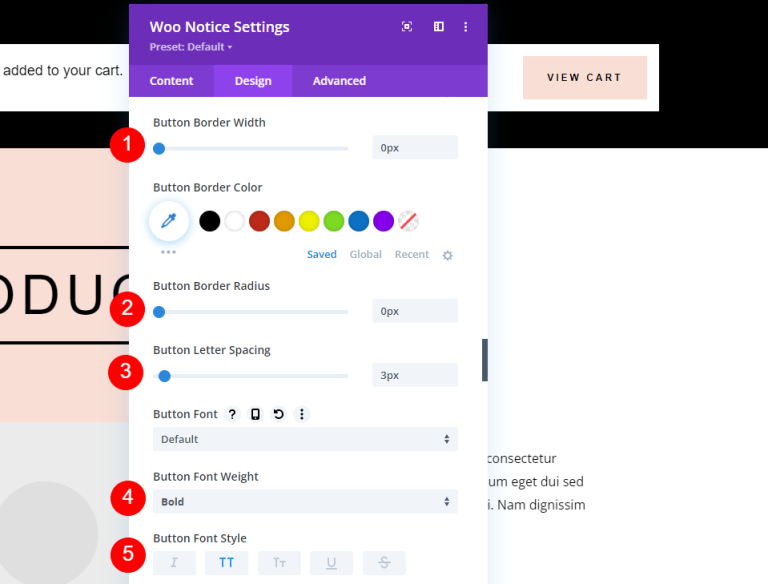
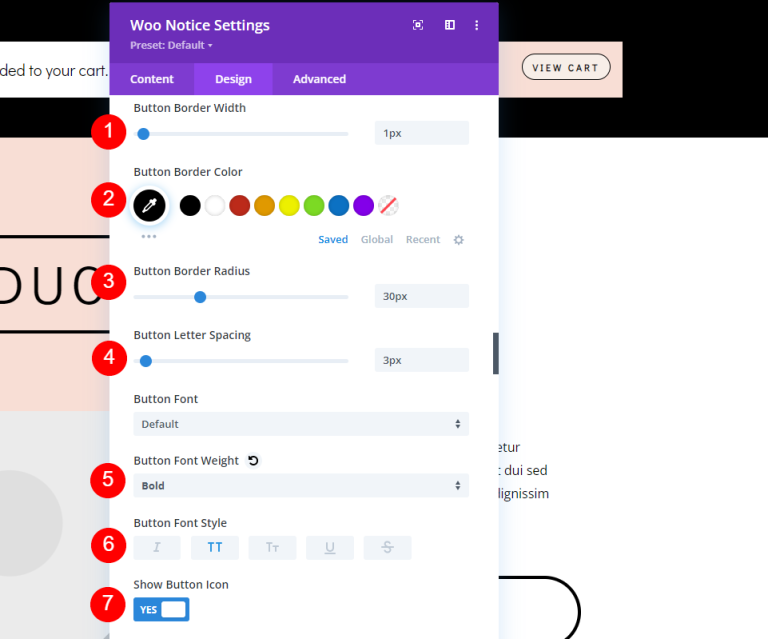
Coming to the Border settings, do the following changes.
- Border Width: 1px
- Border Radius: 30px
- Letter Spacing: 3px
- Font Weight: Bold
- Font Style: TT
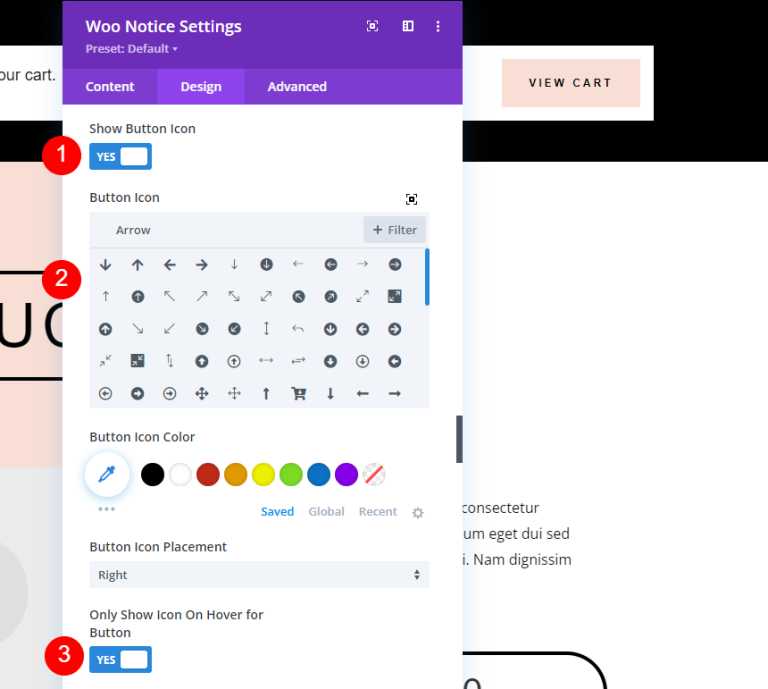
- Show Button Icon: Yes
- Icon: Small Right Arrow
- Only Show Icon on Hover for Button: Yes
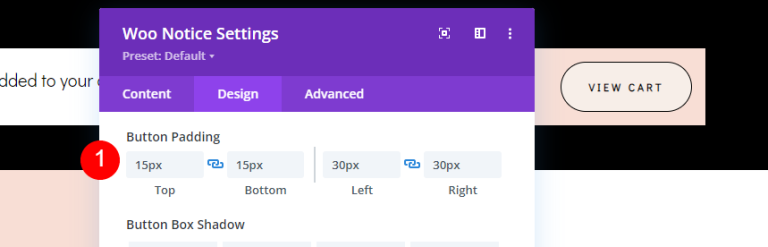
Next, we’ll need to add padding to the Button.
- Button Padding: 15px (Top, Bottom), 30px (Left, Right
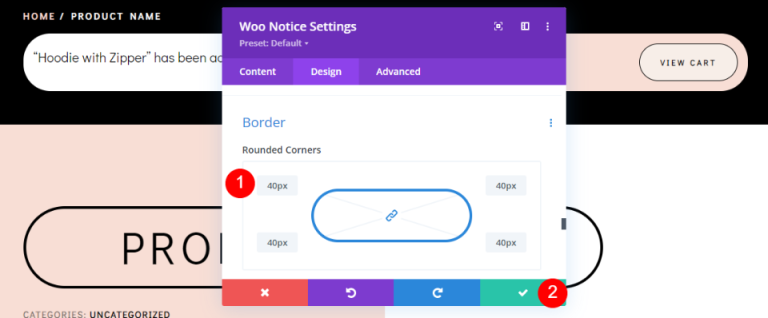
Finally, scroll down to Border. and make the corner rounded.
- Rounded Corner: 40px (all sides)
Final Result
Here is the final output of our design.
Finishing Thoughts
That concludes our examination of how to style and incorporate a WooCommerce notice module into your Divi Product page template. This module provides a wealth of information to the user, which the user will expect to see. This provides them with the response they seek. They'll immediately be notified that a product has been put to their cart, and they'll have a simple way to view it. This module is simple to use and belongs at the upper edge of any WooCommerce Divi Product page template.


