
What is an SEO Markup, why do you need that and how can you install that on your WordPress website ? That are the questions we'll try to bring answer in this tutorial.

What is An SEO Markup (Schema Markup)
An SEO markup or Schema Markup is a code that you can add to your website for search engines to understand your content better. Doing this ensures your website provides more information and therefore is well and accurately ranked by search engines, for better traffic and potentially customers.
Why Should You Add Schema Markup to WordPress?
Adding a Schema markup ensures you give additional information to search engines that use it to display useful information to potential visitors. In many cases, that increases your click-through rate (CTR) and brings more traffic to your website.
So, by adding schema markup, you can easily Rich Snippets on Goole SERP (Search Result Page) which has bigger visibility and therefore more chances to be clicked than other results.
Create Amazing Websites
With the best free page builder Elementor
Start NowYour content not only looks more presentable on the search engine result page, but rich snippets encourage users to click on your link. This boosts your search rankings, and you’ll start attracting the right people to your website.
Now that you know the benefits of schema and rich snippets, let's see how to add that to WordPress.
How To Add Schema Markup to Your WordPress Website
Adding the schema markup code manually can be difficult as it’ll take a lot of time. This also requires you to add code, and if anything goes wrong, you’ll need to start all over again.
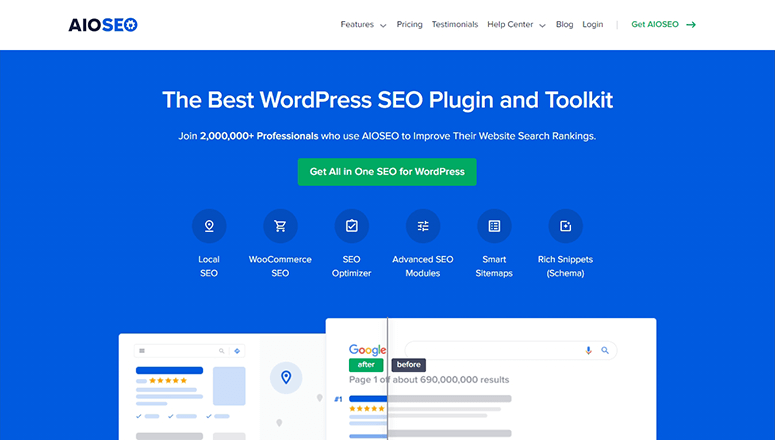
We recommend using All in One SEO (AIOSEO), which is one of the best SEO plugins in the market. It comes with useful tools that you can use to improve your website’s SEO and also add schema markup in just a few clicks without editing your code.
With AIOSEO you'll be able to add schema code to your content, posts, and pages. You can also enable a site links search box to let users directly search your content from Google.
Now let's proceed and install the plugin.
Step 1. Install and Configure All in One SEO Plugin
First of all, we'll need to install and activate the plugin All in One SEO. After the activation, you should visit the All in One SEO » General Settings page in your WordPress dashboard. There you need to add the license key to verify your account.
You can find the license key in your AIOSEO account.
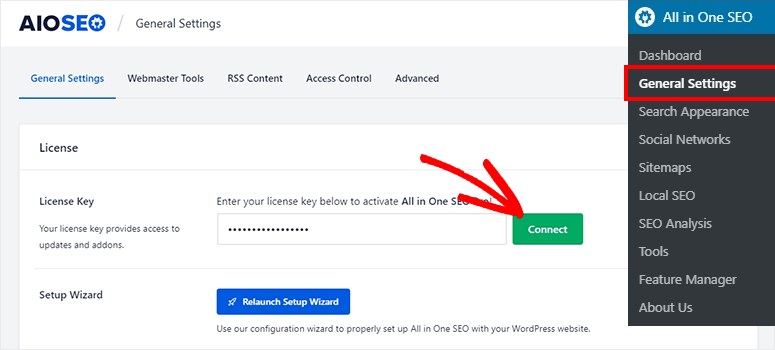
Click on the Connect button to connect your WordPress website to AIOSEO.
Next, you need to go to the All in One SEO » Search Appearance » Global Settings page.
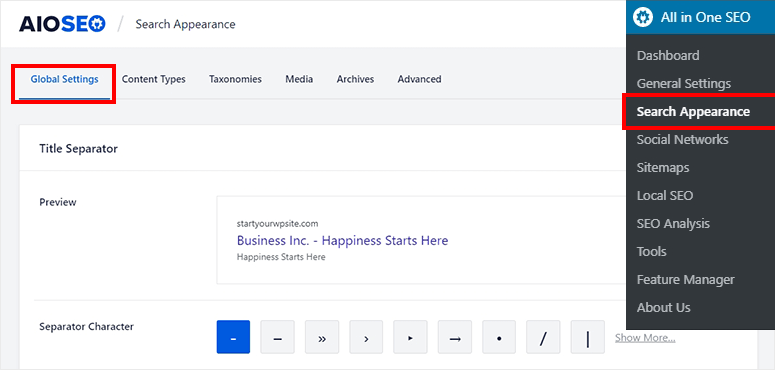
From this page, you should look for the Knowledge Graph option. There, you need to choose whether your website represents a person or an organization.

For this tutorial, we’ll select Organization. Once you select it, you’ll see a few fields, including name, phone number, contact type, and logo.
Now, fill in these details and save your settings by clicking on the Save Changes.
Step 2. Adding Schema Markup to Your Content
the AIOSEO plugin is highly flexible to add schema markup to your content in just a few minutes. Head to All in One SEO » Search Appearance page and click on the Content Types tab from the top navigation menu.

There you need to look for the Posts section and click on the Schema Markup tab. Start by selecting Article as your schema type, and then you can select an Article Type from the given options.
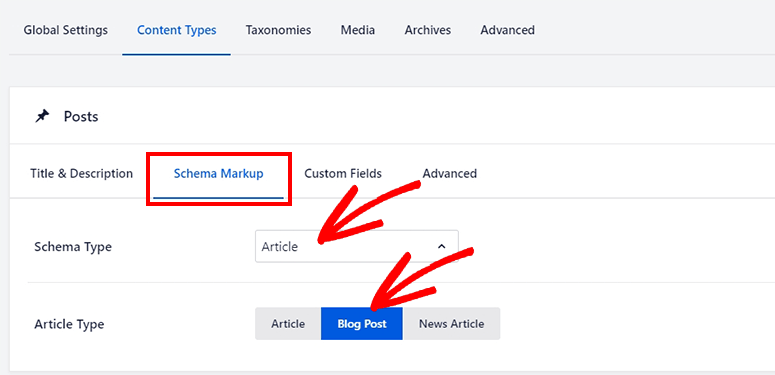
By default, it’s set for Blog Post. But you can choose either Article or News Article the article type of your website. Now scroll down and repeat the same process for Pages and Products options.
Save your changes once you're done, before you move to the next step.
Step 3. Adding Schema Markup to Your Post and Pages
AIOSEO should improve your content with general SEO settings. It also lets you add schema to your individual posts and pages.
If you change any options here, these settings will override the general content settings for the schema that you configured in the above step for that specific Post or Page. However, you can also choose to stay with the default settings.
To add schema, you need to edit your post or page.
Now, scroll to the bottom section to look for AIOSEO Settings. From there, you need to click on the Schema tab.
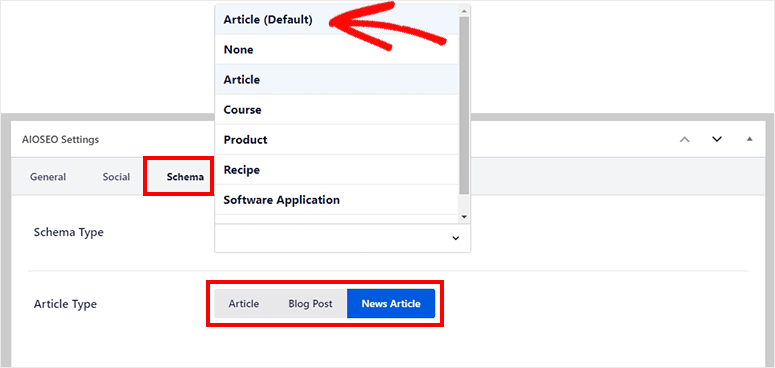
In the Schema Type dropdown, you should select the Default (Set in Search Appearance) option. Proceeding this way, your default settings won’t be interrupted.
Choose an option for Article Type for your page or post. Once you’re satisfied with the schema settings, update your post or page to make sure everything works.
Step 4. Enable Sitelinks Search Box in WordPress
Sitelinks search box makes your content look great in the search engines. Once enabled, your users will be able to use a search field on search engines to directly search into your website.

To enable this option, you need to go back to the All in One SEO » Search Appearance page. From there, head to the Advanced tab. You simply have to turn on the Enable Sitelinks Search Box option and it’ll automatically generate a search box for your website in Google.
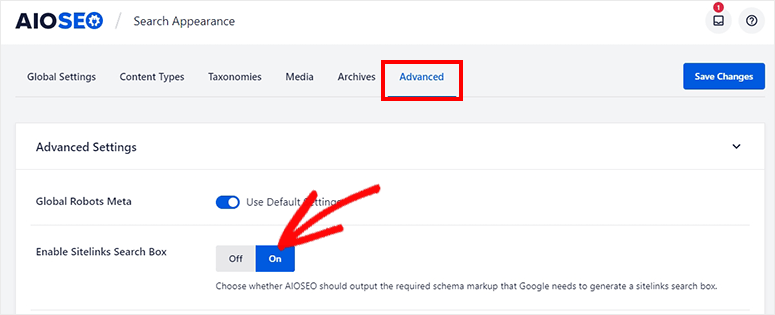
Click on the Save Changes button to store your settings.
That's pretty much all you need to add SEO markup with AIOSEO on WordPress. We hope that will help you increase your traffic.


