
If you run a food blog, you undoubtedly want to increase traffic to your website and make your recipes stand out in search results.
Recipe schema markup is one of the finest ways to achieve it on a WordPress website.
Recipe schema markup is a unique kind of coding that gives search engines additional details about your recipes, like ingredients, cooking times, ratings, and more.
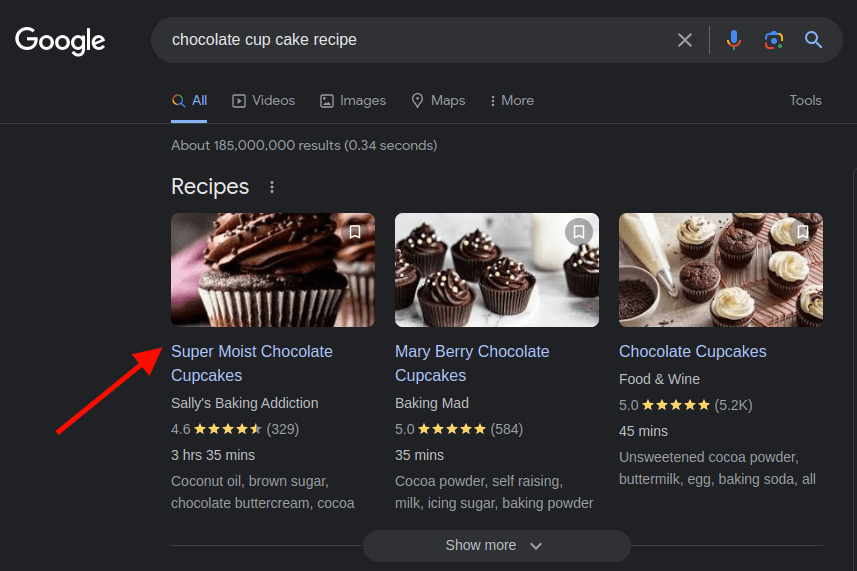
Rich snippets containing this information may appear in search results, increasing traffic and click-through rates. I'll walk you through adding recipe schema markup to your WordPress website in this blog post.
Create Amazing Websites
With the best free page builder Elementor
Start NowAdding recipe schema markup also makes it possible for Google Assistant to walk people through your recipes on Google Home devices and smart displays step-by-step.
Let's begin the tutorial on adding recipe structured data to WordPress now that you know the advantages of recipe schema.
Adding Recipe Schema (Step-by-Step Guide)
To add recipe schema, one of the easiest ways to do it is to use the All in One SEO plugin (AIOSEO).

With over 3 million users, it's one of the best SEO tools available. Without writing a single line of code, you can quickly and simply add recipe schema markup to your WordPress pages and posts using AIOSEO's next-generation Schema Generator.
AIOSEO has a ton of useful tools, including an internal linking assistant, smart XML sitemaps, SEO audit checklists, TruSEO on-page analysis, WooCommerce SEO, and much more, to help you boost WordPress SEO in addition to the Smart Schema Markup.
It is important to note that AIOSEO has a free version which has limited capabilities.
Step 1: Install and Activate the AIOSEO Plugin
Installing and activating the AIOSEO plugin on your WordPress website is necessary to get started.
Navigate to All in One SEO » General Settings from your WordPress admin panel after the plugin has been installed and Activated.
If you're using the Pro edition of AIOSEO, you can activate your license key here. Your license key may be found in your AIOSEO account.

Click the Connect button once you have pasted your license key.
Step 2: Configure Search Appearance Settings
Next, from your WordPress admin area, navigate to All in One SEO » Search Appearance and select the Content Types option. After that, select the Schema Markup tab.
This is where you set up the Schema Markup options for all other content on your website, including pages, articles, goods, and groups.
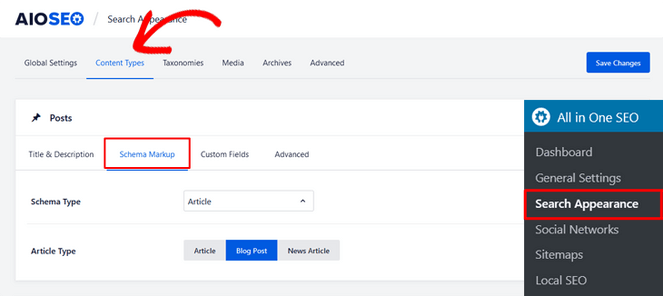
All you have to do is select the Recipe option from the Schema Type dropdown menu.
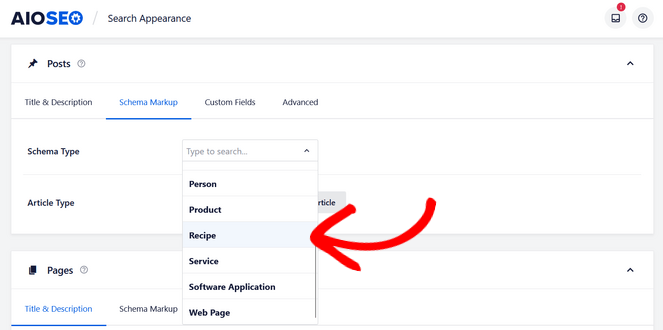
For pages, products, memberships, custom post kinds, and all other content types, simply scroll down and follow the same procedure.
When you're done, remember to click the Save Changes button.
Step 3: Add Recipe Schema Information to Your WordPress Posts and Pages
The articles and pages that you wish to have included in the featured snippets must then have your recipe information added to them.
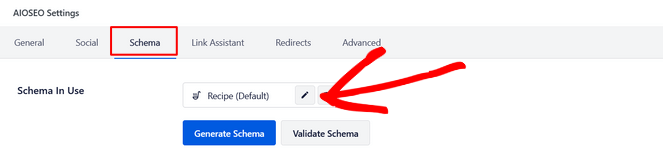
Go ahead and create a new WordPress post or update an existing one to accomplish that. Navigate to the 'AIOSEO Settings' meta box in the WordPress editor by scrolling down and choosing the Schema tab.
You can see that the "Recipe" schema is being used by default here. This is because, in the preceding step, you selected it as the schema type for your posts.
To enter your recipe details, click the Edit Schema button (it looks like a pencil icon).
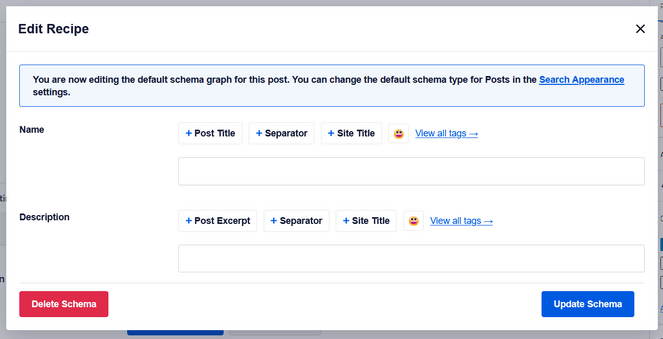
This will cause a modal to appear where you may add information about your recipe and provide Google with further details. To begin, add the dish's name, a description, and the author you like to appear alongside in search results.
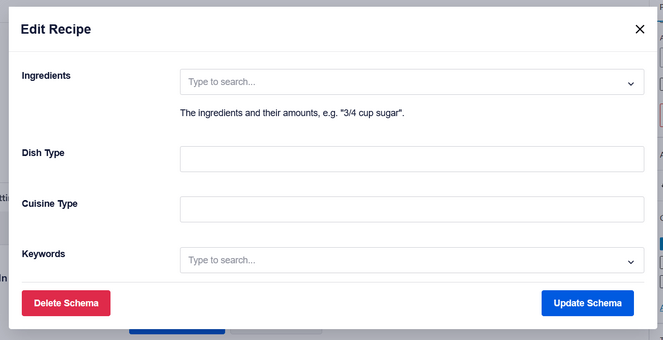
You can provide more details by scrolling down, such as the ingredients and their quantities, the kind of meal, the style of cuisine, and other pertinent keywords for your recipe, such as the season, a particular occasion, or a theme.
Note: Avoid typing your recipe's name or the name of the cuisine type in the "Keywords" area.
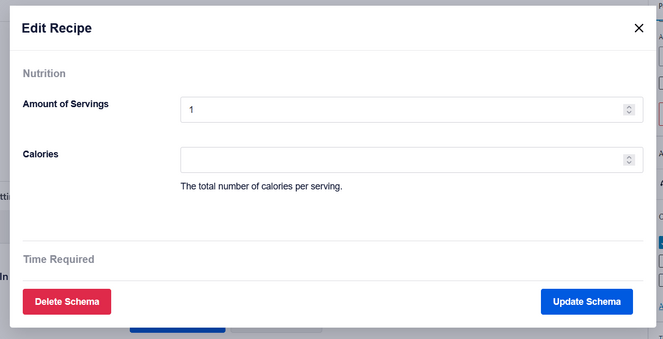
Along with nutritional details like serving size and calories, preparation and cooking times, average star rating and number of reviews, and detailed cooking directions, you may also include an image of your recipe or meal.
Click Update Schema once you have completed entering all of the recipe's details. Then, just use the WordPress editor to publish or edit your blog post.
That is all! AIOSEO will add the recipe schema to your post using the information you gave. To add recipe schema markup to any other articles, pages, or content kinds on your website, simply follow the same procedures.
Note: Visitors to your website won't be able to see the information you included for the recipe snippets. It can only be found in the source code of the schema markup.
Conclusion
That is all! Using the AIOSEO plugin, you have successfully added recipe schema markup to your WordPress website.
You can now take advantage of what comes with having recipes optimized for search engines, which can help your website rank higher and draw more traffic.
The AIOSEO plugin may also be used to add more schema markup to your content, including product, event, review, article, and more. The best WordPress SEO plugin, AIOSEO, allows you to optimize your website for search engines without requiring any technical knowledge.
In addition, it has other great features like local SEO, redirection management, and sitemaps.


