
Divi is a popular WordPress theme that offers a wide range of features to help users build beautiful and functional websites. One of the features that Divi provides is the ability to add maps to your website using the Divi Map module. With this module, you can add a single pin to your map to show the location of your business or a specific point of interest. However, what if you want to add multiple pins to your Divi map to highlight multiple locations? In this article, we will walk you through the steps to add multiple pins to your Divi map and customize them to fit your website's design and functionality.

Getting Started
Before we dive into adding multiple pins to your Divi Map, it's important to make sure you have everything set up correctly. To begin, you'll need to install the Divi theme on your WordPress website if you haven't already done so. This can easily be done by navigating to the Themes section of your WordPress dashboard and selecting "Add New." From there, you can search for Divi and install it with just a few clicks.
Next, you'll need to create a page where you want to add the map. Simply give the page a title and publish it. Once your page is created, you'll need to enable the Visual Builder, which is a drag-and-drop interface that makes it easy to customize your page's design and layout.
Finally, you'll need to create a Google API key, which is necessary for the map to function properly. This can be done by visiting the Google Cloud Console and following the instructions to create a new project and enable the Maps JavaScript API. Once you've done this, you can generate your API key and enter it into the Divi Map module settings. With these steps completed, you'll be ready to start adding multiple pins to your Divi Map.
Create Amazing Websites
With the best free page builder Elementor
Start Now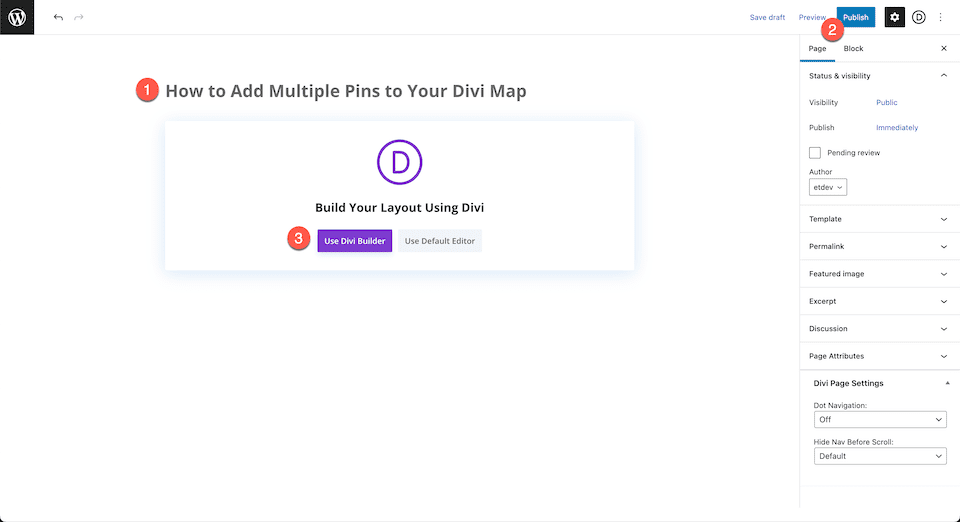
Build From Scratch
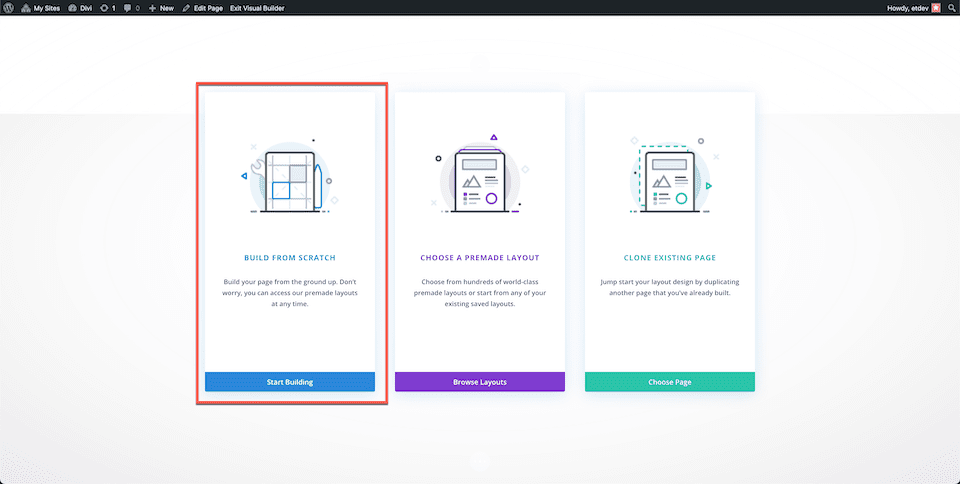
After clicking on the "Use Divi Builder" button, the page will reload, presenting Divi's user-friendly drag-and-drop builder interface. A window will appear with three options to choose from: "Build From Scratch," "Choose A Premade Layout," and "Clone Existing Page." For the purpose of this tutorial, select the "Build From Scratch" option to create a blank canvas where you can let your creativity flow and build your designs without any constraints. This option allows you to start from scratch and design a unique layout that fits your website's needs and aesthetics, tailored specifically to your preferences.
Adding Multiple Pins To Divi Map
Add Google API Key
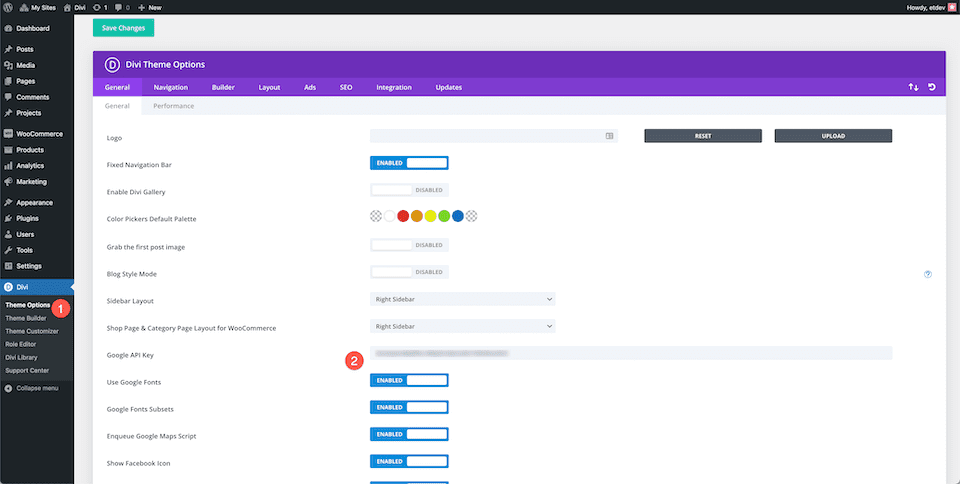
In order to fully utilize the map module and its features, it is necessary to first add your Google API Key to the Theme Options in Divi. This will enable the module to connect with Google Maps and display maps on your website.
To add your Google API Key, start by navigating to the Divi section of your WordPress dashboard and selecting the Theme Options tab. From there, locate the field labeled "Google Maps API Key" and paste your API Key into the provided space.
Once your API Key has been added, be sure to click the "Save Changes" button to ensure that your settings are updated and your API Key is properly integrated with your website's theme. With your API Key now linked to your Divi theme, you can begin using the map module to add pins and customize the maps displayed on your website.
Add a Section, Row, and the Map Module
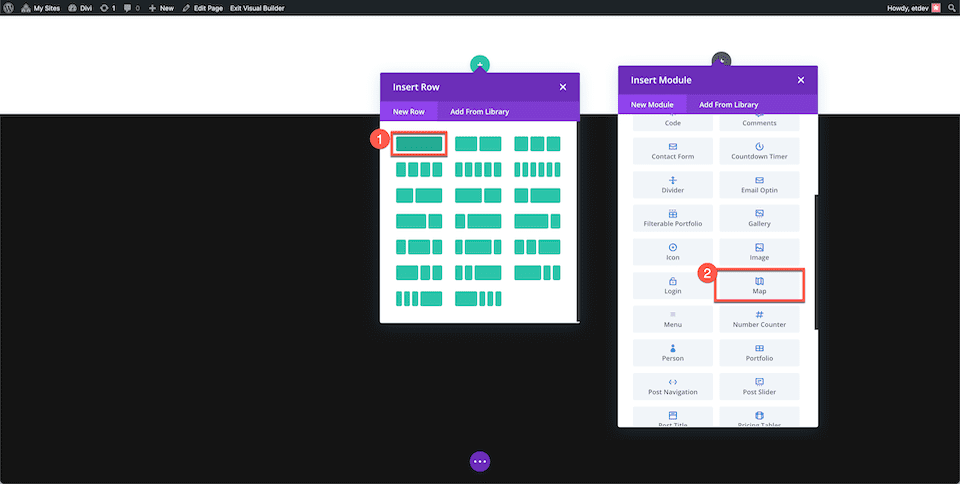
Return to the page you previously created and proceed to add a new section. Within the section, add a single column row that will accommodate the Divi Map module. To add the module, access the module library and locate the Map module. Upon selection, the module's window will appear, presenting a wide range of customizable settings and functionalities for your Divi Map module. This window allows you to fully customize your map to suit your website's specific needs and design aesthetic.
Adding a New Pin
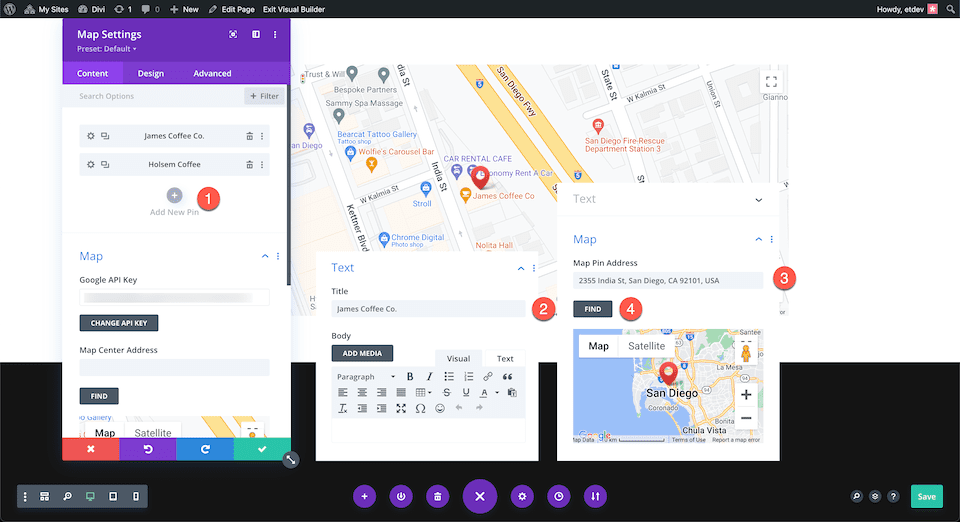
To begin adding a new location pin to your Divi map, locate and click on the “Add A New Pin” button. Upon clicking, a new dialog box will appear, presenting you with the settings for the new pin. In the Text tab, enter the desired title and description for the new location pin that you want to display on your map.
In the Map tab, you will need to provide the address of the location that you want to add to the map. Simply paste the address into the “Map Pin Address” input field and click on the “Find” button. This will update the map and position the new location pin accordingly.
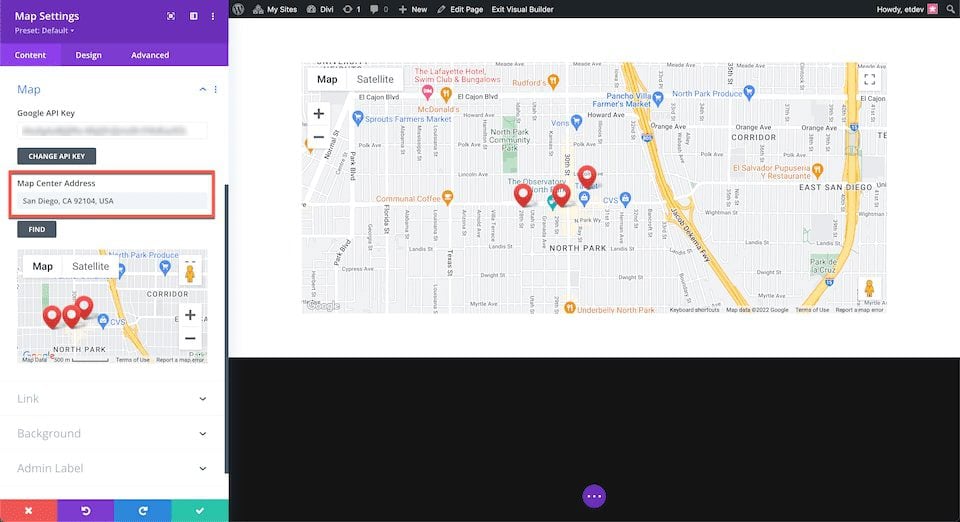
Selecting a Map Center Address
It’s worth noting that the map center address that you choose can greatly impact how your map is oriented and displayed, especially when you are showing multiple pins at once. To ensure that all of your pins are displayed within a certain area, you can set the map center address. For example, if you want to show pins within San Diego, CA 92104, USA, you can set that as the map center address.
Ending Thoughts
With these steps, you can add as many pins as you desire to your Divi map. The process is straightforward and intuitive, resulting in an interactive Google Map that is easy to use for your website visitors.


