
Elementor is more than just a WordPress page builder; it's a dynamic tool that empowers users to craft visually stunning websites without the need for intricate coding. Within the vast repertoire of Elementor's features, the ability to incorporate multiple columns emerges as a game-changer, allowing you to structure and design your web pages with unparalleled flexibility.

If you're in search of the step-by-step process to seamlessly integrate columns into your Elementor design, you're in the right spot. In this guide, we'll walk you through the entire process to ensure you can effortlessly add columns to your Elementor-powered website. Stick with us until the end to unravel the secrets of effective column design.
What are Elementor Columns?
Elementor columns refer to the layout structure within the Elementor page builder, a powerful WordPress plugin. These columns allow users to organize and structure content on a webpage in a grid format, creating visually appealing and well-organized layouts. With Elementor, you can easily add, adjust, and customize columns to suit your design preferences.
The columns in Elementor provide a flexible framework for arranging content side by side, making it particularly useful for creating diverse page layouts. Users can access various options and settings in the Elementor Panel to manipulate the columns, adjusting their width, spacing, and other parameters.
Create Amazing Websites
With the best free page builder Elementor
Start NowBy utilizing Elementor columns, designers and website creators can achieve a responsive and aesthetically pleasing design without delving into complex coding. This feature enhances the user experience and allows for a dynamic presentation of content, making Elementor a popular choice among WordPress users for its intuitive column management capabilities.
Adding Multiple Elementor Columns
Before You Start
You might have noticed that the editor no longer displays columns and sections.
You might be wondering, "Why can't I find the columns anymore?"
To answer that question, it's important to know that due to a recent update in the Elementor plugin, columns and sections have been replaced with Elementor Flexbox containers.
Now, you might be asking, "What will happen to my columns?"
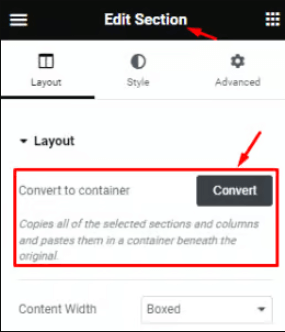
The solution is simple: Elementor has provided a quick way to convert existing columns into containers.
For example, you can easily convert a section to a container using Elementor's features, allowing you to maintain your designs.
However, if you prefer to continue working with columns and sections, there is a way to restore them.
Let me guide you on how to do that.
Now, you can switch to flexbox containers smoothly without losing your designs.
But if you prefer using columns and sections and want to revert to them, there's a solution.
Let me demonstrate how
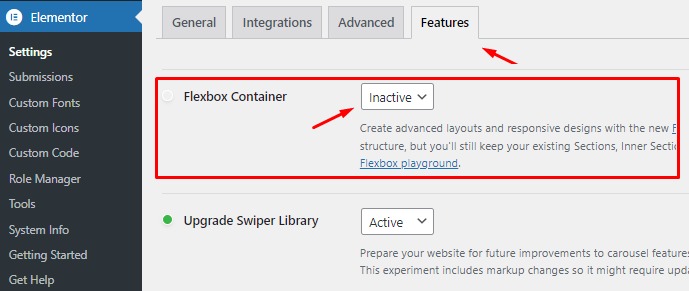
Navigate to your WordPress Dashboard, then go to Elementor, followed by Settings and Features. Locate the Flexbox Container option in the Features section.
Simply switch it to "Inactive" and save your settings.
By doing this, you will disable containers and bring back the Sections and columns in the editor.
Add Columns in Elementor
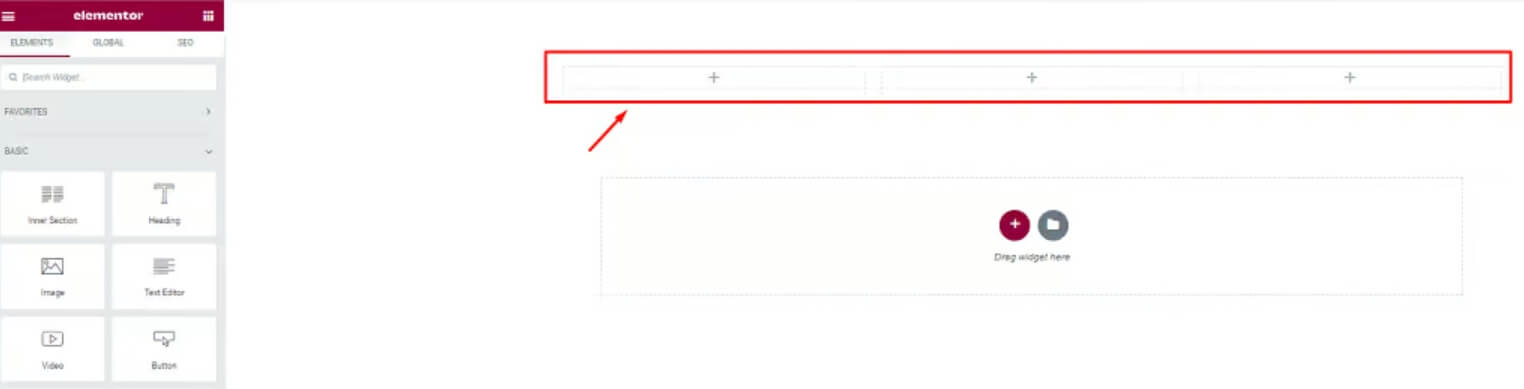
To start building your layout, the first step is to create a row. Simply click on the plus (+) sign, as indicated in the image below.

Next, choose the layout that suits your design and content preferences. For example, let's select a row with two columns.
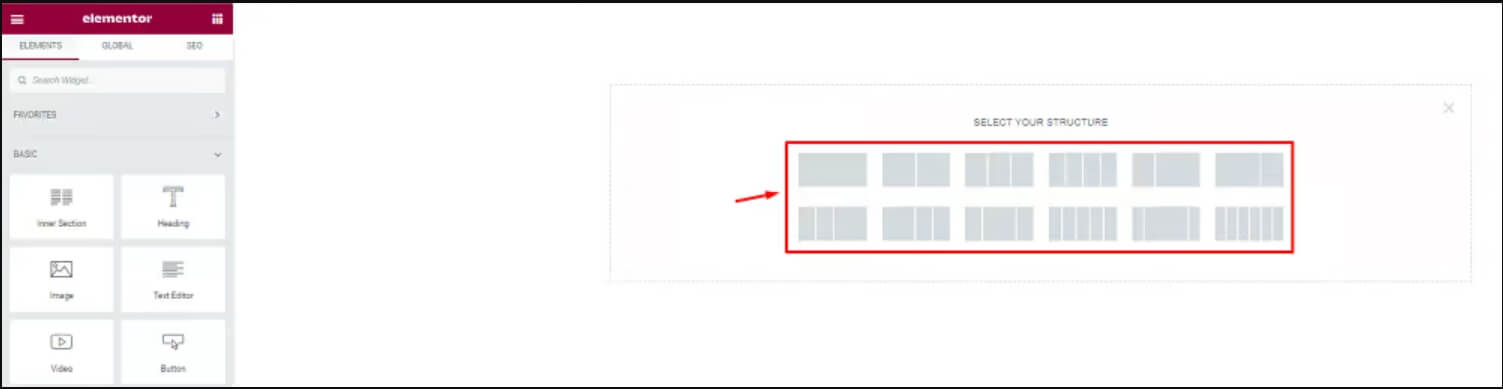
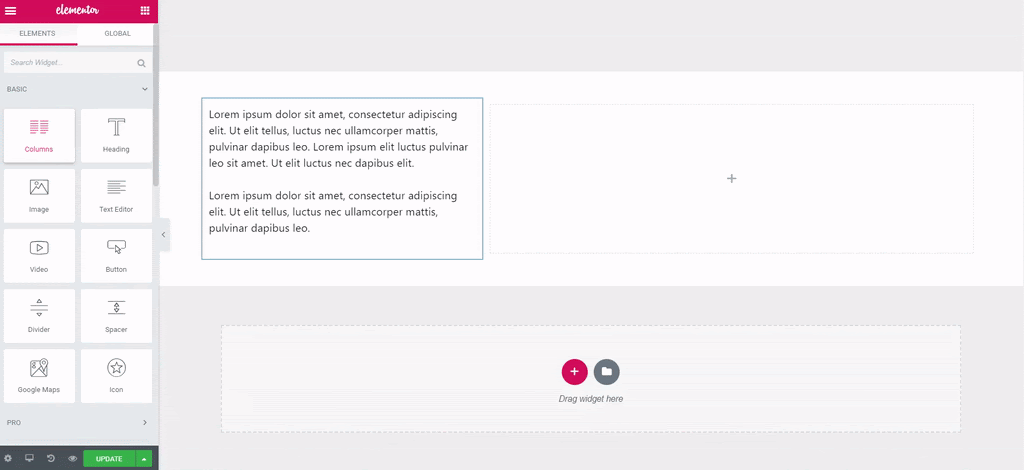
Once you've made your choice, the columns will appear in the text area. Now, you can populate these columns with your content or widgets. Feel free to adjust the row and columns according to your needs.
Keep in mind that hovering over the row will highlight it in blue. To edit the row, right-click on it and select "Edit section."
However, for now, our focus will be on adding columns to the structure. Let's move forward.

Move your cursor over the column, then right-click on either the field or the "Edit Column" option.
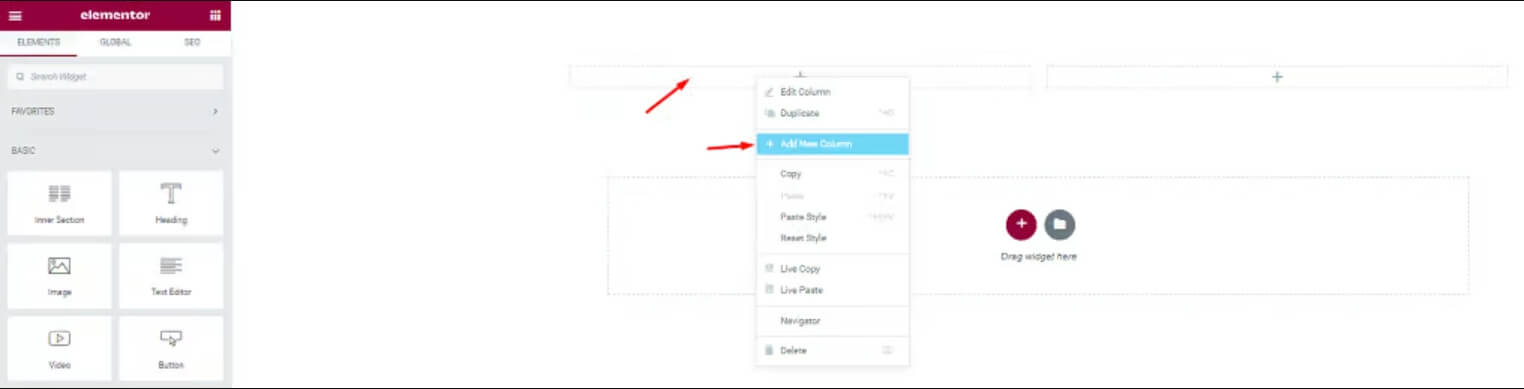
Next, select "Add New Column" to create a new column in that field.
After completing these steps, you'll see that the number of columns has gone up. Repeat these actions to add more columns as required.
Create Nested Column
The Inner Section widget is used to make nested columns inside a section. This allows you to make intricate layouts.
To use it, drag the Inner Section Widget into your column. By default, it gives you a section with two columns. You can add or remove columns by right-clicking on the columns handle icon.
Feel free to drag and drop the Inner Section widget into any column on your page. Just note that it can't be used inside another Inner Section.
Multiple Column Using Handles
An alternative method for performing actions related to columns is to activate the "Editing Handles" option in Elementor. The following steps demonstrate how to enable these editing options in Elementor.
To start customizing your page, find the button with three horizontal lines at the top left corner and click it. This will open the Elementor menu.

In the Elementor toolbox, select the preferences menu.
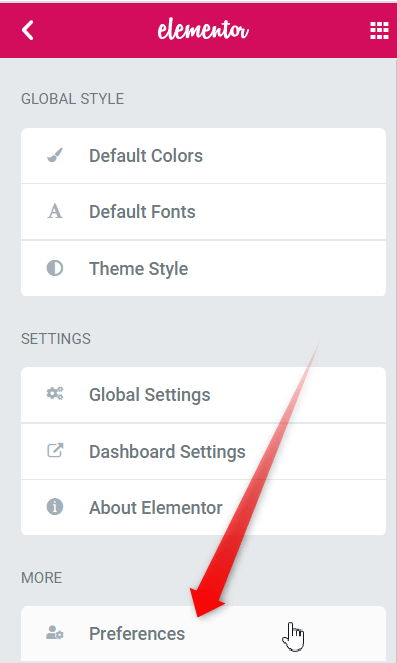
Turn on Editing Handles.

When you hover over the edit column icon in a section, you'll see handles appear. These handles let you add, duplicate, or delete columns.
Click the "+" icon to add more columns as needed. Repeat this step to add multiple columns.
Wrapping Up
We've provided you with user-friendly methods for seamlessly adding columns and multiplying them in Elementor. Following either of these straightforward approaches will enable you to effortlessly incorporate the desired columns into your Elementor field, catering to the specific needs of your business. Whether you opt for the any method, the steps are designed to make the process easy and effective for enhancing your Elementor experience.


