
Looking for a simple approach to implementing image hover effects in WordPress? In such a case, the Image Hover Effects for Elementor plugin is precisely what you need. It is easy to use and provides a selection of Elementor hover effects.

These can let you add information such as location, price, and availability to photographs. It opens up an entirely new degree of image modification.
Today I will teach how to create image effects in WordPress using Elementor.
What is the Image Hover Effect?
An image hovers effect is a dynamic feature that enables the elegant presentation of additional information about a picture. There is a vast selection of hover effects to pick from, and they won't slow down your website or clutter its layout.
Create Amazing Websites
With the best free page builder Elementor
Start NowIn most cases, an animation will create slowness, however, this is not the case with these CSS effects.
Therefore, they meet the requirements of any website.
They have a range of applications. For instance, if your website specializes on photography, you may add a picture hover effect to display the location, date, or other relevant information.
Another useful application is product information. You may upload an image of a product and utilize the hover effect to display its price, availability, or other information.
The only limitation is your imagination.
Add Elementor Hover Effects
Installing Image Hover Effects
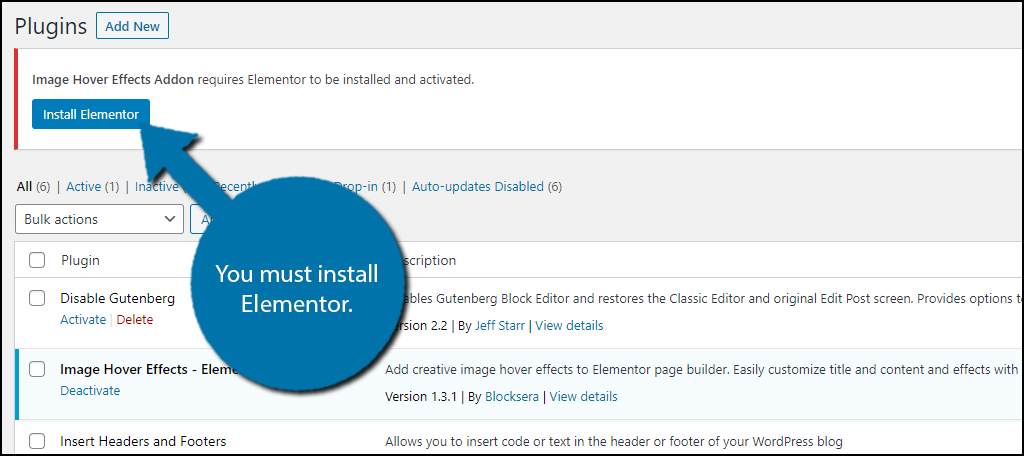
Amazing is the Image Hover Effects - Elementor Addon plugin. As the name suggests, it is an extension for Elementor Website Builder, one of, if not the greatest, WordPress website builder. Therefore, both must be installed.
The plugin provides forty distinct hover effects, including fade, zoom, and blur, among others. Among other things, you may include a title, description, title tag, icons, and links to other pages (ideal for items or affiliates).
It also includes a new widget you can use to display the effects in the bottom or sidebar of your website.
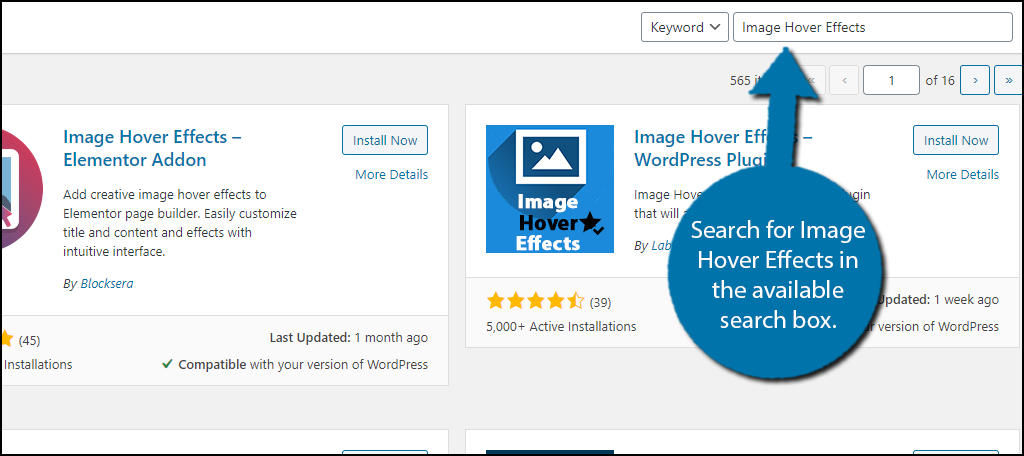
Let's begin by clicking Plugins and selecting Add New from the admin panel's left sidebar.

Image Hover Effects may be searched for using the supplied search box. This will display extra plugins that may be useful.
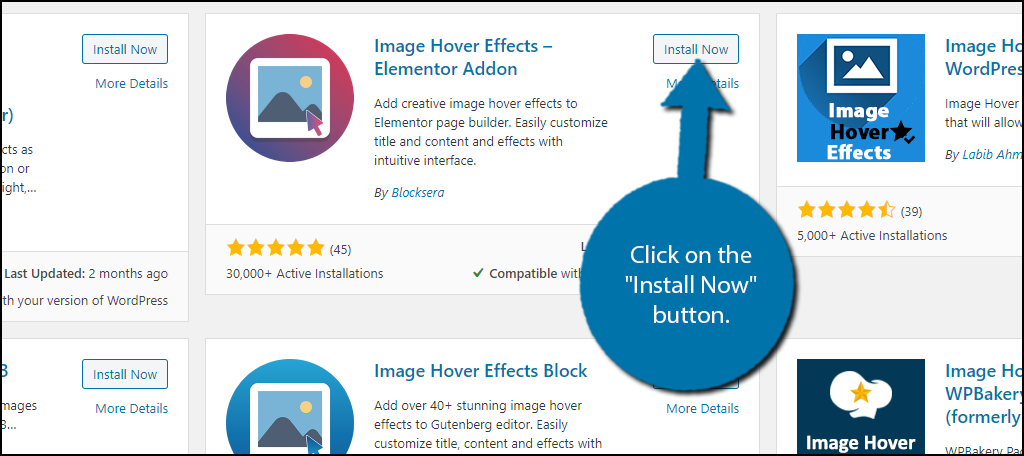
Scroll down until you locate the Image Hover Effects – Elementor Addon plugin, then click "Install Now" to install and activate it.
If you do not have the Elementor Website Builder plugin installed, a message will appear at the top of each page instructing you to do so. It is necessary.
Add the Image Hover Effects Widget
Fortunately, creating hover effects is simple. To clarify, it is not possible to simply add a hover effect to an existing image. Instead, you will need to re-insert the picture using the corresponding Elementor widget.
Consequently, you may have to dig through the media library to find older images, but it shouldn't be too difficult. This means that adding this feature to your entire website will take a considerable amount of time.
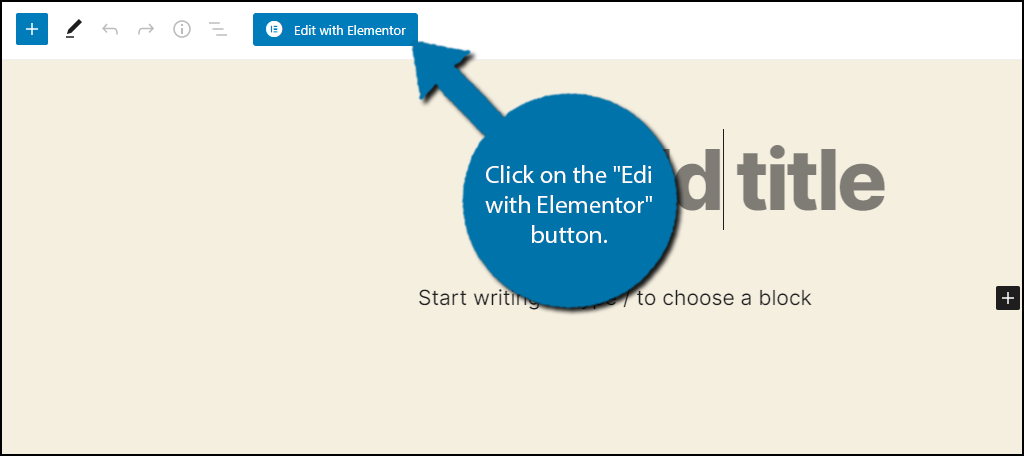
Navigate to any existing article or page on your site. Additionally, you can build a new one for testing. Click the "Edit with Elementor" button once there.
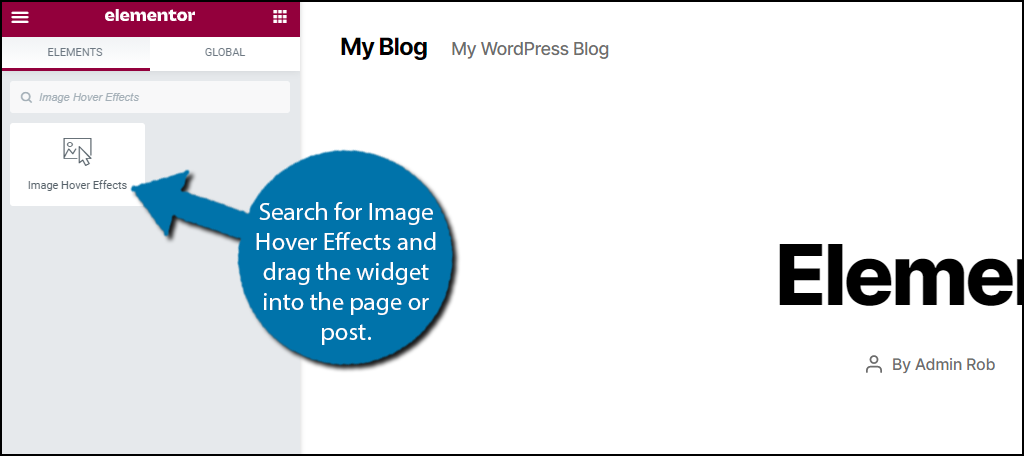
This will launch the editor for Elementor. Search for Image Hover Effects on the left and drag the widget into the page or post.
You are now able to begin customizing the widget, and all of the settings are located on the left.
Set up Image Hover Effects
It shouldn't take more than a minute or two to go through the options, and anyone can comprehend them.
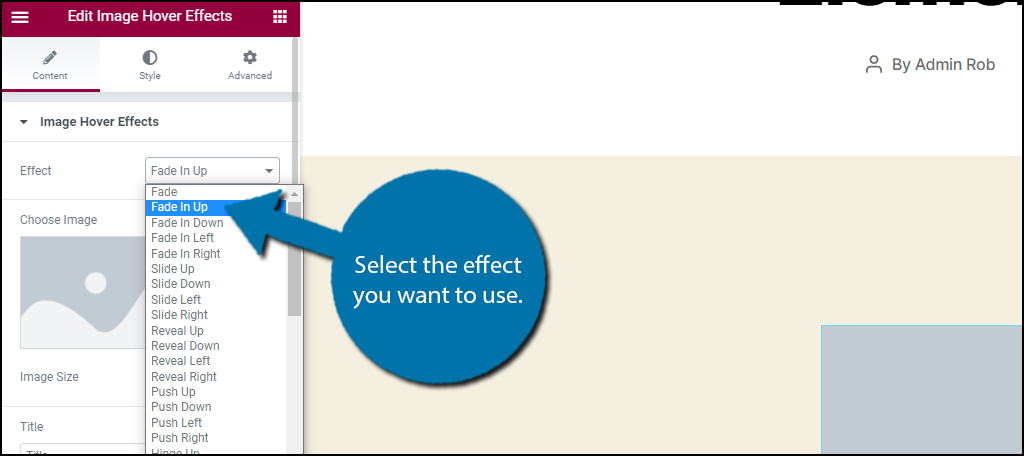
The first choice - effects. As stated previously, there are forty options, which display in a drop-down menu. Choose the one you wish to employ. By picking the effect and hovering over the widget you added to your post or page, you can observe its effect. I suggest testing each one if you have the time.
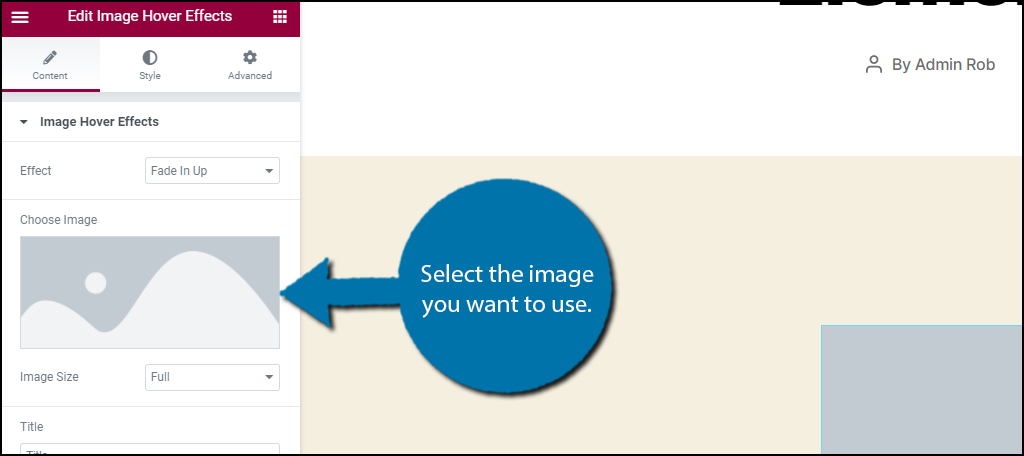
The next thing you can do is add the image itself. All you have to do is click on it and choose an image from your media library. You can choose the size of the image below it.
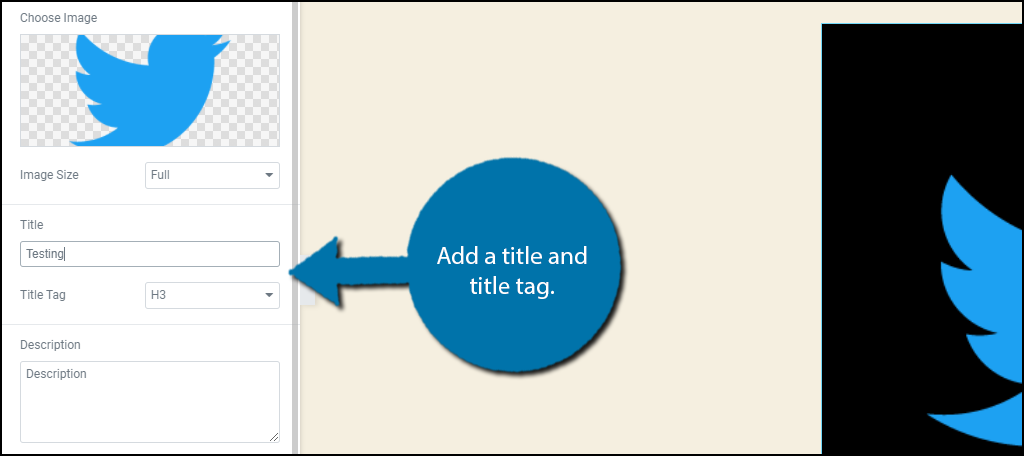
The next step is to add a title and title tag. The title is what will show up in the header text, and the title tag is what kind of header it will show up as (H2, H3, H4, etc.).
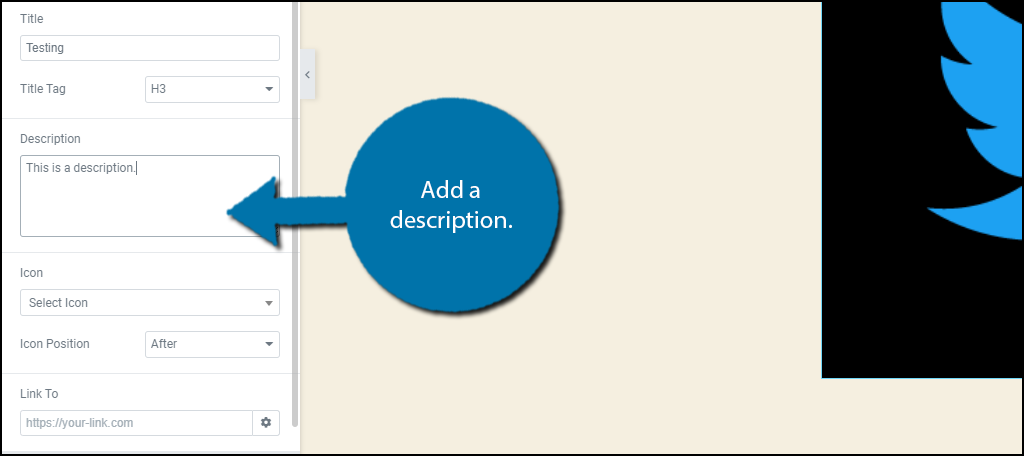
After that, there will be a description. You can add a lot of extra information here, but I think it's better to keep it short and to the point. Type in the information for the description.
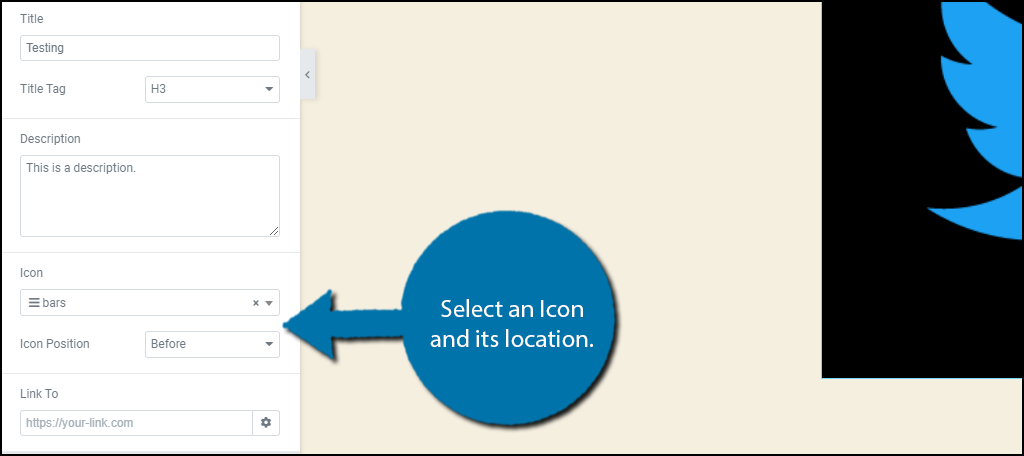
Next, set up the icons. You can add an icon to your title in this section. It will only show up before (to the left of the title) or after (to the right of the title).
If the icon doesn't show up when you hover over the image, it's because Elementor has been updated recently. To fix this, go to Elementor > Settings > Advanced and check the box next to Load Font Awesome 4.
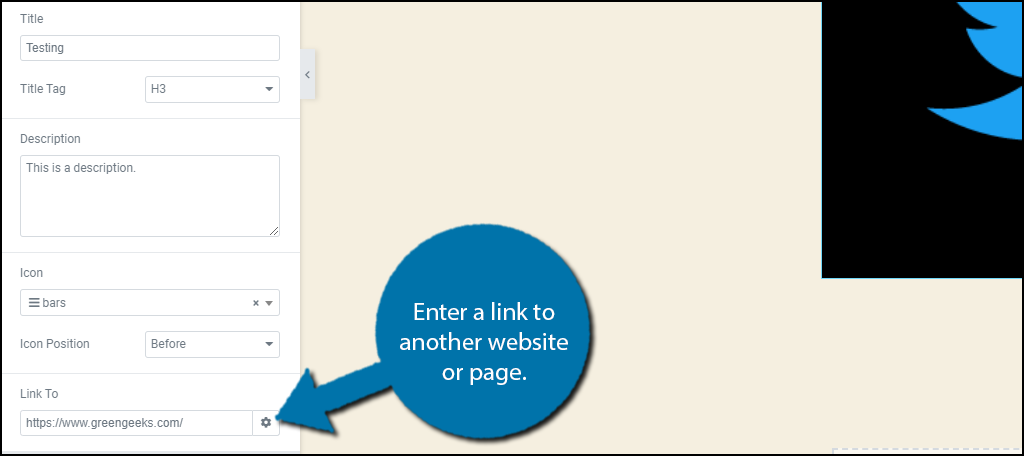
The link to option is the last one. This is how you can make your image a link to another page or website. It works well on a sales page or as an affiliate link.
If you don't want to add a link, you can leave this blank.
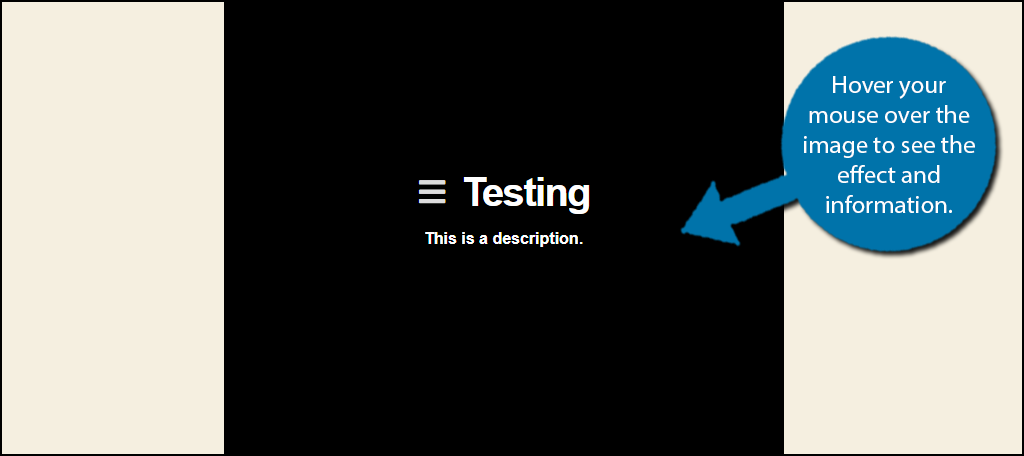
That takes care of all the settings. Click the Save or Update button, and you can see it on your website.
You did a great job using Elementor in WordPress to add hover effects to images.
Final Words
When people don't know which images will have more information or not, it can be very confusing. In fact, some people might not even know that your website has hover effects. To fix this, you can try putting a sign before or under your images to let people on your elementor site know what's going on. It can really help you use the feature to its fullest potential.
How easy was it for you to figure out how to use the Image Hover Effects Elementor Addon? What do you do with your website's hover effects?


