
Creating a theme-based website includes following up the colors that go with the theme and create a pleasing contrast for the user. Gradients can be very valuable to give your website that fancy and glamorous look.

Gradient Borders enhance the block text and highlight it on your website. As they get more prominent with gradient borders, the users' eyes strike directly at that text. It can be very valuable to highlight a block i.e. in e-commerce stores to highlight a specific product. Let's move ahead and see how to add gradient borders with Elementor.
How To Create Gradient Borders Using Elementor
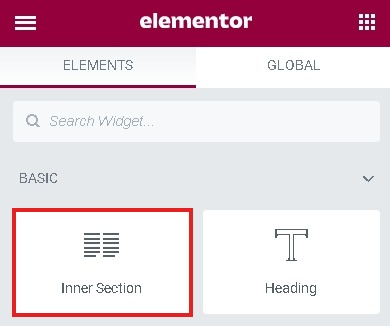
Now that you know the basic details, to go on with the process you need to add an inner section for widgets.
Add a column where you will be placing your widget. For this tutorial, we will be using the two-column structure.
Create Amazing Websites
With the best free page builder Elementor
Start Now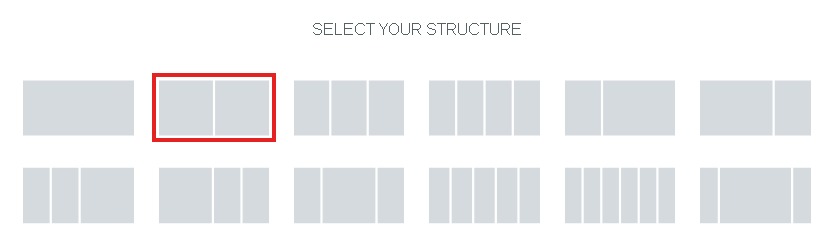
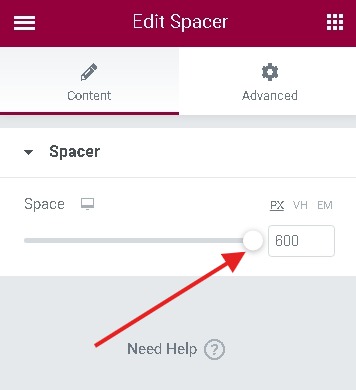
You can add any widget to the column while I will be going with the Spacer widget.
Set the spacer height to maximum from the Space option in the Spacer panel.
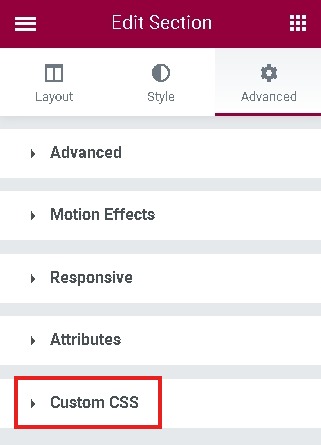
Go to the Custom CSS panel of the spacer block.
Now the final step is to paste the following CSS code in the custom CSS field.
selector {
   border-left: 1px solid #a70ccc;
   border-right: 1px solid #ff1685;
   box-sizing: border-box;
   background-position: 0 0, 0 100%;
   background-repeat: no-repeat;
   background-size: 100% 1px;
   background-image: linear-gradient(to right, #a70ccc 0%, #ff1685 100%), linear-gradient(to right, #a70ccc 0%, #ff1685 100%);
}
You are almost there. Publish the page and check out the gradient border you created.

While you can always come back to make the changes you want.
This is how you can create a gradient border on your website with Elementor Website Builder. Don't forget to join us on our Facebook and Twitter to stay updated about our tutorials.


