
As the digital era progresses, having a reliable email service for your business or personal needs has become more important than ever. If you own a domain and need mailboxes for it, we have teamed up with Rackspace to offer you their dependable Rackspace Email service.

By subscribing to our service, you can enjoy a complete email experience that is managed by Cloudways and costs just $1 per month per mailbox. With this email service, you can set up mailboxes, aliases, mail forwarding, and even add catch-all addresses for your domains.
At a reasonable cost, you can trust us to provide you with a dependable email service that meets your requirements. You can now communicate with your clients or associates without worrying about email issues, allowing you to concentrate on what matters most.
How to Use Rackspace Email Add-on
This tutorial will guide you through the process of using the Rackspace email addon in a step-by-step manner. You'll gain a clear understanding of how to utilize this addon and take full advantage of its features.
Create Amazing Websites
With the best free page builder Elementor
Start NowSetting up Addon and Mailboxes
To get started, simply use your email and password to log in to your Cloudways Platform. Once you've successfully logged in, navigate to the top menu bar and click on "Grid." From there, select "Add-ons" to access and manage additional features for your website or application.
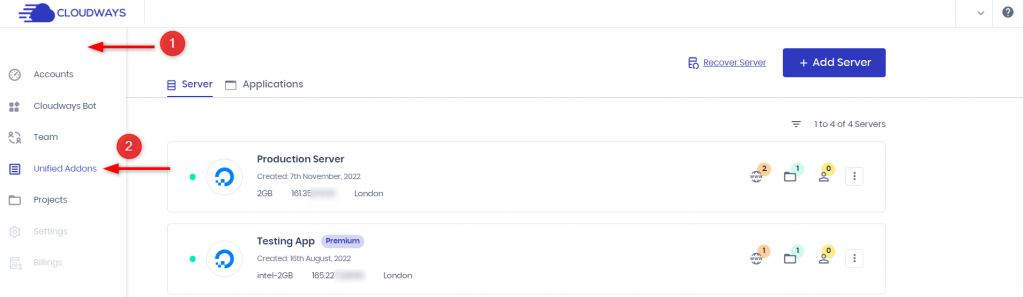
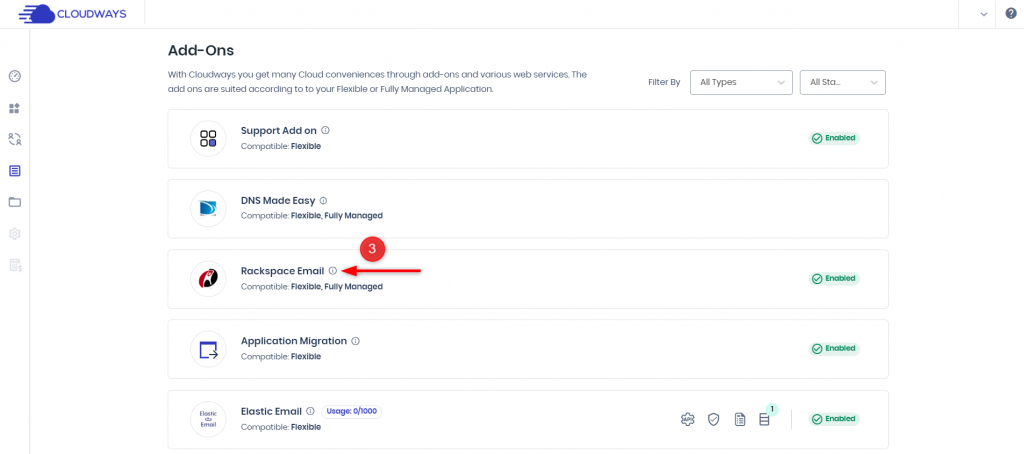
To get started with the Rackspace Email add-on, you simply need to click on the Edit icon. Once you click on it, the add-on will be activated and you can start using it right away.
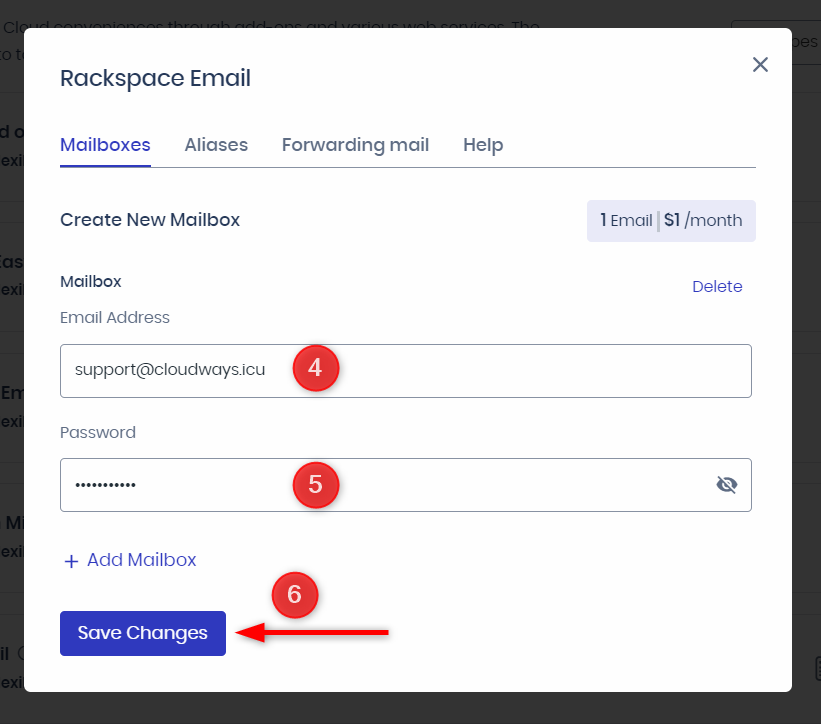
To create your email address with Rackspace, begin by typing in the email address you desire. Then, create a password containing a minimum of eight characters, with at least one uppercase letter, one lowercase letter, and a number. Remember to keep it secure. Once you have entered the necessary details, click on the 'Save Changes’ button to complete the process.
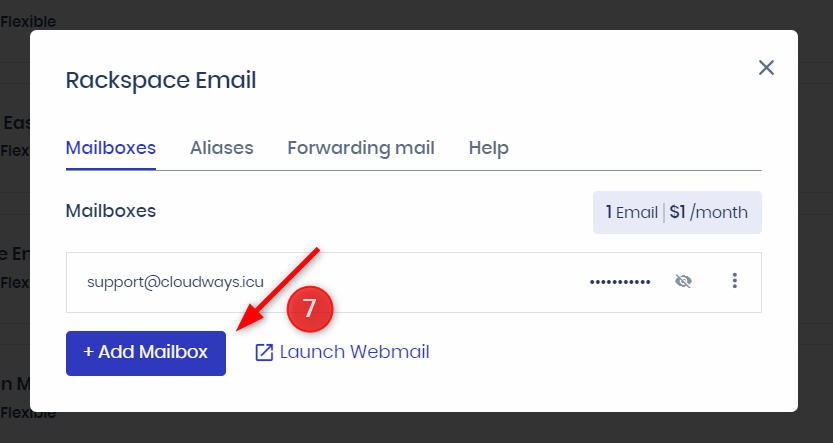
If you need to create additional mailboxes, you can do so by clicking on the '+ Add Mailbox' button. This allows you to create several email addresses at once, so you can manage all your communication channels efficiently.
In case you need to add a mailbox later on, you can easily do so by clicking on the option "Add Mailbox.
Setting up Aliases
Aliases are a great way to have multiple email addresses that point to a single mailbox. For instance, if you have a mailbox with the address [email protected] but you also want to receive emails at another address [email protected], you can set up an alias. This will redirect any emails sent to [email protected] to your original mailbox, so you can see all your messages in one place.
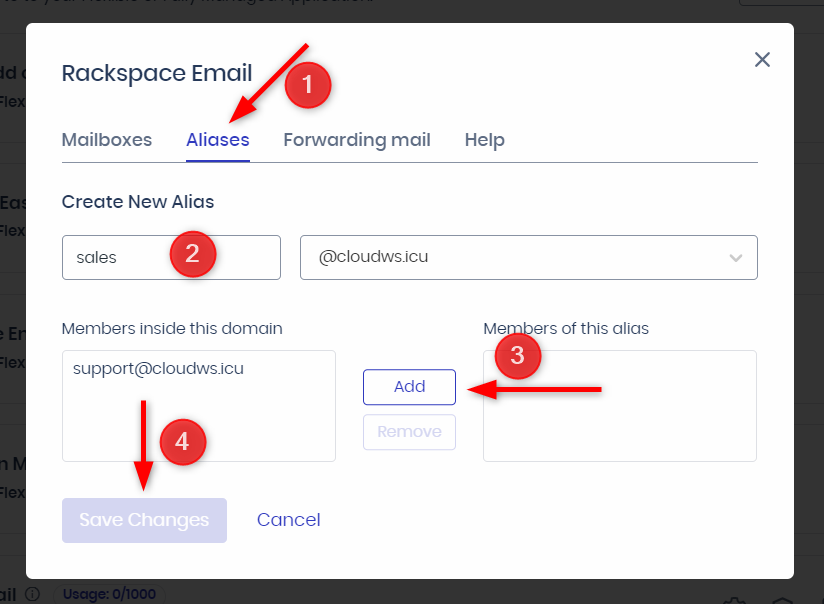
To create an alias, go to the Aliases section and enter the desired email address in the field provided. Choose the appropriate domain from the drop-down menu and then select the mailbox that you want to associate with the new alias. Once you have made the necessary changes, click on the "Add" button and then "Save Changes" to confirm.
Keep in mind that you cannot have aliases with the same name as your mailboxes or other aliases.
Setting up Mail Forwarding
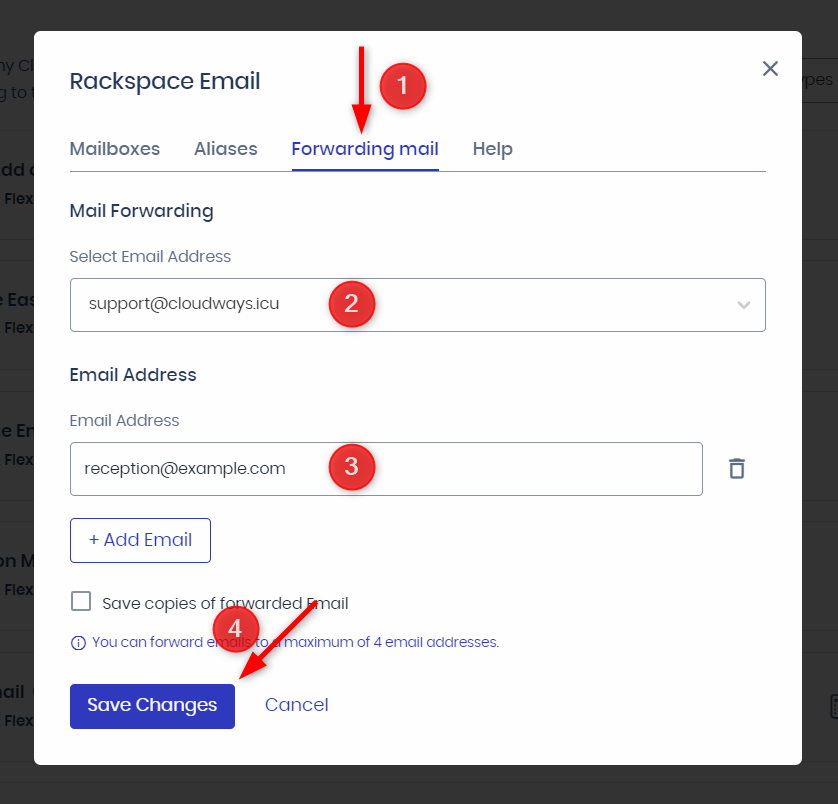
In addition to managing your mailboxes on Cloudways, you can also forward your emails to other mailboxes, whether they are hosted on or outside Cloudways. Setting up mail forwarding is simple: just go to the "Forwarding Mail" section, select the mailbox you want to set up forwarding for, and choose the email address where you want your emails to be forwarded. If you want to keep copies of the forwarded emails, you can select the "Save Copies of Forwarded Email" option. Once you're done, click "Save Changes" to confirm. You can set up multiple mail forwardings by clicking "Add Email". Please note that you can only forward emails to a maximum of four email addresses.
Setting up Catch-All Address
If someone sends an email to an incorrect or non-existent mailbox on your domain, don't worry because you can still receive it with the Catch-All feature. This feature is useful because it ensures that any email sent to your domain is not lost, even if there is a typo in the email address.
Setting up a catch-all address is easy. Just head over to the Catch-All tab and select your domain from the first dropdown. Next, choose the email address you want to use as the catch-all address from the second dropdown. Finally, click Save Changes to confirm your selection.
That's all there is to it! With this simple setup, you can rest assured that no important emails will be lost due to minor typos or incorrect mailbox entries.
Wrapping Up
In summary, adding email support to a domain on Cloudways is a simple and affordable process. By collaborating with Rackspace, Cloudways offers its users reliable and secure Rackspace Email services for only $1 per month per mailbox. With this email service, users can easily create mailboxes, aliases, mail forwarding, and catch-all addresses for their domains. Furthermore, the Cloudways support team is available 24/7 to provide assistance and address any issues that may arise. With Cloudways, users can be assured that their email communication is secure and uninterrupted. So why wait? Sign up for Cloudways email support today and experience a hassle-free email service for your domain.


