
Have you always wondered how you can add extra information to your article or your post using Elementor on WordPress, like storing your own custom data, then using it on your website, when you want and how you want?

Worry no more, because Advanced Custom Fields provides you with the solution.
What are custom fields in WordPress?
Custom fields are advanced WordPress features, which aid you to add extra information to certain posts or articles on your website. That extra information is also called 'metadata.' Custom fields let you create dynamic features on your website, and this information added to your website is based on your website's focus area.
For example, if you have an eCommerce website that sells kid items for kids between 1-10 years, you may want to create Custom fields that group the kid's items based on their age.
Create Amazing Websites
With the best free page builder Elementor
Start NowGenerally, based on the website's need, you may want to add additional custom fields.
Adding custom fields in WordPress
There are many ways in which one can add custom fields in WordPress. One of which is the default custom field option that comes inbuilt with WordPress, and another way is by using a plugin.
Adding Custom Fields Using Default WordPress Built-In Functionality
Let's start by looking at how we can add custom fields from the default WordPress editor. In the default WordPress editor, we can add custom fields to our post when we go to the screen options, which are the three vertical dots at the top right-hand of your screen. After clicking on the screen options, click on preferences at the bottom.
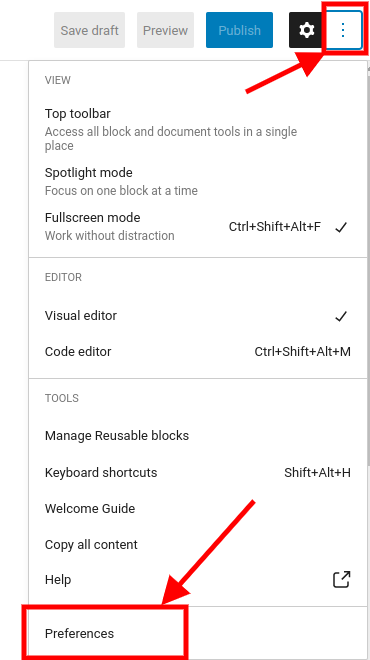
After clicking on preferences, click on the panel from the new window that appears.
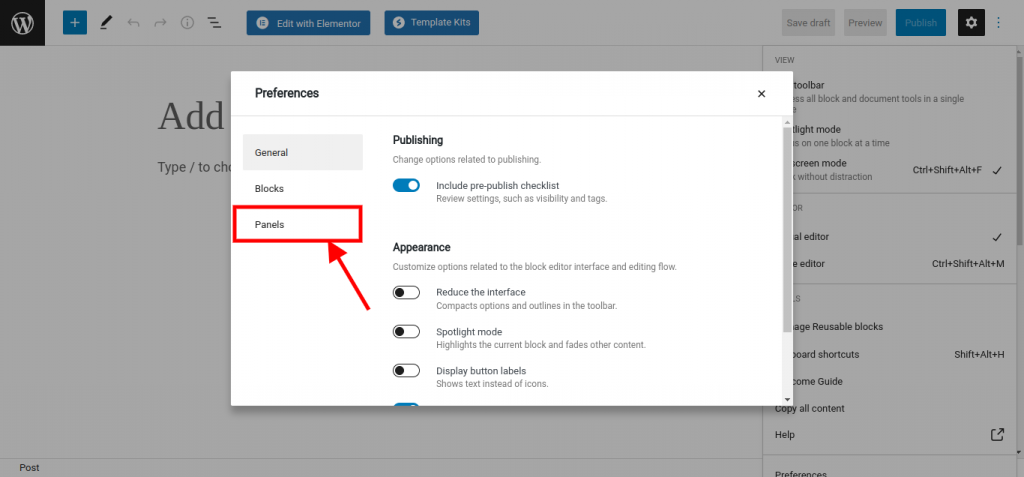
After clicking on 'panels', other options will appear on the screen with toggle buttons, and on the last which contains the heading 'Additional', there you will see the option 'custom field' with a toggle button by the side, left to it.
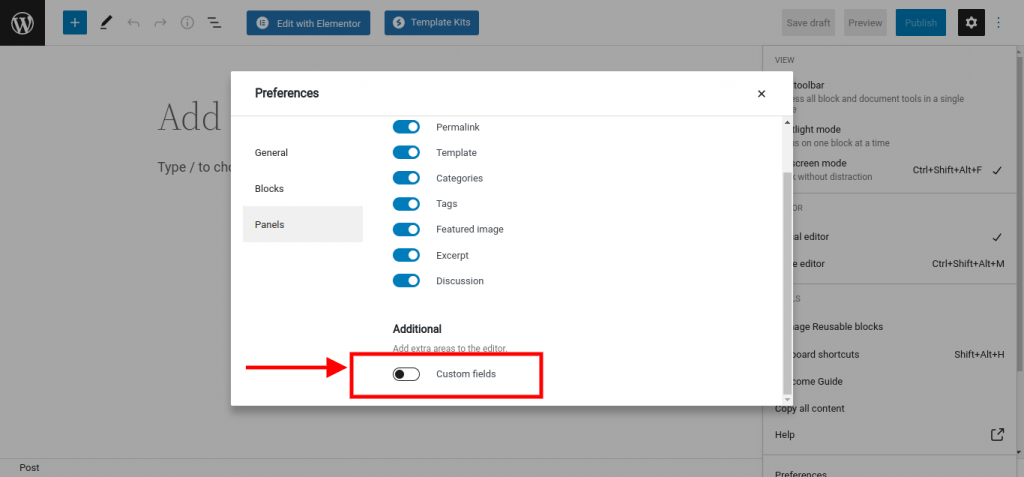
After switching on the custom fields toggle button, another button will appear, and written on it is 'Enable & Reload'.
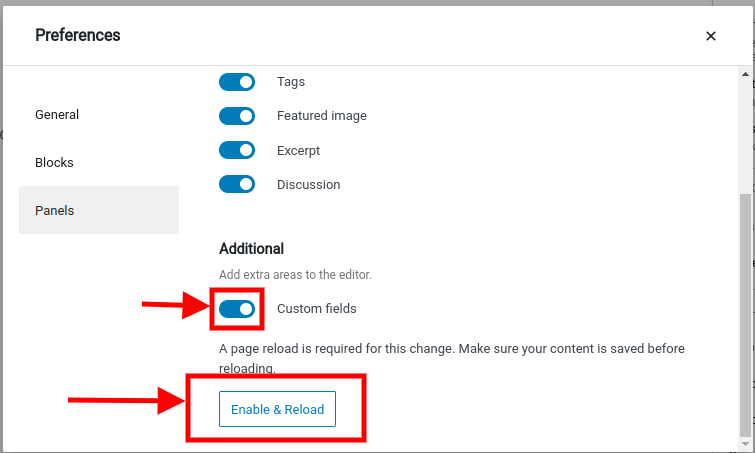
After clicking on that button the page reloads, showing a new screen with the custom field options enabled.
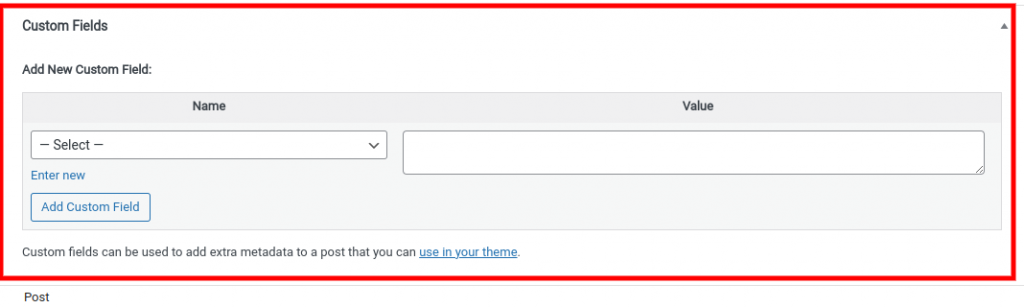
From here, you can enter your custom field data using key/value pairs.
Adding Custom Fields using the Advanced Custom Fields plugin And Elementor Pro
Advanced Custom Fields is one of the most widely used custom field plugins for WordPress. There is a free and paid version available for this plugin. The paid version offers more flexibility and features. But in this tutorial, we will be walking you through how to use the free version.
It's important to note that the free Elementor plugin does not give you the option to add custom fields. This option comes only with Elementor Pro.
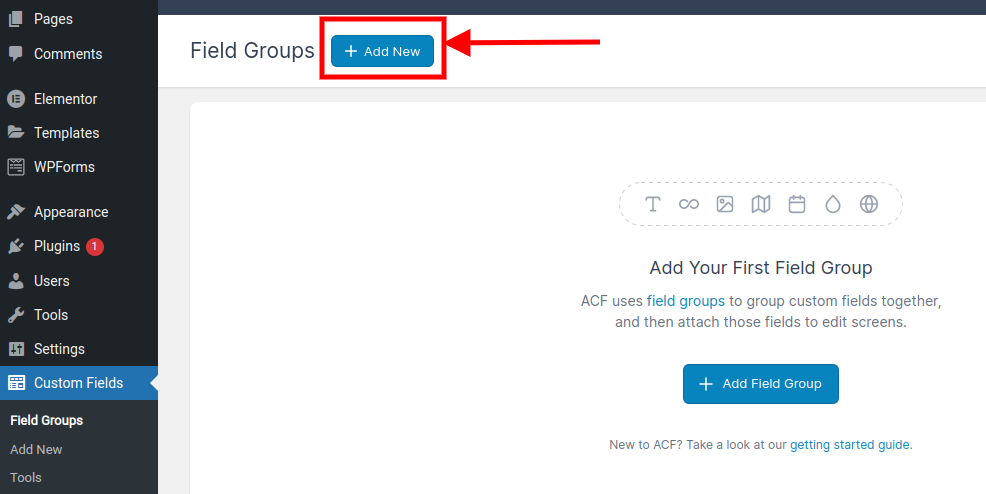
To start, go to the plugins and search for Advanced custom fields, install the plugin and activate. After activating, go to the WordPress dashboard, and on the left side where you have the menu on the dashboard, click on Custom fields then click on Add New, or you can also click Add New as seen on the top of the window.
After clicking on the add new button, the field form will open up and you need to give the name of the custom field, then click on Add Field. After clicking on the add field button, the field form will open up and you need to add custom field data. Add all the parameters in the form and then click on the add field button again.
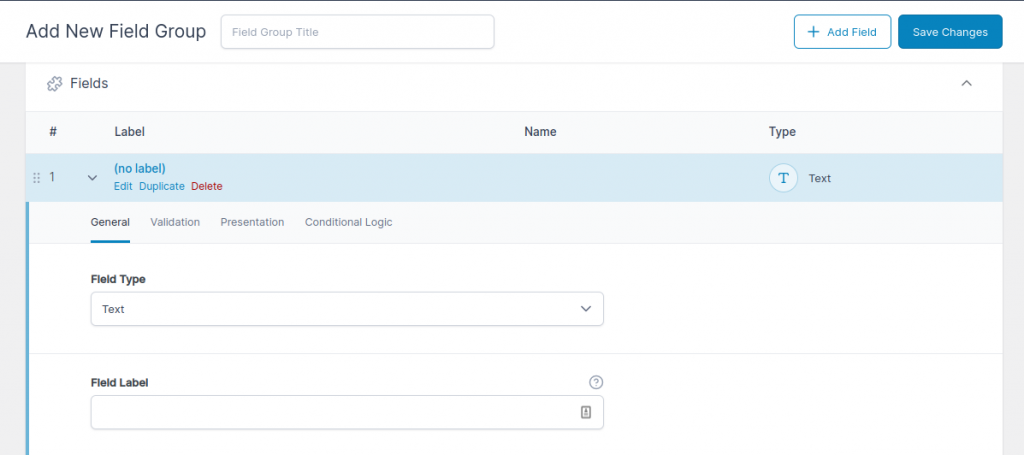
Additional custom fields can be added when you click on the add field button. After adding the custom field information move on to the location section where you can select where to display the field.
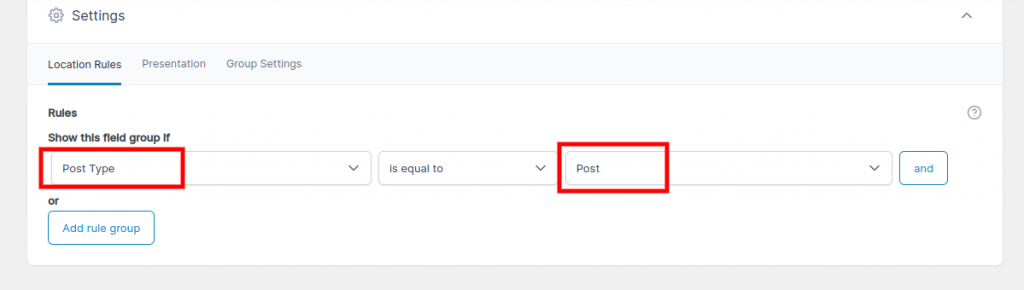
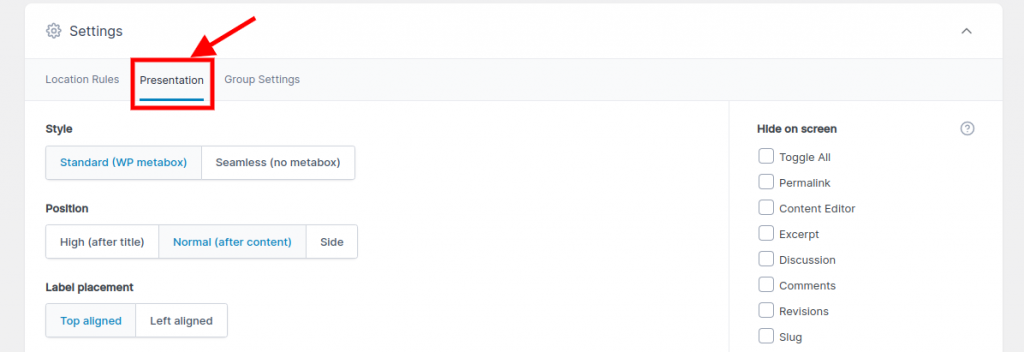
Go to the setting section to set style, position, placements, and others set for your custom field.
Adding the Custom Fields In Elementor Pro
Following the processes above, your custom field type is created now you need to add the custom field on your page. You need to have the Elementor pro installed to add the custom field.
Open up a page with Elementor editor and create a section and add a new widget. Under the content tab, click on the dynamic icon and select Advanced Custom Fields.

Conclusion:
Following the whole process orderly, you will be able to add custom fields on both WordPress and Elementor Pro.


