
You can use custom CSS to change the look of any part of your Elementor page, such as sections, columns, and widgets. By adding CSS code to the Custom CSS field, you can style and decorate these elements. It's like giving a basic HTML page a modern and attractive design.

Please note that the Elementor Custom CSS feature is only available in Elementor Pro. But if you're using the free version of Elementor and want to add custom CSS, don't worry! We have a solution for you. This article will guide you through the process of adding custom CSS to your Elementor page, even if you're using the free version.
Add Custom CSS in Elementor Free Version
In this example, we'll show you how to create a multi-color gradient button in Elementor using CSS code. To use this code, you'll need to upgrade to Elementor Pro and add it to the Custom CSS field on the Advanced tab in the settings panel.
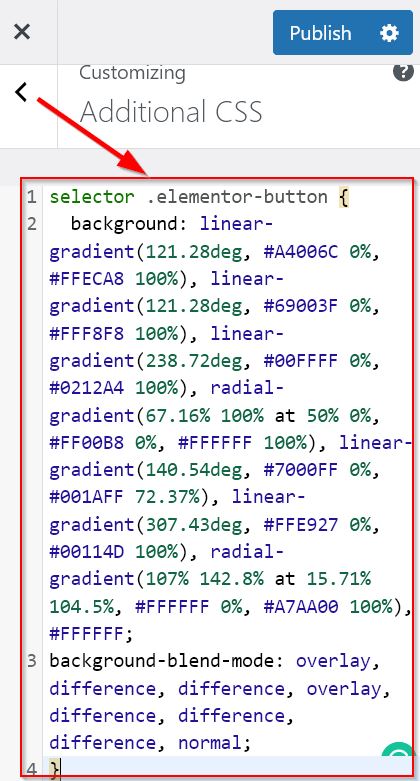
selector .elementor-button {
  background: linear-gradient(121.28deg, #A4006C 0%, #FFECA8 100%), linear-gradient(121.28deg, #69003F 0%, #FFF8F8 100%), linear-gradient(238.72deg, #00FFFF 0%, #0212A4 100%), radial-gradient(67.16% 100% at 50% 0%, #FF00B8 0%, #FFFFFF 100%), linear-gradient(140.54deg, #7000FF 0%, #001AFF 72.37%), linear-gradient(307.43deg, #FFE927 0%, #00114D 100%), radial-gradient(107% 142.8% at 15.71% 104.5%, #FFFFFF 0%, #A7AA00 100%), #FFFFFF;
background-blend-mode: overlay, difference, difference, overlay, difference, difference, difference, normal;
}
If you're using the free version of Elementor, don't worry! We'll explain the necessary steps to modify the code and achieve the same multi-color gradient button effect.
Create Amazing Websites
With the best free page builder Elementor
Start NowAdd the Additional CSS Code
The WordPress Customizer's CSS editor will receive the CSS snippet. Go to Appearance -> Customize on your WordPress dashboard.
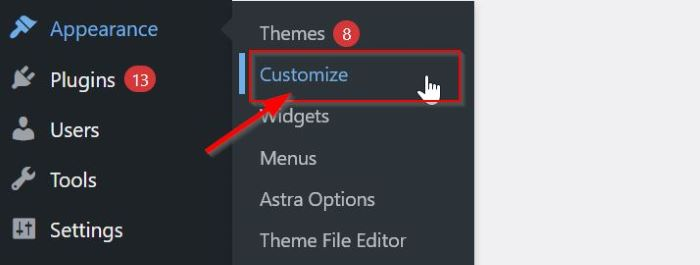
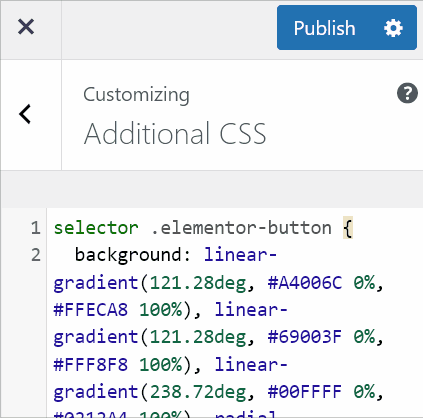
Go to the Additional CSS block once you've reached the customization settings page and click on it. The Additional CSS field should now include the copied CSS code from above.
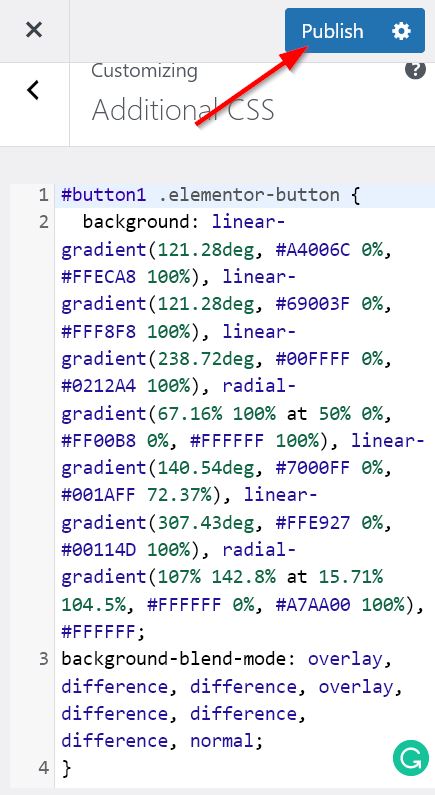
As previously said, in order to provide a multi-color gradient button, you must alter the CSS code. Replace the selector text with a customized, one-of-a-kind CSS ID. Any CSS ID may be entered into the code; in this case, we'll use #button1.
After making changes to the CSS code, use the Publish button to put them into effect.
Add the Elementor CSS ID
Now we can go to the following action. To identify the CSS code used in the Additional CSS, we will create a special Class ID.
Access the Elementor editor. Please then drag and drop the button widget into the canvas area after choosing it from the widget panel. After adding the button widget, you may change and style it however you like.
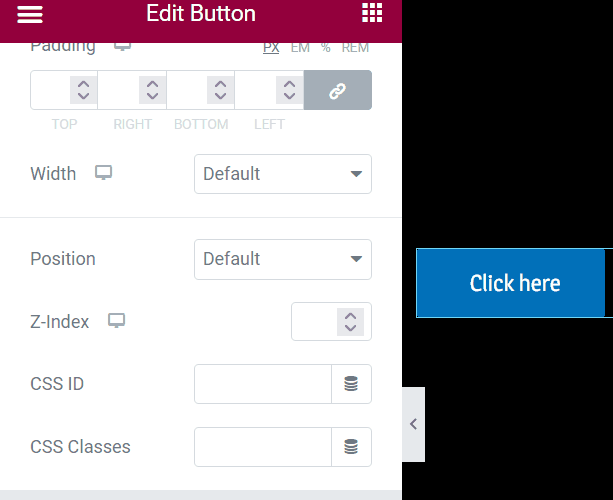
Go to the Advanced tab -> Layout -> CSS ID on the Button widget settings panel. Please provide a specific, unique CSS ID that you added in the Additional CSS section next.
When you add the unique custom CSS ID, the button becomes a multi-color gradient, as seen in the GIF image. Don't forget to click the Save Draft button to save your project.
Well. Consider adding a multi-color gradient to a different multi-color gradient for a button widget.
Return to the Additional CSS field after that, and then copy and paste the current code into the Additional CSS field's final section. Please change your custom, unique CSS ID to a new one after you've pasted it, and then modify the CSS fragment more precisely in the declaration block of the CSS. In this illustration, we substitute #button2 for a CSS ID.
To obtain the declaration block, you can generate a gradient using online CSS gradient tools.
When you're done editing your new CSS code, use the Publish button to put it into effect.

Reload your page after returning to your Elementor editor. Create a new Button widget, tweak it, and then style it as desired. Go to Layout > CSS ID under the Advanced tab of the Button widget settings. After that, enter your new, personalized CSS ID in the section marked CSS ID.
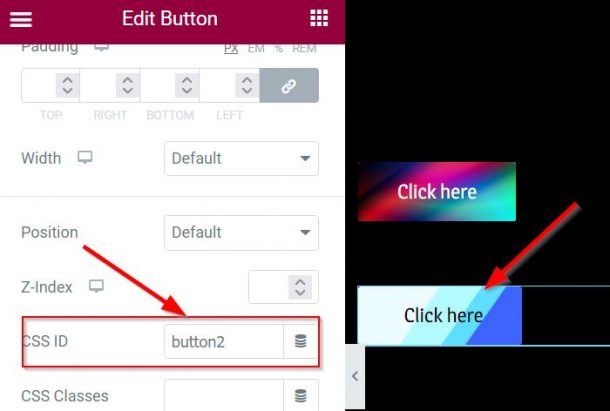
That's all there is. You now have two buttons with various multi-color gradients, as seen in the figure above. If you choose, you can publish or save your project.
Wrapping Up
This article teaches you how to customize the look of Elementor for free by adding your own CSS. By following some tips, you can make your free version of Elementor resemble Elementor Pro.
In our view, this tutorial is great for beginners who are using WordPress and Elementor. However, if your website is growing or already well-established, we suggest upgrading to Elementor Pro. With Elementor Pro, you'll have access to additional features and benefits, allowing you to work more efficiently.


