
When it comes to optimizing your WooCommerce store, providing valuable information to potential buyers is paramount. One effective approach is the integration of size charts directly into your product pages. These charts not only furnish customers with crucial insights for informed purchasing choices but also play a pivotal role in boosting customer interaction and curbing cart abandonment rates within your online store.
In the following guide, I will walk you through a step-by-step tutorial on seamlessly incorporating a size chart into your WooCommerce product pages, leveraging the functionalities of our specialized Botiga theme. By the end of this tutorial, you'll be equipped with the knowledge to enhance your customers' shopping experiences and drive better conversion rates.
Add a Size Chart to WooCommerce
Step 1: Install and Activate Botiga Theme
Botiga stands as a complimentary WooCommerce theme at your disposal for WordPress.
Following the acquisition of this theme, it becomes necessary to transfer it onto your WordPress website.
Create Amazing Websites
With the best free page builder Elementor
Start NowNavigate to your WordPress dashboard, proceed to Appearance > Themes > Add New, and give a tap to the Upload Theme tab.
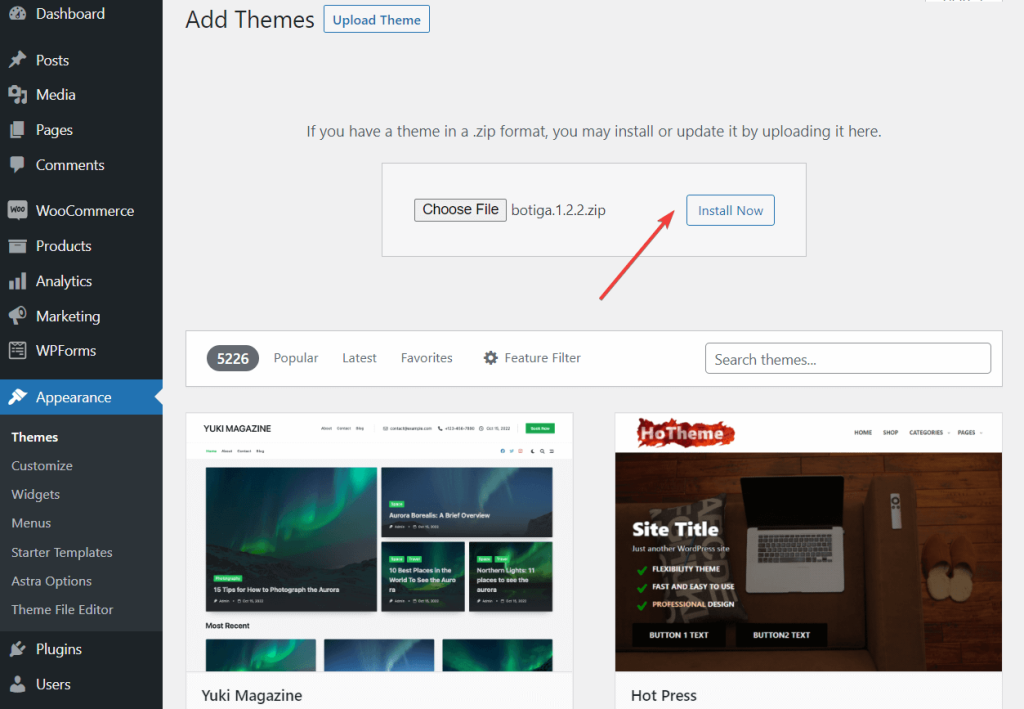
Subsequently, make use of the Choose File feature to upload the theme. Proceed by pressing the Install Now button. Once the theme finds its place within your website, give a click to Activate.
In merely a matter of seconds, Botiga will be up and running, adorning your site with its presence.
Step 2: Install and Activate Botiga Pro Plugin
Botiga Pro stands as a top-tier WordPress plugin, elevating the capabilities of the free theme. It brings forth a multitude of advanced features, including size charts, sticky add-to-cart buttons, audio and video galleries, mega menus, and more.
Following your purchase, you can obtain the plugin by downloading it from your aThemes account directly to your local computer.
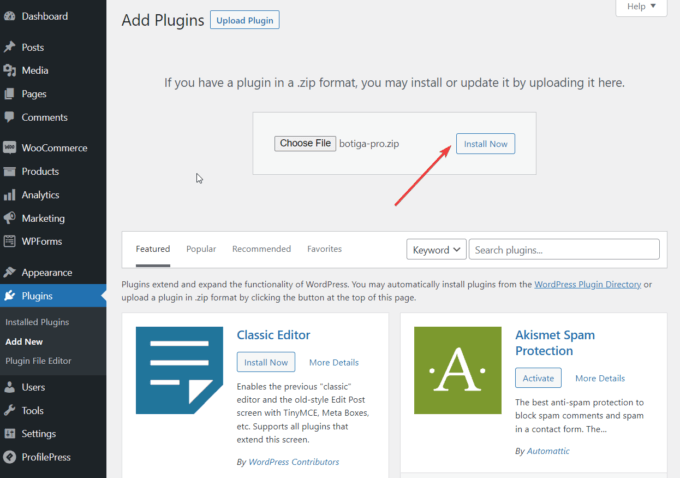
To seamlessly integrate the plugin with your WordPress site, navigate to the "Plugins" section, then select "Add New" and click on the "Upload Plugin" button. From there, proceed to upload the plugin by opting for the "Choose File" feature, followed by clicking "Install Now." Once completed, activate the plugin by simply clicking on the "Activate" button.
Upon successful activation of Botiga Pro, it's imperative to validate the plugin license. Begin by accessing your aThemes account and copying the license key. Subsequently, move on to the "Plugins" section, locate "Botiga Pro License," and input your license key for activation.
Step 3: Import Demo Site
A starter site is a ready-made demonstration that gives you a complete website design once you bring it into your WordPress site.
Botiga Pro presents nine starter sites, each aimed at a different specific area. It's not obligatory to employ a starter site if you'd prefer not to; however, it can serve as a helpful initial point.
Alternatively, you have the option to fashion your own website design from the ground up, utilizing either the theme choices within the WordPress Customizer (accessible from Appearance > Customize menu) or the Elementor page builder plugin.
Regardless of whether you decide to import a starter site or not, you'll have access to the same range of customization choices.
For importing a starter site, navigate to Appearance > Starter Sites in your WordPress administrative section. There, you can preview each site by choosing the Preview Demo selection.
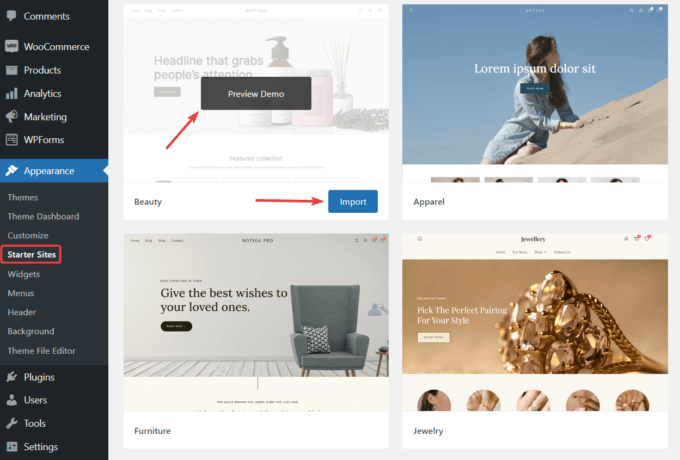
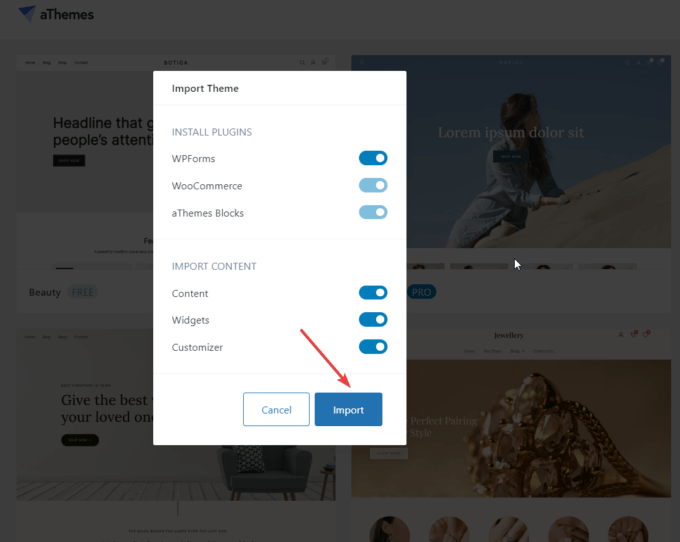
Once you discover a starter site that appeals to you, initiate the import process by clicking the Import button:
The demo importer will present you with a list of the additional plugins and content elements that will be incorporated into your site as part of the import procedure.
Although you do have the choice to skip some of the plugins and content during import, I strongly suggest including everything.
Activate the Import button, and the importing process will commence. Please be aware that it will take a few minutes for the imports to finalize.
Step 4: Enable Size Chart Module
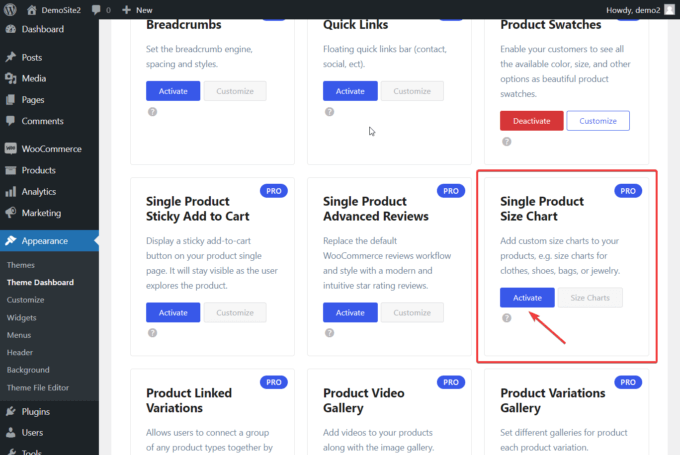
The default setting has the size chart feature turned off. To activate it, follow these steps: Navigate to Appearance, then head to Theme Dashboard, and finally, go to Theme Features. Scroll down until you find the module labeled "Single Product Size Chart" and simply click the "Activate" button.
Step 5: Create a Size Chart
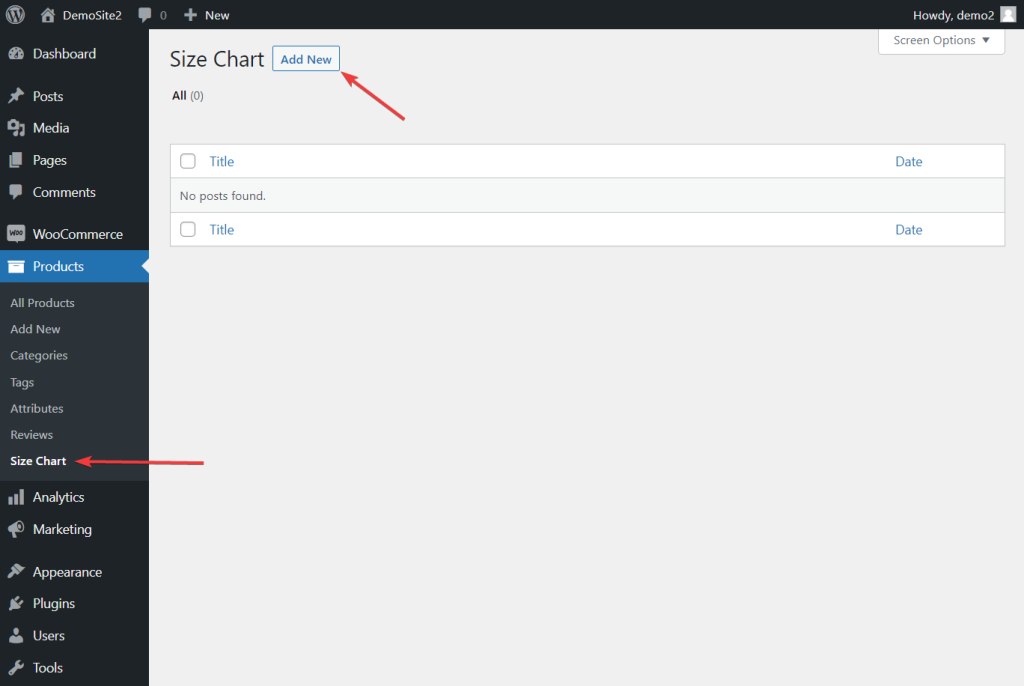
Once the Size Chart module has been activated, navigate to Products in the WordPress admin area.
You will see a new Size Chart submenu under the Products menu.
After selecting it, select Add New:
The Botiga Pro plugin introduces size charts as a specialized type of content. These charts can be generated and modified using the editing interface within the WordPress post section.
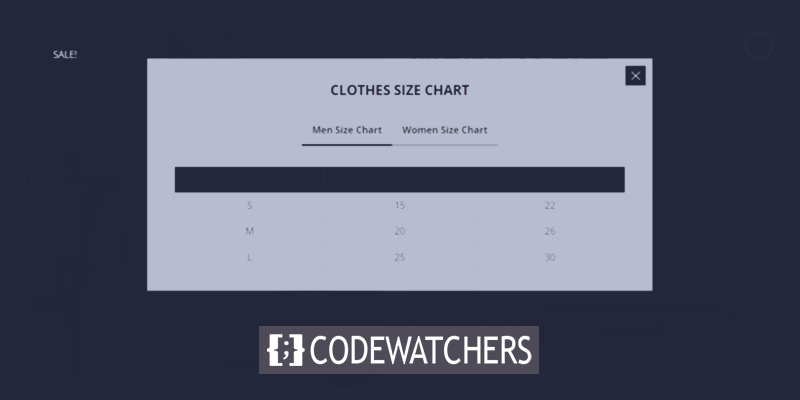
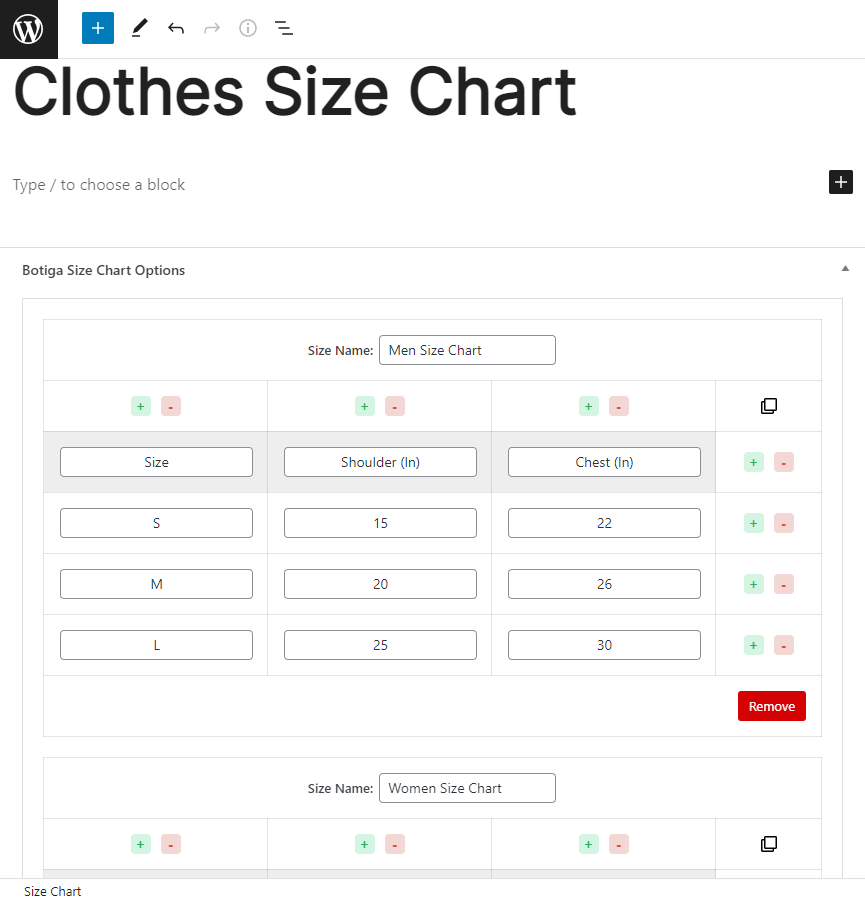
To begin, provide a title for the unique post dedicated to housing your size chart(s). It's possible for one post to encompass multiple size charts. For instance, you could establish a post titled "Clothes Size Chart" featuring a pair of size charts: one tailored for men and another for women.
After assigning the title, navigate to the Botiga Size Chart Options section further down the page. From there, simply click on the "Add Size Chart" button.
Instantly, a size chart will materialize on your screen, replete with rows and columns. Furthermore, you'll have the option to assign a name to this size chart.
Tweaking the chart is also effortless. The ability to insert or delete rows and columns is at your fingertips, easily accessed by utilizing the "+" or "–" buttons.
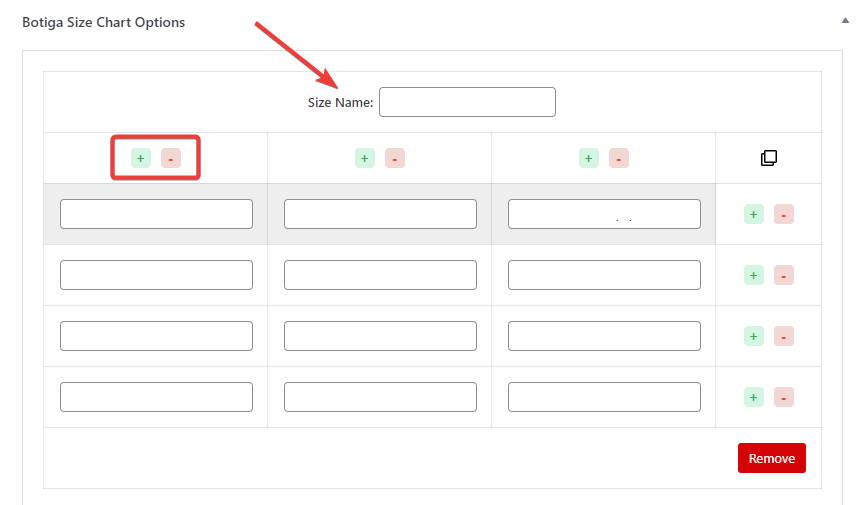
The chart can be duplicated by selecting the copy icon, or it can be removed by selecting the Remove button:

Here is an illustration of my sample size chart:
Step 6: Display Size Chart In All/Product Page
Now, go to Appearance > Customize to add a size chart to every product page.
The Customizer window will then open, with the available settings on the left side of the screen:
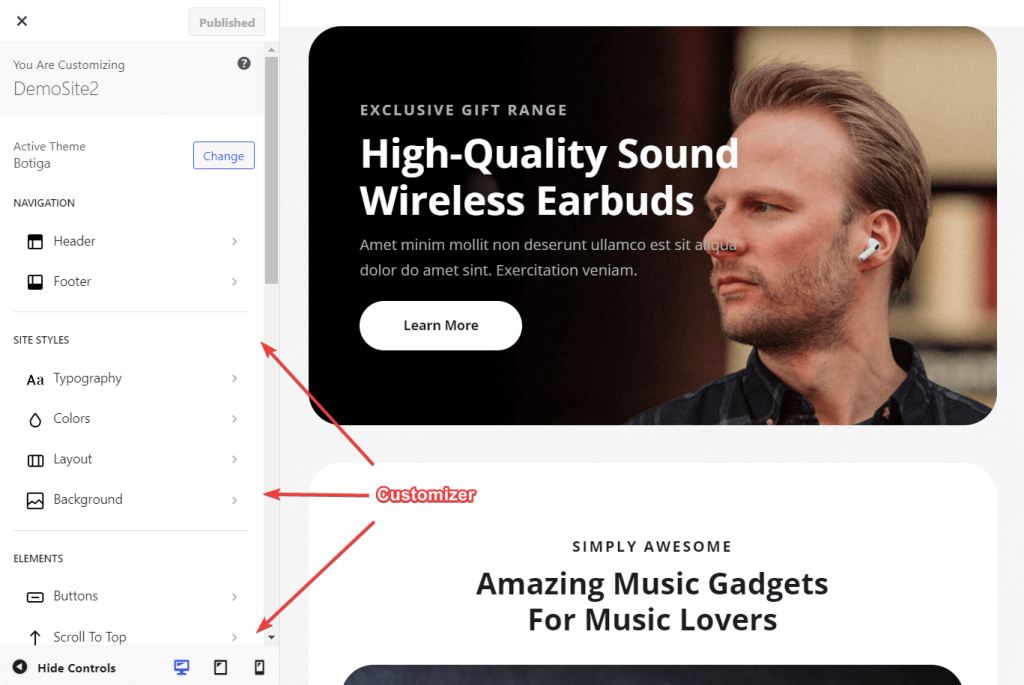
Select the Single Product option in the WooCommerce section of the Customizer by scrolling down:
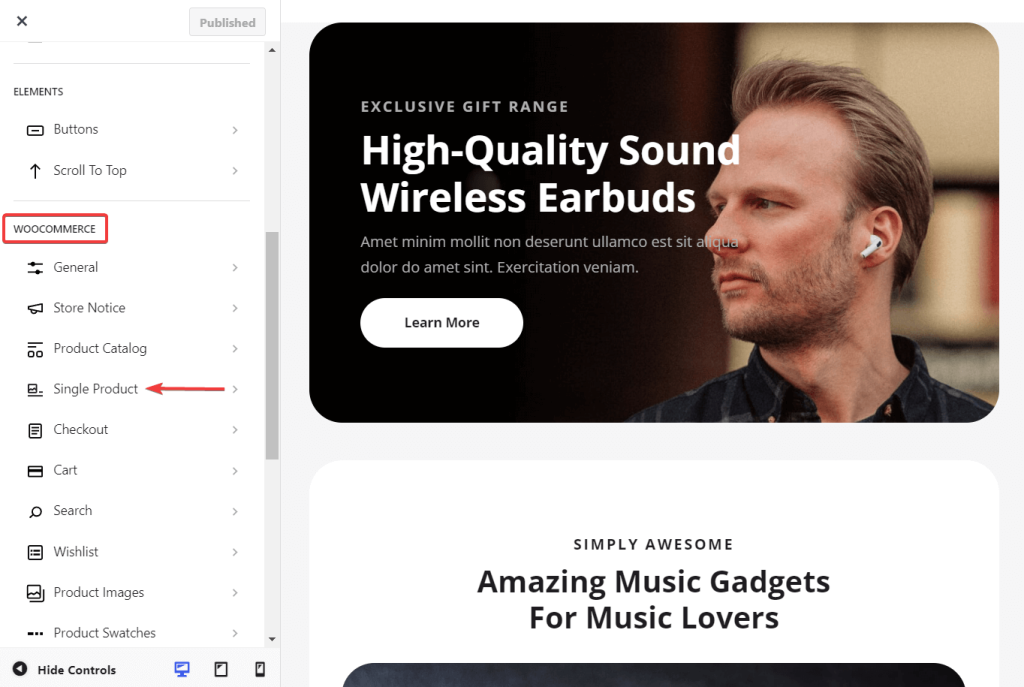
Select Size Chart from the following screen. It will display the Global Size Chart and Title options.
All of your size charts are available as dropdown options in the global size chart configuration. Choose the one to include in your product pages and give it a title.
To save your settings, use the Publish button at the top of the screen.

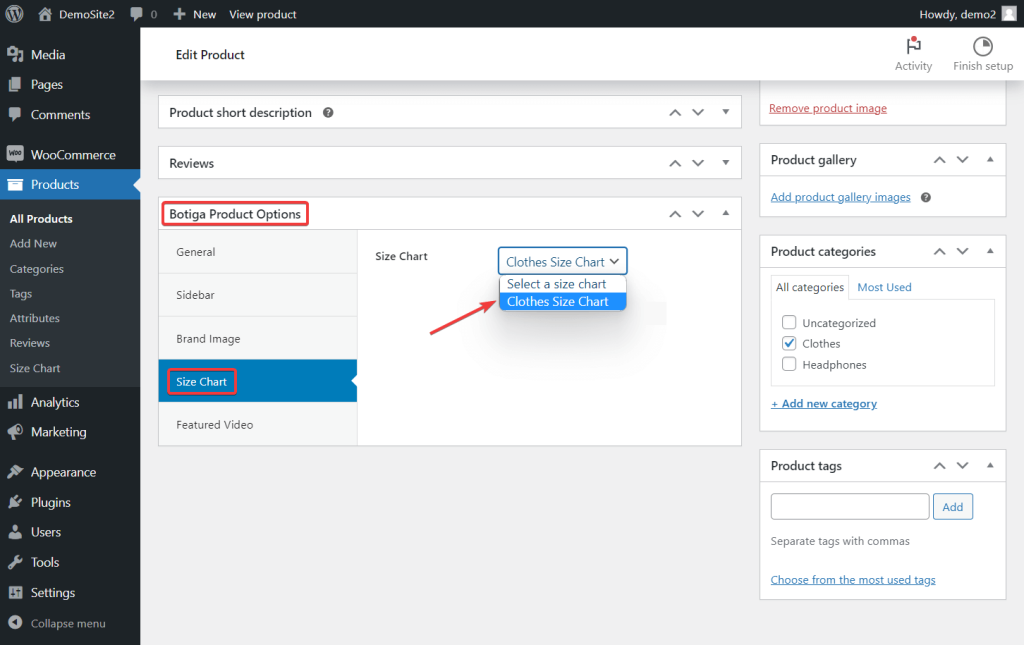
To display on a specific product page, open the product page where you want to add the size chart by selecting Products > All Products and then clicking on the desired product.
Scroll down to the Botiga Product Options panel on the product page and click the Size Chart tab.
You can choose from a dropdown menu that includes your size charts here. Choose the one you wish to include in your product, then, to save the changes, click Update at the top of the page:
Open the product page now to see how your size chart appears in-store.
Under the product description, there is a size chart option.

When you select that option, a modal box displaying your size chart will appear:
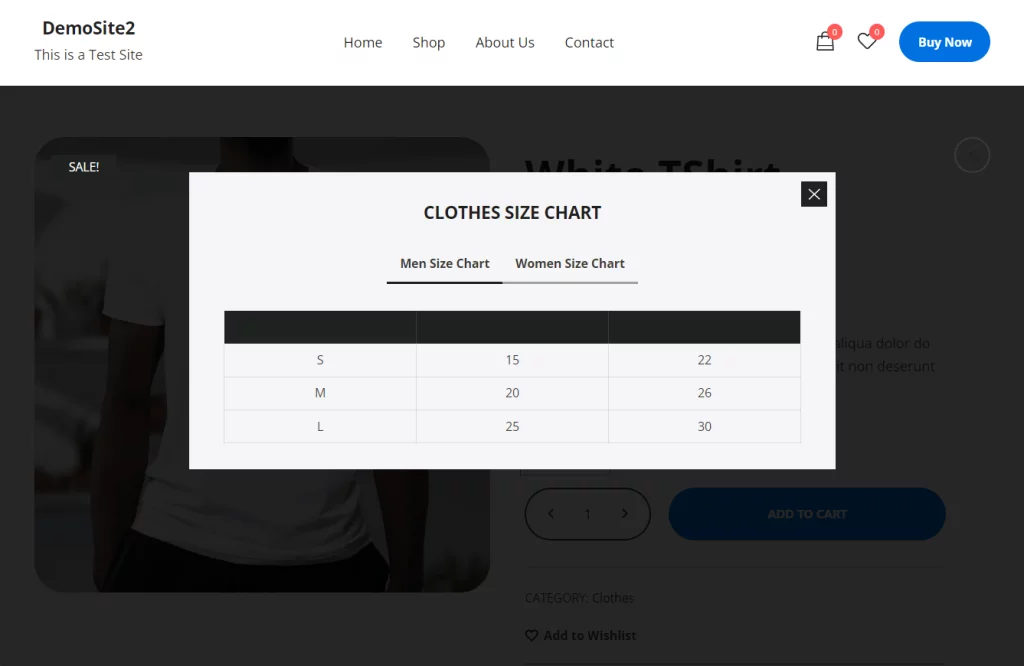
And its done!
Wrapping Up
Incorporating a size chart into your WooCommerce site not only enhances the user experience but also boosts your store's conversion rate. However, with Botiga and Botiga Pro, you can go beyond just adding a size chart. For instance, you can introduce videos and audio to your product galleries, implement captivating hover effects on product images, integrate quick view boxes into your shop and archive pages, and much more.
This provides you with a comprehensive toolkit to elevate your online store's functionality and appeal.


