
If you are a WordPress site owner, then you know that you have to be careful about the bounce rate of visitors. You may be looking for a way in which you can keep your users' attention on your site. Well, real-time notifications can be a solution; since they inform the user about what is happening in real-time on what is happening on the platform.

But concretely, how do they present themselves?
What is a real-time notification and what is it for?
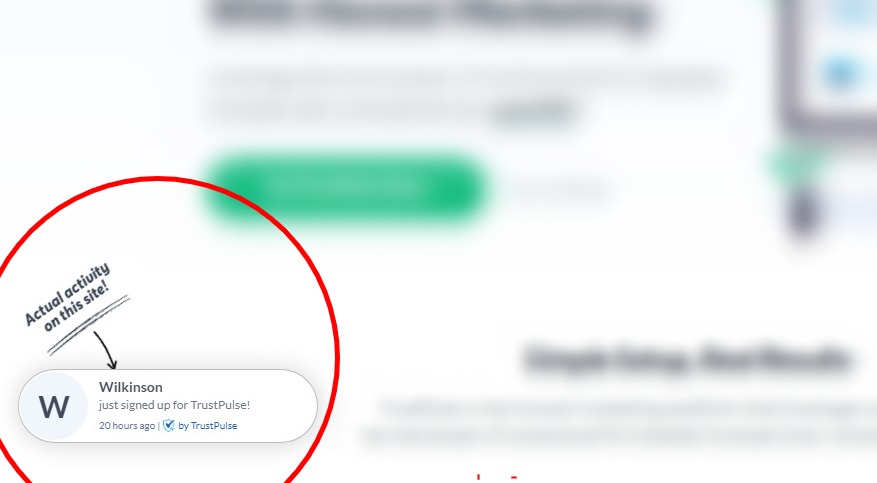
These are actually small messages that appear on the site while the user is browsing. These little messages will inform him in real time of everything that is happening on the site.
For example, your visitors will be notified if another user makes a purchase, signs up for an event, or even leaves a comment. The point here is to get users to take action.
Create Amazing Websites
With the best free page builder Elementor
Start NowIndeed, it happens that our new website visitors may hesitate to take certain actions when they first visit your site. That means you can lose a lot of potential leads and customers.
You will therefore see that by this process, you will be able to maintain users on your site and increase your conversion rate.
But how do you add such functionality?
The most effective solution at this level is to use a WordPress plugin, in particular a social proof notification plugin.
There is just one that is perfect for this job, called TrustPulse. This plugin can provide real-time information about your site's activities in the form of notifications. These can be welcome notifications, new user sign-ups, and other custom messages in a creative popup on your website.
We will now see how to concretely add this functionality thanks to TrustPulse.
Integration of real-time notifications with TrustPulse
We will organize this in several stages. The end goal here is to create a campaign that will allow us to display real-time notifications. This is the process of applying TrustPulse.
First, of course, you have to get TrustPulse.
1. Sign up and add your website to TrustPulse
To use TrustPulse, you must first create an account on its dedicated page. To do this, click on the Get TrustPulse Now button.

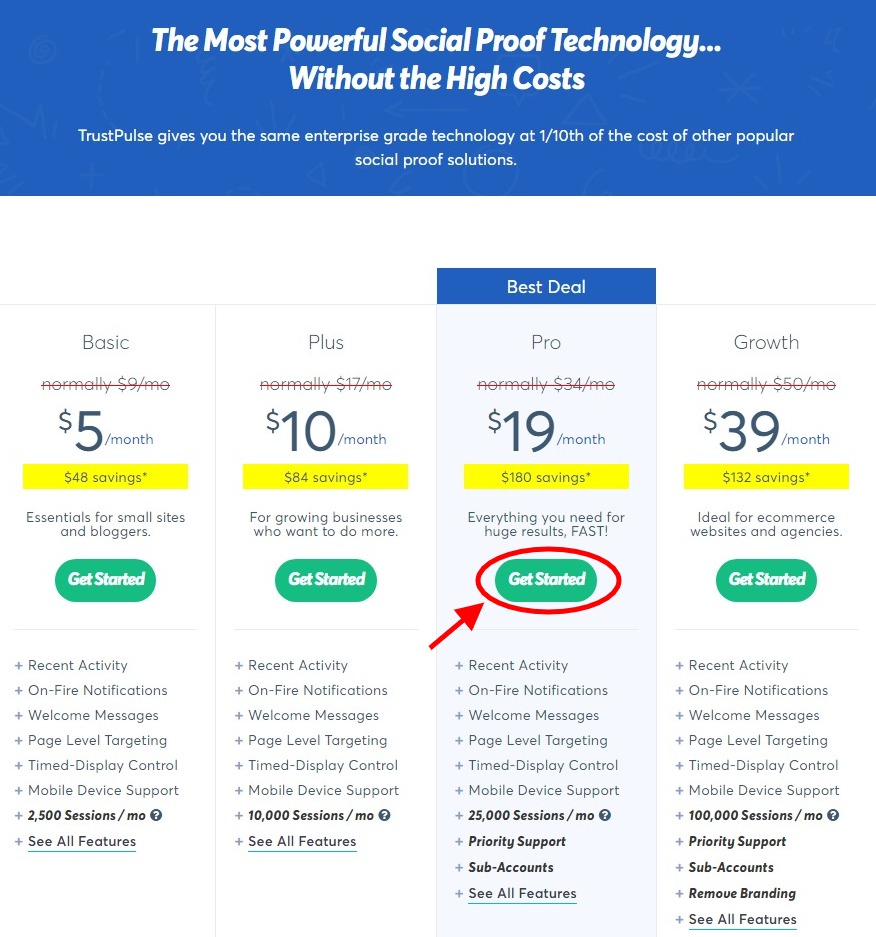
On the following page, you will choose the price plan that suits you best. Click Get Started when it's good.
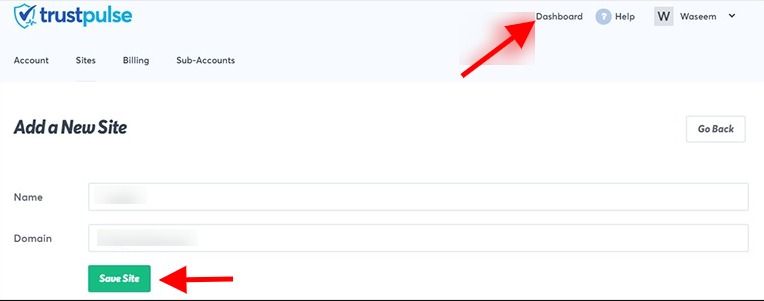
Now enter the requested information (name, address) to register. From there, just go to the Dashboard from the top bar. Fill in the information and click Save Site when you are done.
Note: You have the possibility to take advantage of the TrustPulse14-day free trial.
2. Create a new campaign
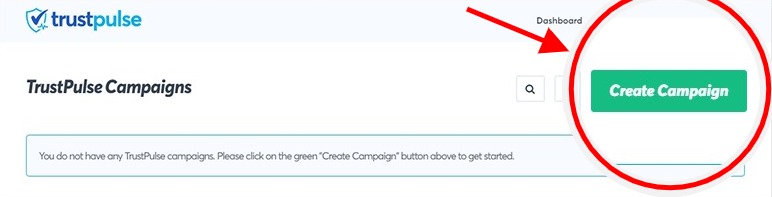
You will now create a new campaign in Trust Pulse. To get started, click on Create Campaign on the dashboard.
Then, you just have to fill in information for the configuration of the new campaign. In particular, the name of the latter and the site on which the notifications will be displayed is sufficient. Choose the type of campaign and we can move on.

Note: Note that Recent Activity and On-Fire are the two types of campaigns that TrustPulse offers. So, that the first allows displaying new user sign-ups and member registrations in real-time; the second displays a total number of people signing up on your website in the last few days.
For the rest of this article, we'll use the Recent Activity campaign.
3. Configuring notification popups
There are several types of popup notifications that you can configure. We find for example the Welcome notification popup which is provided by default by TrustPulse. You can turn it on or off as per your convenience. It is also possible to personalize it (change the icon, the style …) and to preview the result.
It should be noted that when activated, the Welcome notification popup appears until the next notification shows up.
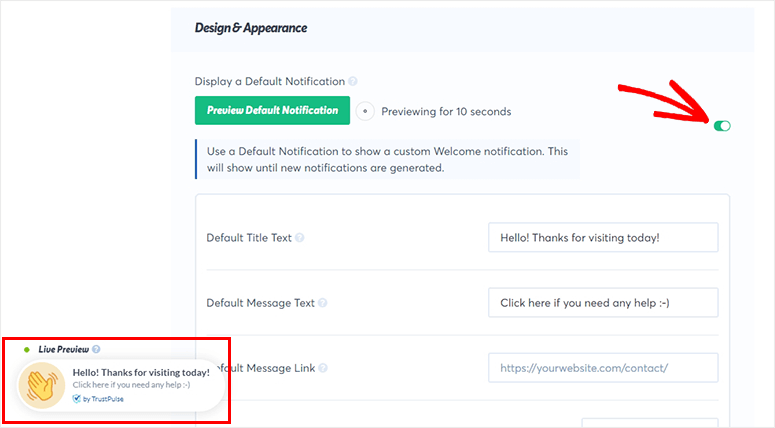
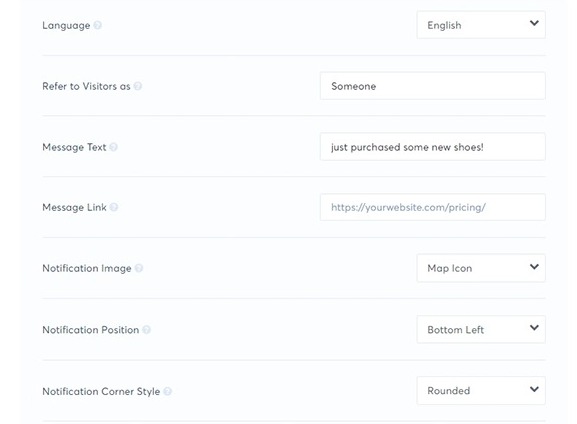
As for other types of popups, such as Sign up notification, just go below to see the settings concerning them (language, notification text, popup position, etc.).
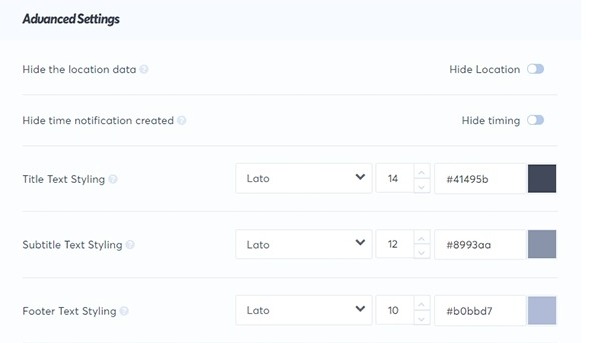
Going further down the page, you will find the Advanced Settings to further customize your notification popup: text color, font, size, background color, border size, drop shadow, etc.
Finally, check the configurations made. As long as it is good, you can click on the Next Step button and move on.
Establishing capture activity parameters
At this level, the goal is to define the trigger and the action that will enable the notification popup to be activated. This is a useful function, for example when an action takes place off your website, but you’d like to display it to your site’s customers. That would be like when someone leaves you a review on a site like Google My Business or Yelp.
TrustPulse provides you with 2 solutions to choose from AutoMagic and Zapier.
AutoMagic relies on the actions of your users to trigger the notification popup. Various actions can be taken into account, for example, new user signups. This is the most recommended solution.
However, Zapier's function is to connect your TrustPulse campaign to thousands of third-party applications.
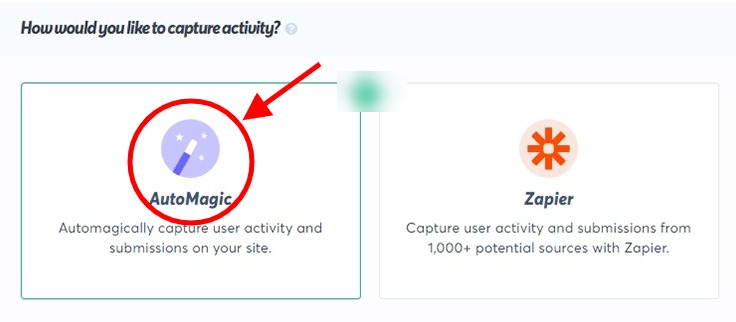
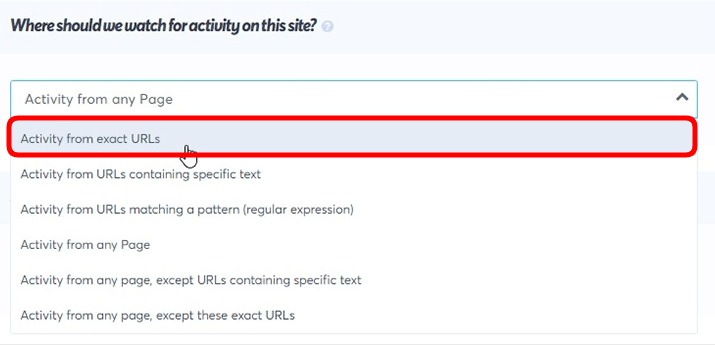
As you can see in the image above, we'll be using AutoMagic for our case. Click on the drop-down menu to select the activity. For example, you can choose the Activity from exact URLs option.
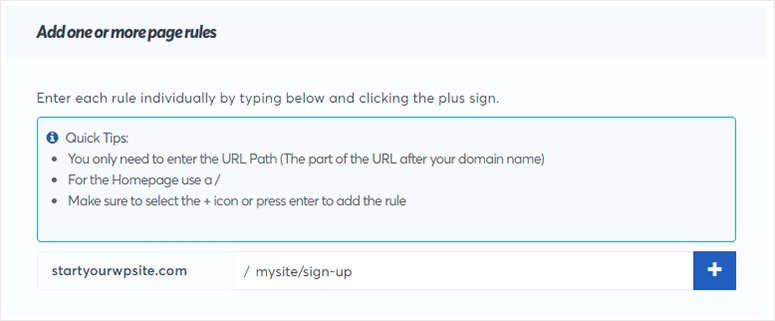
Now you need to add a Page URL so that TrustPulse can capture user activity on that specific page and display a notification to new visitors.
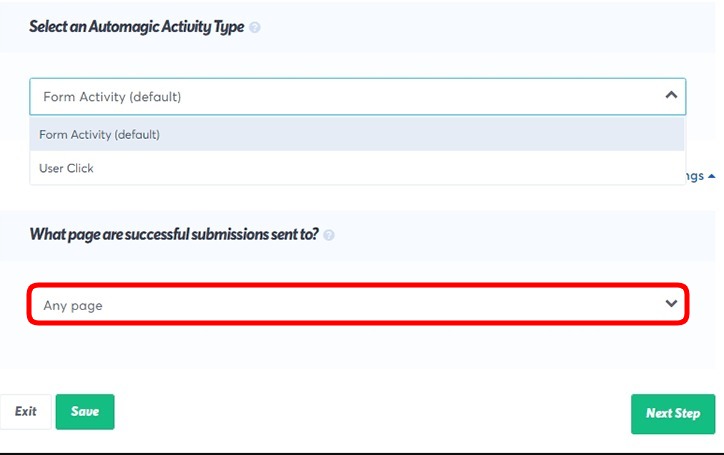
This will also allow you to select the type of activity. This means that the trigger can work on the default form activity or on a user click. From Advanced Settings, you can redirect users to a specific page after successful submission.
You can after all this save your settings simply by clicking on Next Step.
5. Changing the rules for displaying your notifications
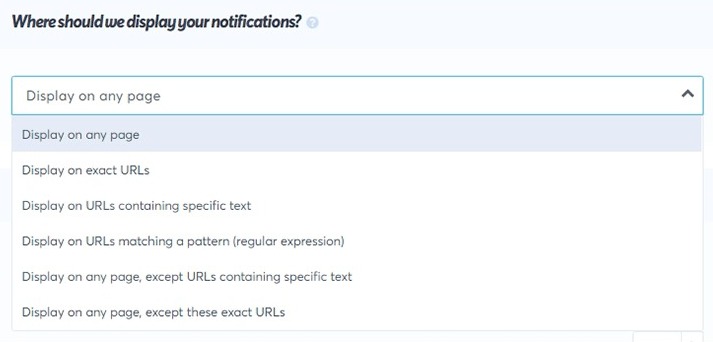
Here, it is possible for you to define where you want real-time notifications to appear. Just click on the drop-down menu to see multiple options: display on any page, display on exact URLs, etc.
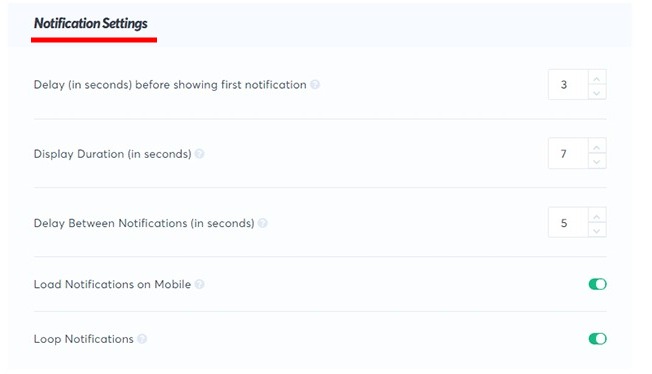
You can also set more advanced settings like notification delay and duration and many more.
Now, click on the Next Step button to go to the last step.
6. Connecting TrustPulse to WordPress to display real-time notifications
Now that the settings are complete on the TrustPulse site, it's time to link it to your WordPress site. And to do so, you must first get the TrustPulse plugin that you will install and activate.
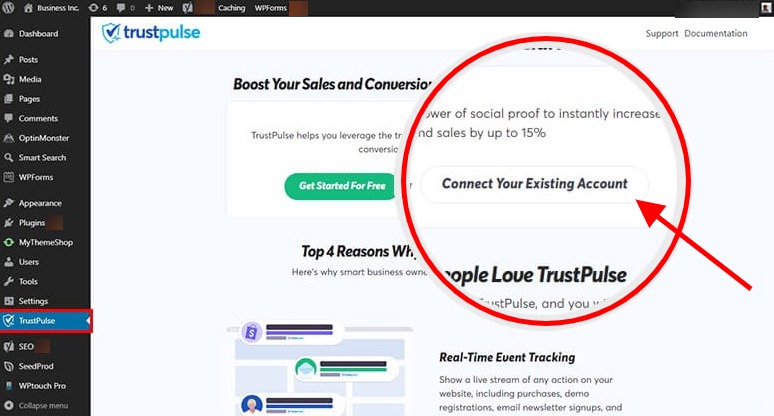
Then go to the TrustPulse menu from the dashboard and click on the Create Your Existing Account button to link to the account we created above.
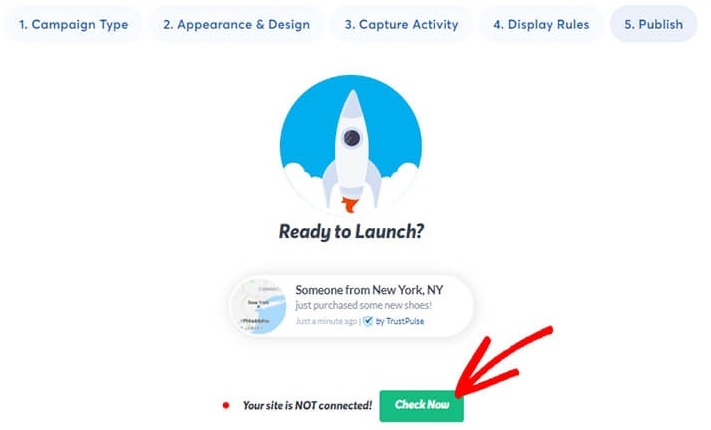
Now go back to your TrustPulse account and click on the Check Now button.
This will refresh the page and display a message indicating that the campaign is active.
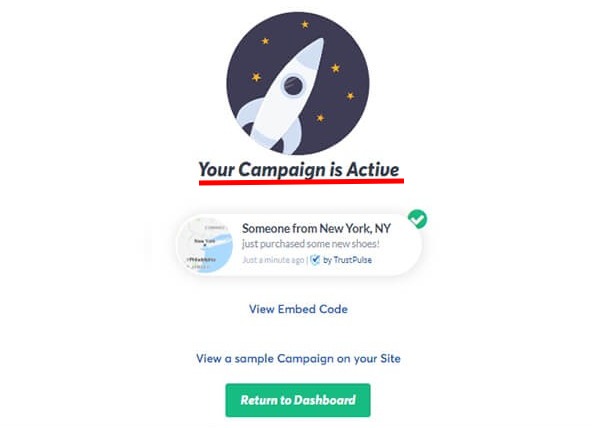
And There you go! Your TrustPulse campaign is now in action on your WordPress site.
We really hope you found this article helpful in integrating real-time notifications into your website. Please share it on your favorite social networks so that others can enjoy it as well.
You can follow us on Facebook and Twitter to be quickly informed of our publications.


