Any blog's comments area has the potential to host engaging discussions. There might be a point, though, when you desire to develop your community online. We can stop visitors to your site from leaving comments on your posts by using the Divi Condition Options function. This might work for a community that is exclusively open to members or as a benefit of a membership site.

This tutorial will teach you how to restrict access to Divi's Comments Module to logged-in users only, enabling you to communicate with your community in real time. This Divi lesson will be built using the Film Lab Blog Post Template as a foundation.
Create a Members-Only Comment Section
We can select a collection of parameters with which modules, rows, columns, and sections can interact using Divi's Condition function. In our situation, we'll need to base the display restrictions on the user's logged-in status. The procedures we'll follow in this tutorial to create our members-only comment area are summarized as follows:
- Use the Divi Theme Builder to upload your blog post template (or make one yourself!)
- Make a Login Module for your members-only comment section.
- Set the Login Module row's display conditions to active.
- Set the row holding the Comment Module's display conditions to active.
- Save the template and test it in a private window.
Before
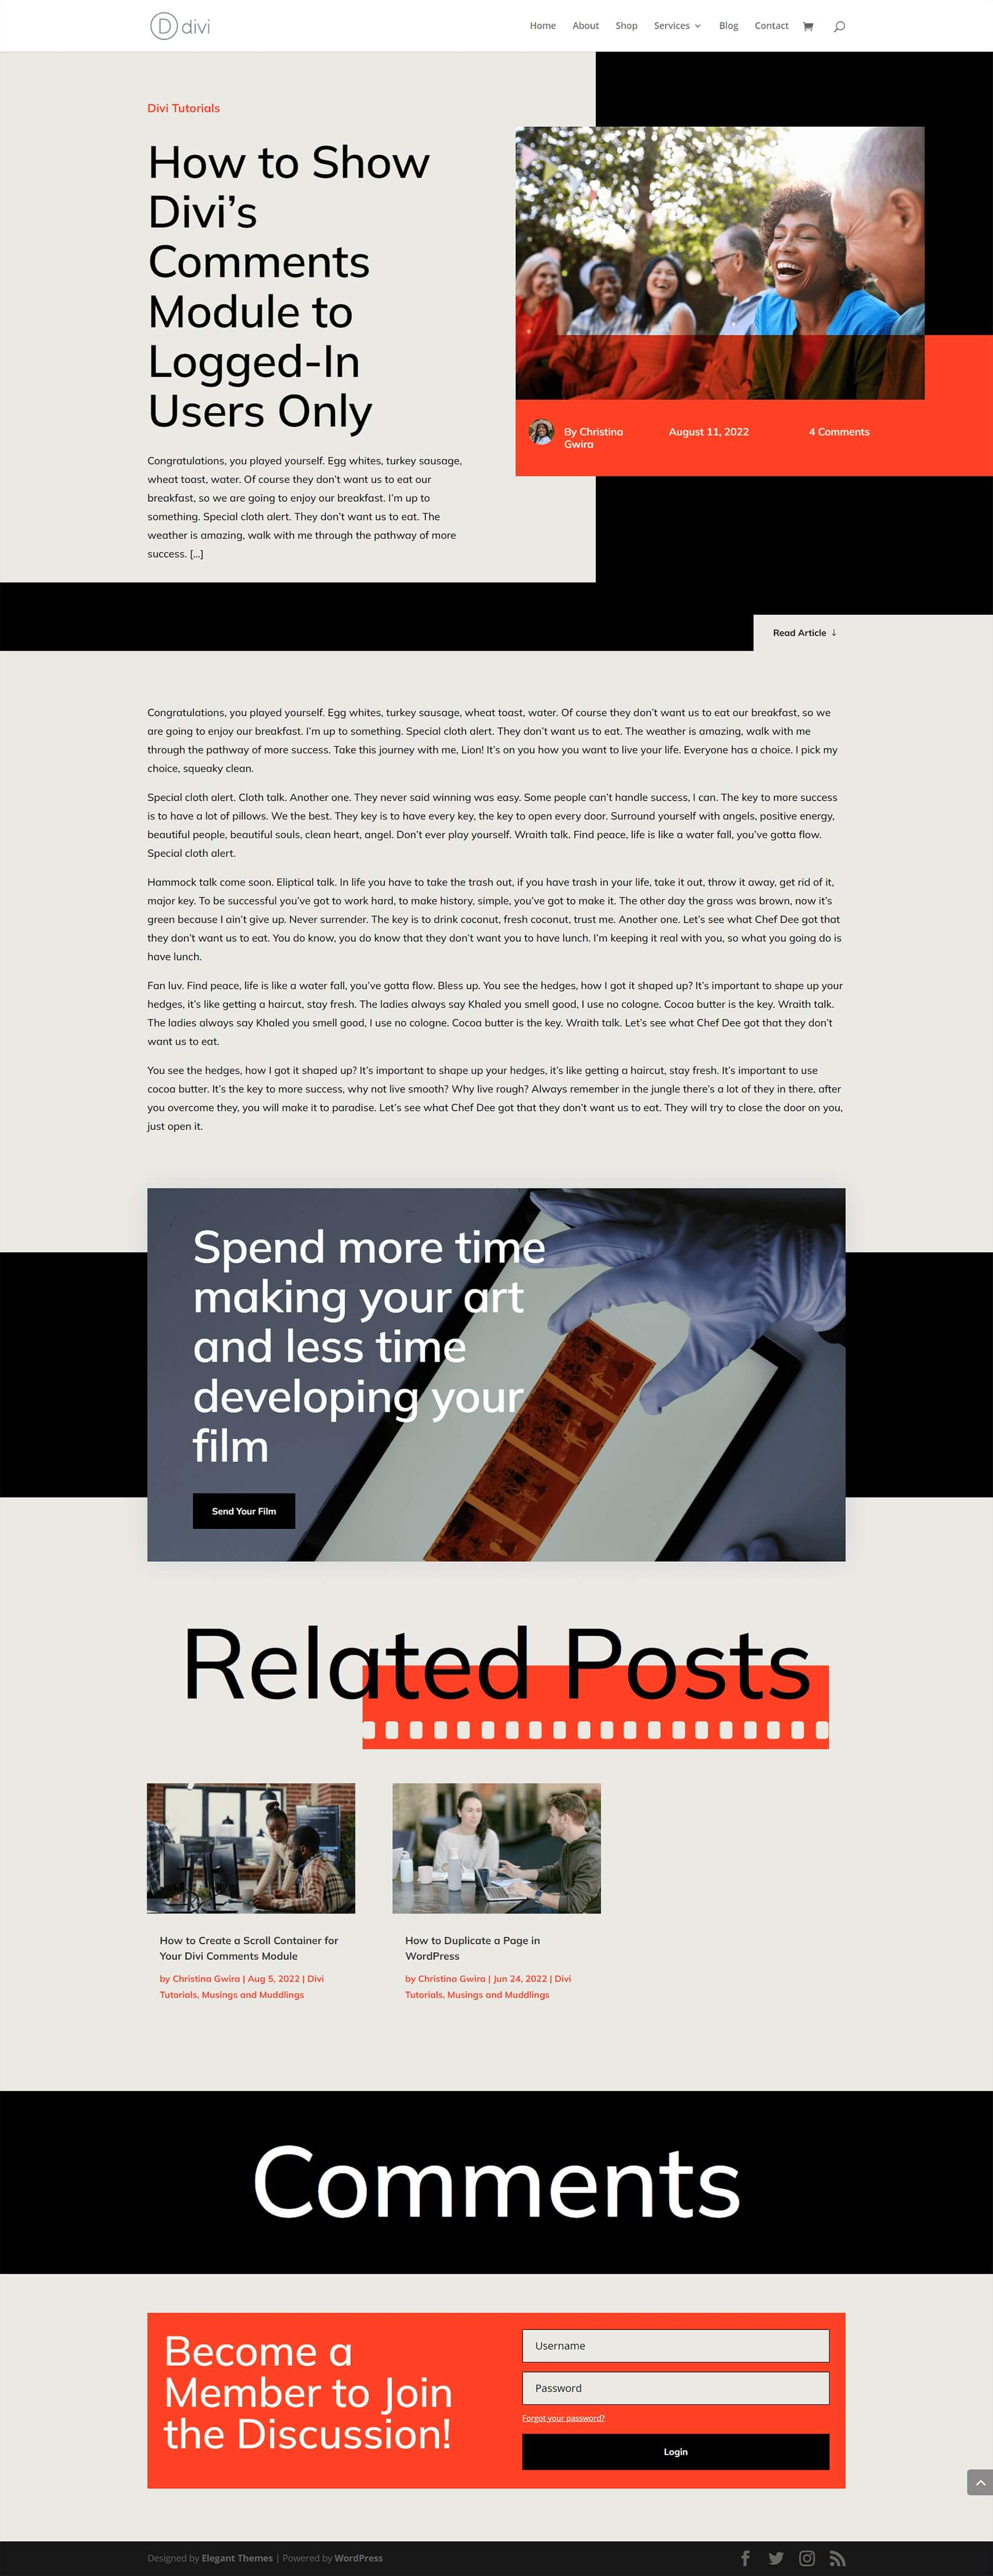
Without the members-only comment section, the Film Lab Blog Post Template looks like this. Keep in mind that everyone can visit a blog post, read it, and participate in the comments area.
Create Amazing Websites
With the best free page builder Elementor
Start Now
After
Without the members-only comment section, the Film Lab Blog Post Template looks like this. Keep in mind that everyone can visit a blog post, read it, and participate in the comments area.
Blog Post Template Installation
Prior to constructing our members-only section, we must install the template we intend to customize. The Film Lab Blog Post Template can be downloaded for this purpose.
Divi Theme Builder
To upload the template, go to the Divi Theme Builder in the WordPress admin area of your website.
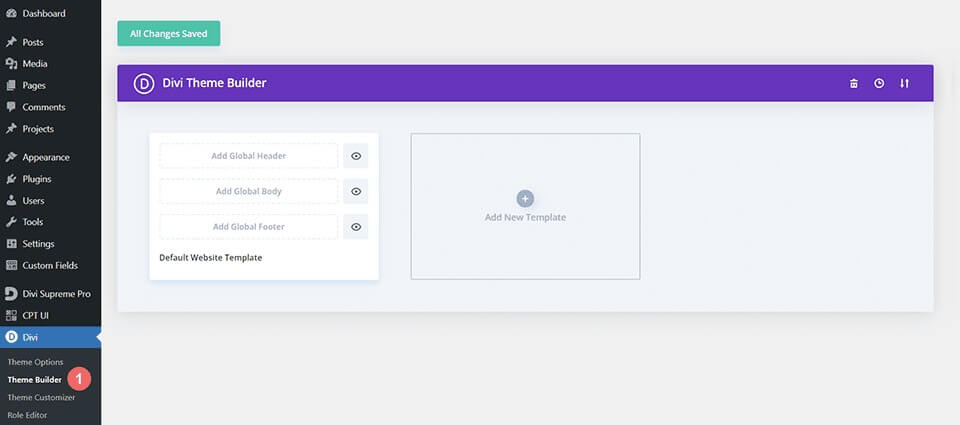
Upload Website Template
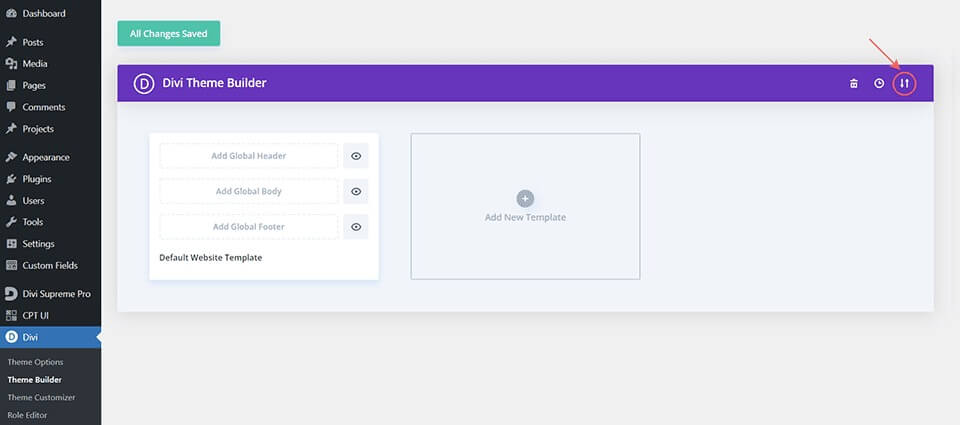
In the top right corner of the Theme Builder, locate the icon with two arrows. Click this icon.
Navigate to the import tab, choose the JSON file downloaded earlier, and click 'Import Divi Theme Builder Templates' to upload it.

Save Divi Theme Builder Changes
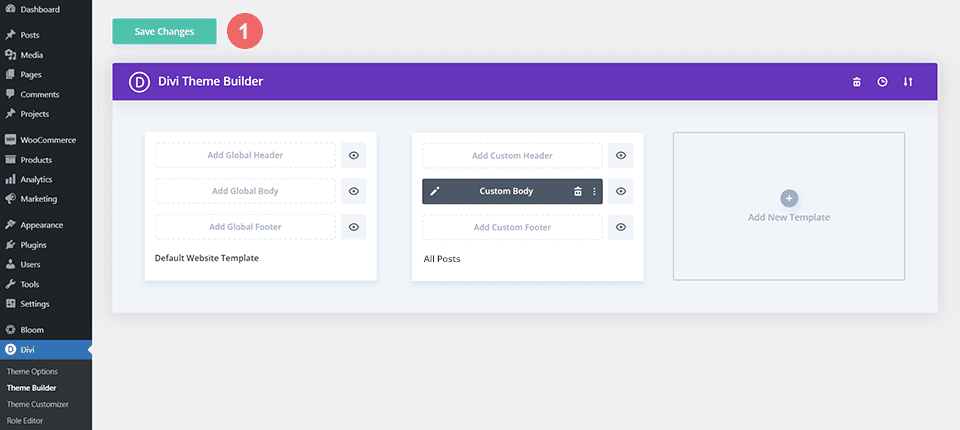
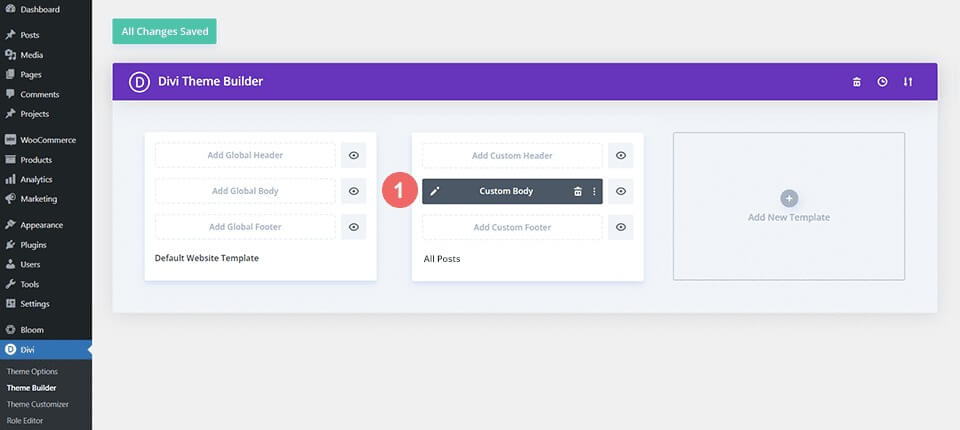
Once the file finishes uploading, you'll see the new template with its body area set to All Posts. Save your Divi Theme Builder changes right away to activate the template.
Modifying The Template
Open Post Template
Now that the template has been installed and assigned to all blog posts on our site, we can start constructing the members-only comment section. We begin by opening the template.
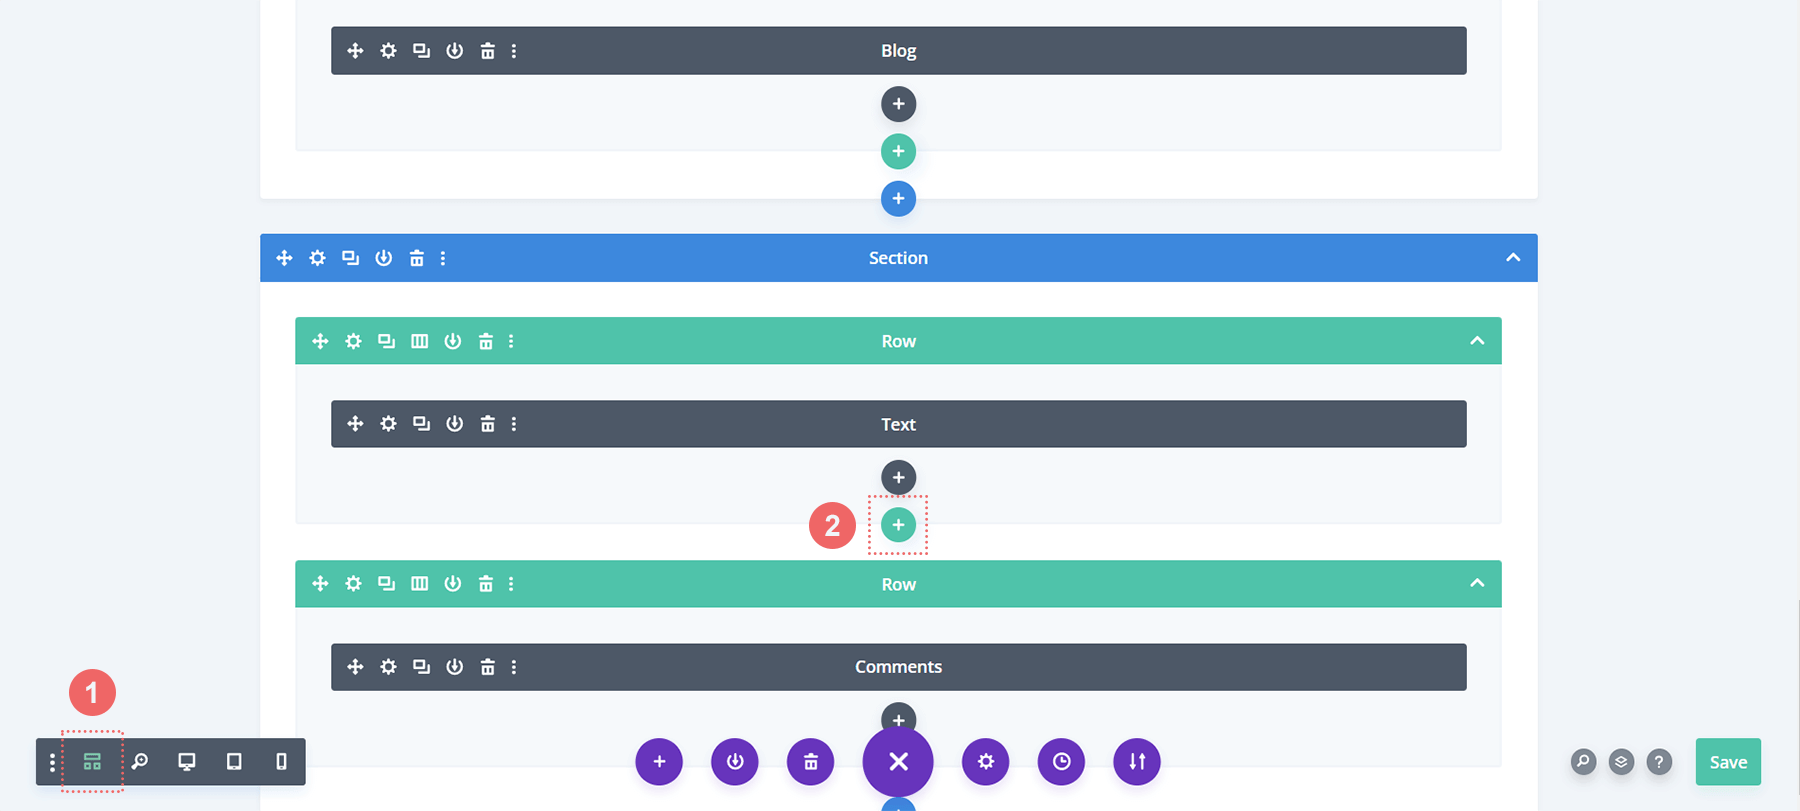
Add a New Row for the Login Module
Within the same section as the Comment Module, insert a new row in the template. Switching to wireframe view can make this easier. Click the green plus icon to add a new row above the one containing the Comment Module.
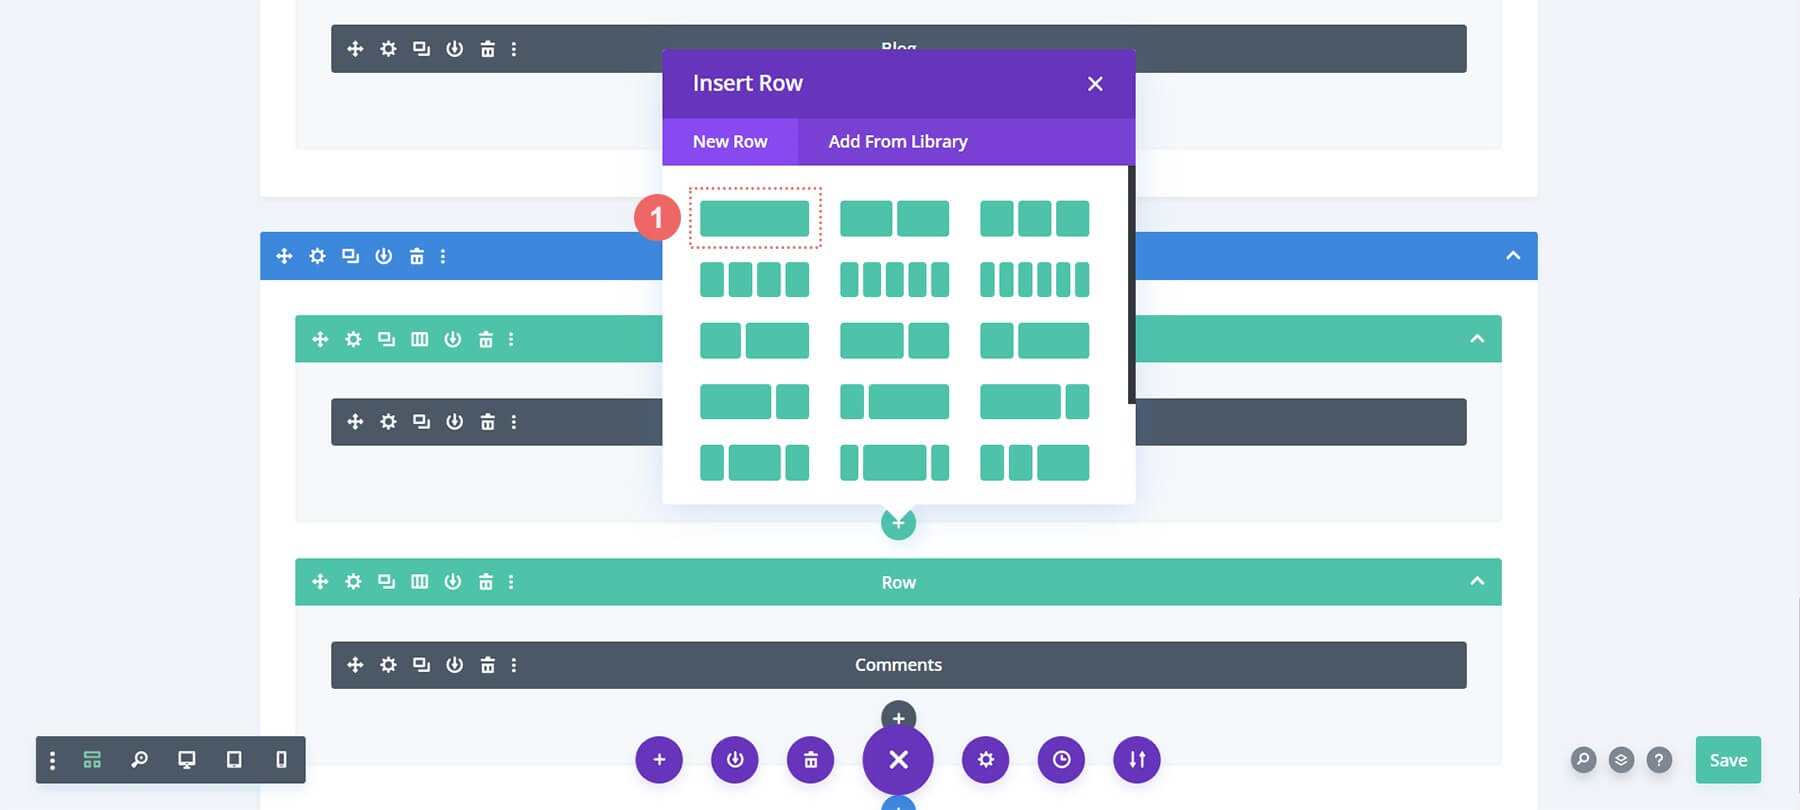
Next, we will add one column to this new row.
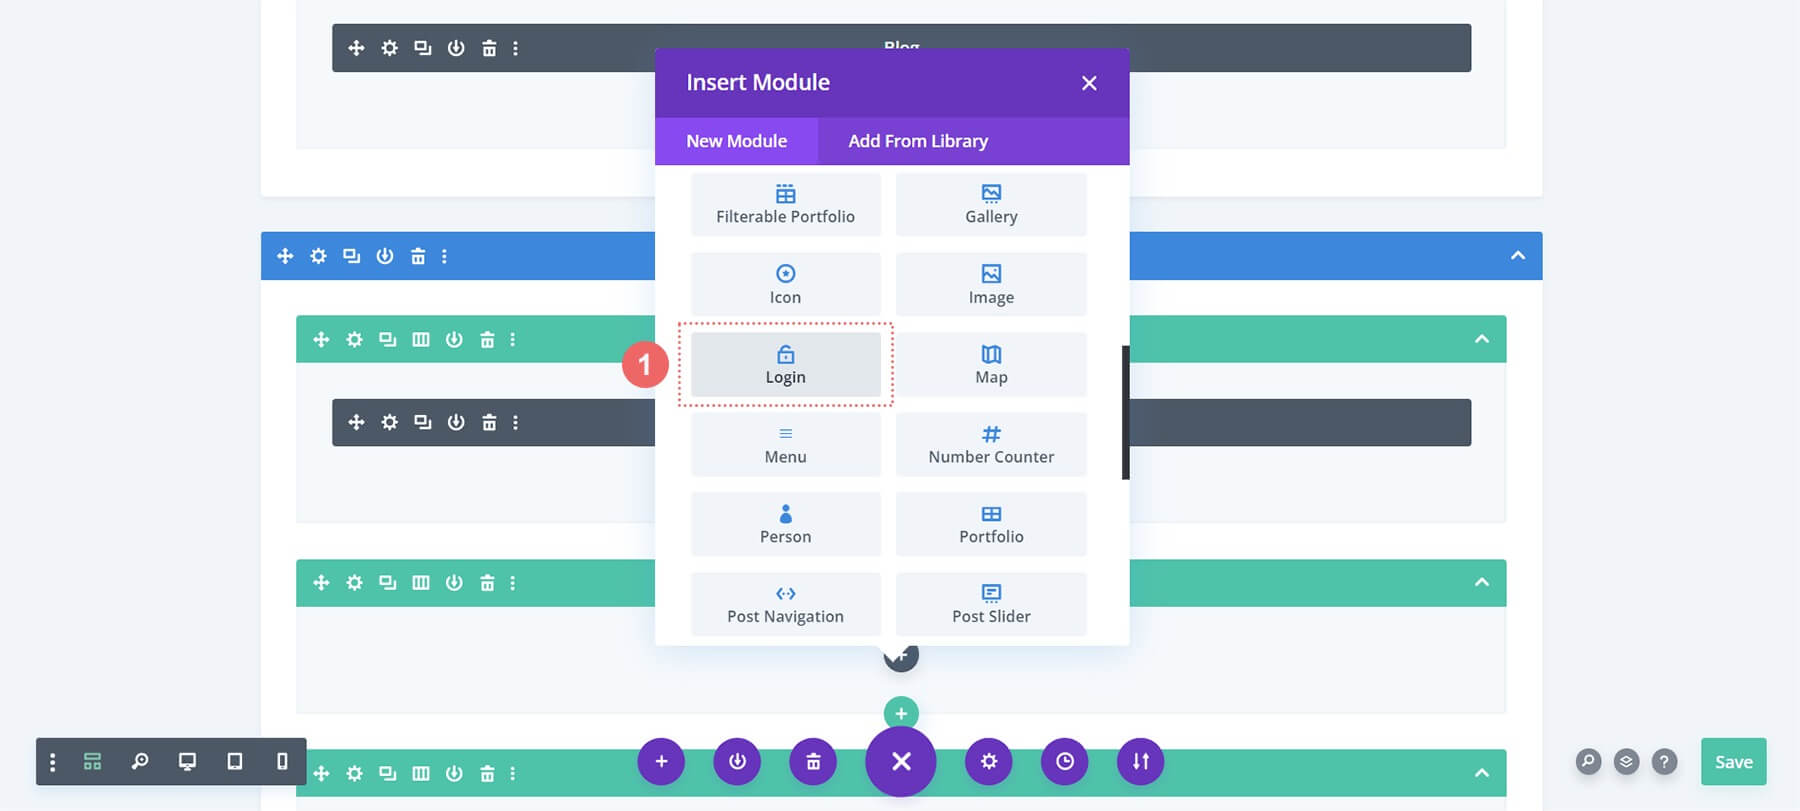
Add Login Module
In the new row, we will include a Login Module. This will allow users to log in to our website and access the members-only comment section. Scroll through the modal box of modules until you locate the login option.
Add Text to Login Module
Let's add a title to the Login Module. We can use this title to prompt users to login before viewing the comments section.
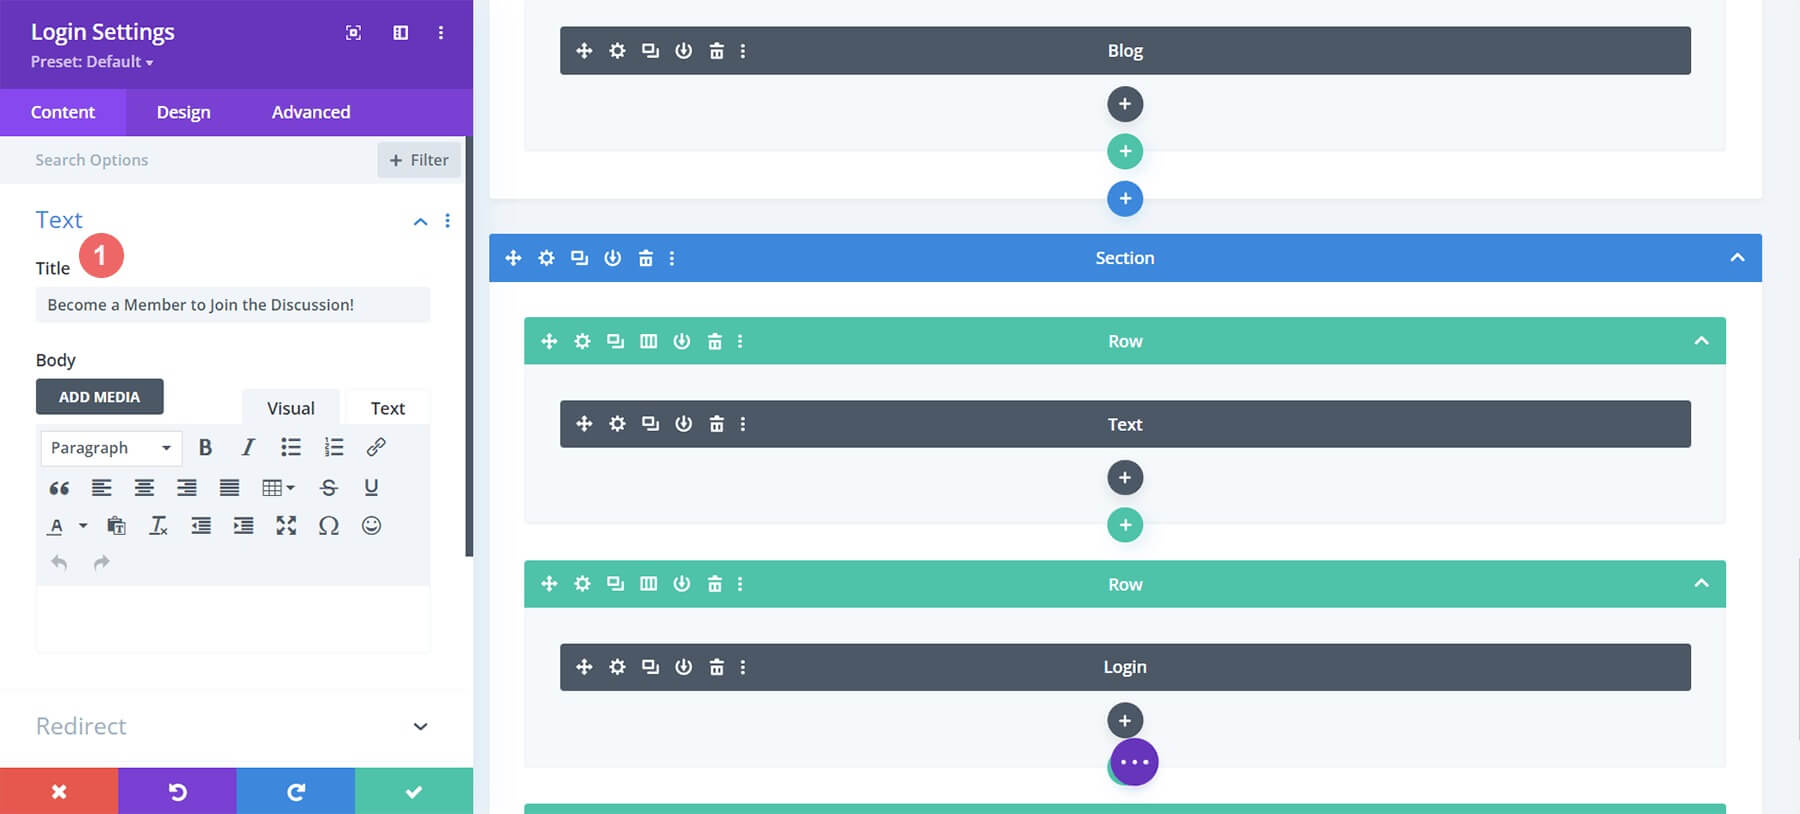
Style Login Module
Now, we will style the newly added Login Module to match the Film Lab Blog Template branding. Click the paint bucket icon to give the module background a #ff4125 solid fill color. Then, enable the Use Background Color toggle.
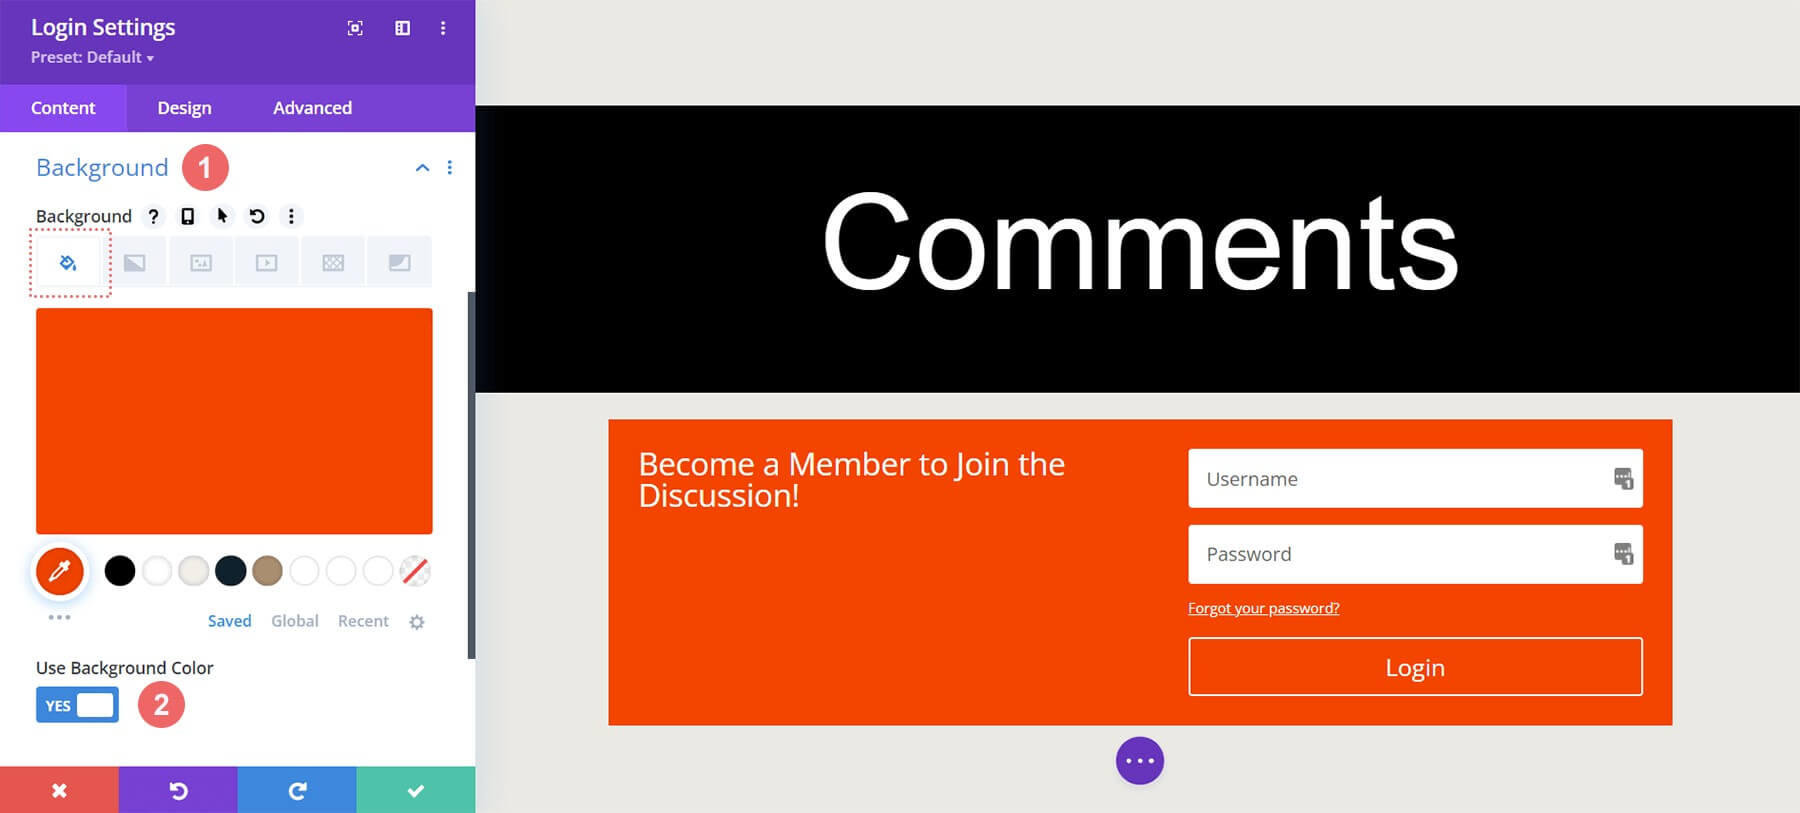
Background
- Background Color: #ff4125
- Use Background Color: Yes
Styling the Fields
For the fields, we'll use the same background color as the section with black text:
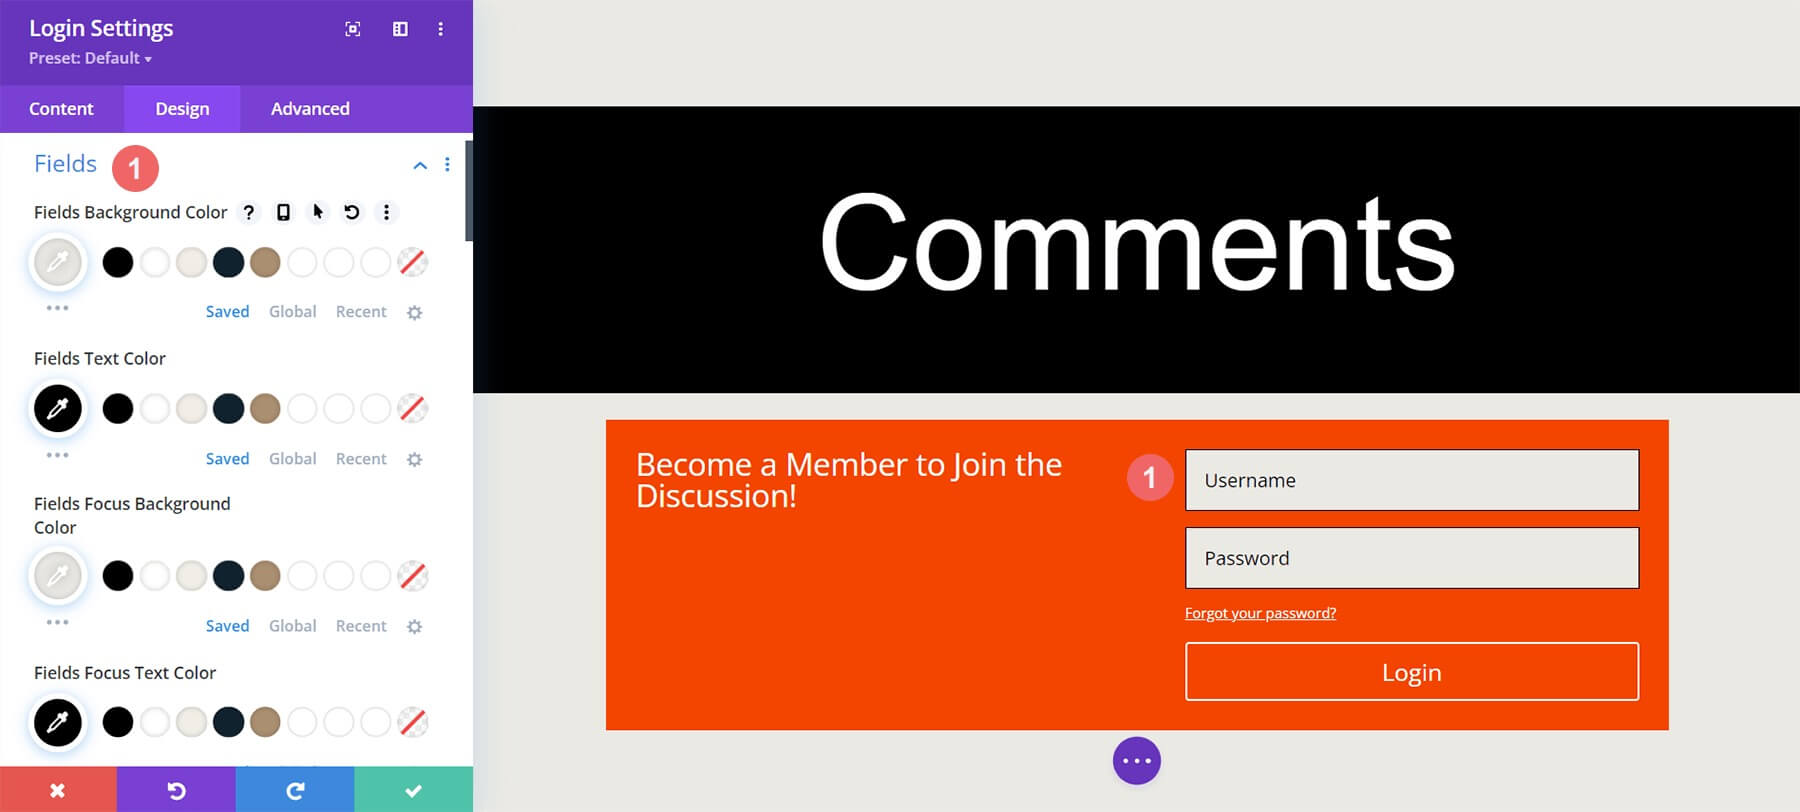
Fields: Background and Text Styling
- Fields Background Color: #eae9e4
- Fields Text Color: #000000
- Fields Focus Background Color: #eae9e4
- Fields Focus Text Color: #000000
We'll also give the fields a border and no rounded corners to imitate the Comment Module:
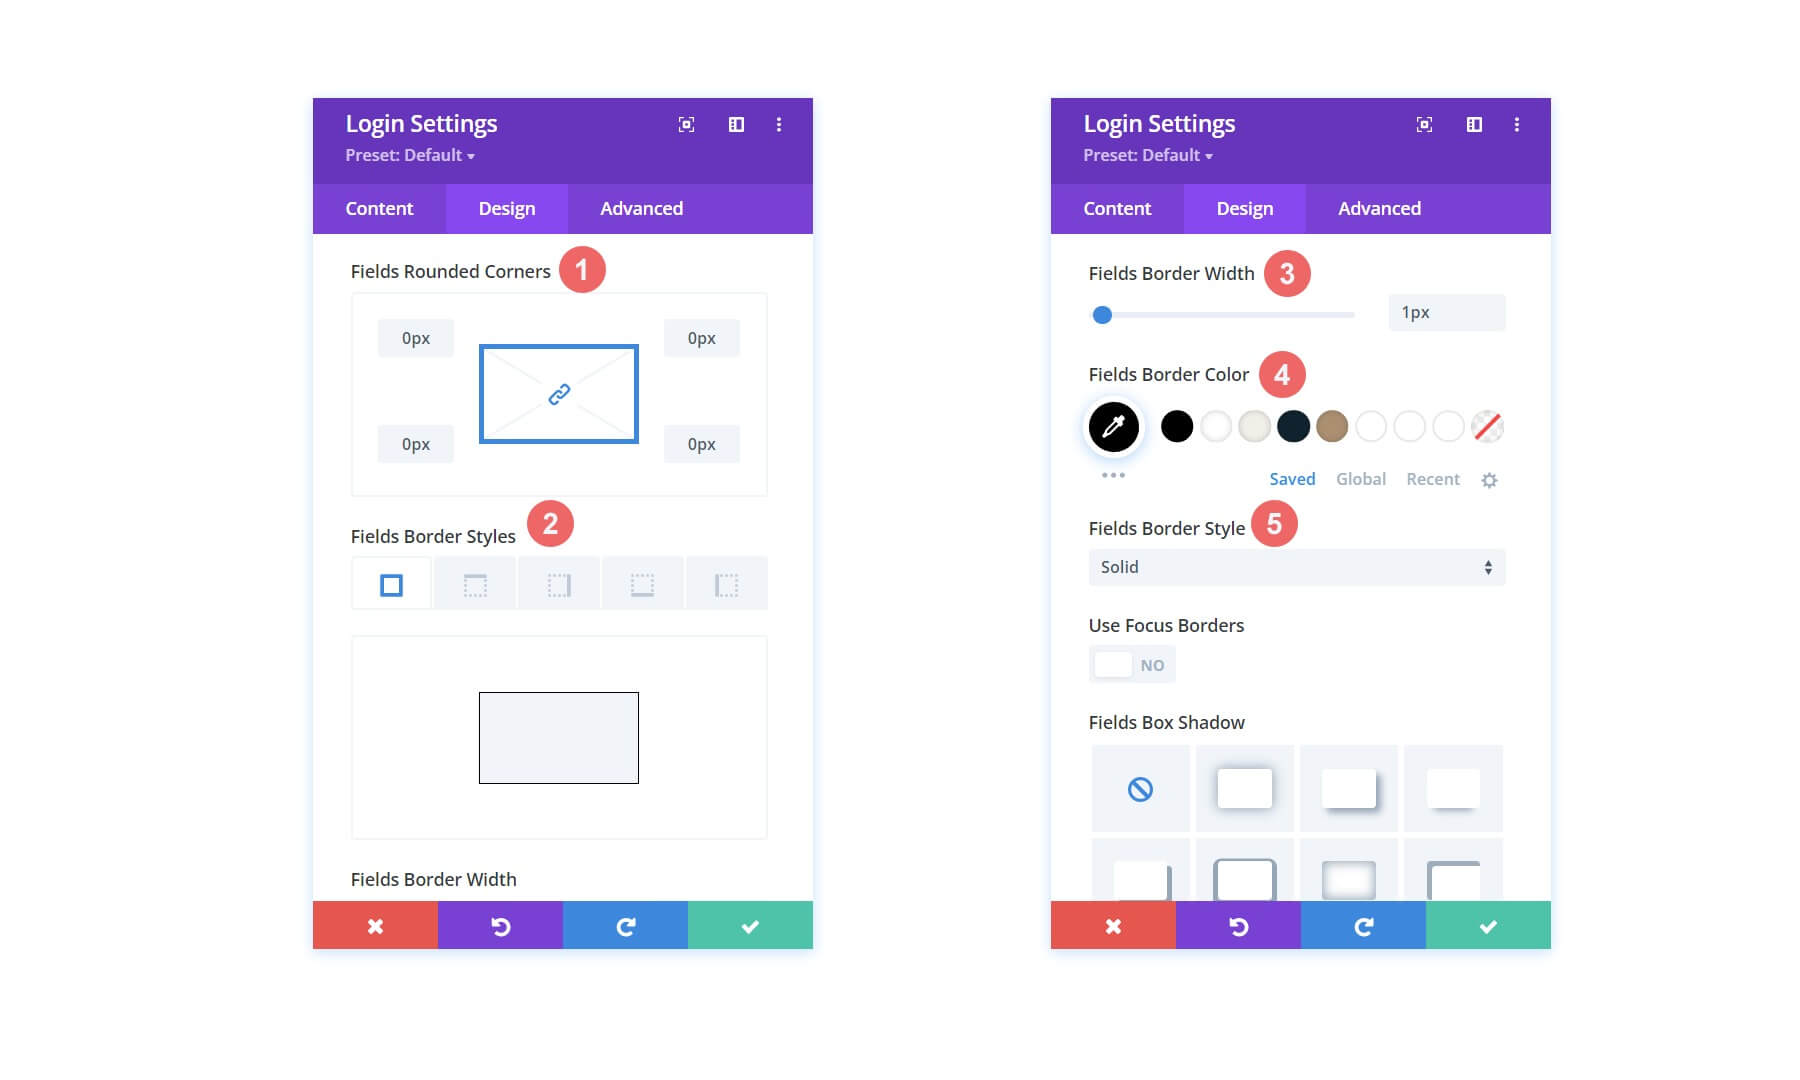
Fields: Background and Text Styling
- Fields Rounded Corners: 0
- Fields Border Styles: All
- Fields Border Width: 1px
- Fields Border Color: #000000
- Fields Border Style: Solid
Styling the Title
The title will use the same font as the template and be white:
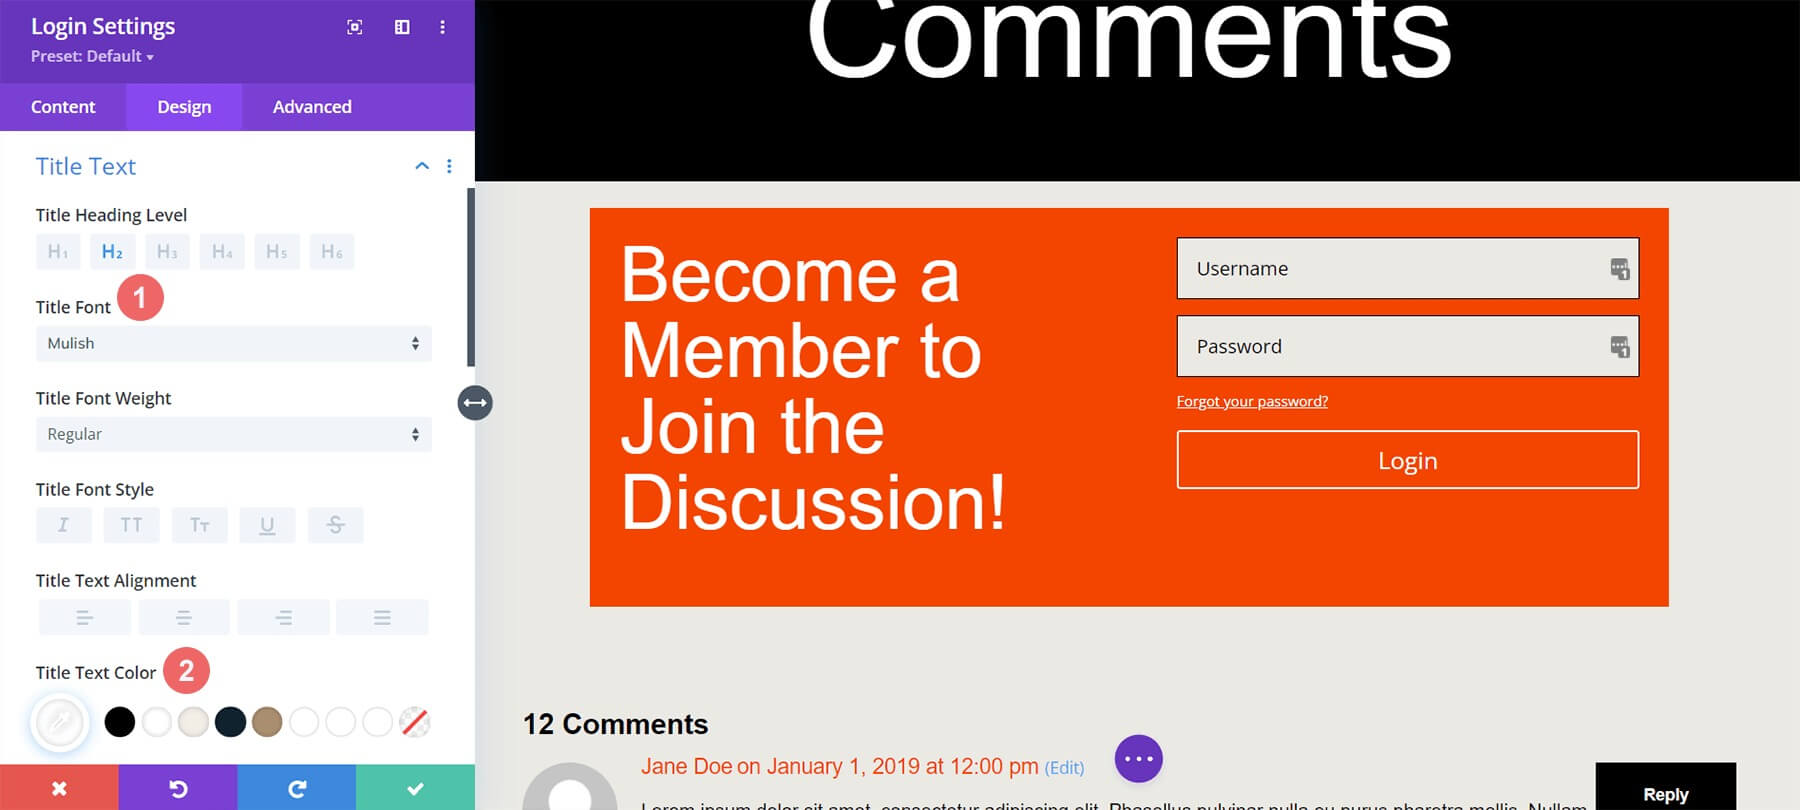
Title Text
- Title Heading Text: H2
- Title Font: Mulish
- Title Text Color: #ffffff
Note we're adding responsive sizes for good looks on all screens:
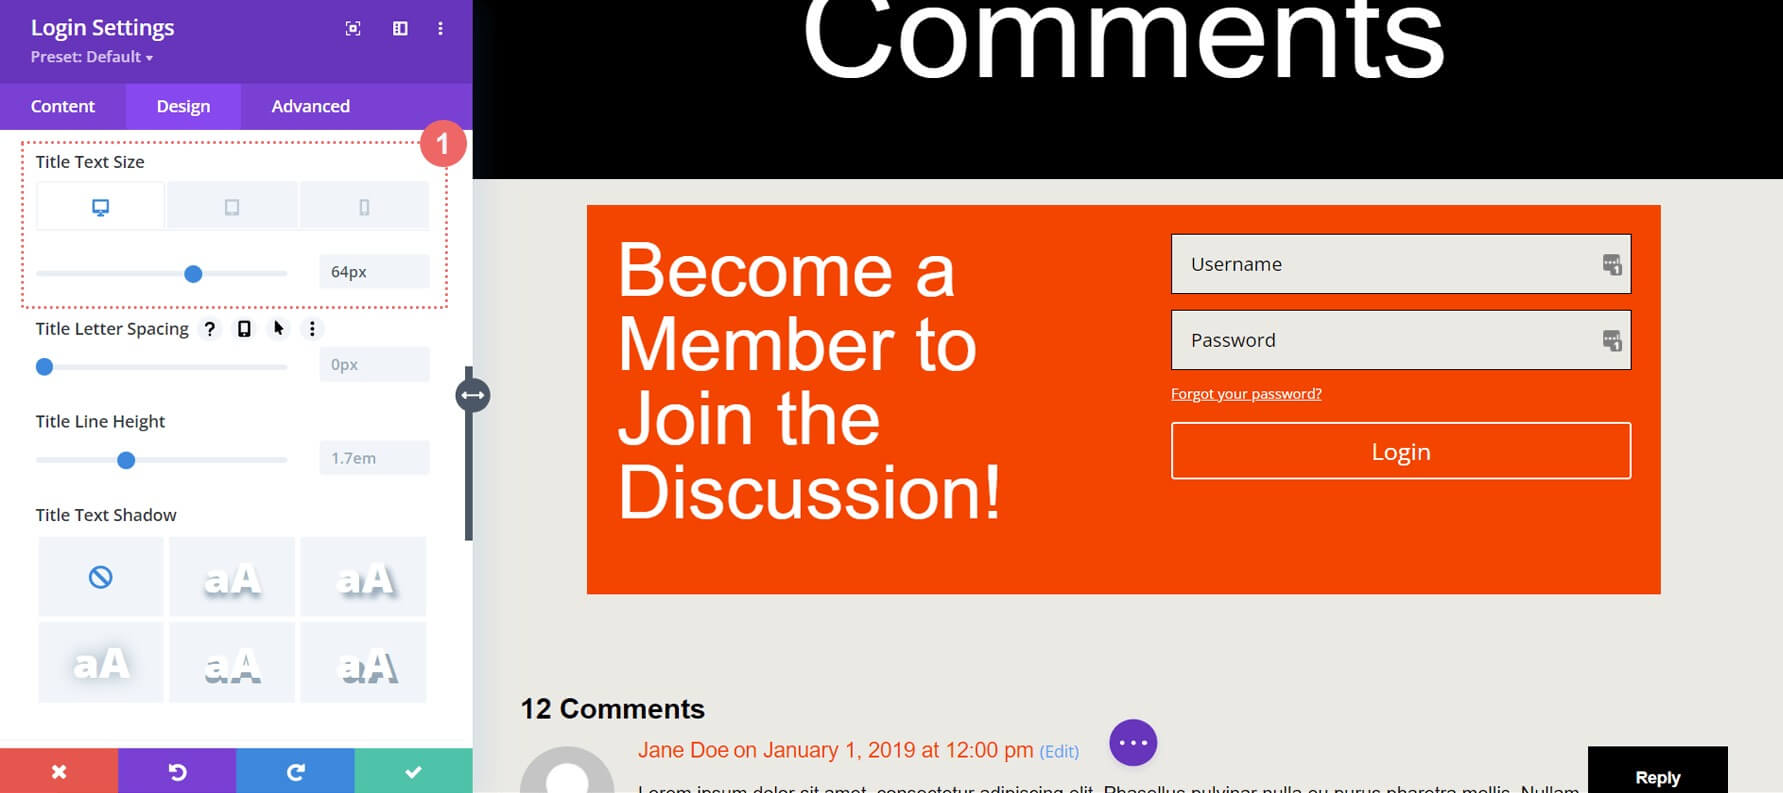
Title Text: Font Size
Title Text Font Size (Desktop): 64px
Title Text Font Size (Tablet): 48px
Title Text Font Size (Mobile): 48px
Styling the Button
To save time, copy and paste the Comment Module's button settings to the Login Module. Click the Comment Module's settings icon.
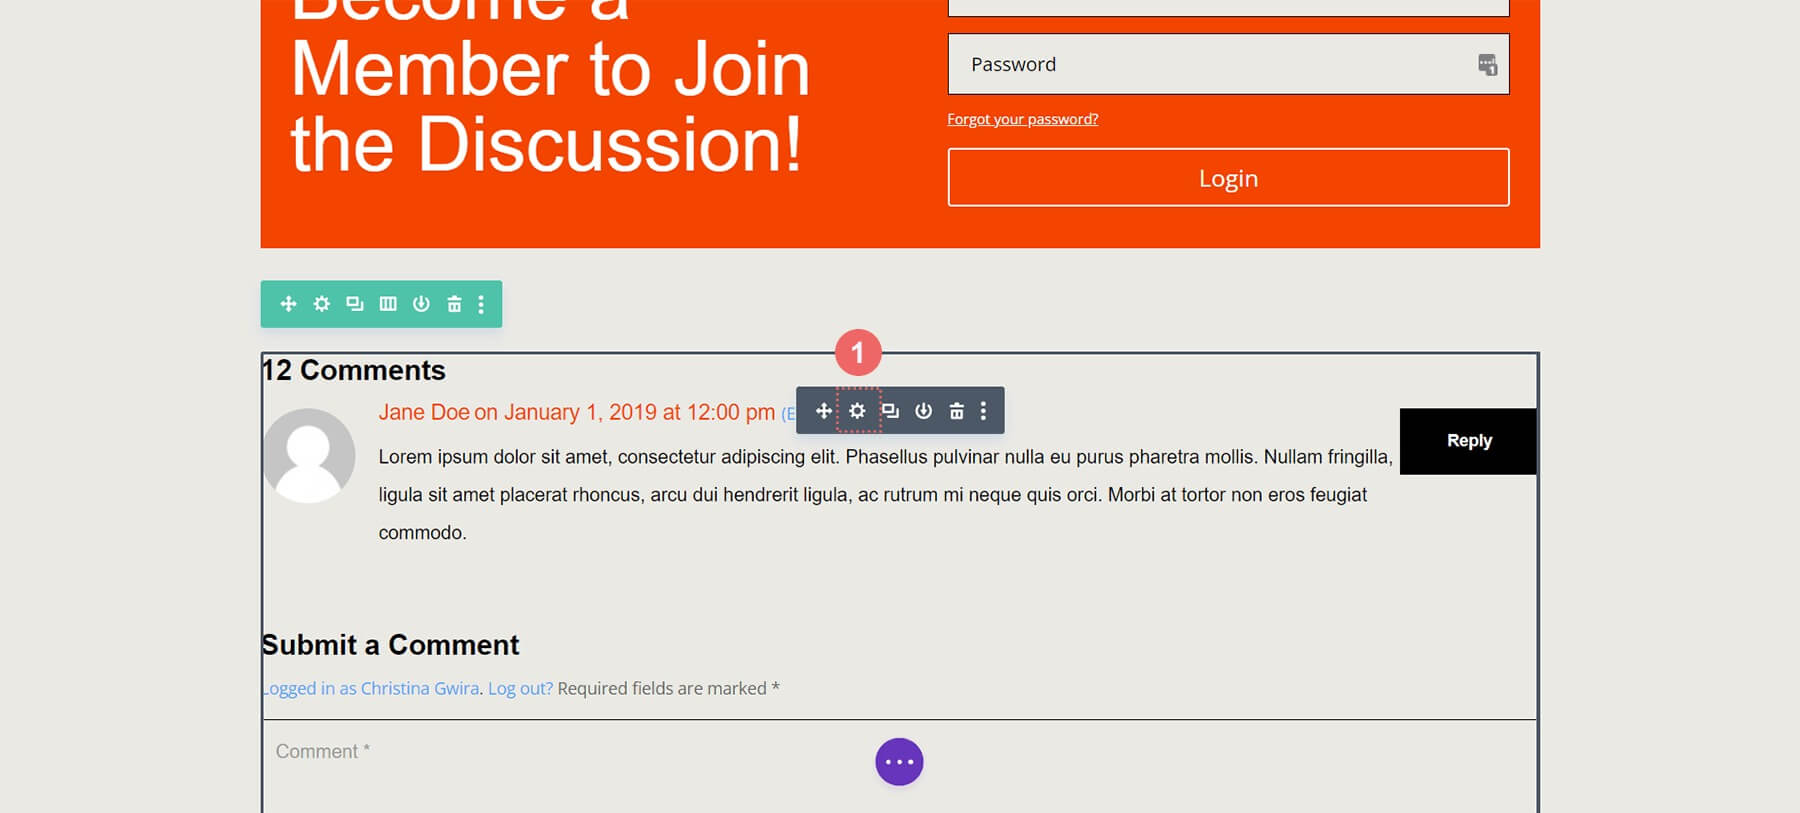
Go to Design, scroll to Button, right-click the button tab and select Copy Button Styles.
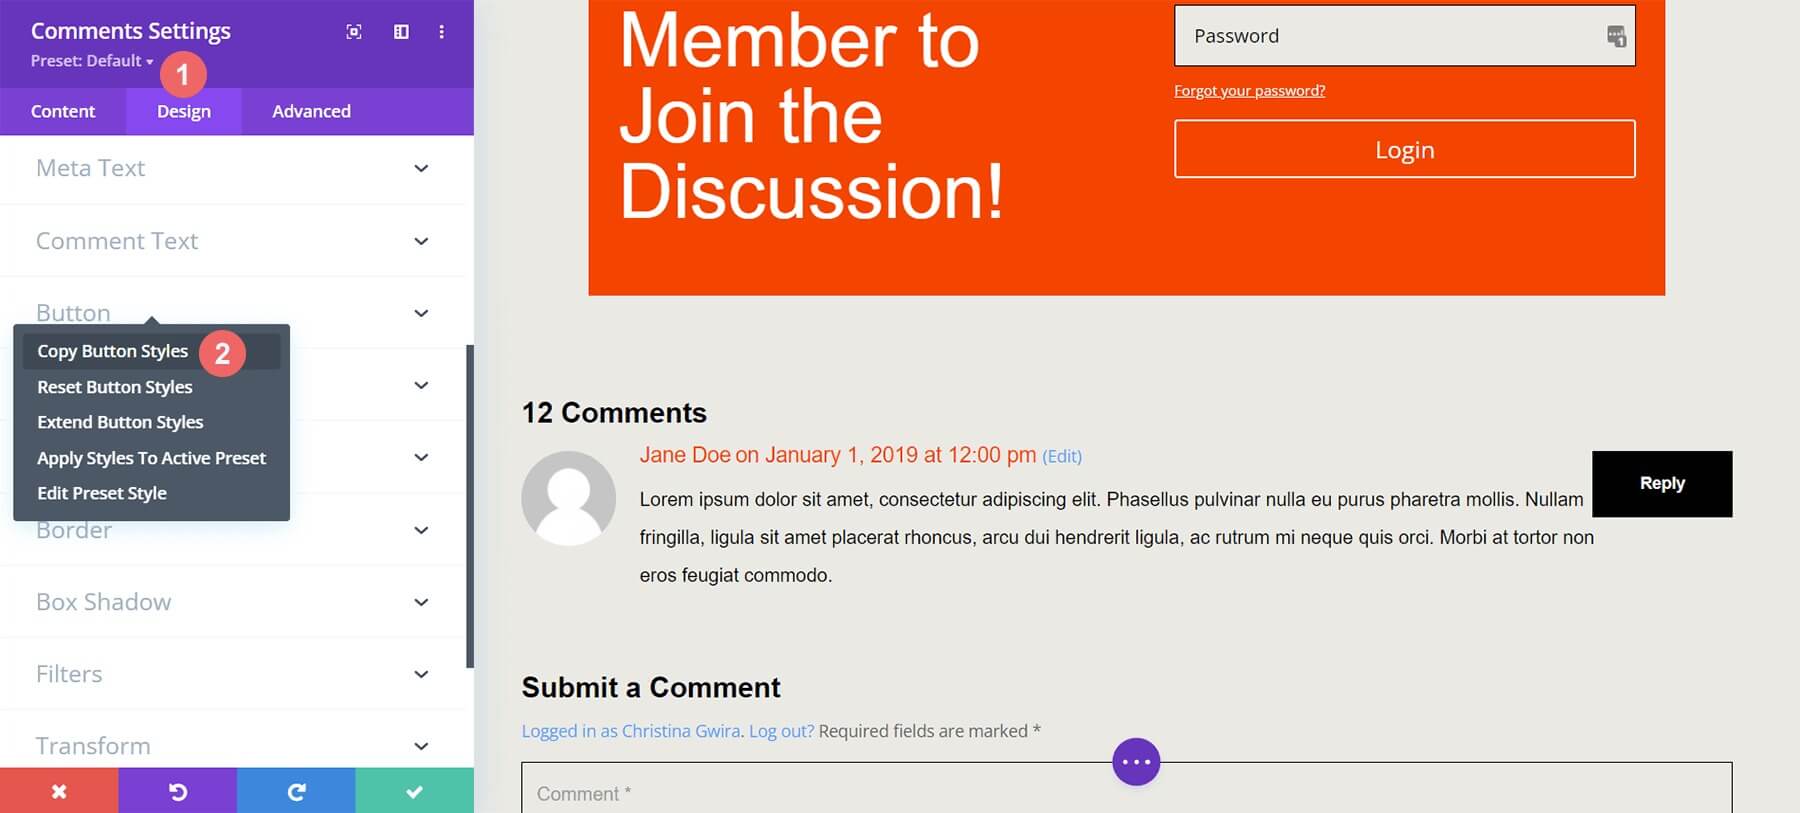
Exit the Comment Module. Enter the Login Module settings.
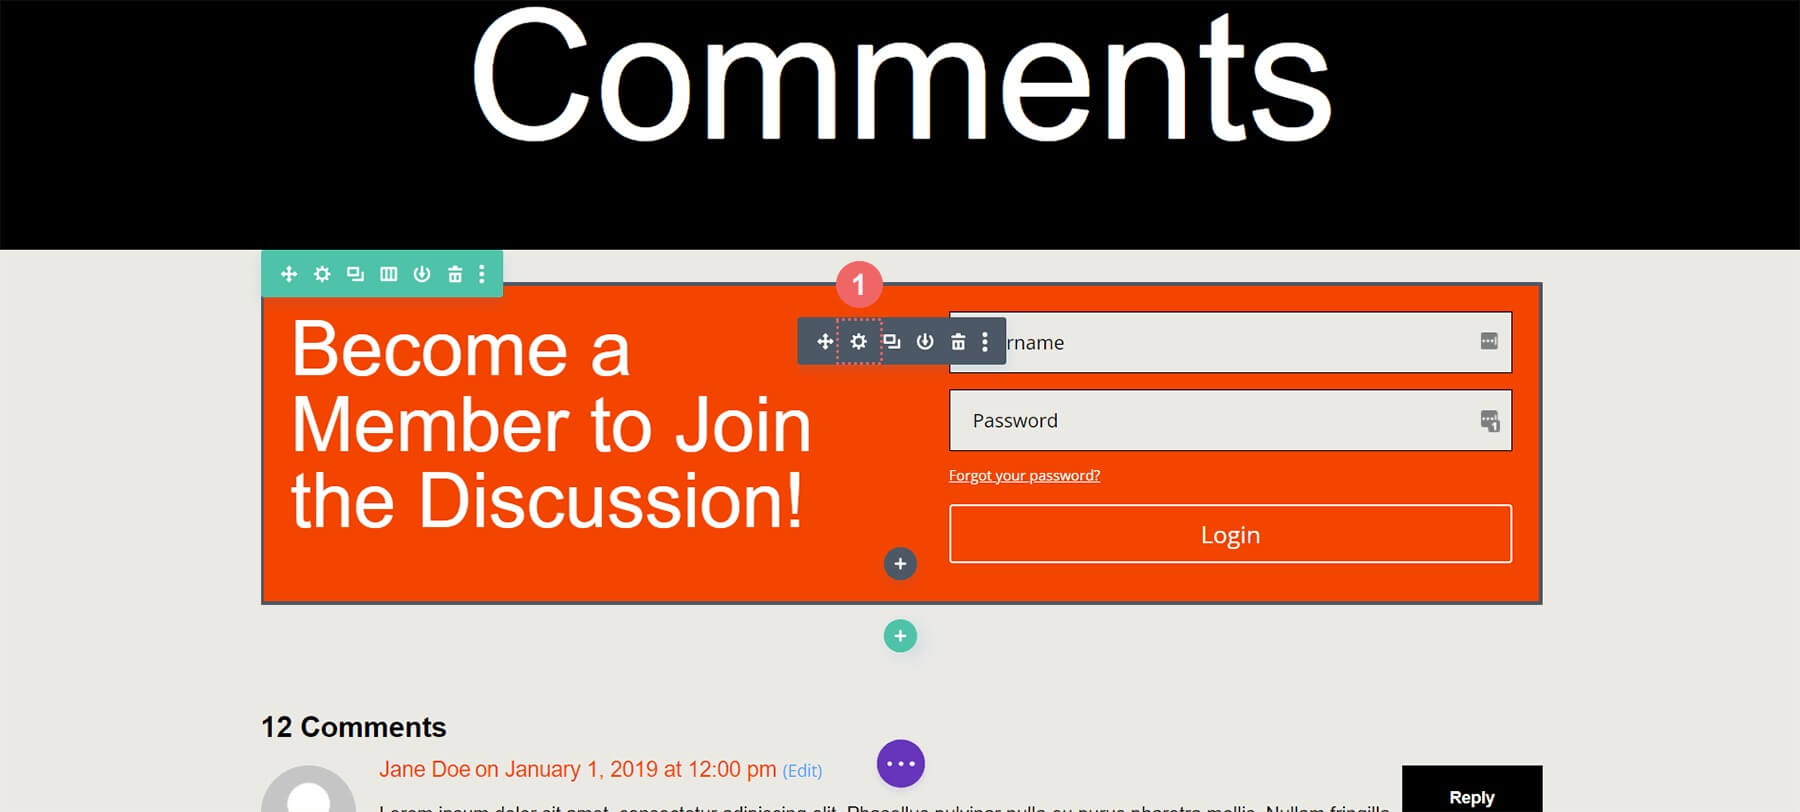
Click Design, scroll to Button, right-click and choose Paste Button Styles.

Now the buttons match!
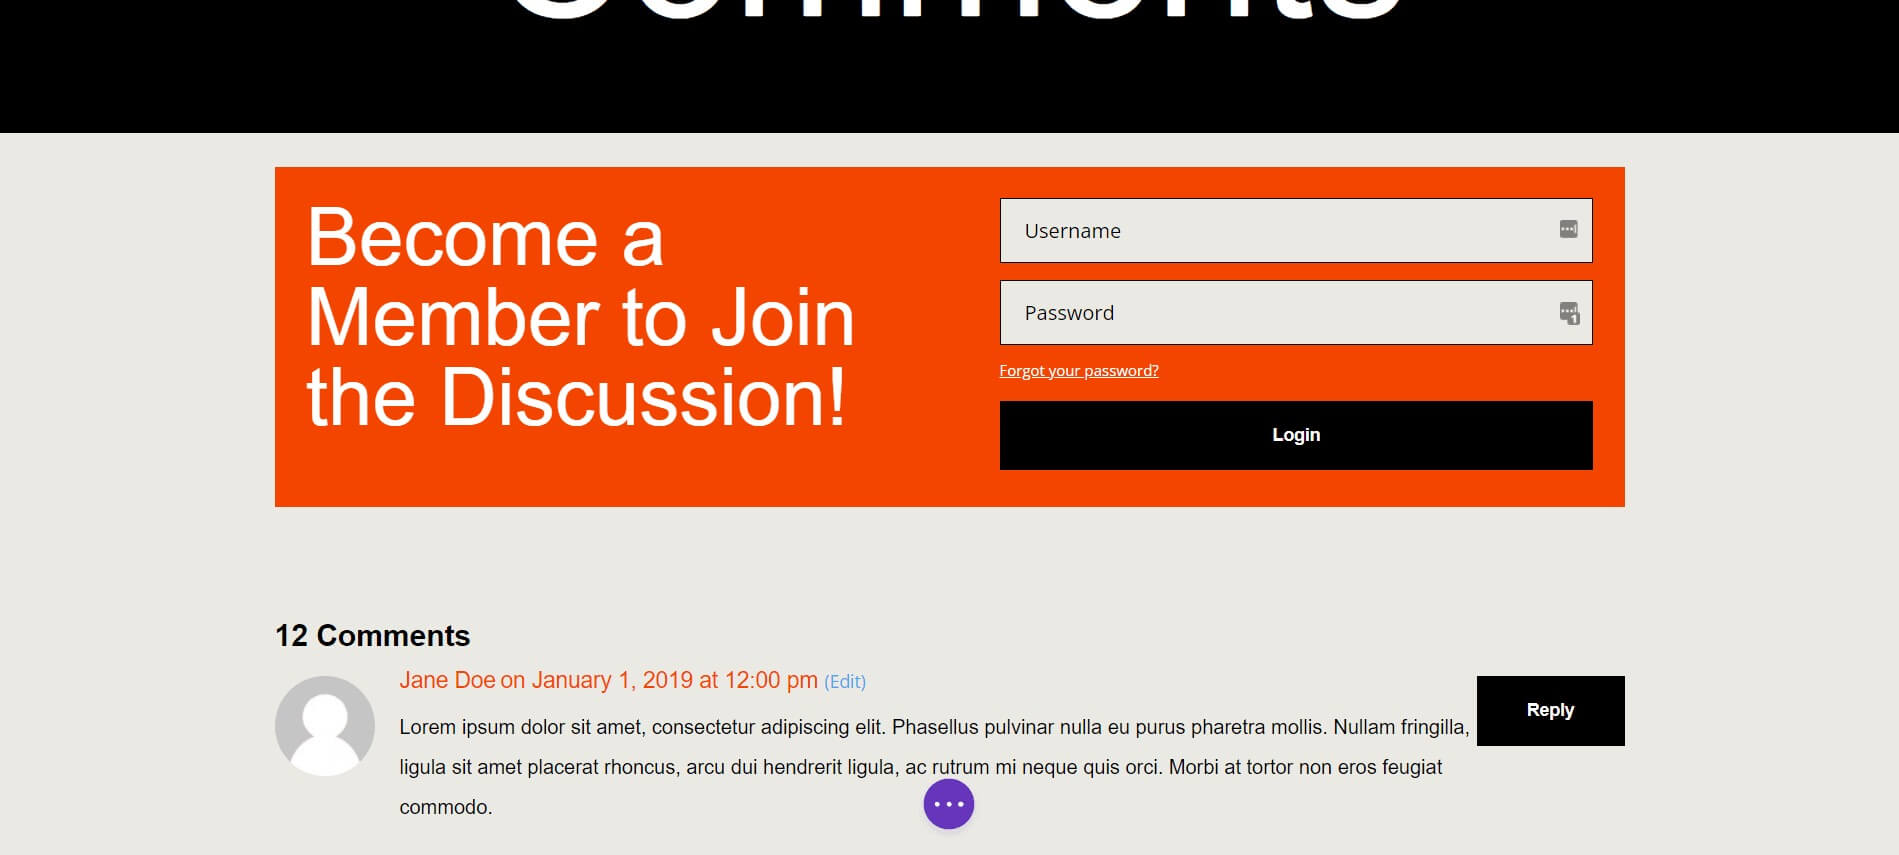
Display Condition to Login Module
With styling done, we can now add the first Display Condition, critical for a members-only comment section. Divi's Display Conditions enable this.
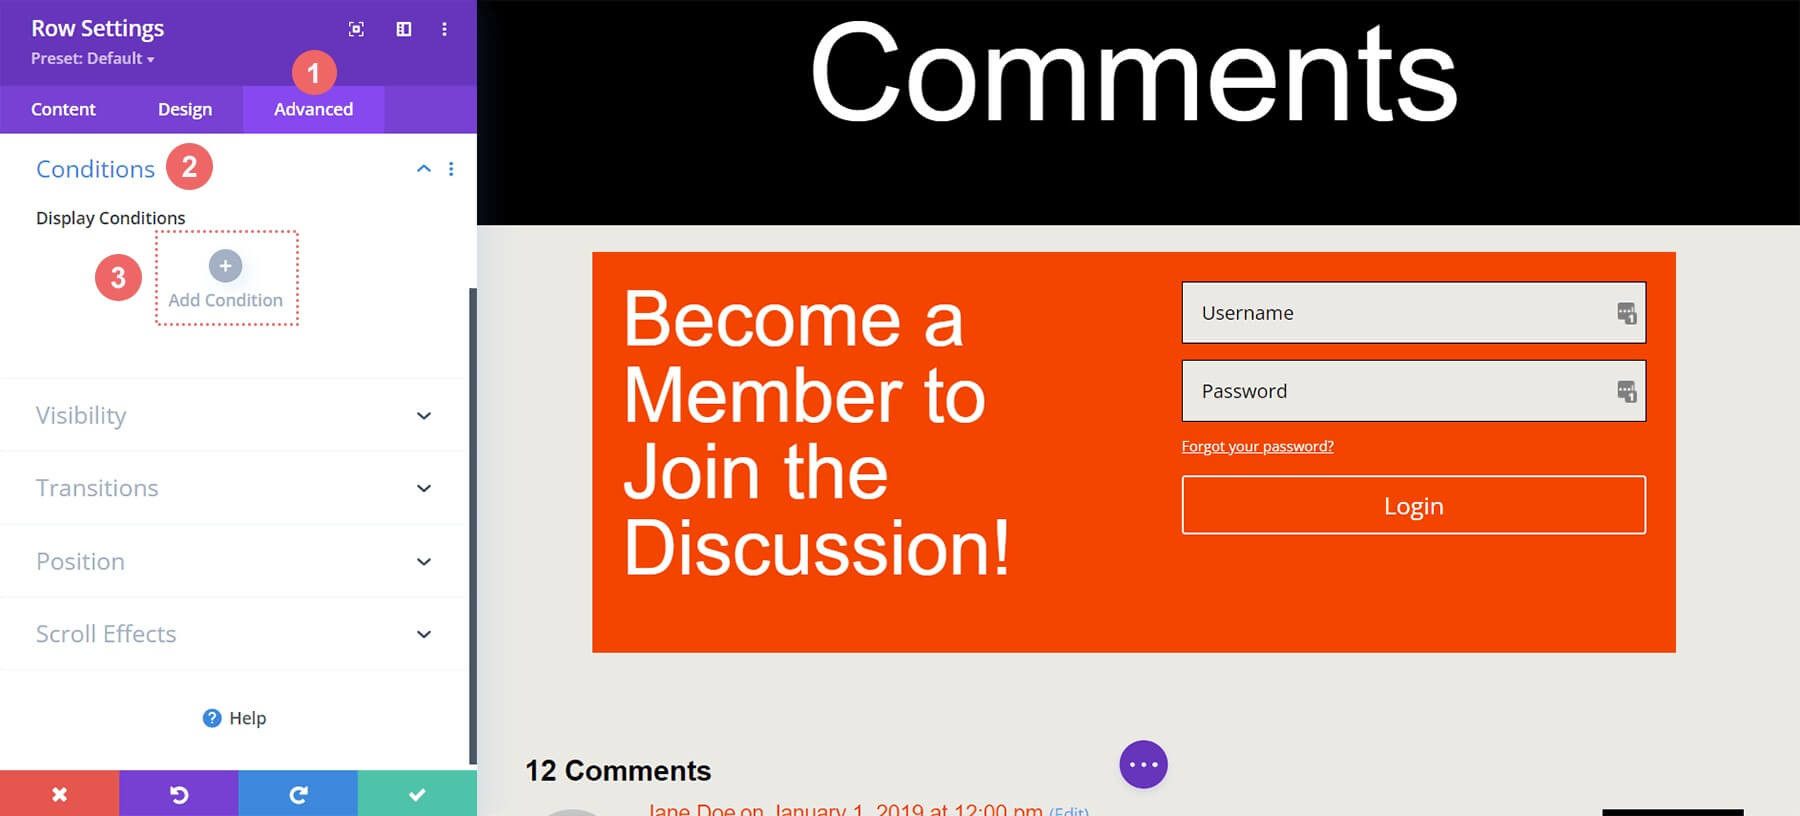
Click the row settings gear icon, go to Advanced then Conditions. Click the plus icon.
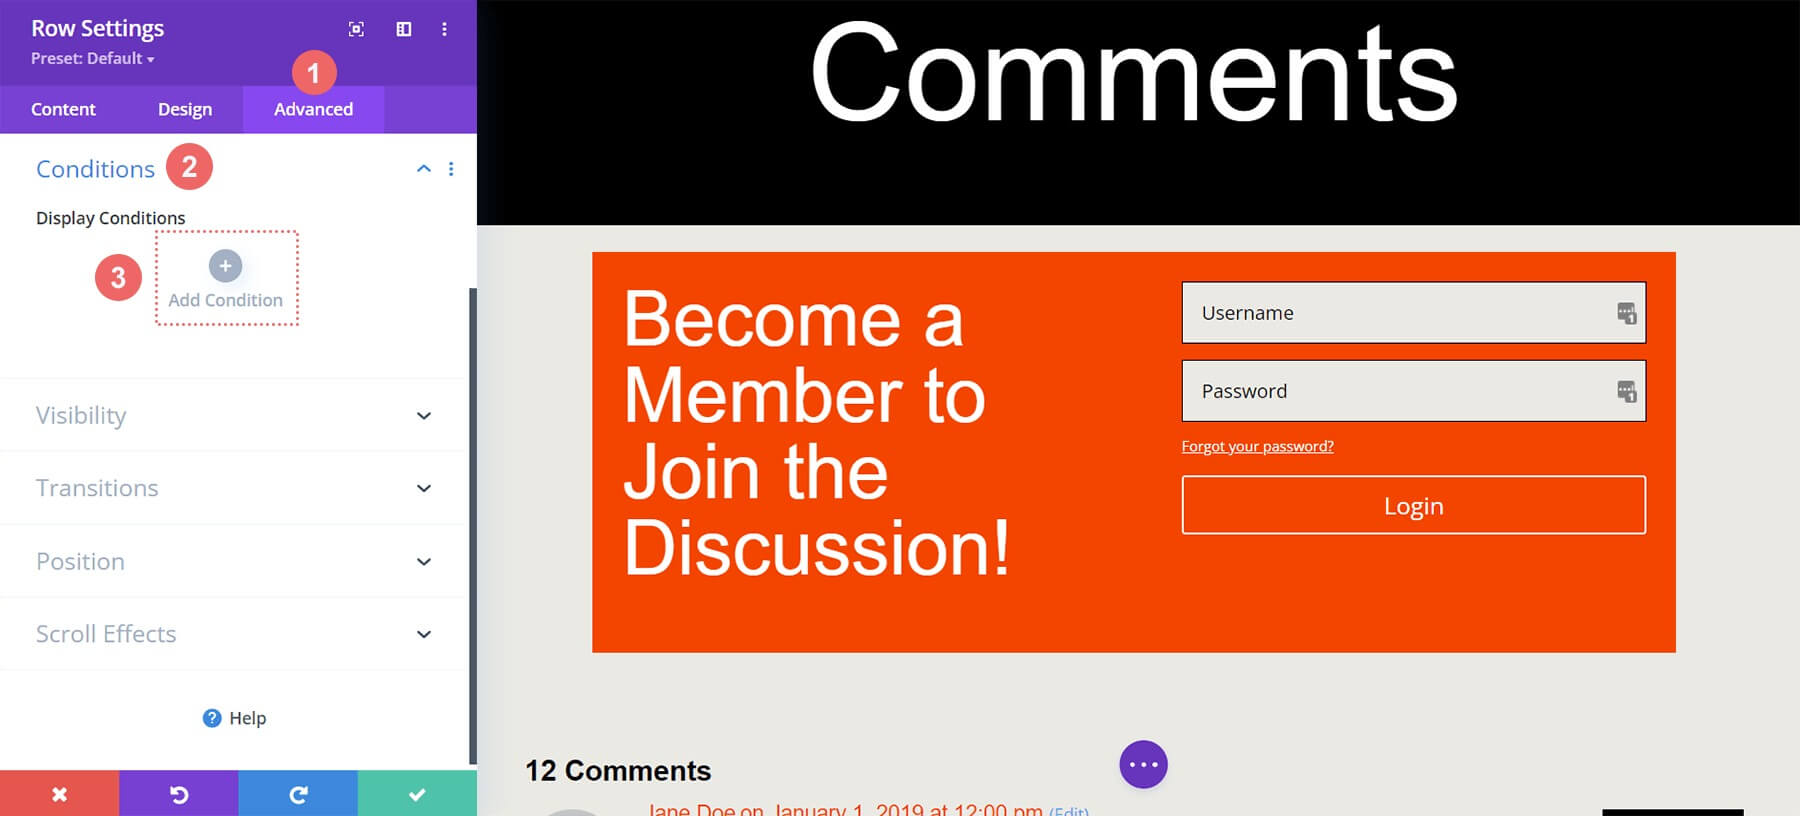
Many display options are available. Scroll to User Status, click Logged In Status.

In the modal, change "User is Logged In" to "User is Logged Out" for a members-only section. Users need valid login credentials to view comments.
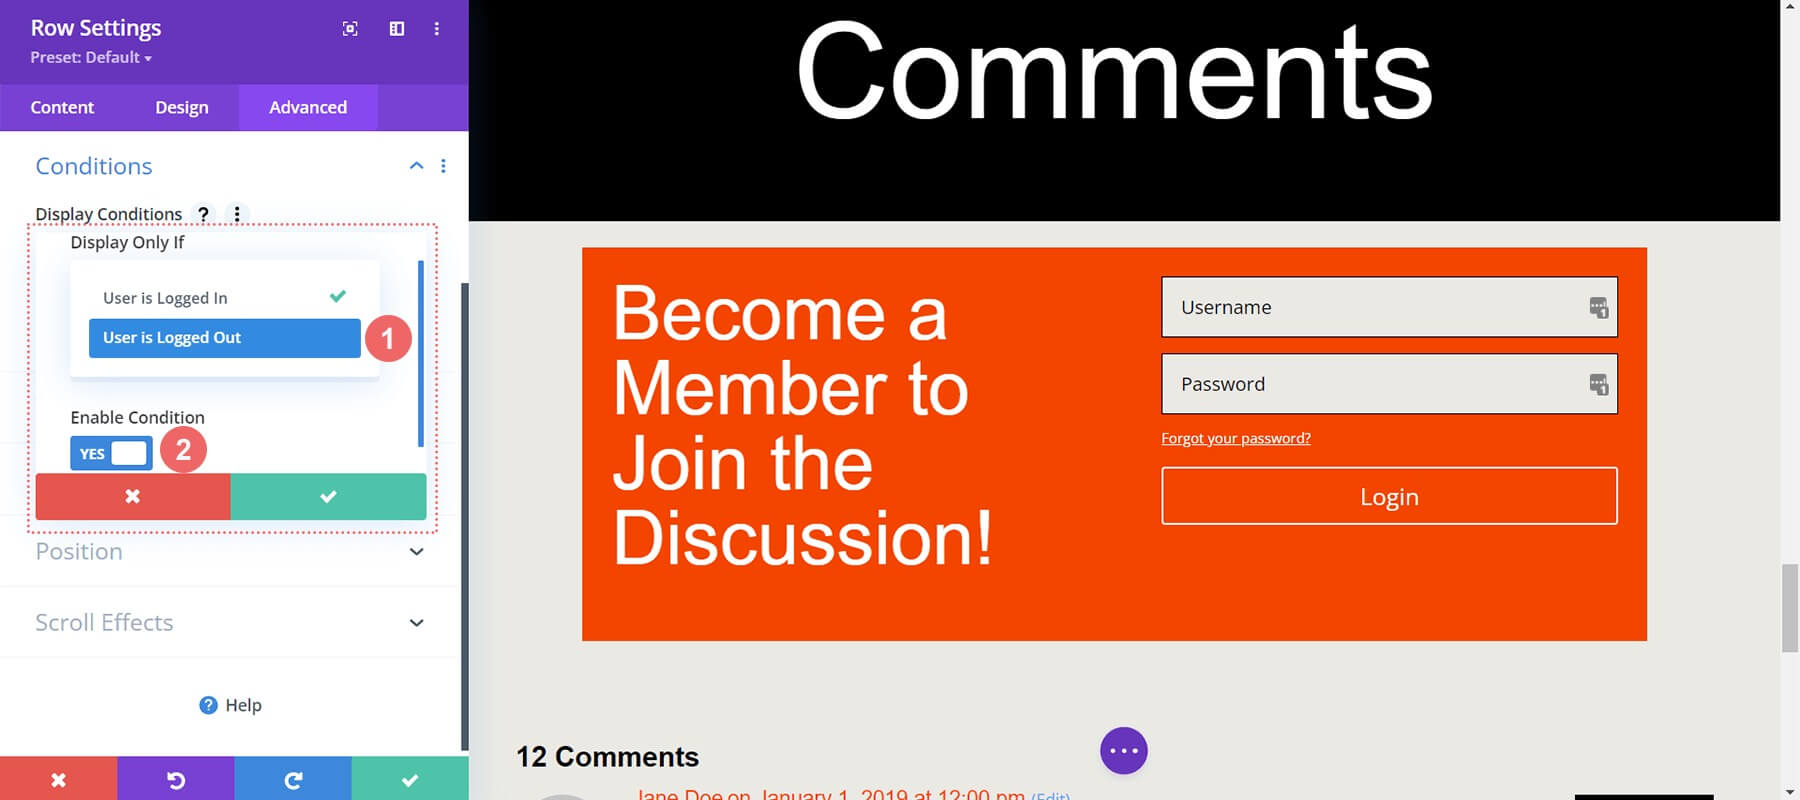
Display Conditions
- Display Only If: User is Logged Out
- Enable Condition: Yes
Once your Display Condition is set, save your changes by clicking the model's green check button. Note the caching plugin notification.
Final Outlook
At this point, with Display Conditions enabled for the Comment Module and Login Module rows, we can validate our work. Visit a blog post on the site using an incognito or private browsing window.
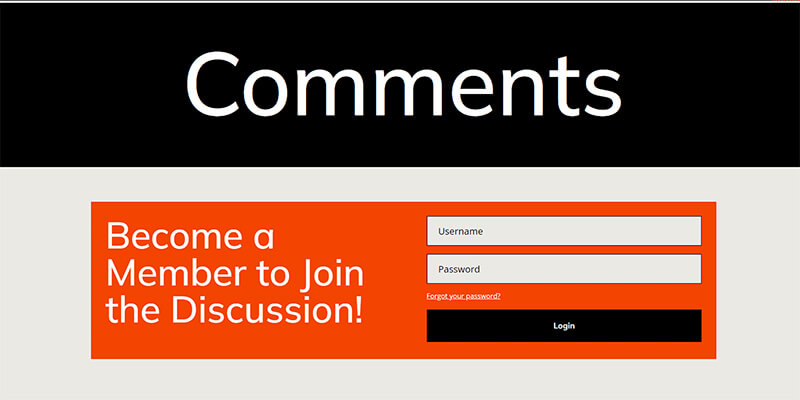
Using a private or incognito window is ideal for testing, since it will temporarily log us out while browsing. Later, when returning to regular browsing logged into the site, the comment section should be visible again. Alternatively, manually logging out of WordPress will also display the finished product!
While this tutorial utilized a Comment Module, these principles can apply to any Divi module, row, column or section without needing extra plugins. Feel free to explore different display combinations to create your own experiences.
Wrapping Up
Building a community on your WordPress site lets you foster deeper trust with engaged users. An effective approach is creating a members-only comment section where members can easily interact.
Divi's built-in tools and features make this straightforward. With native Display Conditions, you can let only users interact. Styling Comments Modules is also easy using the Design tab and Divi's full editing tools.
You don't need a membership plugin to build an agile private community with Divi. Activating core features like logged-in user comments can strengthen your community while keeping your site lightweight.
Before installing plugins for basic membership functions, consider Divi’s Display Conditions to enhance your site today.


