
Having better speed is at the top of every website owner’s wishlist. The faster the site, the greater the user experience, which leads to more progress of purpose. Also, Google ranks pages that load more quickly higher in search results. So you have a good reason to take out every last millisecond you can from your site. One very effective way to do that with WordPress sites is GZIP. The perfect best way to accelerate things is to make them smaller. Right? And that’s exactly what GZIP does. We’re going to tell you how to use it and make sure your page is fast like a flash, even if you already have image compression and other settings set up and optimized.
What is WordPress GZIP Compression?
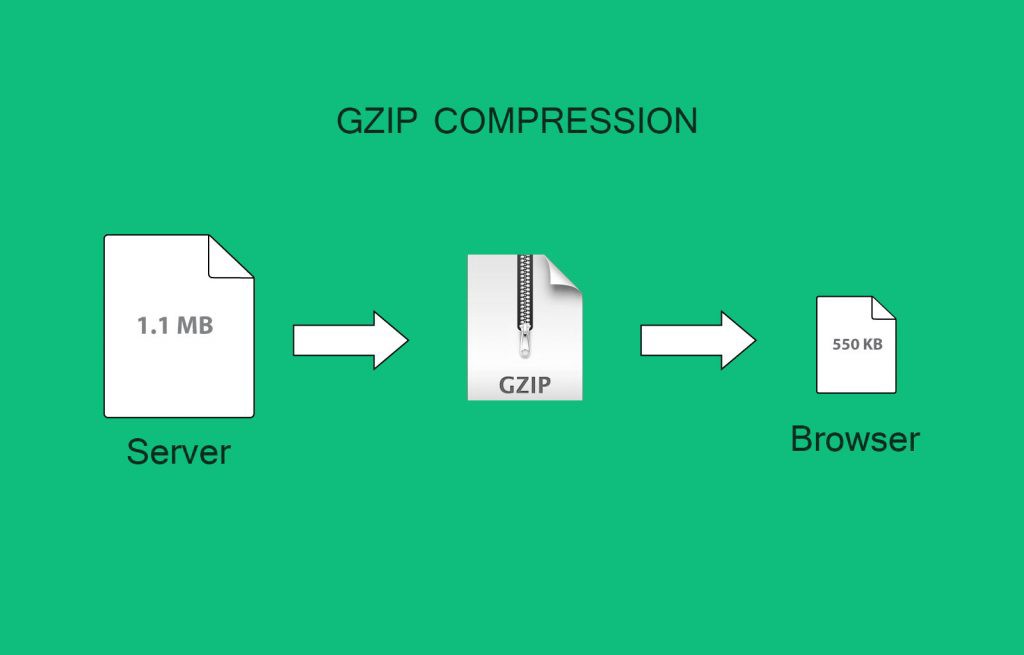
GZIP is a data type and a software application used for file compression and decompression. Jean-loup Gailly and Mark Adler created GZIP compression. It was published as a free software replacement for the compression program used in early Unix systems.
As with the WordPress core software in general, GZIP was designed for GNU (open source, free software). The “G” in “GZIP” is from “GNU.” WordPress GZIP compression is the method of reducing the size of your website files, including HTML, JavaScript, and CSS.
GZIP compression does not work on images; however, it is a mixed bag for media files.
Create Amazing Websites
With the best free page builder Elementor
Start NowFor example, some multimedia files, such as MPEG and WAV files, compress well with GZIP, while other file types, such as MP3 files, may actually increase in size if you try to compress them.
GZIP compression must be enabled on your webserver to work, enable file and folder compression (web servers with GZIP enabled will return the content-encoding: GZIP header in its response).
From the client-side, all modern web browsers support GZIP compression and automatically ask for it when making HTTP requests — this means that you can expect all users to reap the benefits of GZIP compression once you’ve enabled it.
Is GZIP Already Enabled on Your WordPress Site?
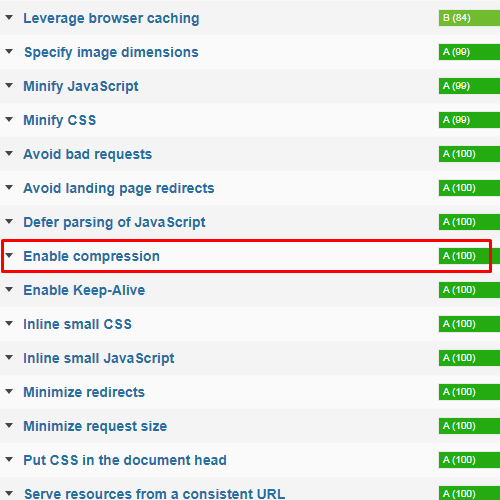
Maybe you don't actually have to enable GZIP. You may already be using it and not know it. If you go to GTMetrix or the Pingdom speed test, you can see if it grades your site on compressing your site’s components or not. You should see something like this under Enable Compression or a similar heading.
If you do not, though, you will get a poor grade for compression that will read similar to this:
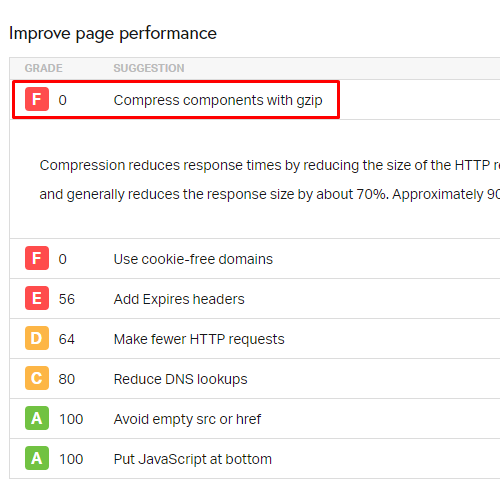
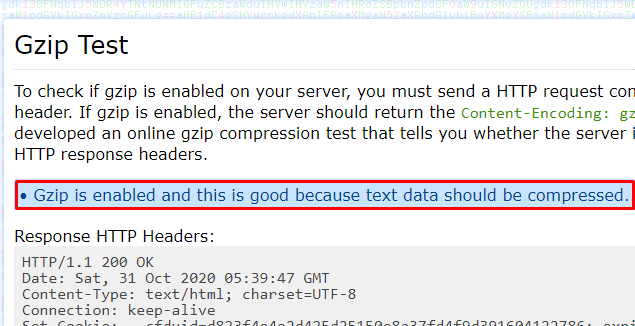
And if you want to run various checks to see what’s happening under the hood, even if you get a green result from a speed test. You can always seek out a GZIP-specific checker. Base64.guru is one that returns a quick answer that specifically shows you how and why GZIP is or is not enabled
How to Enable GZIP Compression on WordPress
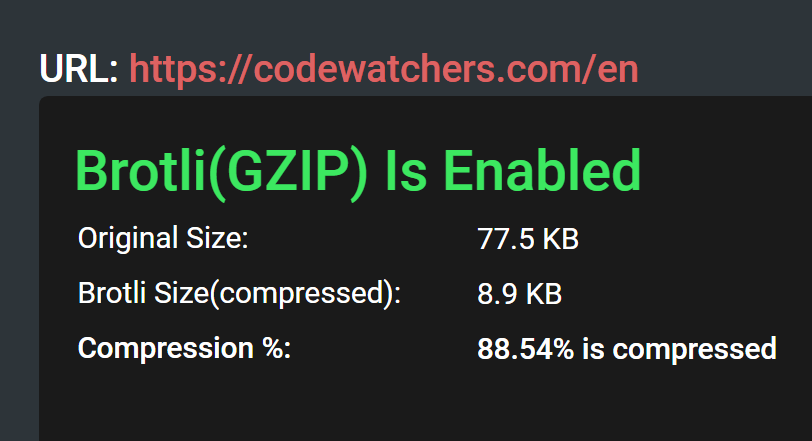
GZIP compression is enabled as a default in all websites that use WP Engine. All static files, including text files, images, CSS, and JavaScript, are automatically compressed for optimal website performance. This mechanical compression lessens the need for GZIP directives in your .htaccess file. Check if your website has GZIP enabled at the Gift of speed GZIP checker.
However, not all WordPress websites are hosted on WP Engine and will not benefit from GZIP compression's default enabling. If your website is hosted on another platform, you may need to enable GZIP compression manually. There are several ways to do this, which we’ll look at next.
Enable GZIP Compression with a Plugin
The easiest way to enable GZIP compression on any website is to use a caching plugin. Tools such as WP Rocket enable compression by adding code to your .htaccess file for you, while others such as W3 Total Cache will require you to add that code manually.

While this is generally the simplest method, it does involve adding an extra plugin to your site. If you’re trying to keep your plugin library lean, you can use one of the following solutions instead.
Enable GZIP Compression for Nginx
If your website uses Nginx, there is a code snippet you can use to enable GZIP compression. It would be best if you placed the code snippet below in your site’s nginx.conf file, in the “HTTP” section. You can also place this code snippet in the server or location configuration block, but the HTTP section is generally recommended:
gzip on;
gzip_types text/plain text/css text/javascript image/svg+xml image/x-icon application/javascript application/x-javascript;
gzip_min_length 1000;
gzip_vary on;
gzip_proxied no-cache no-store private expired auth;
gzip_diable “MSIE [1-6];
Once you’ve saved and closed the file, you will need to restart Nginx. To do so, use the following command:
sudo service nginx restart
After the restart, check to ensure that GZIP compression is active, using the previously detailed methods.
Enable GZIP Compression for Apache
If your web host uses Apache, you will need to edit the .htaccess file to enable GZIP compression. This file can be found in the root directory of your WordPress installation via File Transfer Protocol (FTP) or your file manager.
You can use two Apache mods to enable GZIP, but mod_deflate is the most widely-supported and best-documented option. To enable mod_deflate, add:
<IfModule mod_deflate.c>
 # Compress HTML, CSS, JavaScript, Text, XML and fonts
 AddOutputFilterByType DEFLATE application/javascript
 AddOutputFilterByType DEFLATE application/rss+xml
 AddOutputFilterByType DEFLATE application/vnd.ms-fontobject
 AddOutputFilterByType DEFLATE application/x-font
 AddOutputFilterByType DEFLATE application/x-font-opentype
 AddOutputFilterByType DEFLATE application/x-font-otf
 AddOutputFilterByType DEFLATE application/x-font-truetype
 AddOutputFilterByType DEFLATE application/x-font-ttf
 AddOutputFilterByType DEFLATE application/x-javascript
 AddOutputFilterByType DEFLATE application/xhtml+xml
 AddOutputFilterByType DEFLATE application/xml
 AddOutputFilterByType DEFLATE font/opentype
 AddOutputFilterByType DEFLATE font/otf
 AddOutputFilterByType DEFLATE font/ttf
 AddOutputFilterByType DEFLATE image/svg+xml
 AddOutputFilterByType DEFLATE image/x-icon
 AddOutputFilterByType DEFLATE text/css
 AddOutputFilterByType DEFLATE text/html
 AddOutputFilterByType DEFLATE text/javascript
 AddOutputFilterByType DEFLATE text/plain
 AddOutputFilterByType DEFLATE text/xml

 # Remove browser bugs (only needed for really old browsers)
 BrowserMatch ^Mozilla/4 gzip-only-text/html
 BrowserMatch ^Mozilla/4\.0[678] no-gzip
 BrowserMatch \bMSIE !no-gzip !gzip-only-text/html
 Header append Vary User-Agent
</IfModule>
To enable mod_gzip instead, add:
<ifModule mod_gzip.c>
mod_gzip_on Yes
mod_gzip_dechunk Yes
mod_gzip_item_include file \.(html?|txt|css|js|php|pl)$
mod_gzip_item_include mime ^application/x-javascript.*
mod_gzip_item_include mime ^text/.*
mod_gzip_item_exclude rspheader ^Content-Encoding:.*gzip.*
mod_gzip_item_exclude mime ^image/.*
mod_gzip_item_include handler ^cgi-script$
</ifModule>
Before using either mod, you should make a backup of your .htaccess file and ensure that the module mod_filter is on your server, or a 500 error may occur.
Final Words
GZIP is a great thing for many users cause it is working under the hood already. They may not know about it, but it’s there. If your site is running into any speed issues, though, it’s always in your best interest to check on the GZIP settings for your site. And if the tools and utilities come back to you with a message saying you do not have GZIP enabled, don’t worry. It’s just a couple of clicks away with the best plugins. And since you need a caching plugin for WordPress speed development anyway, there is nothing but positives and benefits for doing what you need to do for GZIP.


