
In today's digital age, communication is key to building and maintaining strong relationships with your audience. As a website owner, one effective way to keep your users engaged and informed is by setting up a contact form on your WordPress website. However, simply having a contact form is not enough. You need to ensure that you receive timely notifications whenever someone submits a message through your form. One way to achieve this is by setting up SMS notifications for your WordPress contact form. In this blog post, we'll show you how to set up SMS notifications for your WordPress contact form using some simple tools and techniques. So, whether you're a business owner, a blogger, or anyone looking to improve communication with your website users, read on to learn how to send SMS notifications from a WordPress contact form.

Best Way to Send WordPress Contact Form SMS Notification
As a WordPress website owner, you may be familiar with the default email confirmation that is sent when someone submits a form on your website. However, what about SMS notifications? Are you aware of how to set up this feature on your WordPress contact form?
Thankfully, sending SMS notifications from a WordPress contact form is a simple process. One effective method is to utilize a plugin that integrates with SMS API, such as Twilio.
Fortunately, a highly innovative WordPress form builder plugin, Everest Forms, offers a user-friendly solution for setting up SMS notifications on your contact forms.
Create Amazing Websites
With the best free page builder Elementor
Start NowEverest Forms simplifies the process of creating and managing forms on your WordPress website, making it an excellent choice for both beginners and experienced users alike. With its seamless integration with Twilio and other SMS APIs, you can easily set up and customize SMS notifications for your contact form submissions.
By taking advantage of Everest Forms' features, you can enhance communication with your website users and ensure timely notifications of their inquiries. So, why wait? Start using Everest Forms today and streamline your contact form management!
Guide To Send SMS Notifications from Your WordPress Forms
Use these easy steps to send SMS notifications using Everest Forms.
Install & Activate The Plugin
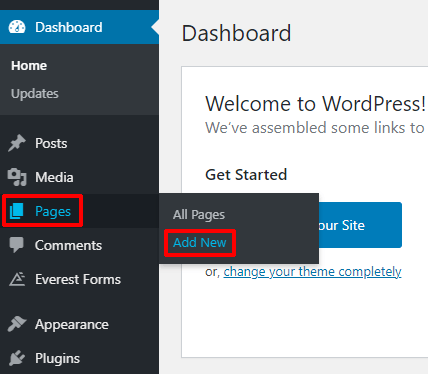
The free version's installation procedure is rather straightforward. From your WordPress dashboard, select Plugins >> Add new.
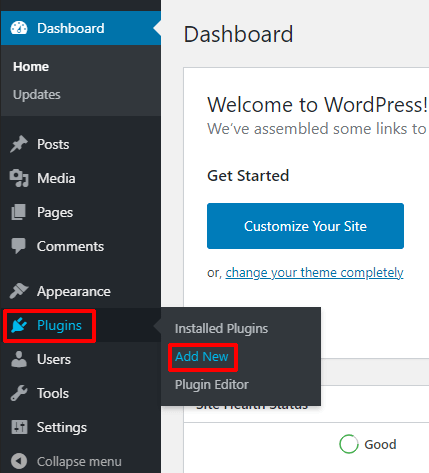
Search for Everest Forms after that. Install and then turn on the plugin.
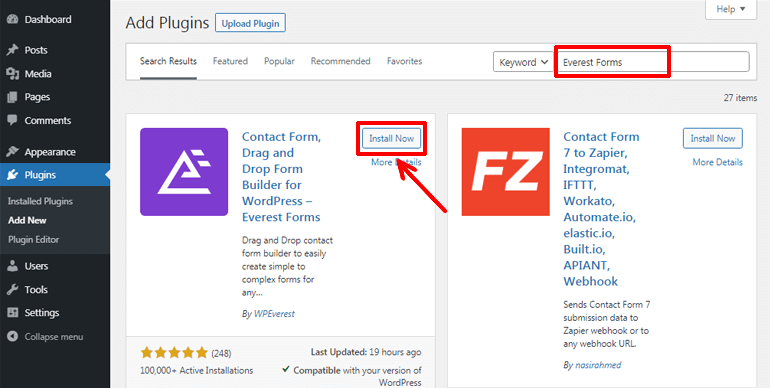
Since the SMS Notifications add-on is only accessible with the Professional or Agency Plan, you'll need the plugin's pro edition.
Purchase Everest Forms Pro first from the vendor's website. Your purchase-related email address will be used to provide your login information.
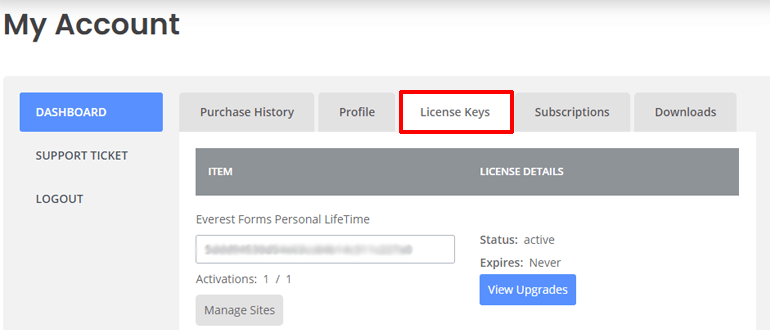
You may visit the WPEverest Customer dashboard by clicking the link.
You can receive the plugin's license key under the license key tab and download the pro version of the plugin from this page.
Next select Plugins >> Add New. The Upload Plugin button must be clicked. Choose the previously downloaded Everest Forms pro zip file, then click Install Now.
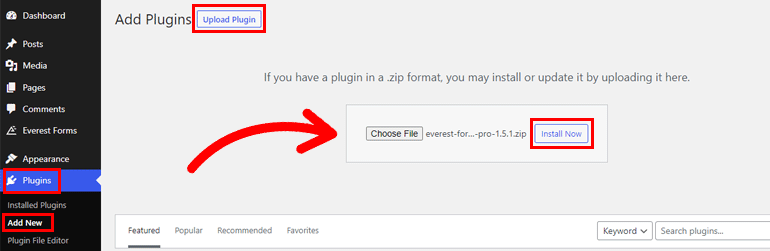
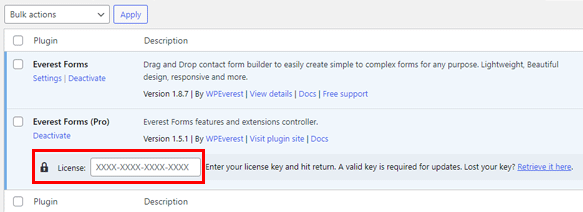
Copy the license key, then paste it where it is needed to activate the plugin on your website.
The following step can be taken once the plugin has been appropriately configured.
Turn SMS Notifications Add-on
Once the installation is complete, you may quickly add any Everest Forms add-on. Go to Everest Forms >> Add-on to do that.
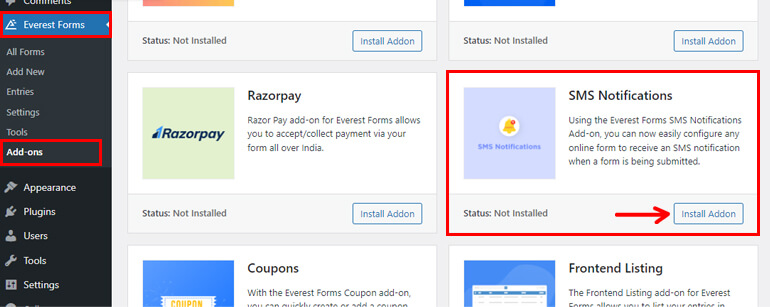
Locate the SMS Notifications add-on next. Next, select Install Add-on and then select Activate.
When the status for the add-on reads "Activated," you'll know it has been activated.
Set Up Twilio SMS Integration
Setting up the Twilio SMS integration is the third and most crucial step.
A cloud-based communication platform is Twilio. It offers a range of APIs and management tools for real-time communication.

Generally speaking, it has all the tools required to develop, test, and scale the deployment of communication services. As a result, it enables websites to engage with users via SMS.
Twilio can be easily integrated with Everest Forms. Moreover, you must include the Twilio API keys in your form in order to complete the integration.
To make the integration process clearer and simpler for you, we broke it into two parts.
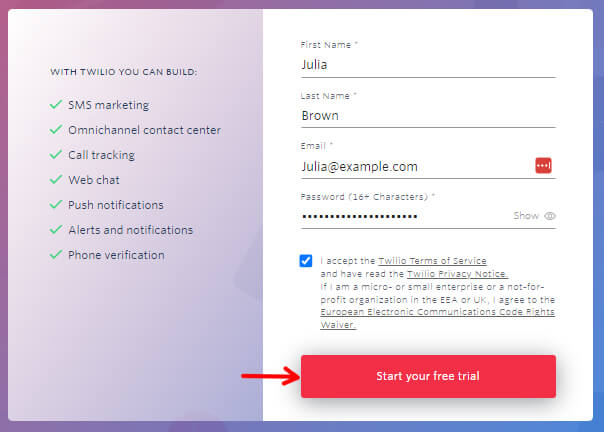
You must sign in to Twilio's website in order to obtain API keys. On the official Twilio page, you may quickly and easily create a free account if you don't already have one.
Twilio's registration process is not too complicated.
Click on Start Your Free Trial after entering all the necessary information. Once your email has been verified, you may create a Twilio account.
You can get all the necessary keys and phone numbers under Account Details right after that. This can be found at the bottom of your page.
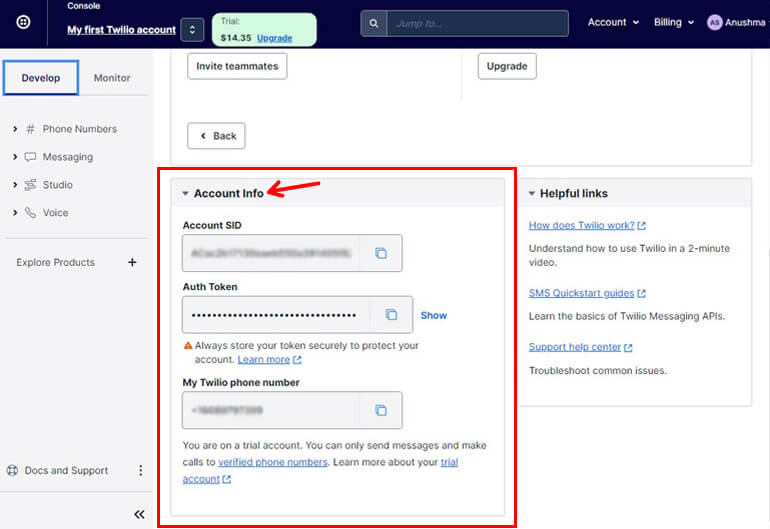
To further integrate Twilio with your Everest forms, you will require these keys.
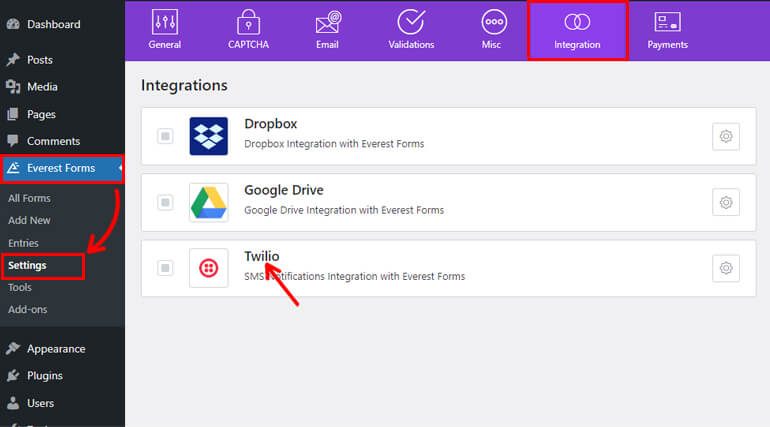
Integrate Everest Forms with the API Keys. And select Twilio under Everest Forms >> Settings >> Integration.
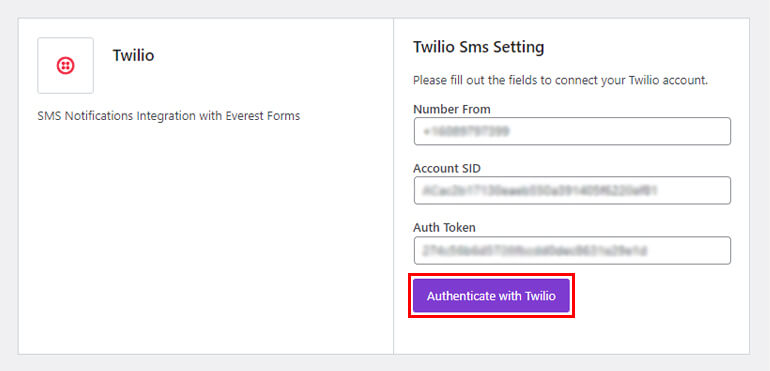
Now the Twilio SMS Configuration window will appear. Number From, Account SID, and Auth Token, which we previously generated from a Twilio account, must be entered here.
Click on Authenticate with Twilio after copying and pasting the keys into the pertinent areas.
You've finally finished integrating Twilio SMS integration with Everest Forms. You can now proceed to the following action.
Customize Your Contact Form
You require a contact form after integrating Twilio SMS connection with Everest Forms.
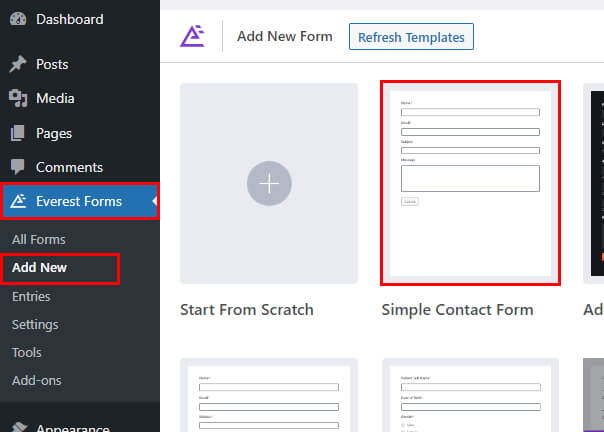
By selecting Start from Scratch, you can build a basic contact form and then further personalize it. Use the pre-made contact form templates instead to save time.
Go to Everest Forms >> Add New and select the Simple Contact Form template to utilize the pre-built template.
The contact form already has each and every necessary field that it should.
But, including a phone field can let your form users know when their submission was successful. So, simply drag and drop the Phone field onto your form to finish.
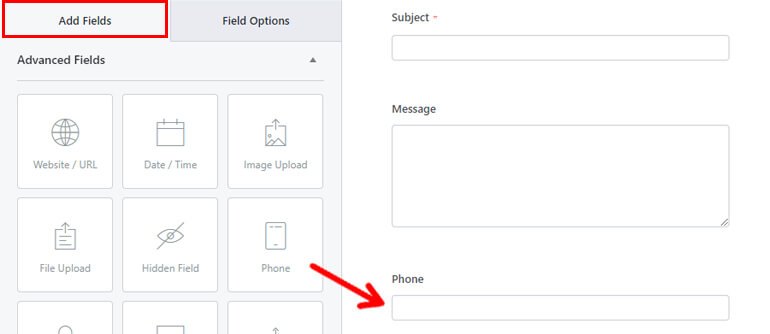
According to the requirements of your form, you can change and customize more fields.
When your contact form is prepared, save the modifications and continue.
Set Up SMS Notification
It's time to configure SMS notifications for the form at this point.
You may alert administrators and users about successful form submissions using Everest Forms.
We'll make things simple by demonstrating both the admin and user notification setups.
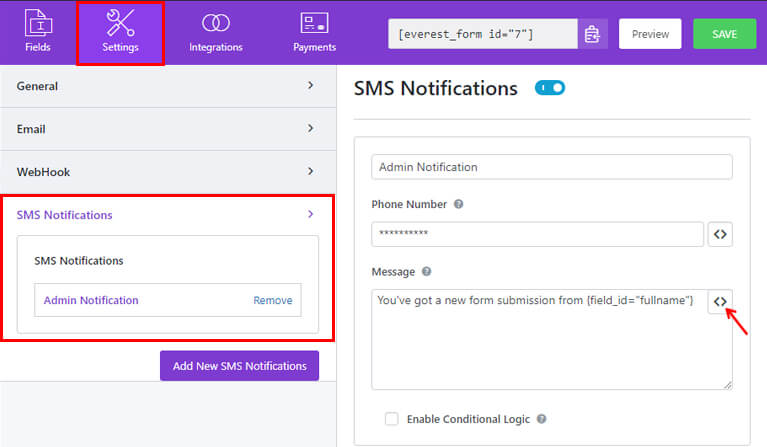
To set administrative notice, navigate to SMS Notifications under Settings. A standard Admin Notification will appear. You have the option of changing the notification's name or leaving it as Admin Notification.
You can adjust the features on the right side of your screen.
- Notification heading title: Customize the notification's title however you see suitable.
- Phone: Provide the admin's phone number here if you wish to be notified when the form is submitted.
- Message: You can enter the notification message you want to receive whenever a form submission has been made. Using the smart tag option ">," you can also include fields from your contact form.
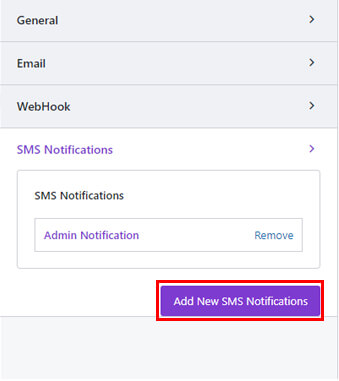
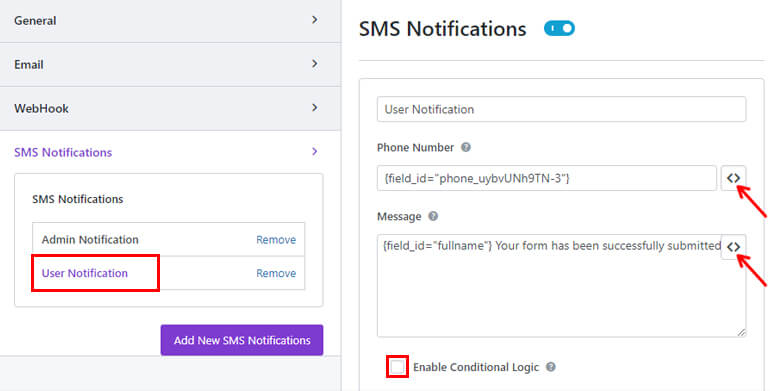
Click the Add New SMS Notification button to send notifications to those submitting the form.
After that, you can add a title and a user notification. Here, it is referred to as User Notification.
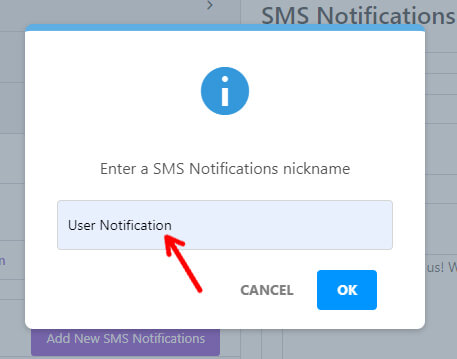
Like before, there are additional choices available, including:
- Title of Notification: Change the SMS notification's headline.
- Phone Number: Enter the Phone field from the > button so that form submitters will receive a notification when their submission is successful.
- Message: Add a statement you want to send to users after they submit the form. By using the > button, you may add form fields to your message, such as First Name, Last Name, etc.
By selecting the Enable Conditional Logic button, you can similarly add conditional logic to your form.
Press the Save button once more after configuring the SMS notification for your contact form's admin and users.
Publish Your Form
The completed contact form has to be added to your website as the last step. There are two ways to share your form. Both techniques will be taught to you sequentially.
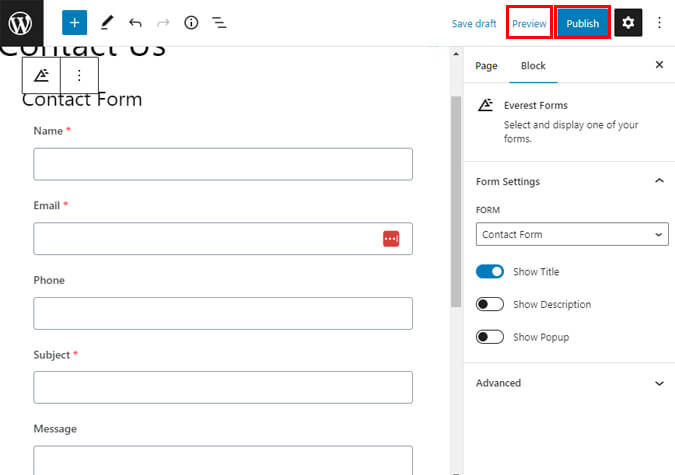
The initial method involves using Everest Forms Block. Go to the Posts/Pages menu >> For this process, Add New.
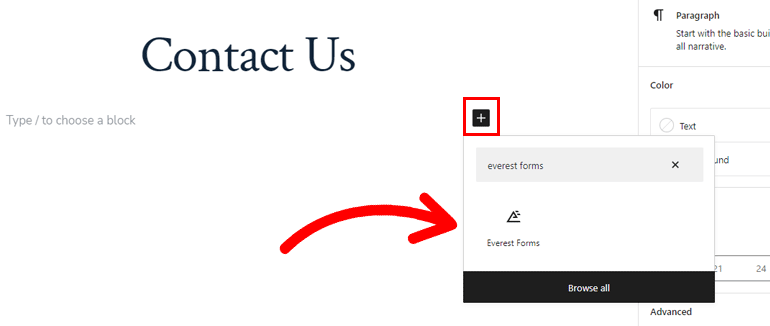
After that, locate the Everest Forms block by using the Add Block (+) icon and adding it to the page.
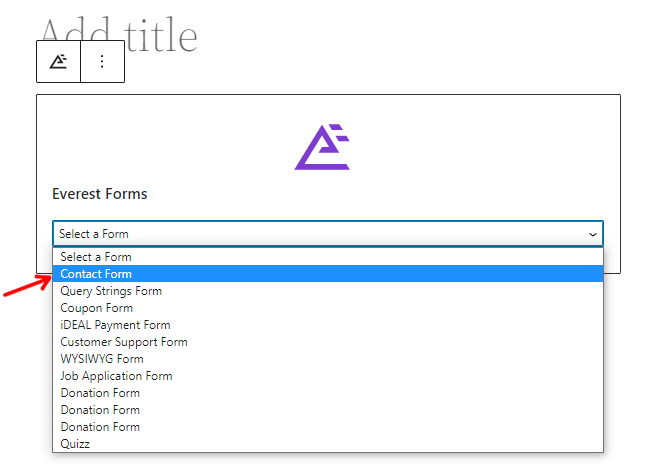
Choose your WordPress Contact Form from the drop-down menu once you're finished.
You may preview the form before publishing it. Click the Publish button at the top if you're satisfied with the way your form appears.
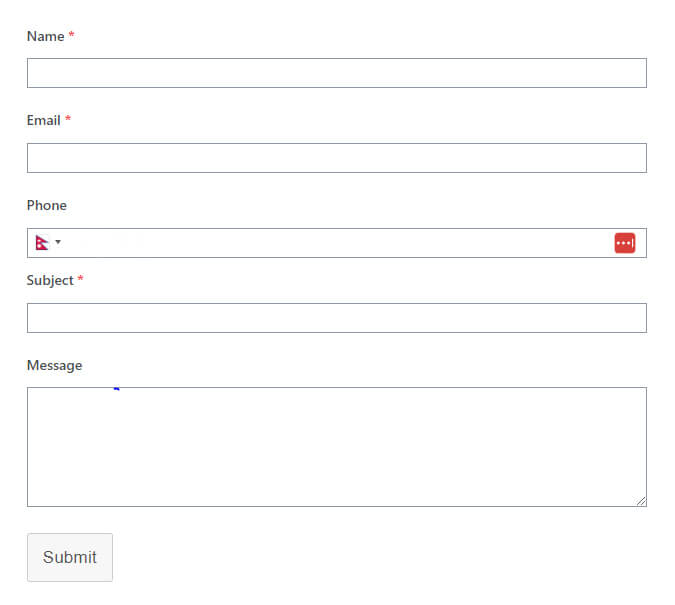
Your form looks like this when viewed from the front end.
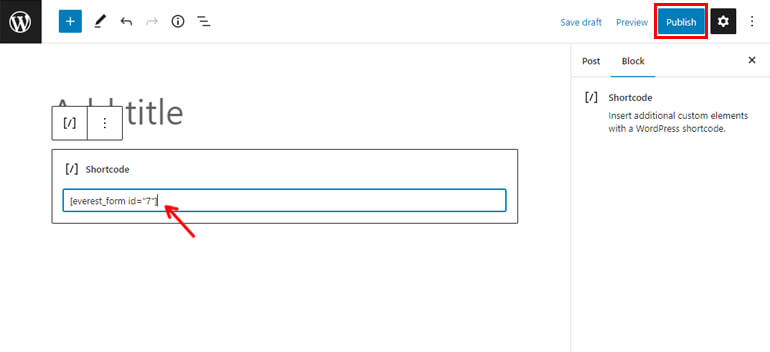
Also, you can use a shortcode to add the form. To do that, copy your contact form's shortcode from the builder's top.
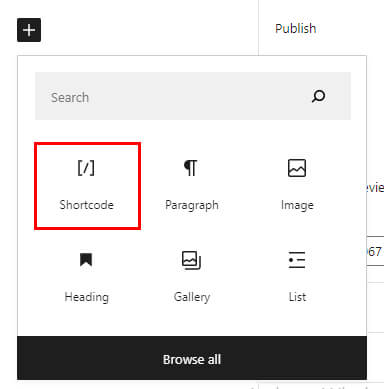
The Gutenberg editor will appear after you create a new page or post. To add the block, select the Add Block (+) icon, look for the Shortcode block, and then click on it.
Copy the shortcode, and then paste it. Lastly, you can click the Publish button at the top if you're satisfied with how your form appears.
Your contact form with SMS notification is now complete.
Wrapping Up
And there you have it - a complete guide to setting up SMS notifications from your WordPress contact form! By following these steps, you can ensure that you never miss an important message from your website visitors again.
Remember, SMS notifications can be a powerful tool for improving your website's user experience and increasing customer engagement. By providing quick and convenient communication options, you can build trust and loyalty with your audience.
As always, be sure to test your SMS notifications thoroughly to ensure that they are working correctly. And if you have any questions or issues, don't hesitate to reach out to your SMS provider or WordPress support for assistance.
Thank you for following along with this guide, and best of luck with your SMS notification setup!


