
Mastering the art of presentation is crucial for creating a website that stands out. Featured images play a pivotal role in enhancing the visual appeal of your posts, pages, and archives. However, there are occasions when you might want to keep these spotlight images under wraps, whether for design aesthetics, special promotions, or simply to experiment with different looks.

If you've ever found yourself wondering how to discreetly tuck away those featured images on your WordPress site, you're in the right place. In this comprehensive guide, we'll unravel seven ingenious methods to gracefully hide your featured images. From quick and easy CSS tweaks to plugin-powered solutions, we've got you covered.
Whether you're a seasoned WordPress aficionado or a beginner looking to customize your site's appearance, join us on this journey to discover the diverse techniques that can transform the way your content is presented. Let's dive into the world of WordPress customization and learn how to wield the power of invisibility for your featured images.
Ways To Hide Featured Image On WordPress
We will explore 7 ways to hide featured image on WordPress.
Create Amazing Websites
With the best free page builder Elementor
Start Now- Upload Featured Images Selectively
- Remove Uploaded Featured Images
- Disable Auto-Set Featured Images
- Hide Featured Images in WordPress via Theme Settings
- Use Code to Hide Featured Images in WordPress
- Activate a Hiding Featured Image Plugin
- Enable a File Protection Plugin
Upload Featured Images Selectively
The most straightforward approach involves uploading and configuring your featured images in a discerning and organized manner. It is essential to maintain a curated list of blog posts where the determination of featuring images is carefully outlined. Through meticulous definition and strategic planning of your images, you gain absolute control and efficient management over their display.
In instances where you wish to abstain from showcasing the post's featured image altogether, leave the Featured Image section blank. This strategic omission ensures that the designated image remains concealed across all platforms and locations.
Remove Uploaded Featured Images
After designating a featured image for your post, follow these steps to eliminate it. This approach is effective for both the Classic Editor and the Gutenberg Editor.
Locate the Featured Image section within your post or page.
Click on the "Remove Featured Image" button.
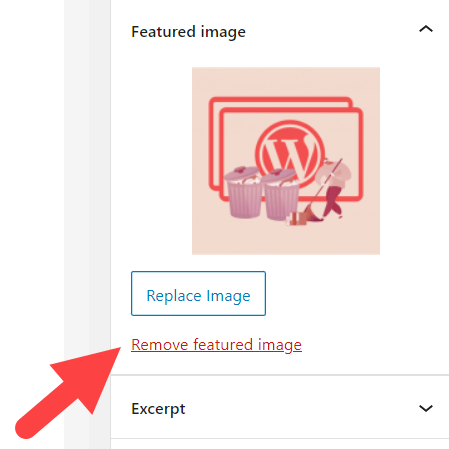
Preview and update your post to complete the process.
Nevertheless, WordPress may, at times, automatically set a default featured image for all your blog posts or assign the first image in the post as the featured image. Consequently, your posts may still display featured images even after deletion or if no images were uploaded.
Encountering this issue? Follow the method outlined below.
Disable Auto-Set Featured Images
The presentation of your featured images extends across two key areas:
- Posts/Pages: Typically situated at the outset of a post or page.
- Blog Gallery Page: Featured images are visible within the post listings on your website.
If you've integrated a featured image plugin, it likely generates a default featured image automatically for your content. Essentially, these auto-generated featured images won't be visible within your individual posts but will manifest on the post gallery page.
It's essential to note that the functionalities and configurations of each plugin may vary. It is advisable to verify whether your plugin includes an option to deactivate the automatic generation of featured images. If you encounter any challenges, reaching out to the plugin's support team for assistance is a prudent step.
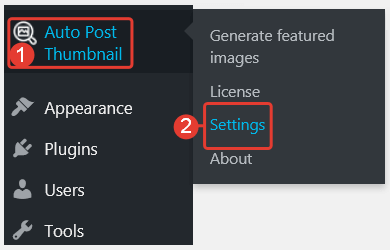
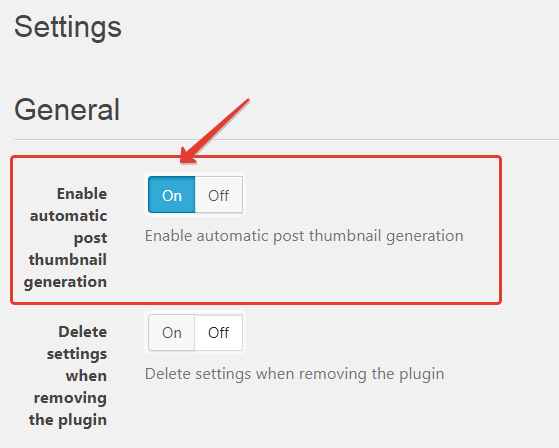
For instance, if you're utilizing the Auto Featured Image plugin and wish to disable the automatic featured images, follow these steps:
In your admin dashboard, navigate to Auto Post Thumbnail → Settings.
Scroll down to the 'Enable automatic post thumbnail generation' option and switch it Off.
By carefully adjusting these settings, you can exert greater control over the display of featured images on your WordPress site, ensuring a tailored and polished visual presentation.
Hide Featured Images in WordPress via Theme Settings
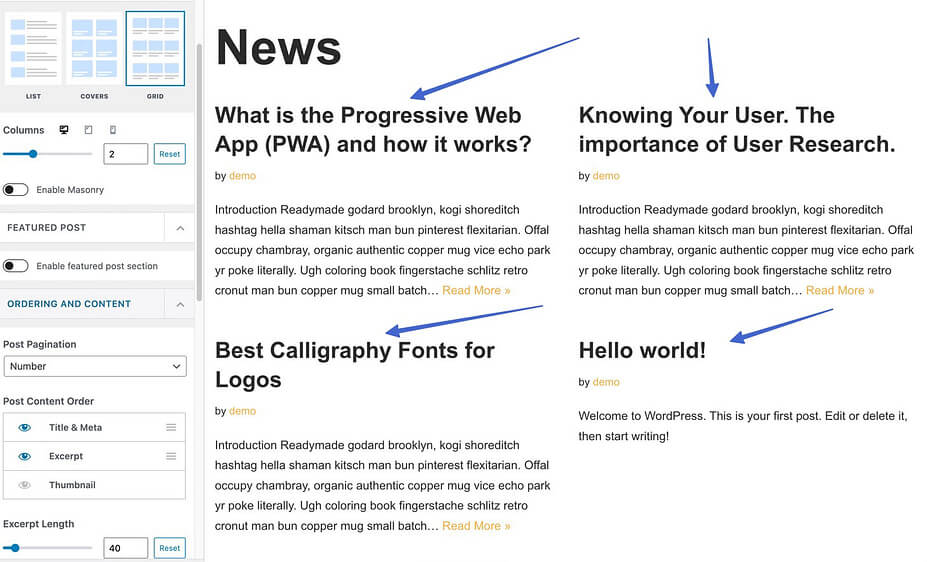
To begin, install and activate the Neve theme. Next, navigate to Appearance → Customize and choose Layout → Blog/Archive. Within the Post Content Order menu, click the eye icon situated under the Thumbnail section.
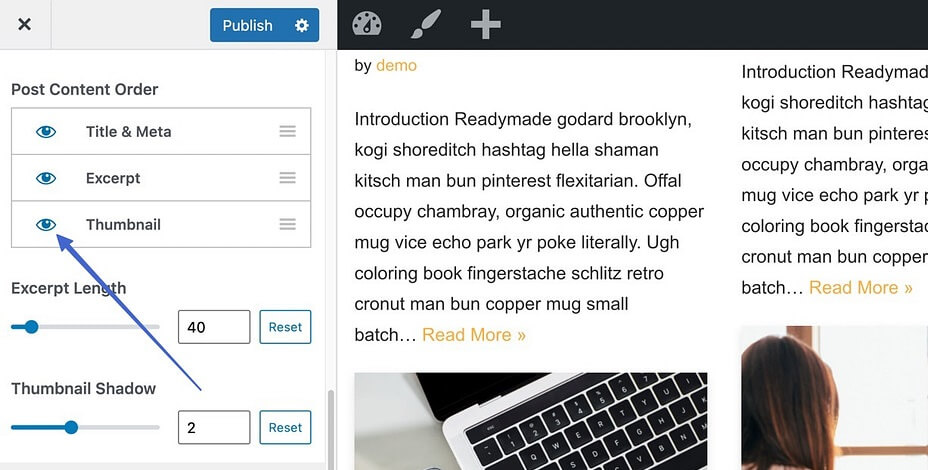
By doing so, you will disable the display of thumbnails on your blog gallery page. Consequently, only the post titles, descriptions, and metadata that you have included will be visible.
Hide Post Thumbnail From Entire Website
In addition to the post listing page, the Neve theme provides the option to conceal featured images across all your posts and pages.
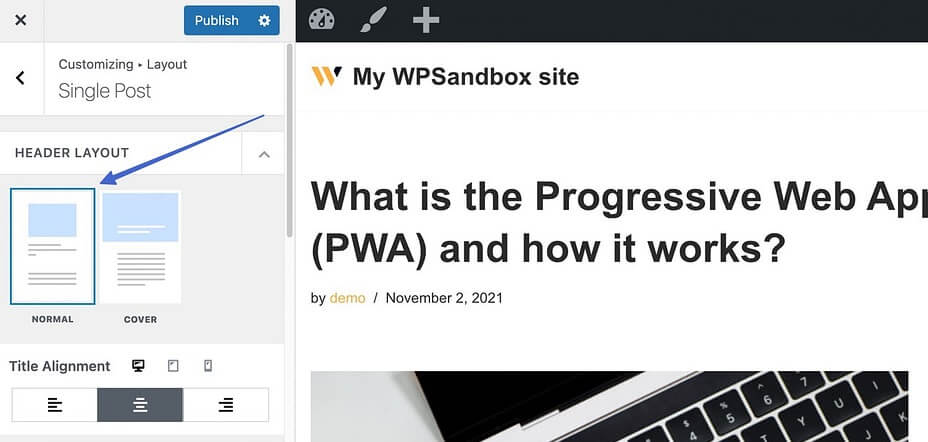
Navigate to Appearance → Customize within your WordPress dashboard, and proceed to Layout → Single Post.
Ensure that you select the "Normal" mode under the Header Layout option.
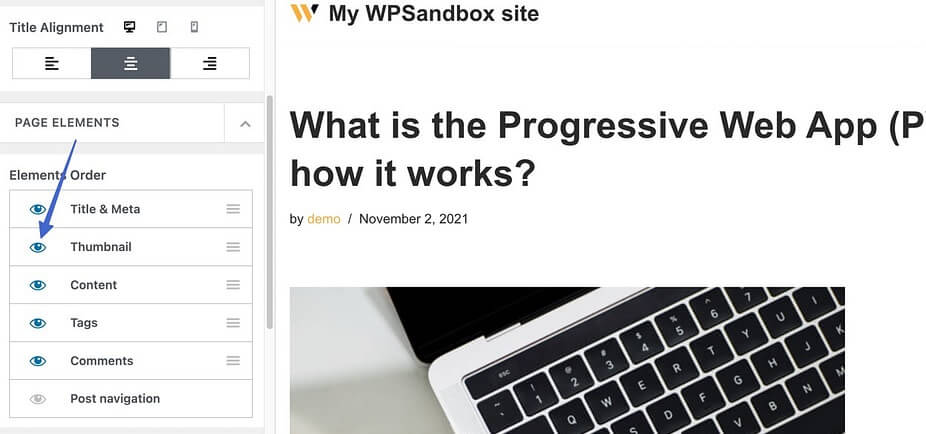
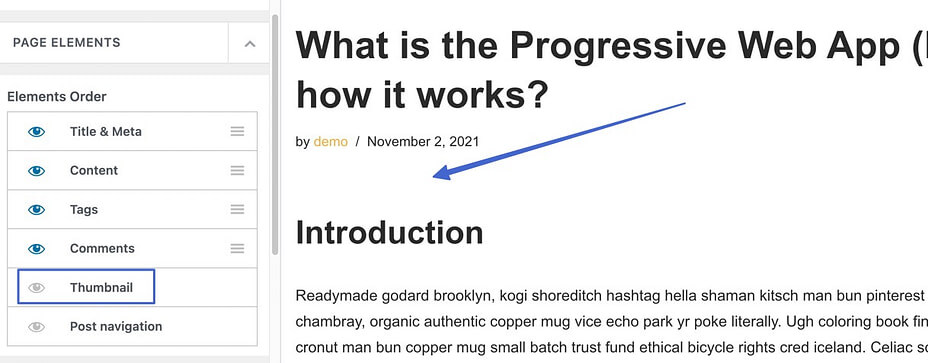
Navigate to the Elements Order section and deselect the eye icon adjacent to the Thumbnail element.
Click on the Publish button to effectuate the removal of thumbnails from the post view.
If you're utilizing the Cover layout rather than the Normal header layout, follow these steps:
Scroll down to the Layout section and switch the Hide featured image option to On.
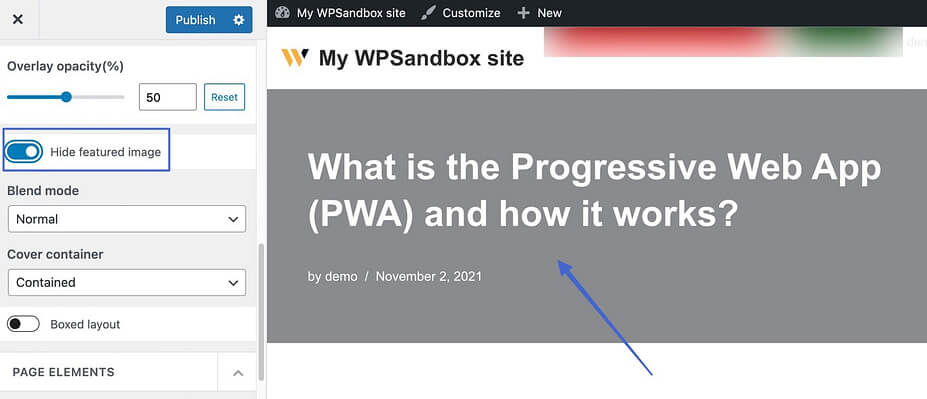
Click the Publish button to witness the seamless disappearance of featured images.
Keep in mind that this approach conceals featured images for every post across your website, while they remain visible on the blog listing page. This serves as an excellent choice if you aim to maintain a tidy appearance for your posts, with featured images retained solely on the blog gallery page.
Hide Featured Images on Specific Blog Posts
Ultimately, the Neve theme offers a solution for concealing thumbnail images specifically within individual posts, all while preserving their default visibility settings.
To initiate this process, access the post you intend to hide the featured image for. Once in the post edit screen, locate and click on the N icon positioned at the top-right corner to reveal the Neve Options.
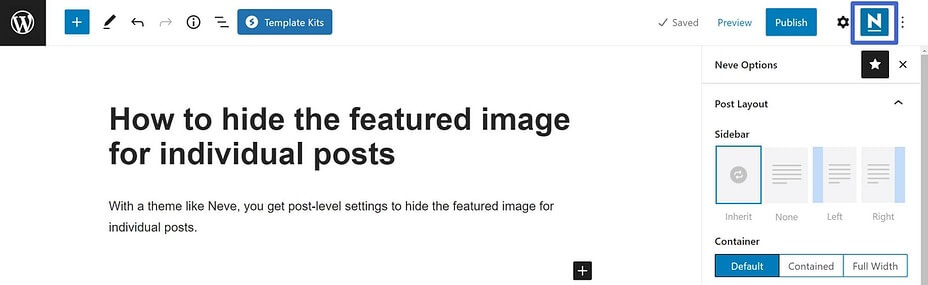
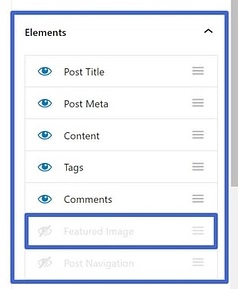
Within the Elements section, deactivate the Featured Image option to seamlessly implement the desired concealment.
Use Code to Hide Featured Images in WordPress
What if your theme lacks the built-in option to conceal featured images? Fear not, as you can employ a bit of code to achieve this.
Navigate to your admin panel, then access Appearance → Customize → Additional CSS.
Insert the provided code snippet into the designated space.
.entry-content img {
display: none;
}
This will effectively hide the featured image across all your posts.
.post-12345 .post-image {
display: none;
Alternatively, if you wish to conceal the featured image for a specific post, use the following code:
Activate a Hiding Featured Image Plugin
This approach is particularly suitable for beginners. Simply enable a plugin, and it will streamline the process for you. We'll guide you through the steps of displaying/hiding featured images on posts/pages using a complimentary plugin.
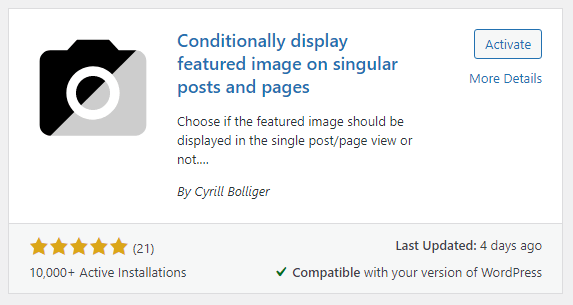
Navigate to Plugins → Add New.
Search for the "Conditionally display featured image on singular posts and pages" plugin and proceed to Install → Activate.
Access the post/page where you wish to conceal the featured image.
Within the Featured Image section, select the checkbox labeled "Display featured image in post lists only, hide on singular views."
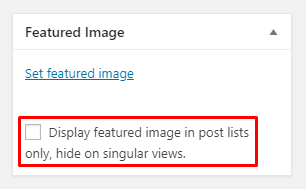
Click the Update or Publish button to implement the changes and make them visible on your site.
Enable a File Protection Plugin
Finally, a compelling approach involves employing a file protection plugin to obscure your featured images from public visibility. This not only safeguards your images against unauthorized viewing but also allows tailored access permissions based on specific user roles.
Here's a step-by-step guide:
Activate the PDA Gold plugin along with its optional Access Restriction addon.
Navigate to the Media → Library section.
Click the "Protect" button to conceal your featured image from both views and search engines like Google.
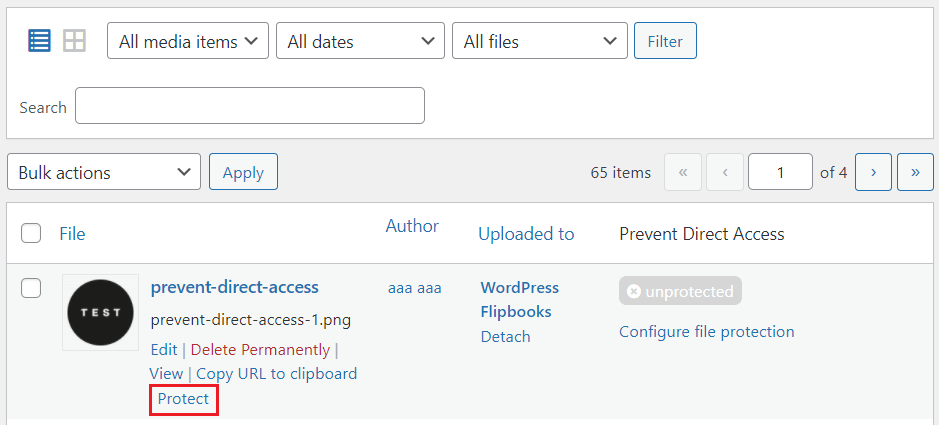
Select the "Configure file protection" option.
Navigate to the "File Access Permission" tab and choose the user roles to which you wish to grant file access.
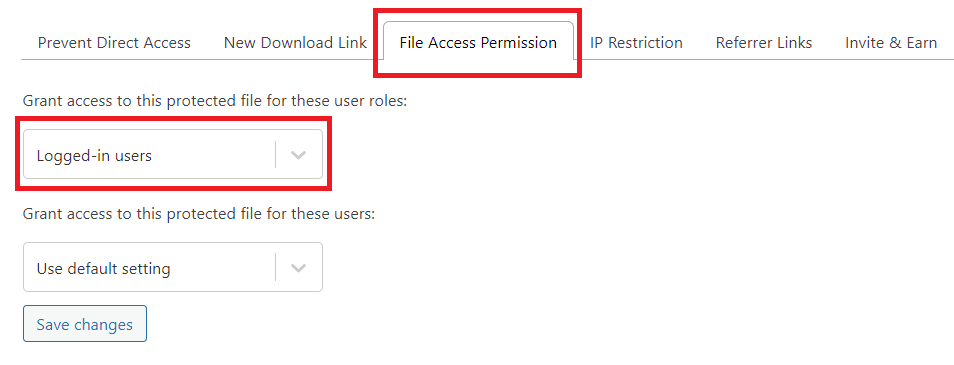
Press the "Save changes" button to complete the process.
Wrapping Up
We've elucidated seven straightforward methods for concealing featured images in WordPress. Depending on your requirements, you can opt for the built-in function, theme settings, codes, or plugins. Now is the opportune moment to select the most suitable approach and get ready to implement it.
Should you encounter any challenges while following our guidelines, please feel free to share your concerns in the comment section below. Above all, remember to subscribe to our website for an array of invaluable tutorials.


